You are using an out of date browser. It may not display this or other websites correctly.
You should upgrade or use an alternative browser.
You should upgrade or use an alternative browser.
look what I found
- Thread starter mojobaby
- Start date
mojobaby
Enthusiast
- Messages
- 1,287
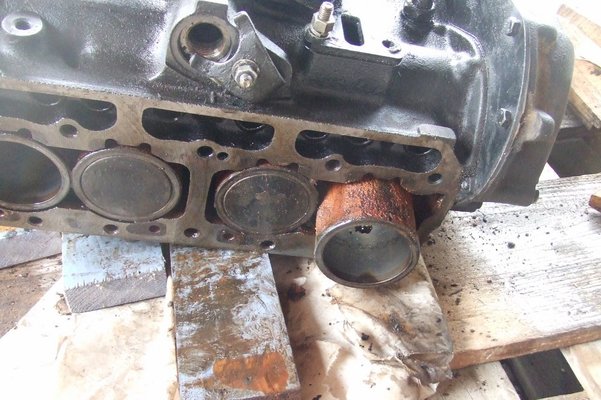
The sump came off yesterday to expose the crankshaft and bottom of the pistons. I'm not too sure what to do next! I think I'll probably try to loosen the pistons and push them out.
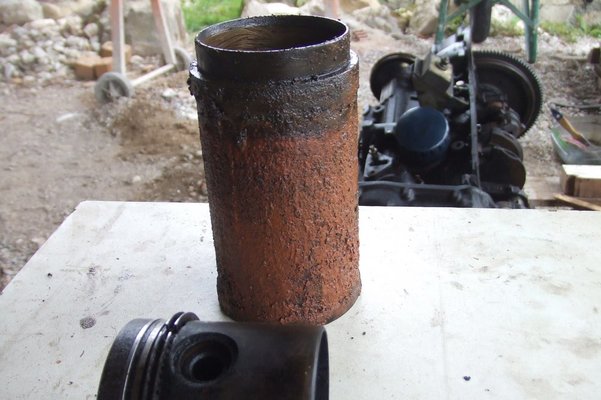
The liners will probably be dislodged, but they need a good clean anyway.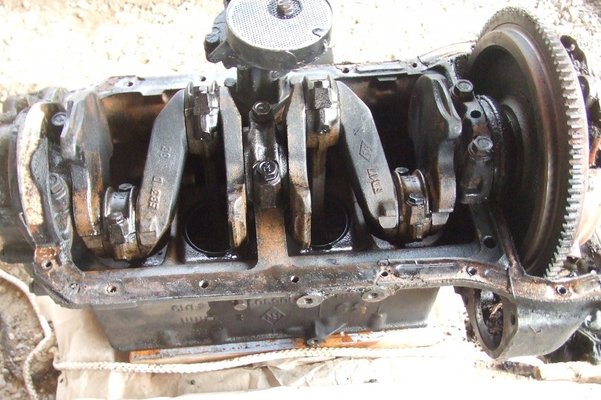
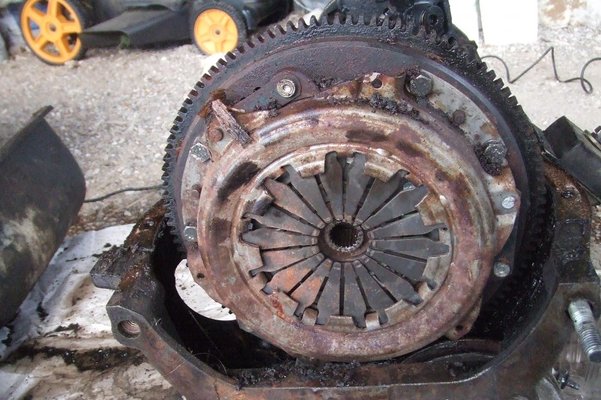
The crankshaft can't turn freely and the only way I can move anything is by smacking the clutch with a piece of wood and a hammer
The liners will probably be dislodged, but they need a good clean anyway.


The crankshaft can't turn freely and the only way I can move anything is by smacking the clutch with a piece of wood and a hammer
Cyprus Andy
Enthusiast
- Messages
- 266
- Location
- Troodos Mountains Cyprus
Keep the pistons and con rods in the order they came out or mark them so the bearings go back on the same crank they came offThe sump came off yesterday to expose the crankshaft and bottom of the pistons. I'm not too sure what to do next! I think I'll probably try to loosen the pistons and push them out.
The liners will probably be dislodged, but they need a good clean anyway. View attachment 10520
View attachment 10521
The crankshaft can't turn freely and the only way I can move anything is by smacking the clutch with a piece of wood and a hammer
mojobaby
Enthusiast
- Messages
- 1,287
Keep the pistons and con rods in the order they came out or mark them so the bearings go back on the same crank they came off
Thanks, I did that!
Obviously the pistons should be returned to their original liners as well.
I read in the Heynes manual that there is a flat spot on the outer rim of the liners. Number 3 and 4 liners should have their flat spots facing each other and number 1 and 2 should also have their flat spots facing each other.
I might add that the flat spots are not that obvious.!!!

I managed to get all the pistons out and in the process, only one liner shifted. I will however remove the rest as well for cleaning. There isn't any sign of corrosion on any of the liner inner surfaces.
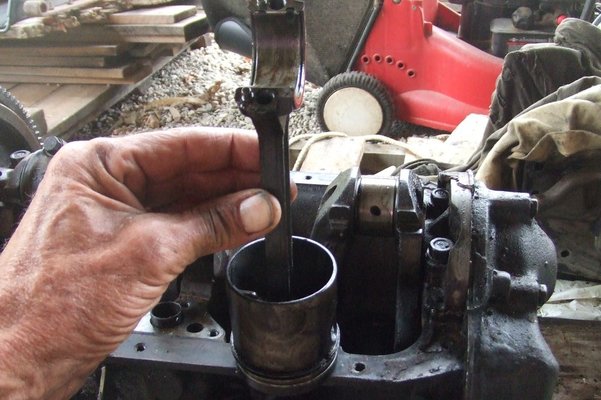
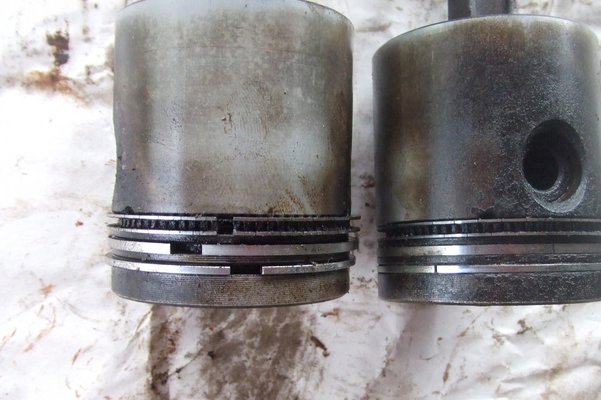
I took a photo of number 2 and 4 pistons. As you can see, the rings on number 2 piston released as soon as I took the piston out.
The rings on number 4 piston were wedged into the grooves and corroded to the piston. One of them broke as I was trying to remove it.
Also, look at the condition of the 2 pistons. 3 and 4 were blackened on the outside.
A question:- can I replace the rings for one piston only, or is it advisable to replace the entire set?
Cyprus Andy
Enthusiast
- Messages
- 266
- Location
- Troodos Mountains Cyprus
There seems to be no shortage of piston ring sets on ebay so if your getting a set you might as well replace the lot then you know the job is done 
mojobaby
Enthusiast
- Messages
- 1,287
The cam sprocket was removed, timing chain removed and finally the crankshaft. All the bearings are perfect so I'll keep them. Now its just a matter of cleaning.and deciding what parts to replace
But just take a look at that crankshaft. Its a work of art. I feel like hanging it above my fireplace!!!
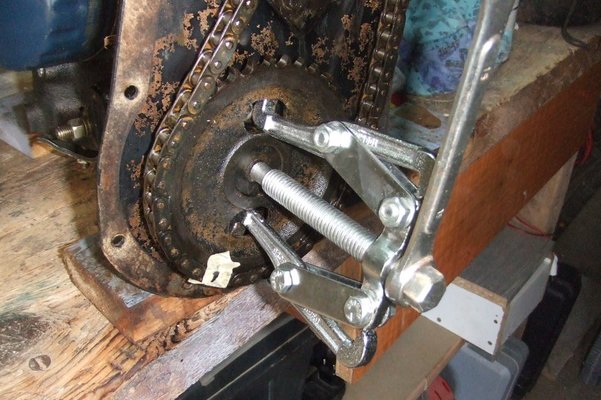
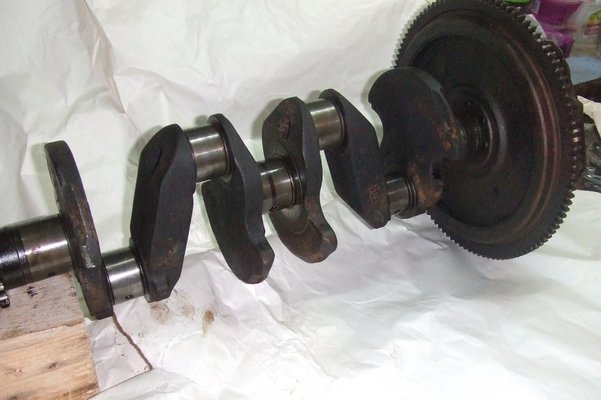
But just take a look at that crankshaft. Its a work of art. I feel like hanging it above my fireplace!!!


Cyprus Andy
Enthusiast
- Messages
- 266
- Location
- Troodos Mountains Cyprus
it would make a good stand for a small table............not quite the "Top Gear" V8 table but interesting 

mojobaby
Enthusiast
- Messages
- 1,287
I tried to remove my camshaft this afternoon, but found that the distributor gear was in the way. To get the gear out, it seems to me that the threaded bush has to be removed first, but I can't see how this is fitted.
Please don't tell me that its one of those "press fit" bushes and I need another puller!!!
It's an 800 engine by the way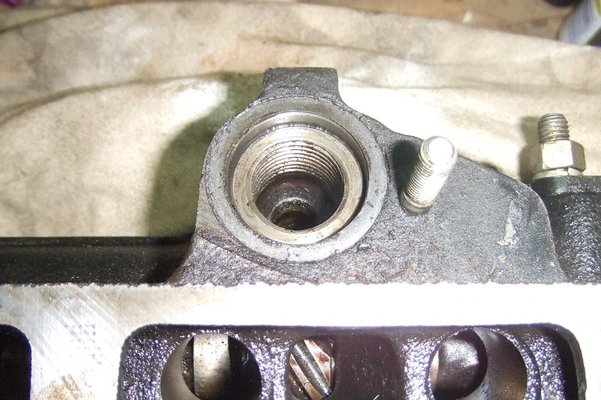
Please don't tell me that its one of those "press fit" bushes and I need another puller!!!
It's an 800 engine by the way

Last edited:
Cyprus Andy
Enthusiast
- Messages
- 266
- Location
- Troodos Mountains Cyprus
you have the patience of an oyster mate ..........I would have slung it by now and put a replacement in 

Geoff in the Gully
Getting it together
- Messages
- 281
I guess someone has to do it.
Yes, that is a press fit thing.
It's threaded on the inside so that the special removal device screws in.
My method is to find a suitably sized bolt, screw that in and a puller.
Sorry I don't recall what size the thread is.
Good news is the threads are only used for removal so nothing breaks on the engine if you damage the threads a bit.
btw, it just taps back in but you have to be careful with the clearance gap on the bottom - you need a feeler gauge with a small bent tip.
I made one out of a suitable thickness scrap of metal sheet.
It's not a difficult job once you make the right helpers.
mojobaby
Enthusiast
- Messages
- 1,287
Thanks for that Geoff, I'll be getting a puller tomorrow-one that can pull a bolt! I can feel a very slight up and down bit of movement in the gear, maybe 0,10mm or 0,20, but I'll try to get it more exact.
As regards the thread, I think it might be M15x21 as all my plumbing fittings are that measurement. For what its worth, even a tap screws in!!
Sorry, the photo is a bit blurry-bad light.
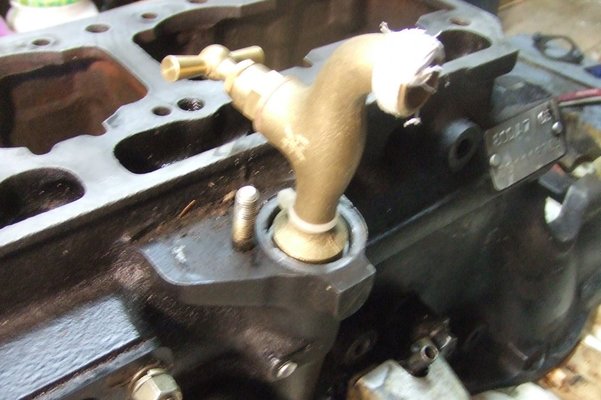
As regards the thread, I think it might be M15x21 as all my plumbing fittings are that measurement. For what its worth, even a tap screws in!!
Sorry, the photo is a bit blurry-bad light.

André4Renaults
Enthusiast
- Messages
- 709
- Location
- Barnet, Hertfordshire.
The humour element of that picture is staggering... I'm just trying to come up with a caption.....
Geoff in the Gully
Getting it together
- Messages
- 281
Brilliant. Love the tap. Now all you need is a tap puller 
Seriously though, you could probably find a plumbing size adapter that's got that thread on the outside and is threaded on the inside.
Put that in and wind something through the inner that'l push on the gear below and push out that pressed in thing.
I'd drop a washer in first to avoid damage to the dizzy drive sprocket
Geoff in the Gully
Getting it together
- Messages
- 281
Thanks for that Geoff, I'll be getting a puller tomorrow-one that can pull a bolt! I can feel a very slight up and down bit of movement in the gear, maybe 0,10mm or 0,20, but I'll try to get it more exact...
The workshop manual says the clearance between the gear and the sleeve should be between 0,15mm and 0.55mm. A pretty wide tolerance.
André4Renaults
Enthusiast
- Messages
- 709
- Location
- Barnet, Hertfordshire.
mojobaby
Enthusiast
- Messages
- 1,287
The workshop manual says the clearance between the gear and the sleeve should be between 0,15mm and 0.55mm. A pretty wide tolerance.
Thanks Geoff, that is quite wide, they obviously take into account that the gear might wear over time/
I made a mistake with the thread size- it's a 20mm tap fitting. The threaded bar that I bought started stripping, probably because it was brass, I'll have to try something else tomorrow.
Haha Andrew! I just know you've been thinking about that all weekend!


