Clementine's Garage
Clementine the Cat
 
Image of flower
Yellow R4
 
Réparateur d'automobiles

A tale for two 4s (GTLs)

bobjacqs

Enthusiast
Messages
73
Location
Kinver, Stourbridge
renault-and-lotus.jpg


Hi All, Here we have my new toy which I will be attempting to restore. It's a 1985 GTL that should have been scrapped but which I have decided to try and save and in doing so learn some new technical skills. If you want to follow my progress, check out my blog, Beambreaking, which is also about hillclimbing in the Elise and other motor related stuff. Best wishes, Bob.
 
Last edited:
I also expressed an interest in C840LEWbut wasn't prepared to pay the asking price and my more realistic offers were declined. Good luck with the restoration and I look forward to seeing just what condition the chassis is in.
 
Nothing really to do with restoration although both vehicles will be ongoing !
Best wishes
Charles
 
  • 2015-04-27 14.40.56.jpg
    2015-04-27 14.40.56.jpg
    235.2 KB · Views: 1
not That strange bedfellows Bob!-as Lotus had year long and close connections to Renault -R16motor in the Europe etc etc.. this is why I personally have no big issues accepting your little Lotus sitting beside a R4 :clapping: -Reid.
 
There are many things in common. Both are mid engine, both have long travel suspension that relies on geometry (and finely tuned dampers in the case of the Lotus) for handling.

I tried to pick up some spare headlamps when I worked at Lotus but failed miserably. Probably because I worked on the Mk2 Elise.
 
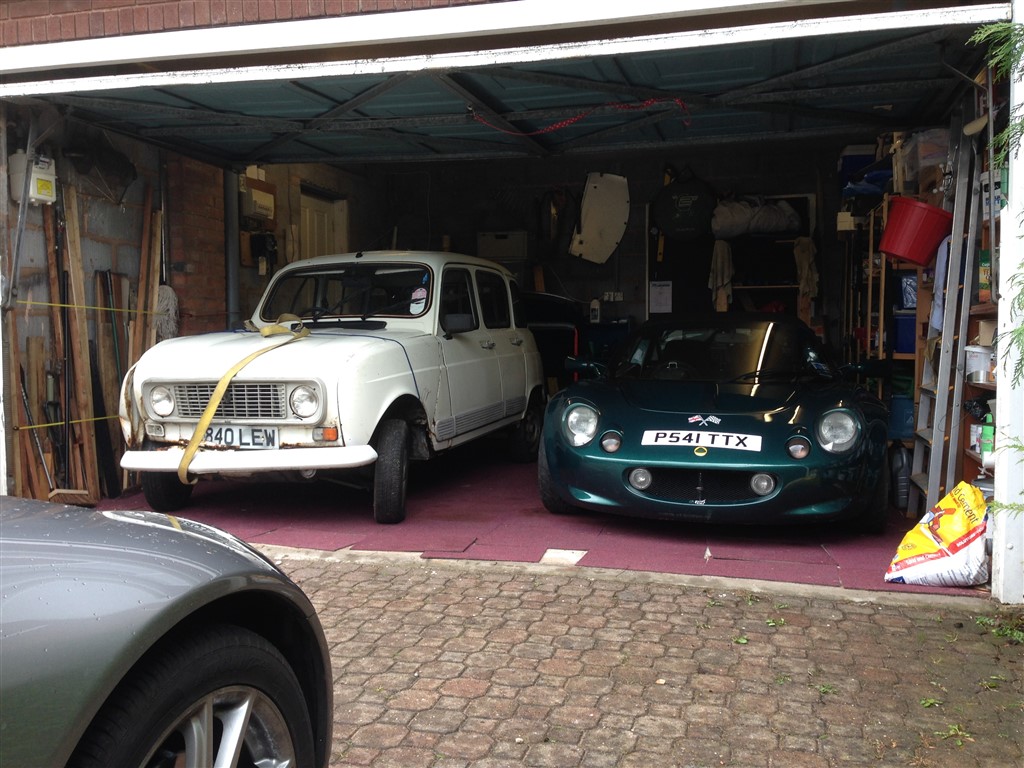
I was going to write up the restoration on my blog but have decided to do so here instead. So. Let’s start at the beginning… My restoration started a week ago when I picked up a C840 LEW from Nottingham. I bought it on ebay and may have paid a little too much considering its condition, but it was still less that a racing clutch and master cylinder for my Elise and although I may have been able to find a better example I wanted something I could make a difference to rather than a basically sound car that I could tart up.

Why a Renault 4?
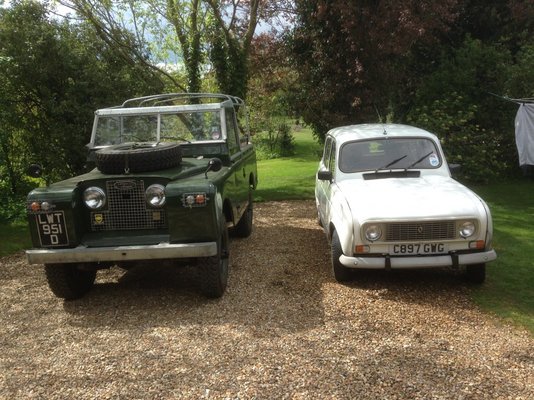
1. I like Renaults – I’m a big far of Dauphines (in which I learnt to drive when I was ten) and R8s, and I like the 4L for its honest simplicity.
2. It is light and small (so can be wheeled in and out of my domestic garage)
3. It’s uncomplicated
4. It’s cheap
5. It has a separate chassis so I can remove the body and more easily get to grips with chassis and suspension
6. Parts are easily available
7. There’s this forum and Frederick's tech tips! Knowing that help is at hand was a definite consideration.

And why am I doing a restoration? Because although I have a couple of high performance sports cars I don’t do any work on them myself and spend my days sat in front of a computer. So I decided to deconstruct a car and put it back together again in order to learn some new skills and get away from the computer. Anyway, enough preamble. This is what I did in the first week.

IMG_7282.JPG
The bonnet more or less fell off.

01 wing removed.JPG
Getting the right hand side wing off was fairly easy.

02 wing in place.JPG
Initially I thought I'd leave the left wing as it is solid and the inner wing has been patched, but now I've decided to remove that side as well.
IMG_7418.JPG
However, I am currently stuck as I cannot undo the bottom nut and bolt that holds it to the triangular panel behind the wing and I cannot get my angle grinder to it.

03 wet floor.JPG
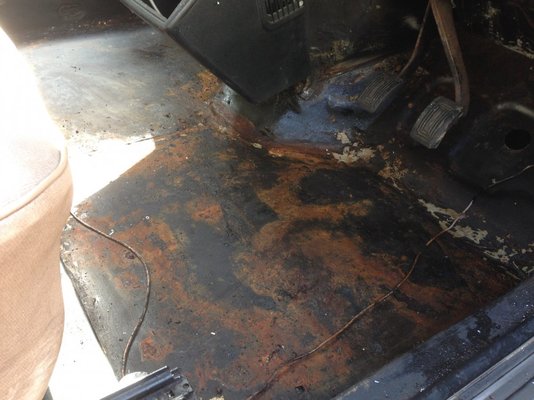
When I removed the rubber floor mats, it was not a pretty sight.

05 thrown away.JPG
I guess this was once soundproofing.

06 front doors off.JPG
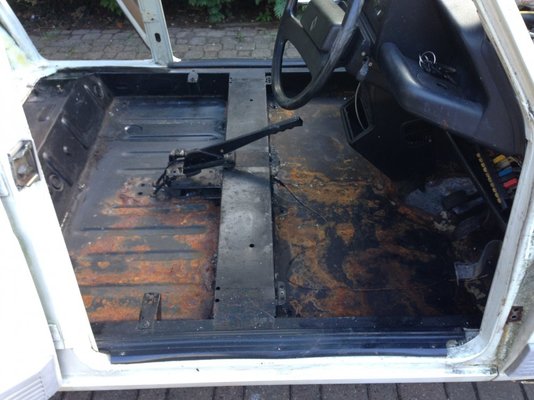
I then removed the front doors to give me easier access to the interior. I almost removed the rear doors but thought they might provide structural strength when I remove the body from the chassis (?). So I left them in.

08 seats out 2.JPG
The seats came out easily. They're not in very good condition and will need recovering. However,I don't like the beige colour anyway so I'm not too disappointed.
 
  • 04 sound proffing.JPG
    04 sound proffing.JPG
    129.6 KB · Views: 2
  • 07 seats out 1.JPG
    07 seats out 1.JPG
    120.4 KB · Views: 2
To remove the right inner wing I needed to deal with the brake lines which passed through a hole in it.
brake master 01.JPG
However, I was unable to undo them at the master cylinder so ended up cutting them. Note there are only three lines.

brake master 02.JPG
As you can see I was able to undo one of the lines.

IMG_7423[1].JPG
The inner wing then came off easily.

Before using the angle grinder on the other wing, which was not accident damaged and is very firmly attached to the car, I wanted to remove the danger of fire by removing the petrol.
I could not remove the air filter cover to get to the carb and in the end removed the carb itself. I made a video in case other people feel a fool like myself for not being able to get it off. Knowing how it sits on the filter holder helps.

I could not drain the fuel tank because the drain plug was seized so decided to remove the tank.

cross-member.jpg
This proved time consuming because I did not realise until I asked a question on this forum that I had to remove the cross member behind it. I knew about a cross member but thought it supported the tank (ie was under it) and that it was missing from my car.

crossmember.JPG
I also spent a while trying to undo the spare wheel carrier not realising that it would come away anyway with the cross member. Seems obvious now but at the time I did not recognise the thing as the cross member.

Lots of other bits and pieces have come off in the last week, normally to facilitate the removal of something else.

IMG_7414.JPG
IMG_7415.JPG
IMG_7416.JPG
IMG_7420[1].JPG

IMG_7422[1].JPG
It was pleasing to see that the right front chassis rail appears to be straight.

You may wonder why I don't know certain things, like the process to remove the tank. The fact is that I do not have a workshop manual yet. I ordered it off Amazon before I picked up the car but failed to notice that it would not be despatched for two weeks. So in the interim I am just removing what seems obvious in order to lift the body off the chassis. If anyone has any suggestions as to what I should do next, please let me know.
Cheers,
Bob
 
A little late now, but I prefer to strip a car down as little as possible.

What do you need to do to strip everything off the chassis?
 
Oh and for seized bolts like the one pictured above I bought a Sonic crafter from Homebase when they were on offer, they are a vibrating saw, and you can get bi metal blades to cut soft metal with.

They are neat, and far easier to use than an angle grinder in tight spaces.
 
A little late now, but I prefer to strip a car down as little as possible.
What do you need to do to strip everything off the chassis?

Whether you need to or not, the reason I am doing so is to learn as much as possible. So I may do unnecessary things for a normal restoration but I really want to deconstruct it. Every rusted nut teaches me something :-)

Best wishes,
Bob
 
Oh and for seized bolts like the one pictured above I bought a Sonic crafter from Homebase when they were on offer, they are a vibrating saw, and you can get bi metal blades to cut soft metal with.

They are neat, and far easier to use than an angle grinder in tight spaces.

Excellent. Many thanks,
Bob
 
There are many things in common. Both are mid engine, both have long travel suspension that relies on geometry (and finely tuned dampers in the case of the Lotus) for handling.

I tried to pick up some spare headlamps when I worked at Lotus but failed miserably. Probably because I worked on the Mk2 Elise.

What did you do at Lotus?
Bob.
 
Bob, I love reading threads like this one, and each step you take teaches us something. About six years ago our daughter Lucy was getting married and said she'd really love to go to her wedding in a Citroen 2CV, the first car she ever drove. I fancied a second car so bought a white 2CV off eBay which "just needed a patch or two on the chassis". I knew from experience that, just like the R4 chassis, these rotted from the insides outwards so what may have been a small hole only showed a worse mess inside. The solution was easy. Buy a galvanised chassis. For a mere £250 a local specialist delivered me one and I handed him the bodyshell to do all of the expensive welding that it needed. So two weeks later, I had a sound bodyshell and could slowly swop engine and suspension over. I completed the car just a fortnight before the wedding and was able to take the bride-to-be and two of her bridesmaids to the ceremony in the Shepherd Neame Brewery in Faversham. A great day.
 
What did you do at Lotus?
Bob.

I worked in the consultancy section for a couple of years doing noise and vibration. Lotus is a great company to work for - there is no politics, instead everyone works for the best of the cars.
 
I worked in the consultancy section for a couple of years doing noise and vibration. Lotus is a great company to work for - there is no politics, instead everyone works for the best of the cars.

You did a good job. My Elise makes a ridiculously loud noise and shakes your fillings loose.
 
You did a good job. My Elise makes a ridiculously loud noise and shakes your fillings loose.

I don't think anyone saw noise and vibrations as core values in the Elise. The one thing that improved the Mk2 a lot was blocking up the holes in the rear of the sill that connect the cabin to the engine bay. I don't know if the Mk1 has the same holes. Some of the aftermarket exhausts are quite fun too.
 
I realise something...
1. This is not a Renault floor.
2. There's a hole
3. The two bolts that would have held a Renault floor to the chassis are nowhere to be seen.
IMG_7432.JPG
Oh, and in the back, the bolt that should hold the body to the chassis ahead of the nearside wheel arch is not there.
IMG_7433.JPG

I need to get underneath and poke about, but not tonight.
 
Back
Top