Clementine's Garage
Clementine the Cat
 
Image of flower
Yellow R4
 
Réparateur d'automobiles

1985 Renault R4 F6 restoration project

DavidN

Enthusiast
Messages
488
Hi there,

I'm pretty new to this site (done my introduction though) and want to share my restoration story with you enthousiasts.

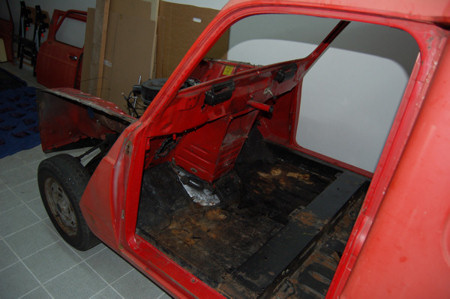
2 Weeks ago I bought a 1985 R4 F6 off eBay.
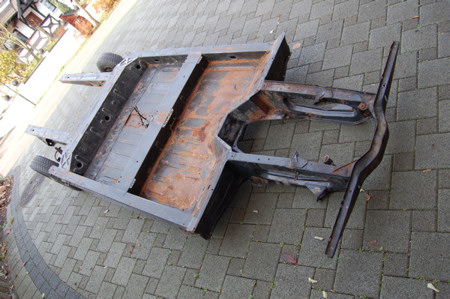
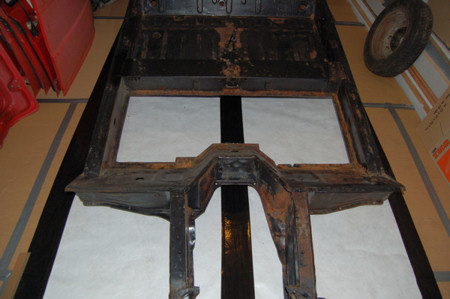
It was out of use since 2001 and unfortunately has a lot of rust, mainly on the chassis, but also around the front windshield.

It was pretty cheap (the seller needed the car to go) and came with a lot of used spare parts. So I decided that it would make a nice winter project.
(At least that have been my initial thoughts, right now I doubt, that I can handle that in just a few month.)

I like the F6 without the side windows most so that car pretty much fitted in and I decided to buy it.

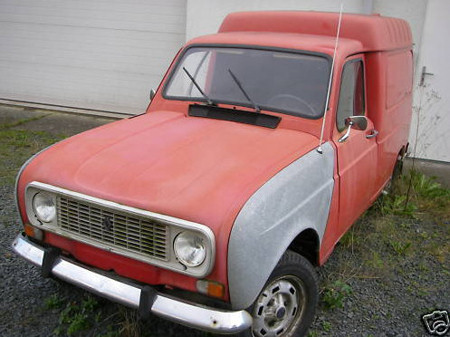
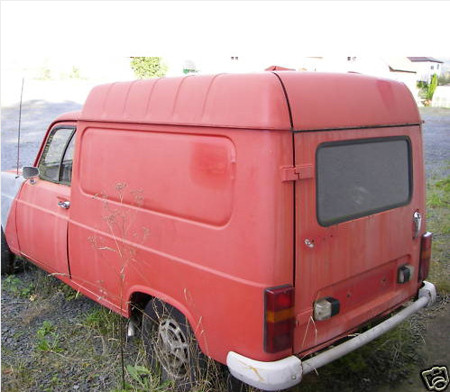
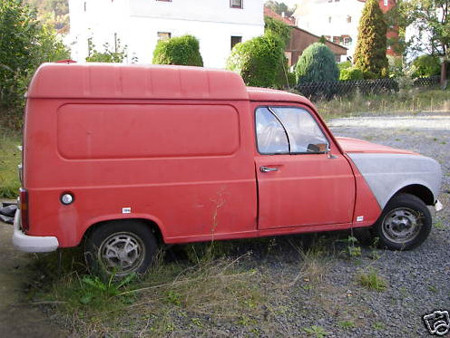
Here's what the R4 looked like when I bought it:

R4-01.jpg


R4-02.jpg


R4-03.jpg


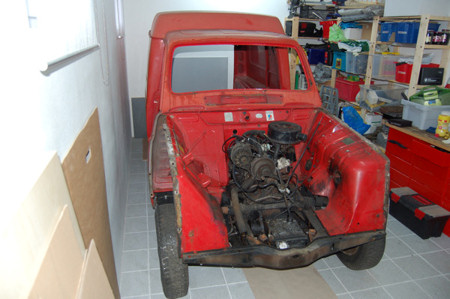
The first thing I did was to re-animate the engine.
I changed all the fluids and filters, cleaned eveything up a bit, bought a new battery and some "start-up-spray" (sorry don't know the english word) :oops: and after a few attempts the engine came to life again. :D

Here it is in front of my garage:

Renault.jpg


The engine now starts right away, and is surprisingly powerful.
The gearbox is full functional, I wish I could say that about the brakes. :rolleyes:

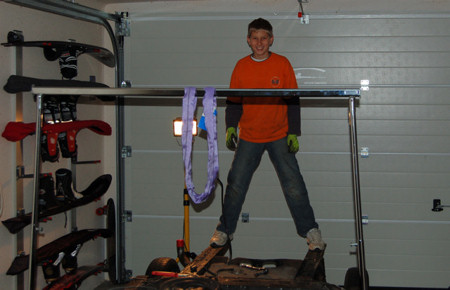
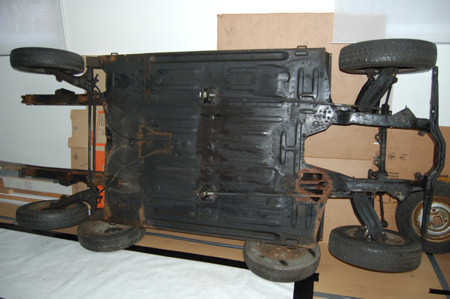
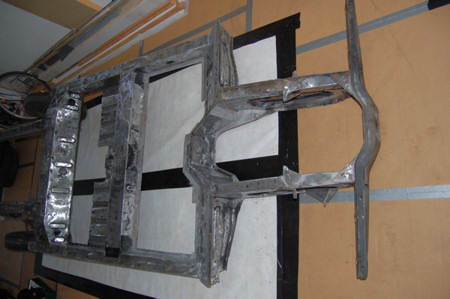
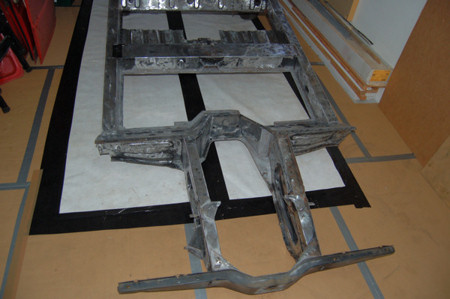
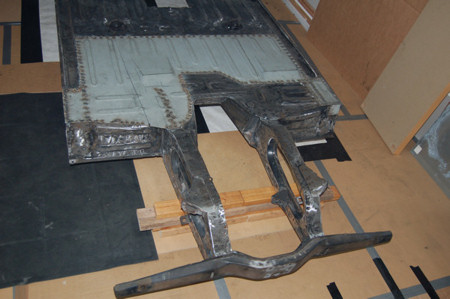
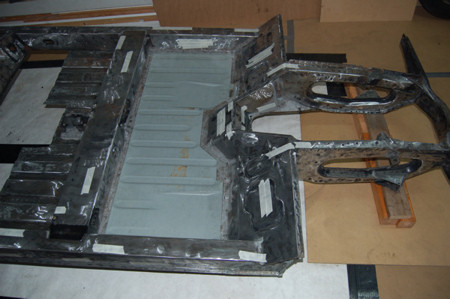
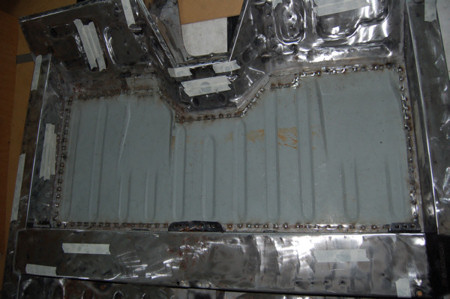
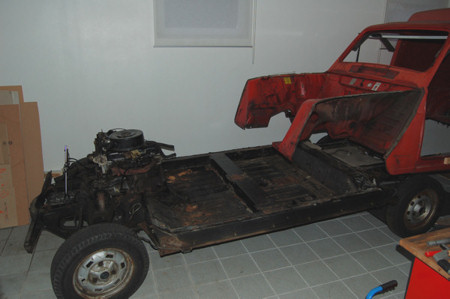
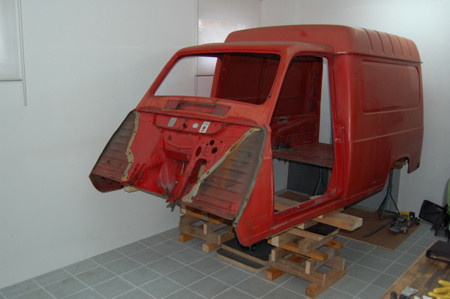
Now came the time to dismanteling...

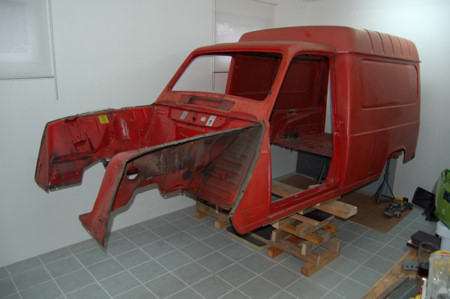
That's the Status Quo:

Restauration-01.jpg


Restauration-02.jpg


Restauration-03.jpg


I'm now ready to separate the body from the chassis to get on with work...

If you are interested, I will keep you updated.

All the best from Germany!


David
 
Last edited by a moderator:
Good luck for your project... and congratulations for your luxurious garage, I dream to have tiled floor in mine... :rolleyes:
 
I'm looking forward to more photos. Do keep us updated with progress.

Yours looks like a good car to restore. It's always best to restore a car before it becomes too rusty. My own project is in it's 4th year of restoration because it wasn't good enough to start with.
 
I'm looking forward to more photos. Do keep us updated with progress.
Thanks Malcolm, I will!

Yours looks like a good car to restore. It's always best to restore a car before it becomes too rusty...

Haha, I wish it was that way.
You know how pictures can lie...

Here are just a few examples of problems I found at the chassis so far:

Rust-01.jpg


Rust-02.jpg


Rust-03.jpg


Rust-04.jpg


Rust-05.jpg


Rust-06.jpg


Rust-07.jpg


Rust-08.jpg


Rust-09.jpg


And that was just the chassis!

I really wished that there would be a source that sells complete new R4 chassis like they do for the Citroen 2CV!
It would be a nobrainer for that invest instead of having all that horrible work with the old one.
http://www.franzose.de/flexxtrader/data/img/sz/123-15000.jpg
 
Last edited by a moderator:
Nevertheless I continued my little project today.

First of all I lifted the body and secured it with jackstands.
The chassis separated slowly as the black rubber glue/seal gave up.
Now I was able to pull out the chassis from under the body.

Restauration-04.jpg


Here is my poor little red F6 without it's chassis:

Restauration-05.jpg


The last thing for today was the removal of the inner front fenders to gain a little room in my garage.
(The plan is to start with the work on the chassis. So the body has to wait until I'm done with that.)

Restauration-06.jpg


That's it for today...


All the best!

David
 
Last edited by a moderator:
Not much to report for now.

I worked a little bit on the chassis today.
Took off the fuel line, the brake lines, the shocks, the tank...
Now I'm ready to remove the engine and gear box.

With a little help of my 12 Year old son it was all fun to work on the R4!
It's a nice father-and-son-project. :)

Restauration-07.jpg

(On the pic you can see Tim learning how a car without shock absorbers is good for bouncing.) :)


All the best,

David
 
Last edited by a moderator:
Today I took out the engine, gearbox, and the driveshafts.
After removing the engine I put the steering rack in again so I can move the chassis.

Restauration-08.jpg
 
Last edited by a moderator:
Today I turned the chassis to the side and worked on its floor.
I began scraping the nasty black oily mixture from underneath the car.
What an awful work...

Restauration-09.jpg
 
Last edited by a moderator:
Yesterday was a lucky day! :)

A friend of mine established a contact to one of his school-mates who owned an R4 years ago. He said that this friend must have some Renault parts as a left over.

What came out was a bucket (!) full of old parts that I actually have no use for AND a complete floor for a very reasonable price. :D
That will help me a lot even if it is 8cm to short for the R6 van.

Restauration-10.jpg
 
Today I removed the front axle and the torsion bars to have better access to the floor.

Restauration-11.jpg


After that I cut out a good part of the front floor with all its rust-holes.

Restauration-12.jpg
 
Last edited by a moderator:
Okay,

it's not that I was lazy the last few days... ;)
It's just that the hours I spent sandblasting & grinding the chassis were extremly -- dirty.
What an awful piece of work! :neutral:

Now comes the welding...

Restauration-13.jpg


Restauration-14.jpg


David
 
Last edited by a moderator:
Is it possible to buy 95% zinc paint over there? It's well worth cleaning out the insides of your chassis parts while they are exposed and coating them with something like http://www.bilthamber.com/electrox.html

With the floor removed the chassis is not stiff. It's well worth checking that everything is straight while you weld in new floors. http://www.mig-welding.co.uk/sills.htm has an indication of the red wine level gauge technology that I tend to use for setting up and checking.

It's a good project - keep on posting the photos.
 
Malcolm,

thanks for that input!
I already noticed the lack of stiffness and have been very careful not to bend anything.

It's not too bad though because I cut out only parts of the floor.
The complete middle-section is still in/on the chassis. It was nearly rust-free. :)

With the zinc-paint I will definitely have a look!

David
 
;) Good job David, your chassis will be more than new when you'll finish your job... Concerning what you're looking for on the the french websites, no problem I can help you as much as possible.
 
;) Good job David, your chassis will be more than new when you'll finish your job... Concerning what you're looking for on the the french websites, no problem I can help you as much as possible.

Hi Alexandre,

when it's time, I will definitely contact you regarding the french parts.
Thanks in advance for helping me out !!! :hug:

The last days I was buisy preparing all the sheets to rebuilt the inner frame parts of my chassis.
Done with that I welded all the sheet metal plates in their places.

Today I could finally weld in the front part of the new floor. :D

The complete replacement floor that I got cheap was from a "standard" R4, the van is 8cm longer.
So I had to cut the floor sheet in two pieces to "stretch" it that it will fit my chassis.
That was not a big problem though as the middle of my chassis was nearly free of rust.

Restauration-15.jpg


Restauration-16.jpg


Now it looks a lot better.
:D

David
 
Last edited by a moderator:
;) waouh, good job ! But... I wonder why you put scotch tape on every hole of the chassis ???
 
That is just for preventing any dirt/abrasives entering the chassis while I still work on it.
After sandblasting it was incredible how much sand and dirt there was inside the chassis.
It took me a good amount of time blowing/vacuuming all that crap out of the chassis parts.

I plan to use Mike Sanders for cavity sealing after I finished the paint job on the chassis.
Therefore the inside of the chassis should stay as clean and free of leftovers as possible.

David
 
In addition to the outside I spot welded the front floor part from the inside as well.
As we say in Germany "Doppelt haelt besser".
(Might be translatet as "going belts and braces".) :D

Restauration-17.jpg


Now, as the front part of the chassis is nearly done, I started to cut out the rusty parts of the rear frames... :mad:

Rust-10.jpg


davidnRust-11.jpg


David
 
Last edited by a moderator:
Back
Top