Clementine's Garage
Clementine the Cat
 
Image of flower
Yellow R4
 
Réparateur d'automobiles

83 tl

nicky4tl

Enthusiast
Messages
190
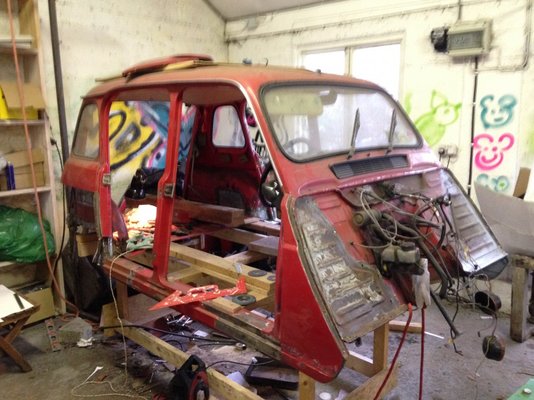
I thought I better start a thread for the restoration of my 1983 TL. We are already about 5 years into the restoration. The hope is to have the car ready for Summer 2016 or so :)

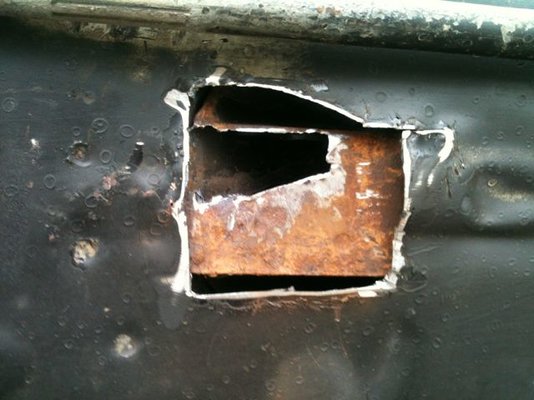
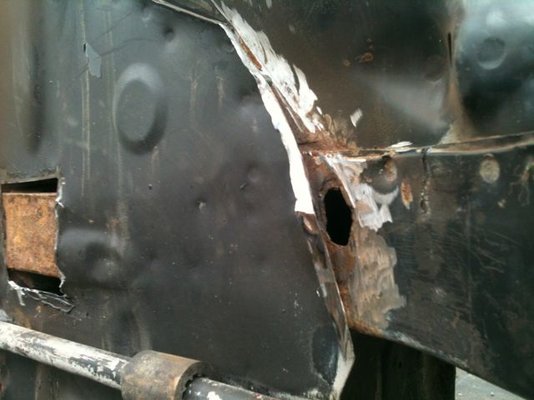
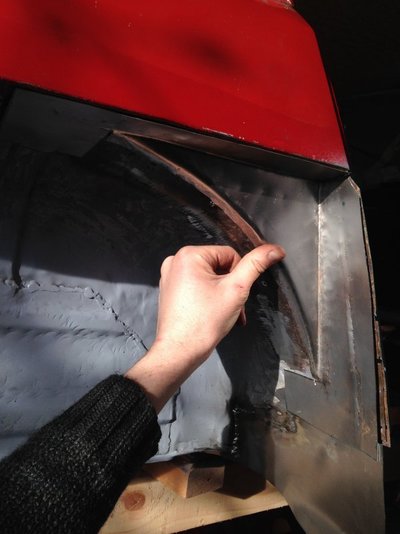
Yesterday I managed to get the back suspension and most of the front off the chassis. The next job is to patch some small holes. If anyone had any advice I'd gladly take it on how to deal with the repair to the two sections in the picture. I'll be able to weld in a repair easily enough but Im wondering if I should treat with rust converter before closing it all back up again. I have a tub of hydrate 80 and also a few cans of dynax s-50 I could use. I also have a can of etch weld (all products I bought about 2 years ago, slow progress indeed). It seems I caught the area just in time as the box section is pretty solid except for the bit I cut out. Its how to protect it now for the future is the real concern.

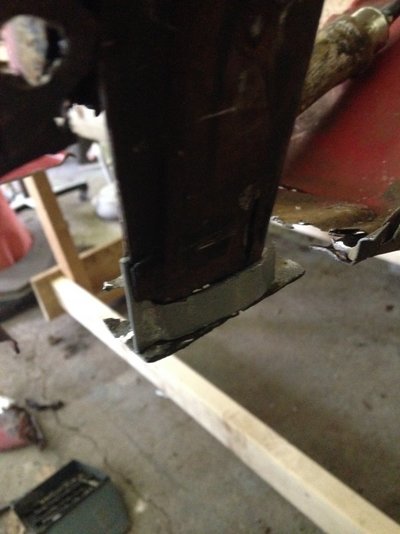
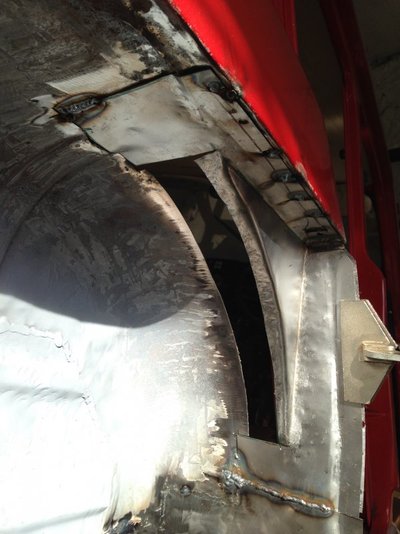
My plan for the third pic is to hammer back the floor, flattening the flange that is there and then weld the floor to the box. The rail is quite solid everywhere except for where the hole is (ehm obviously!). Should I be trying to fill that hole I wonder? Its going to mean pulling off more floor to do so.
 
  • IMG_0486.jpg
    IMG_0486.jpg
    52.3 KB · Views: 145
  • IMG_0487.jpg
    IMG_0487.jpg
    51.4 KB · Views: 145
  • IMG_0485.jpg
    IMG_0485.jpg
    44.7 KB · Views: 144
Looks like quite a small job.

It looks like the corrosion has been painfully removed with tin snips!

Who ever did it needs to get into angle grinders PDQ.

Looks like it will be easy to square off what has been removed in about 20 minutes.

I would but mig weld in mild steel based on cardboard templates after I had "cleaned up" these areas with a small cutting disk.

This would be a neat cheap permanent solution that could be rust proofed (from the inside) afterwards with Waxoil or some such inhibitor.

Please, get the grinder out!
 
I would also cut out those holes a little wider. It's likely that from the inside the metal surrounding those cut-out pieces is also corroded and in bad shape. Especially where the floorpan has been spot welded to the front chassis-stingers, it is likely to be in bad shape and maybe you'll find it rusting again in a short while.

I tend to play it safe and cut out just a little more to make sure I don't leave any bad metal in place. Especially don't be too careful at that spot where the front stinger goes underneath the floorpan in the 3rd picture. Cut out a litle piece of the floorpan to make sure the stinger is okay further on.

And sure: use an anglegrinder and try to make the holes you cut out rectangular (or at least with straight edges), that makes cutting the new patches of metal easier to do.

Good luck.
 
4 years later a bit of an update. I got angle grinding and cut out all the rusty bits from the chassis. Welded in patches. Degreased and sanded. Brush and roller painted with two coats of epoxy mastic, seam sealed, and then sprayed with gloss black. Then i bolted back on the wishbones and a few other bits. And finally my brother and I wrestled the rear axle back on (good god that was some job).So now it looks like this:
IMG_1168.jpg
 
I wonder if that are actually more Renault 4 in pieces then there are as working cars
tyres make very good support 4 chassis
I am slightly further ahead with my rodeo Project I was going to photograph a step-by-step guide 2 refitting rear axle but did not have enough spare hands to take photos and try and lever everything back into place
good luck with your rebuild certainly looks nice so far
next problem I found everything else now looks tatty compared to a shiny chassis meaning everything else needs cleaning and painting as well
 
i hear you re the all else looks tatty. Ive been sanding, epoxy mastic and then spraying with an aerosol lots of little bits and bobs. Started on the body this week. All the usual spots. The only thin steel i could get easily is galvanised unfortunately. No problems though. Im welding with the doors and windows open and wearing a full mask. No prizes for neatness Im afraid. Think I need a bit more practice!
IMG_1234.jpg

IMG_1236.jpg IMG_1237.jpg
IMG_1240.jpg

And then on to the front
IMG_1243.jpg IMG_1245.jpg
IMG_1244.jpg

Now a quiz question. :) Is this a left or right hand lower ball joint? Ive lost the other one so will have to buy again. Didn't have time to check before leaving the garage til next week.
 
  • IMG_1235.jpg
    IMG_1235.jpg
    64.7 KB · Views: 12
  • IMG_1246.jpg
    IMG_1246.jpg
    72.6 KB · Views: 13
  • IMG_1248.jpg
    IMG_1248.jpg
    160.3 KB · Views: 12
A little update. More progress on the body.
IMG_1668.jpg

and a bit of patching...
IMG_1670.jpg

the patch for the seat belt mounting was made with something like 3mm galvanised plate. gulp. I still have to think how Im going to add the actual seat belt mount to it. Inside is still a bit messy but looks like this now.
IMG_1671.jpg

And then on to the other side. I decided to get a little fancy and spend a merry hour hammering the patch a bit before attaching it. Tough stuff to bend this heavier plate.
IMG_1691.jpg


Onwards and onwards. no end in sight.. Replaced bottom and back of pillar.
IMG_1676.jpg

New piece of cill generously sent to me by JonathanT from this forum (thanks Jonathan) added in
IMG_1683.jpg

And thats how it kinda got left. Hoping to get back to it for two weeks at the end of March and finish up most of the body.
 
  • IMG_1686.jpg
    IMG_1686.jpg
    153.3 KB · Views: 16
wahey! So glad those Cill bits are being put to good use.
Amazingly I've finished welding...what a slog but now rust free at last !!
 
I really really really hope my '83 TL doesn't need that kind of attention :S I'll wait to see tomorrow when its on the lift at the MOT. Hopefully theres not too much rust beneath the undercoating. Nice restoration by the way :)
 
Progress was going well this week and I even thought I saw the end of welding in sight. Then I rolled over the tub to see what was going on with a spot of rust down the back and BOOM. Can of worms!
This is going to be tricky me thinks.

IMG_2151.jpg


Has anyone experience with the rear end panels from derfranzose? Im thinking this may be the way to go here
https://www.franzose.de/en/Renault/R4/Hintere-Karosserieteile/ANR87022/

and maybe one of these

https://www.franzose.de/en/Renault/R4/Hintere-Karosserieteile/ANR87023/

hmmmmmm
 
I bought those panels and didn't end up using them. The part in the second link is a poor fit and seems to be intended as a cover for the existing part rather than a replacement. I made my own - http://www.renault4.co.uk/gordini-boot-floor.htm

My boot floor was repairable and it was neater to repair than use the part in the first link which wasn't very accurately made.
 
Ah right. Thanks for that. Ive started patching it. All going well despite being very fiddley.
 
Taking a break until August. Unfortunately I had to move out of the garage I'd been using. Hopefully I'll get it all back together by the end of the summer.
12986919_10209427041782424_8085355804770356212_n.jpg
 
A few photos of the rear right arch. Quite a bit of new steel gone in there :) First thing was the cill, and then floor,
IMG_2110.jpg

Then in to the arch. Had to make a repair piece for in there:
IMG_2111.jpg

Repair in place:
IMG_2113.jpg

IMG_2143.jpg

Roll on August so I can get this wrapped up. Hopefully....
 
  • IMG_2112.jpg
    IMG_2112.jpg
    63 KB · Views: 9
  • IMG_2114.jpg
    IMG_2114.jpg
    79.6 KB · Views: 9
Last edited:
I've enjoyed reading about your project, Nicky. Seeing all the rust you have had to deal with encourages me to think that mine is not an impossible task. Good luck and best wishes, Bob.
 
A little bit of an update. I've been working slowly at the inner wings. They were actually in quite a state.
IMG_2926.jpg

The usual spots. Along the top and in the corners.
IMG_0034.jpg

Must remember to note the colour code there. Finally got it to this stage then..
IMG_0003.jpg

This was using a hot air gun and wire brush wheel on the drill. Filthy job getting all the cracked under seal and old paint off. Tacked in repair and later finished off the welding. Not the prettiest job but it'll do.
IMG_2932.jpg


Once degreased and sanded I gave them a coat of epoxy mastic as a primer. Looks a bit better.
IMG_0037.jpg

SO I had a funny conversation with the painter. I said I needed some epoxy primer for a car which would be eventually painted red. He said to go for a pink primer so. I guess we were thinking pink as in faded red pink. I should have said that to the supplier when ordering the paint. Anyway. It sure is pink!! :)

IMG_0057.jpg

Hopefully I'll get back to finishing the welding on the tub before the end of next week.
 
Well that made me smile there is actually at least one bright pink R4 over here
Renault Reborn got one on their Web page ☺
 
Back
Top