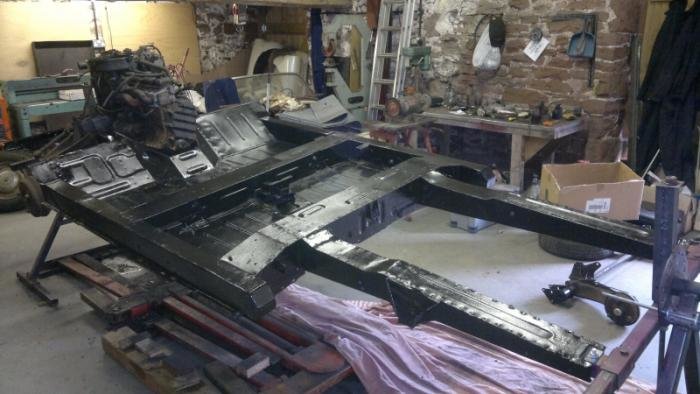
Rear Chassis Leg Repairs.
Just a quick comment on your excellent project.
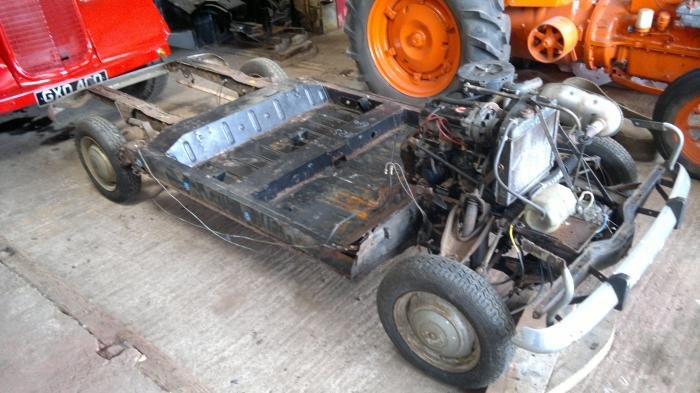
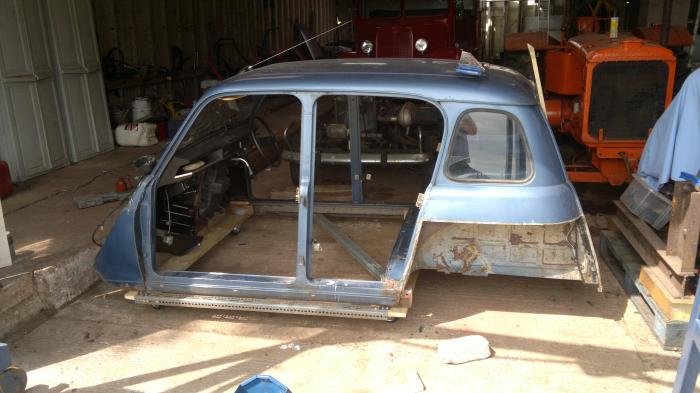
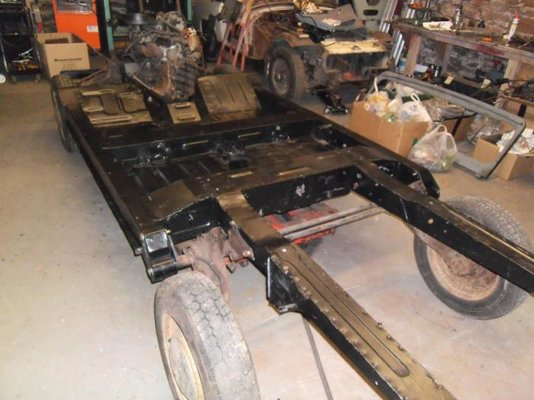
Taking the body and rear axle off really is the only way to properly repair the rear legs. So well done.
We have repaired a few of these at our workshop and often have found that an undetectable repair is simpler then has been described once the car has been stripped as per yours.
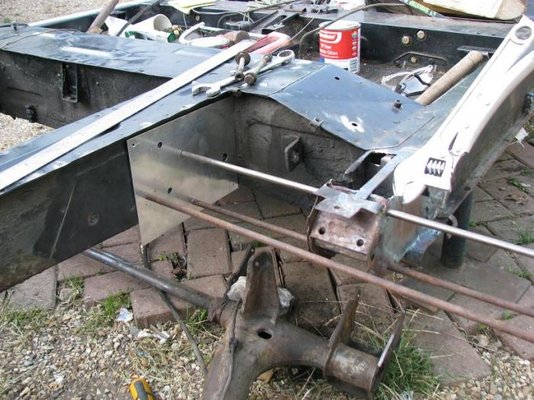
From you pictures, it looks that the corrosion may be confined to the outer faces of the leg of the bottom of the leg. (I cannot quite be sure, but this is quite often the pattern).
This being the case, it is not necessary to use a jig to maintain perfect alignment, just common sense.
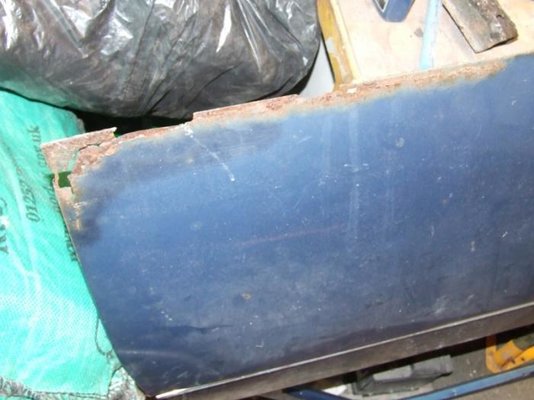
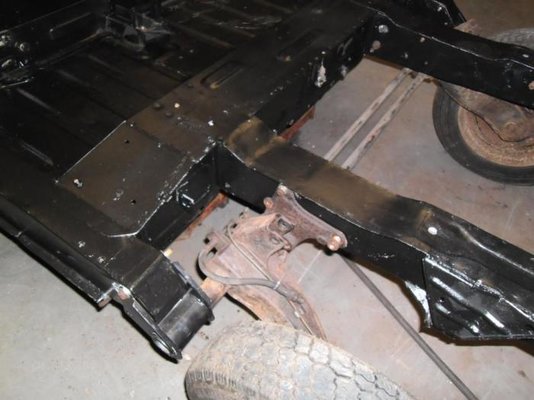
The outer section of chassis leg the axle mounting points bolt through is a simple flanged "U" section of pressed steel about 14 inches long.
See below
https://picasaweb.google.com/109039...sLegStrengtheningPanelCut#5639139685730738658
Simply use a small angle grinder to remove the rotten outer skin (follow the red line on the above link). Do this by cutting along the corners, front to back of each leg. Be careful to only slice off the outer layer only as the leg is two or three layers of steel tick.
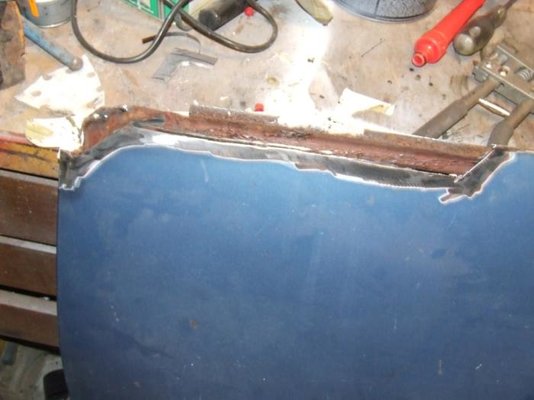
Use a drill and grinder/ cold chisel to unpick all the spot welds between the piece you are removing and the inner chassis section which might look horrible at this stage..
This will enable you remove an "L" shaped section of the outer skin only.
This will keep the inner section of the strengthening section in place. Therefore all the captive spacers inside the chassis leg will still be in place for reference.
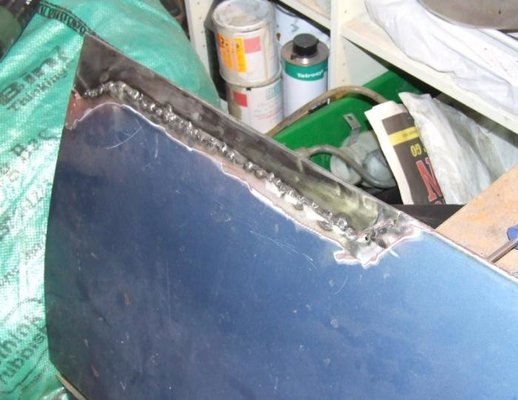
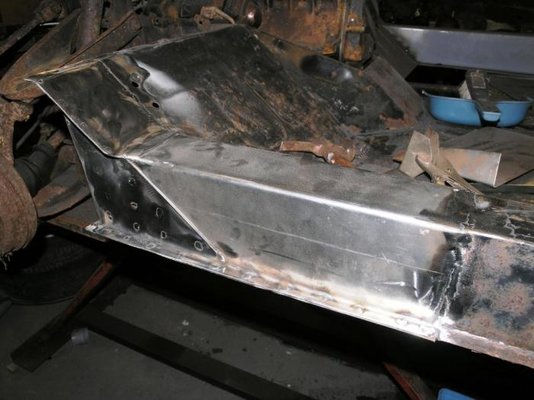
Weld a new "L" shaped piece of steel in place of the old one, I used 2 mm thick steel for extra strength.
Use an appropriate size drill from the inside of the leg to add the axle mounting point holes to the new outer skin,#
The beauty of this is that once the welds and ground and the leg painted, the repair is undetectable and in perfect alignment. It also only takes 45minutes for each side.
Finally fill the chassis leg with the appropriate wax oil at 100psi. This is essential as the repair will rust through from the inside in about 1 year if you neglect this.and it will last forever.
Final tips are-make friend with you local trade motor factor as opposed to Halfords etc as you will save a fortune,
always wash things down prior to painting with Scothbrite and panel wipe NOT THINNERS as this will ensure your paint sticks and you live to tell the tale, again from you local motor factors, and finally
an excellent single pack factory chassis paint is high build self priming satin black in 5 litre tins which just goes straight on to metal.
Regards
James


![PICT0114[1].jpg](/forum/data/attachments/4/4257-55c4d8e6d9090b5b1052807acc0ba65f.jpg)
![PICT0172[1].jpg](/forum/data/attachments/4/4258-2a6b38a2048292e916f13aa8c2c15c83.jpg)
![PICT0154[1].jpg](/forum/data/attachments/4/4259-c4ff36bd670e6a26b5b0ad09d69dcd17.jpg)
![PICT0152[1].jpg](/forum/data/attachments/4/4260-c98706e6b6bcdae6a9650ca6748000e0.jpg)
![PICT0163[1].jpg](/forum/data/attachments/4/4261-278e253f5b9676e0a633ca8c600abd6a.jpg)
![P8166682[1].jpg](/forum/data/attachments/4/4283-2f623a05e6c0cc839af79eb149dcf841.jpg)
![P8186713[1].jpg](/forum/data/attachments/4/4284-6ee2ea77e1e6729fbe4fa49d1da8f35a.jpg)
![P8186719[1].jpg](/forum/data/attachments/4/4285-0d1b6bfa1ae8d92eba1cba237edd11c3.jpg)
![P8186714[1].jpg](/forum/data/attachments/4/4286-28c44eea32cfa2d53577be3677d90594.jpg)
![P8236725[1].jpg](/forum/data/attachments/4/4303-e2c2ae401ee871f686017c4a3ea37e5a.jpg)
![P8236721[1].jpg](/forum/data/attachments/4/4304-eb128a14005d057ac817363bc10a1f23.jpg)
![P8236723[1].jpg](/forum/data/attachments/4/4305-bc64e6ad53f29f39d6411ca944ef5f06.jpg)
![P9146902[1].jpg](/forum/data/attachments/4/4446-9871b0bf47e543ccd6fdc766c87dedd9.jpg)
![P9146908[1].jpg](/forum/data/attachments/4/4447-d244dafaec6948c996659d9a118ad1c1.jpg)
![P9146909[1].jpg](/forum/data/attachments/4/4448-5d23d5f6980349b9cb1057caffd5070d.jpg)
![P9146911[1].jpg](/forum/data/attachments/4/4449-02a376c4988611fff95993301ab0433b.jpg)
![P9146912[1].jpg](/forum/data/attachments/4/4450-399364949ee772df94237f58124cc805.jpg)