Clementine's Garage
Clementine the Cat
 
Image of flower
Yellow R4
 
Réparateur d'automobiles

Lancashire GTL

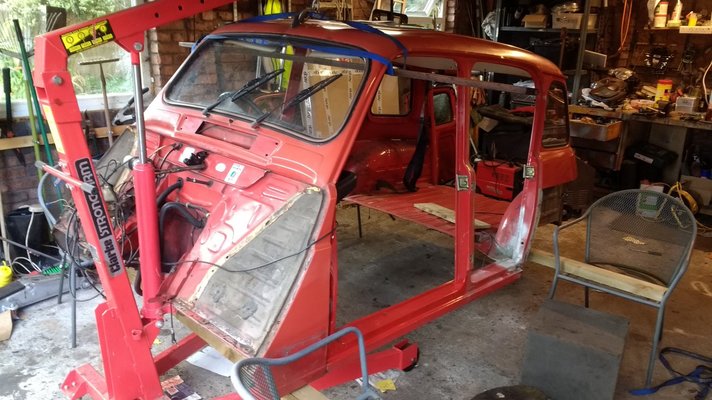
So, we now have body and chassis back as one.
With the judicious use of a set of old steel garden chairs (don't try this with placcy ones!), some beefy wooden beams and my engine crane, .........
IMG_20170818_132825114.jpg

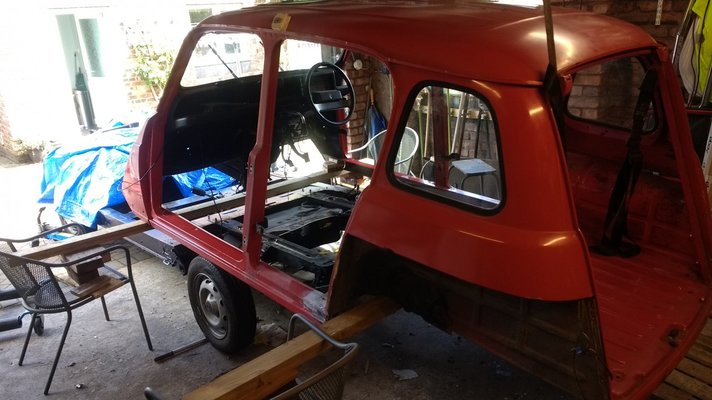
we eventually got the tub packed up high enough to push the chassis back underneath..........
IMG_20170818_143436158.jpg

....and finally after some shoving and pushing........
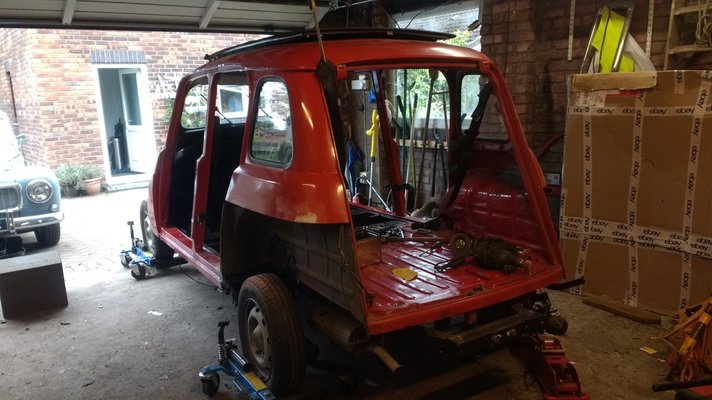
IMG_20170820_171348363.jpg

....it is all in one piece again. Not as easy as it looks because the drive is actually downhill from the garage's threshold, which makes any unbraked vehicle likely to develop a mind of its own. Still, take it steady, and all will be well. The hydraulic wheel dollies are very useful, incidentally for finally accurately placing the chassis, and very useful for moving the complete car around the workshop afterwards. One of my best buys tool-wise.

I have also carried out a welded repair on the offside rear wing mounting area, which has come out quite well, once I had adjusted to the idea of welding such thin metal again.
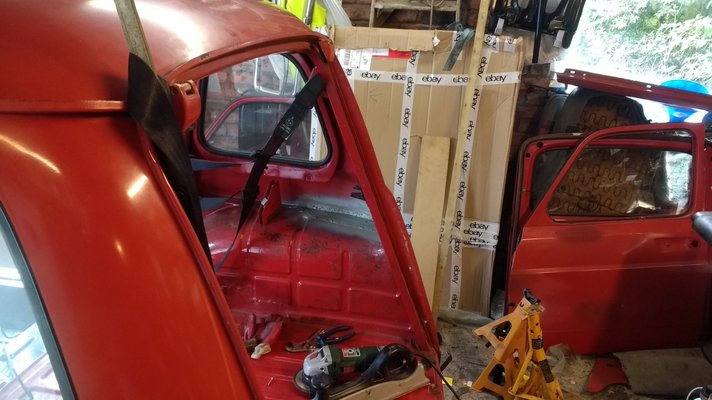
IMG_20170820_132115065.jpg

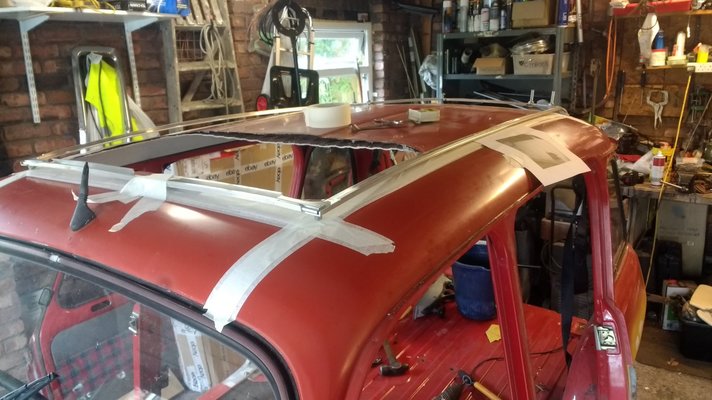
Finally, it was out with the 'moon roof'. I have tried the Twingo roof on the top of the car for size, and that is probably the next major job, to be completed prior to considering any further bodywork such as paint, etc.
I have had a look at the other threads on the forum, which show this operation. Some appear to cut just a straightforward rectangular hole with the necessary holes drilled around the edge, using the frame as a template. Others who have also inherited the chopped off section of Twingo roof as well, seem to have a different sort of hole with scalloped out corners, etc.
Any thoughts? The moon roof aperture is almost the right width and gives me a good starting point for cutting. Next step is to arm myself with a few decent jigsaw blades, or a nibbler.
 
I would so like to separate the body and chassis, i fear there might be corrosion on places my eyes can't see. But, i have no crane, or some type of lift i could use. I'm guessing it is not really that heavy. And, i fear i might not be able to put it all together and make it air tight(somewhat) again. But i suppose this procedure is very rewarding at the end.

Can you tell me approximately how heavy the body is? And the chassis, i suppose i could lift it vertically on it's side and do the work i need?

Cheers.
 
Not sure as to the exact weight, but you can strip off all of the doors, rear hatch etc. to reduce it significantly. You will see elsewhere on this forum that it can be lifted by three or four people. I have also seen examples of the car being tipped on its side onto old mattresses, but that, of course, still leaves a lot of chassis unseen where it is against the bottom of the body.
Once stripped off, the chassis could be tipped onto its side.
 
Thank you.

You're doing exactly what i want to do. Looking great!
I'll be sure to check for updates!
 
I have strip down everything except main body, and used 2T hand crane, hanged on the ceiling oh my garage. Tide rope around body and lift whole car in the air.
Left over night. In the morning chassis was on the floor and body left hanging on the crane.

When you return it than you have to use butil sealant that goes all over chassis where body will lay down. Press easily and bolts will do the rest.
 
I undid all the bolts that hold the body to the chassis.
Then I put a jack under the floor of the booth and jacked the both the rear wheels of the ground and put some extra weight in the rear footwhels.
After 24 hours I came back and found the wheels back on the ground and the body held up by the jack.
The front of the body is then stil holding on to the chassis but that is easily released with a knife.
 
Thanks for the tips. I will definitely work on this rust, i might even construct a ramp on which i could drive the car onto, and work beneath as well as being able to hang the jack on and lift the body up. It'd have to be disassemblable also.
New project perhaps.
 
.....and so we come to the roof. I had decided that there was now little point in carrying on much further without fitting the sun roof, due to the mess that it was likely to make. I had already taken out the 'moon roof' and after a quick measure up, concluded that the aperture already cut in the roof was almost the right width, but not quite far enough forwards.
I decided that the best way forwards was to use the frame to set out the various holes first, and so assembled it, found the centre line of the roof., and after poring over a number of photographs showing how the thing went together on


IMG_20170824_135809249.jpg

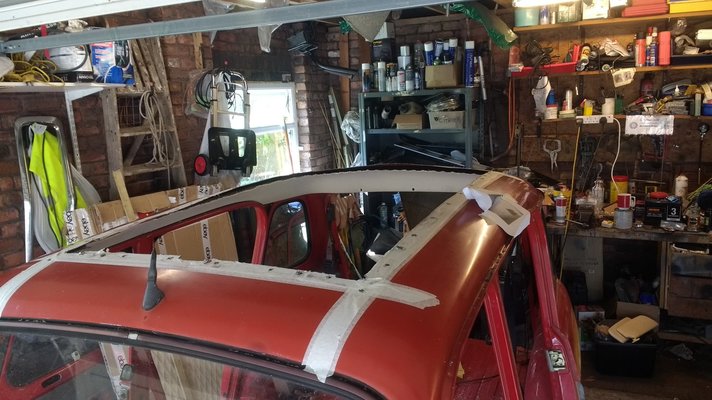
other people's R4's, drilled an initial couple of holes to allow me to bolt the roof frame firmly into place. After drilling everything out, I then marked up the hole, double checked it for size against the roof itself and got out me jigsaw.
I decided to cut through both roof metal and headlining at the same time. This worked out quite well, the thick plastic roof liner moulding damped out some of the roof vibration, although the process was so deafening in the garage, that after the first few inches, I gave up and drove down to B and Q and bought a pair of cheap ear defenders, which made things far more tolerable. The dog, usually happy to lie in the corner and watch matters unfold, fled after the first few seconds! What a mess though. The car was now full of a fine tilth of steel filings and plastic shavings!
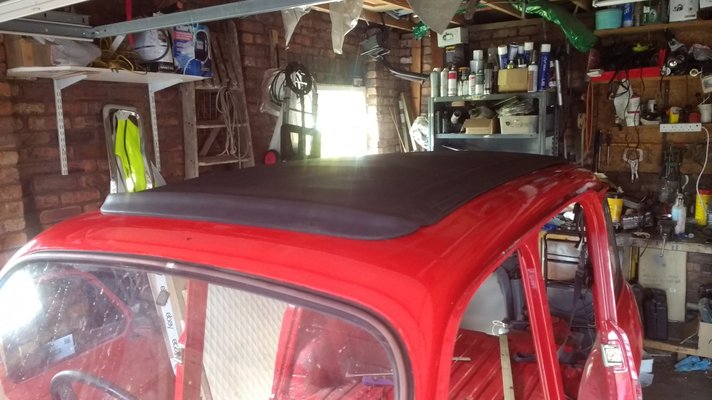
traction stand.jpg So now I had a hole, and after a few hours fettling and trimming, I finally got the roof cassette to drop into place.

After half an hour with the Dyson, I am now in the process of painting the car roof so that I can fit the folding roof permanently. I am returning to my former technique of roller coach painting, which worked extremely well on the TL, gives a finish as good as most mid range spray jobs with a little effort at a fraction of the cost and it is reasonably straightforward to put a few coats onto one panel at a time. I am just waiting for this to harden off as I write.

The headlining had a few small chunks missing around the old aperture and having trimmed it to the right opening size (which is larger than the metal hole.) I gave it a good scrub with kitchen cleaner, and then sprayed it to kill the cream colour and get something closer to the grey trims from the Twingo. I searched high and low for a suitable light grey matt aerosol, and eventually settled upon a can of Rustoleum paint designed to simulate concrete. I primed the roof with some clear plastic primer that I had left over from another project, and then sprayed it. It looks the part, matt with a slight texture.
Next will be the final fit of the roof. watch this space.
 
I undid all the bolts that hold the body to the chassis.
Then I put a jack under the floor of the booth and jacked the both the rear wheels of the ground and put some extra weight in the rear footwhels.
After 24 hours I came back and found the wheels back on the ground and the body held up by the jack.
The front of the body is then stil holding on to the chassis but that is easily released with a knife.

If you undo all of the bolts and cut yourself a series of thin wooden wedges, and then tap these into place at each bolt position, then you will find that the body will separate quite readily with some upward pressure either from a hoist, or from four strong men pushing up on beams inserted through the door apertures.
 
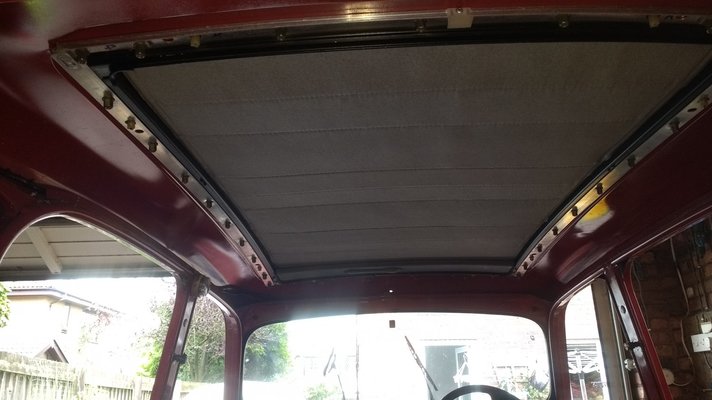
We now have the roof back in the hole, as it were, and after a little local trimming, everything has tightened down nicely. The headlining was cut out, cleaned up and painted to match the Twingo trims. As noted before I struggled to find a suitable matt paint and ended up with a can of spray paint designed to mimic concrete! It is matt, slightly granular and quite a decent match. The liner itself was a devil to get in however, and needs to be sprung back into place with some force, I found the best way of doing it single handed was to loosely fix the front of it into the hole above the mirror with a longish self tapper and then wedge the back end above the tailgate more or less into place, finally working my way around each side, popping the moulding back over the door and window aperture framing.

IMG_20170902_093456427.jpg IMG_20170901_142710296.jpg
My only issue was getting the front moulding to fit, it isn't quite the right shape (understandably since it is from another model of car) and took a little fiddling to understand how it worked in the first place, and then to get it to sit right.
I am now prepping the remaining loose panels for paint. The car has obviously had a respray at some time, in a slightly lighter red. I had thought at first that this was just extreme paint fade, as red is famous for, but a rub down to deal with a couple of dents reveals another layer of the original red under a later layer of primer under a very thin layer of the carrot coloured red. There is also some fine overspray on some of the plastic trims. Also some splashes of pea green! Not sure where that came from! Quite a nice colour actually.
 
Quite a bit of progress. Most of the detached panels (doors, wings, etc.) now have paint on them and I am turning my attention to the bonnet which, although rust free, has a number of dents, including one which pops in and out like an old fashioned biscuit tin lid. Not really sure what to do with that one to make it stay popped out.
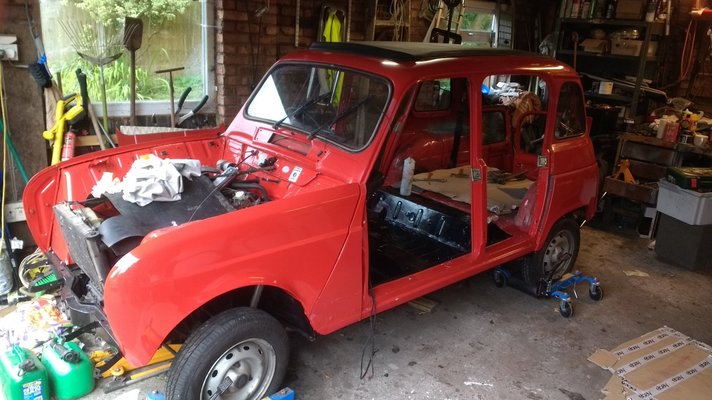
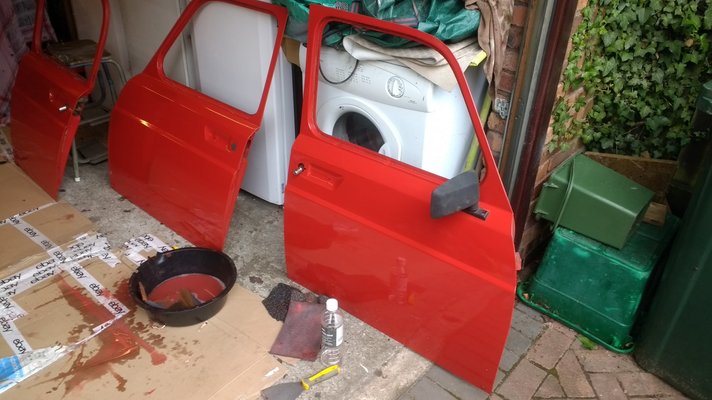
My game plan at the moment is to paint, paint, paint whilst the weather is warm and assemble later. I have however fitted the rear wings which needed a little persuasion to fit properly, but so far things are looking okay. The doors I will leave off until later, since it will be easier to fit the interior without them. The front wings will also be left just fitted loosely for the moment until the bonnet is ready, since from my memories of the TL, it may all require some ongoing adjustment to get a reasonable overall fit, so no point in bolting everything down finally just yet.
IMG_20170920_152131115.jpg
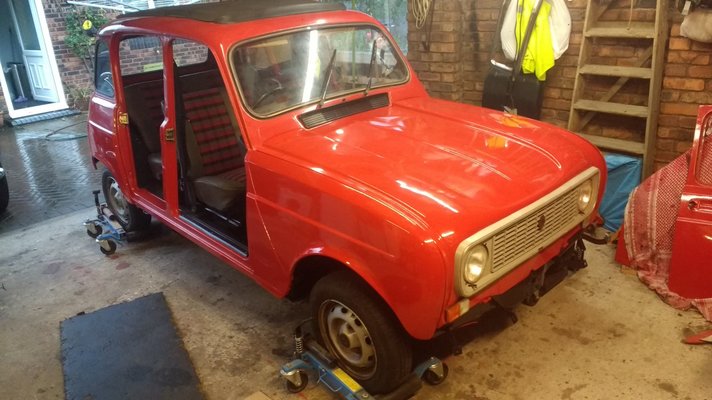
Car looking deceptively complete (front wings are only hung in place).
IMG_20170920_152110196.jpg
Newly painted doors.
 
What a nightmare the bonnet lid has turned out to be. It didn't look too bad with the old faded paint on it, but even after some initial attention to the more visible dents, a coat of glossy red makes it look as if some has just used parts of it for tap dancing practice.
Several layers of filler later, there are still undulations here and there and parts still pop in and out almost at will. Hopefully some sound deadening material on the reverse side will reduce that particular phenomena.
I may leave a few of the smaller puckers in memory of its previous state. at least with the paint system I am using, if it looks terrible when it is finished, it isn't the end of the world and I can get the filler out again.
 
Quite a bit of progress in the last week or so. Paint application is finished now and the paint needs to be left to harden for several weeks before final wet sand and buff. I have buffed a sample section of the roof which is now several weeks old, and the results are good. Wet sand with 1200, then T Cut and final polish with Farecla G3. It is fairly hard work, but the resultant finish is every bit as good as many resprays, especially amateur ones. The very final shine on the finished car will be a good quality wax, but I will leave the paint to continue to harden for the moment.

Front wings have been bolted on, adjusted with a trial fit of the bonnet and seam sealed and I have now turned my attention to some interior work.

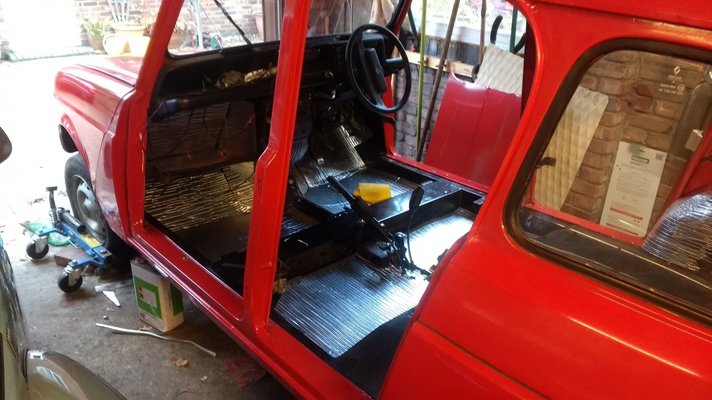
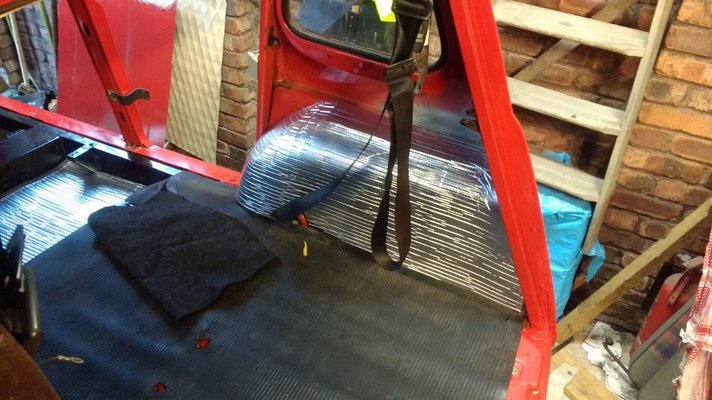
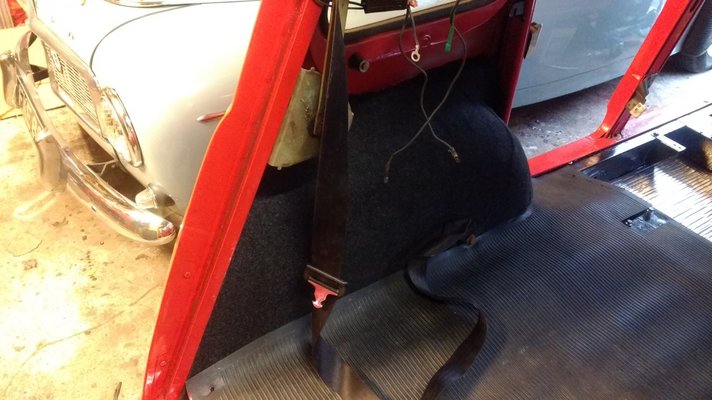
I have had a large roll of dense foam sound insulation in the roof of the garage for a couple of years, and if ever a car needed something to improve its acoustics, it must be the R4. The car has lost whatever insulation this model had on the floor and rear wheelarches internally, with only a few glue smears left to suggest that it might have had some kind of carpet treatment on the latter, and just a set of rather tired Renault rubber mats in the main body. I am reluctant to cough up a lot of money for a new set of rubber mats and will therefore carpet the flat areas, possibly cutting down the surviving sections of rubber to create overmats. I have, therefore treated floors, front bulkhead and rear wheel arches to a layer of aluminium foil faced sound deadening mat. Cutting it to fit around the curved wheel arches was easier than I thought and I am pleased with the overall finish.

IMG_20171002_172116254.jpg
The boot floor mat is reasonable and so after a clean, that will be retained. I was originally thinking of treating the boot floor itself to more of the foil faced mat, but somehow that doesn't seem right, and I may just put a section of loose laid felt to kill a little of the sound. This will make a clear out of any debris after dog ferrying or other utility duties, a lot easier and if everything gets sopping wet, then it can all be whipped out and dried off and the painted floor wiped down.

IMG_20171002_172051681.jpg
I have now started to cover the rear arches and sides with some stretchy van liner carpet. So far I have only done one arch, and the results are quite acceptable, the carpet stretching over the curves wrinkle free. I will use the same finish on the passenger side of the front bulkhead and may also line the parcel shelf with it, albeit more to tidy it up than for any practical reason.

IMG_20171002_172100099.jpg
Seats next, I think, since they take up a lot of garage space and I have obtained some OEM replacement covers. I have also managed to find some door pockets, which will be useful when the time comes to reassemble and fit the doors. But that is a way off yet. .
 
Hello Barnfind, I have exactly the same colour on my car and it has faded considerably. I think the reds tend to do that.

i've never done any painting before, only touch-ups with a spray can. It's my understanding that after the colour, there is a clear coat which is applied and it's this that is wet sanded with 1200 grit and not the colour itself. Is that how you're doing it.

Thanks for your advice:)
 
Hi
Yes red does tend to fade. Pigment strength is good and it covers well however, and you can often get away with fewer coats. This, I was once told, was why it was a popular colour for many bus companies.
Modern car paint systems usually have a base colour, which is non gloss, followed by a lacquer coating which seals the finish and provides the shine. Most of the paints applied this way are two pack, contain various toxic chemicals and are beyond the amateur sprayer. Older cars have a single coat gloss system using an acrylic, oil based or a cellulose paint finish which is not generally overpainted with a clearcoat, although some very old prestige coachpainted cars (hand painted) did finish with multiple clear lacquer layers. Spray can touch ups can be either type, depending on the car that you are touching in. I would have thought that unless the car has been repainted more recently with a modern paint system, an R4 would have a single coat paint finish.
Wet sanding and then polishing with a mild abrasive polish such as T Cut, is a technique used to eliminate paint defects such as extremes of orange peel, overspray, runs, sags, etc. It is also used by detailers to get the mirror finish seem on show cars and involves flatting the paint back to a smooth finish and then polishing the surface back up to a shine again. It can be used on most automotive type car finishes. You need to have sufficient paint thickness since you are shaving off a few microns, and the paint needs to have been left to harden sufficiently if air dried. If you have a two coat system, then you would need to make sure that your prep of the base colour was good, otherwise you would sand through the clearcoat layer when you came to an irregularity.
My car is being coach painted using a foam roller and a paint called combicolor, made in Holland by Rustoleum. It is oil based and has very good self levelling properties and if applied correctly, leaves the sort of finish that you would get straight from the gun in a medium quality respray. Flatting it after leaving it to harden enables the orange peel finish to be flattened down and polished out. Only fairly close inspection then will reveal that this is not a sprayed finish.
The main advantages are:
  • Quite an inexpensive way of painting, no need for expensive spray setups.
  • Limited masking only required.
  • Less toxic, low odour and low vapour so more suitable for application at home.
  • The Rustoleum has rustproof properties and is self priming.
Downside is that it takes a while to self level and dry sufficiently to over coat, so painting is a slow process.
It doesn't give the perfect sort of finish that you would submit to a concours at a show, but it produces a good usable and smart gloss finish to a car in regular use, which is in my view, as good looking as Renault's original , and if you are reluctant (or unable) to spend thousands on a professional respray on a car in daily use, is an excellent alternative. It has been popular in the States as a way of smartening up an older car for some years now. Have a look on YouTube for examples of what can be achieved.
 
Thanks for that very thorough explanation, I'll be sure to return to this page when I start to paint.

I also have more modern Peugeot, a 1999 model if I remember correctly. All the clear lacquer coat has peeled off the roof and if I rub my hand over it the paint transfers to my hand, so that will be my first job. I'll probably just use spray can lacquer for that.

thanks again:)
 
Quite a bit of progress since my last report.
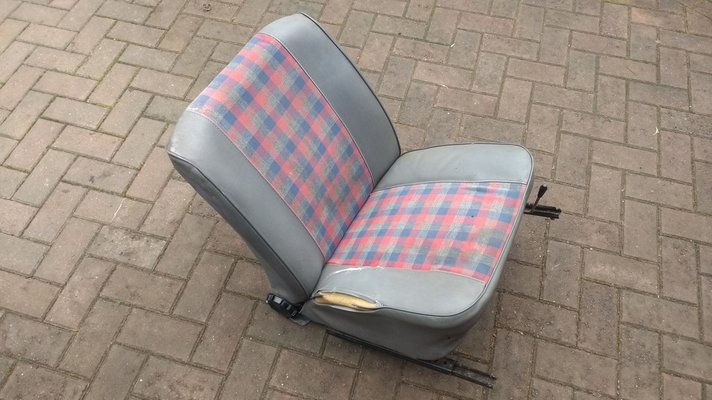
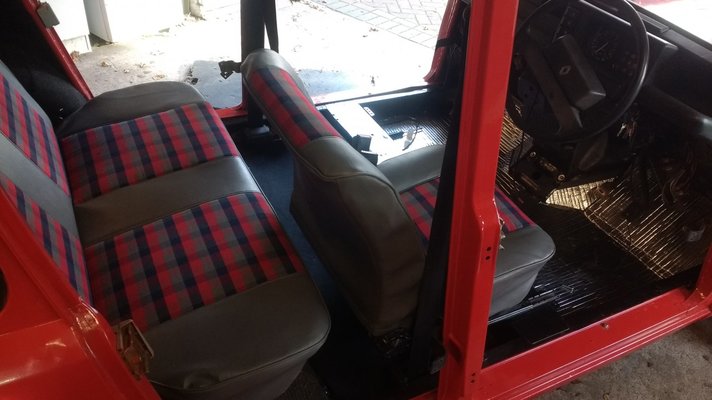
I have stripped the old seats and fitted new covers. This was relatively straightforwards, although a grubby process. The front seat covers were stained and filthy, and the amount of dirt inside was quite considerable, even though only one had
actually burst its stitches. Fortunately the foam itself was okay and had not ripped.IMG_20171016_112929243.jpg
The cover set came with some headrest covers. Alas, I don't have headrests, although the front seat frames have a mounting for them. If anyone has a pair, condition is relatively unimportant since they will be re-covered, then please get in touch.
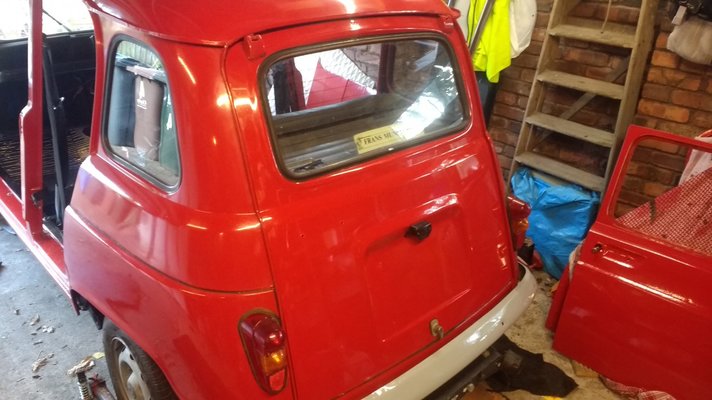
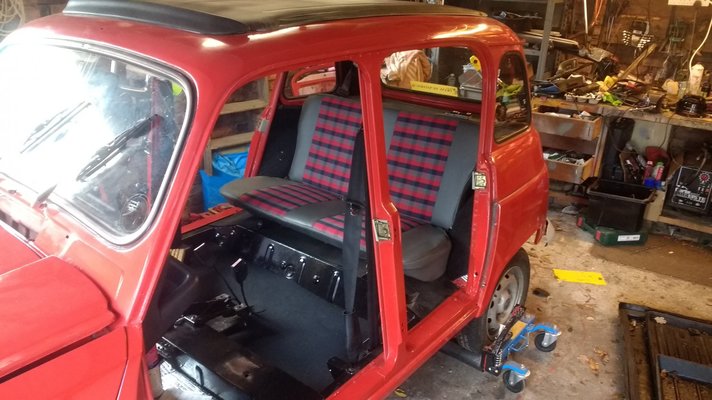
After covering, I fitted the seats and parcel shelf, (much easier without the doors on). Also the rear door (tailgate) after some customising of the lower seal as obtained from Franzose, which was a good 5 mm too deep. I used the spare tailgate that came with the car, and so now have a surplus tailgate with a minor crease, if anyone needs it. I will put it in the parts for sale section.
The rest of the rubber seals appear to fit okay, which is good, since I also have several miles of it for the rest of the doors.

IMG_20171017_150103587.jpg

IMG_20171017_150117535.jpg

IMG_20171017_152751982.jpg

In the roof, I have fitted the trims that came with the sun roof, which smartens that part of the interior up no end. My only issue now with the interior is that the door cards are quite faded compared with the seats. I have given them a preliminary wash, which has improved matters. New cards are available at a price, but I will see how it looks when everything is together, and may live with the difference for the moment.

Finally, I have the given dash and steering wheel a good scrub. The steering wheel was quite a sticky mess with several layers of grease from thirty odd years of sweaty hands, but has come up okay.

I have made a little progress under the bonnet, reconnected clutch and choke cables and reassembled the cross member and the battery tray. The bonnet has also been bolted into place and the catch adjusted. The bonnet to wing gaps are still a little large for my taste, but will do for the moment until I have fitted the 'love handles' .
Bumpers, the rear bumper appears okay and has had a coat of paint (just sitting there in the pictures) but I need a new front, plus a couple of rubber over-riders. Again I will put an appeal in the parts wanted. Maybe someone will do me a swap for the tailgate!
It is starting to look like a car again. getting quite excited!
 
Everything electrical appears to work now, just the last couple of connections to the trailer plug need making and the fuel gauge is untested (empty tank). I have coupled up the exhaust, the accelerator linkage, refitted the hoses with new clips. In theory, if I add some coolant and petrol, she should run. Next mechanical work will be to fill up and bleed the brakes.
A couple of doors also fitted now. I haven't put the glass back in yet, they add significantly to the door's weight and it is easier to manipulate in a stripped down state. I also need to buy some kind of seal to apply to the mounting flange.
 
Getting closer now to the end of the bodywork phase and will shortly be into re-commissioning the mechanical parts of the car.
Recent work includes the following:
  • General wet sand and polish to paintwork. A few remedial bits and bobs.
  • Adjusted the bonnet by shimming up the brackets and fitting the rubber guides to the tops of the inner wings.
  • All doors now fitted, passenger side front still needs a little adjustment but generally okay. Windows fitted too and all handles, mirror and plastic scuff stuff.
  • Fathomed fuel sender wiring (I think) will be finally proven when I put some fuel in the tank.
  • Door trims fitted using new push clips on the front, together with some door pockets fitted to front doors, these were found on Ebay, the seller said off a Mini, but I am doubtful. Good condition and fit okay.
  • New front bumper fitted, plus replacement over riders.
  • Spare wheel cleaned up and painted, (needs a new tyre).
  • Trailer plug wiring reconnected and towball re-fitted.
  • I haven't refitted the 'love handles' at the front as yet. Quite a few cars seem not to have them, looking at photos online. I may change my mind though, and fit them later.
To be done:
  • General service, oil change, new coolant, new filters etc.
  • Clean and paint road wheels.
  • Cut down old floor matting and make individual mats.
  • Need to do something to tidy up rear parcel shelf, will investigate vinyl paint.
  • Refill and bleed brakes, check seals, linings and replace anything dubious.
  • Check front wheel bearings, there seems to be some slight play in these, but will review again when driveable.
  • Find and fit a suitable period looking radio and aerial (hole in roof where old broken one removed).
  • Underbody and cavity wax treatment.
  • Good wax polish.
  • Anything related to MOT, and anything else that crops up en route.
I will probably defer an MOT until after Christmas, assuming that I have all of the above completed, and I will probably not be aiming to do any serious motoring until the winter weather is behind me, plus I also have work to do on my other two cars....which won't get done if I am swanning around in the R4..!

I will get some photos uploaded of the plot so far when I have managed to turf the Volvo out of the garage for a few days (when the current hurricanes pass). It doesn't stop me working on the Renault, but it clutters up a decent shot with the camera.
 
Back
Top