Clementine's Garage
Clementine the Cat
 
Image of flower
Yellow R4
 
Réparateur d'automobiles

White 1990 Gtl repair - MOT completed successfully!

Teodor

Enthusiast
Messages
64
Location
Istria
So, as I stated yesterday, I recently bought an R4, and it looks like I've been deceived a bit from the seller.
But, nevermind, as I think it is worth repairing and making it shine on the road once again.

The fuel pump is dead. (Pumps fuel very irregularly).
The water pump leaks.
Only 3 cylinders seem to be functioning.!?
I will get a new fuel pump tomorrow and hope that fixes it at least on that part.

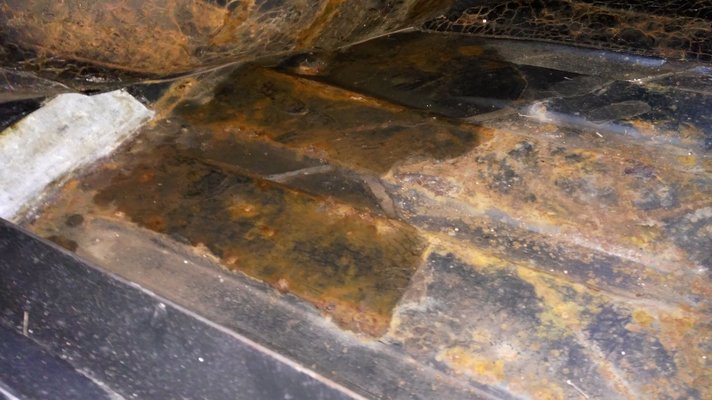
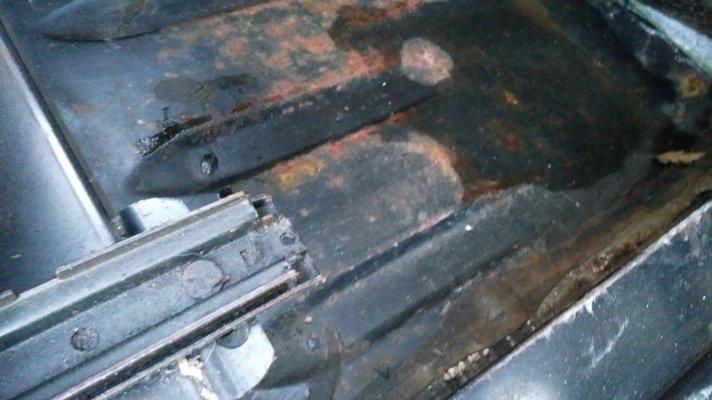
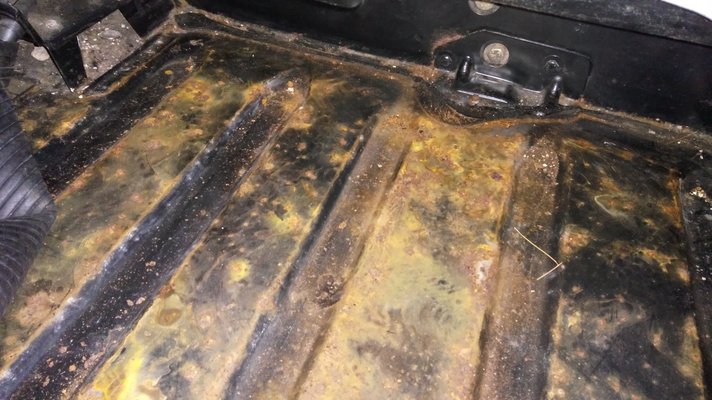
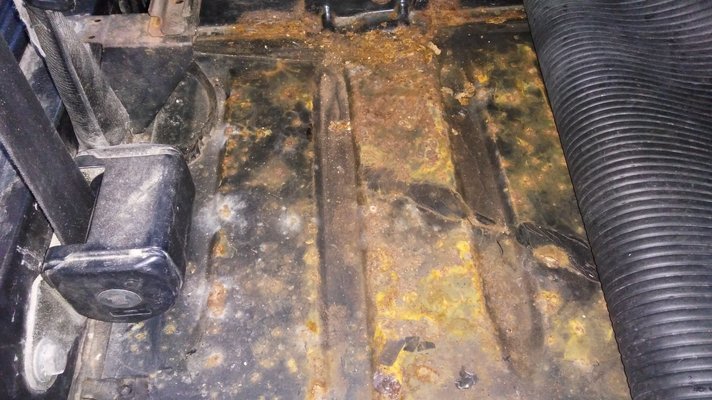
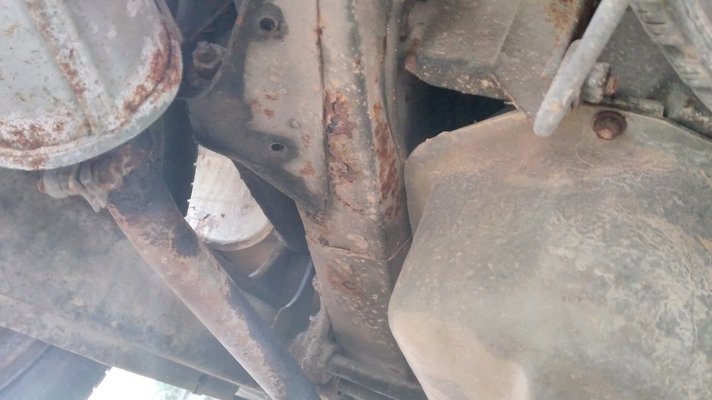
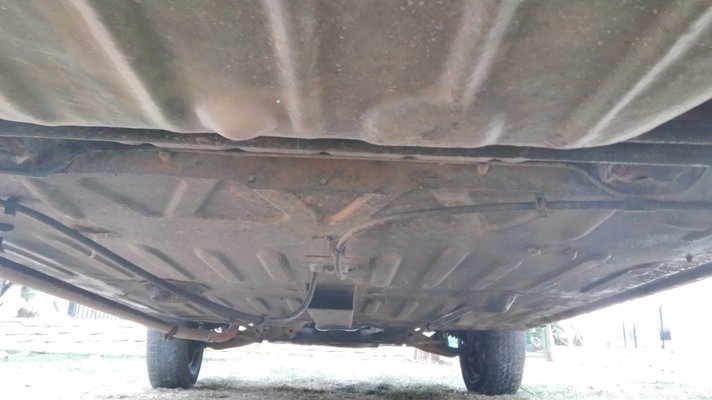
Here are some pictures, the rust is very visible on the photo, it doesn't look so bad in real life.
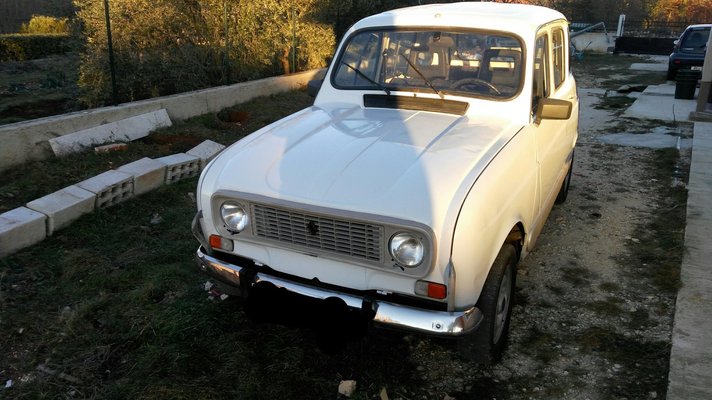
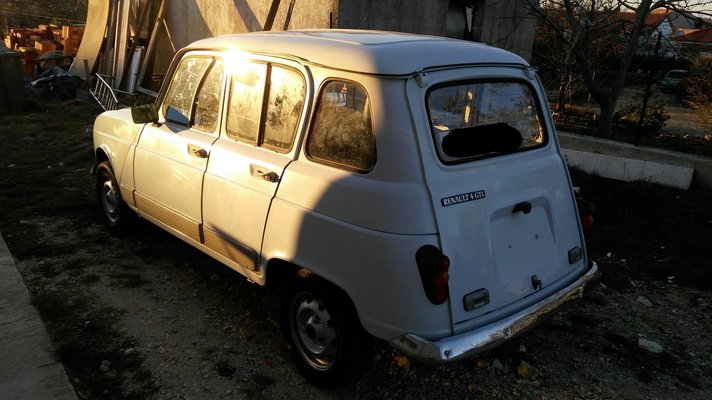
IMG-1483801293577-V.jpg IMG-1483801257403-V.jpg IMG_20170110_122219.jpg IMG_20170110_122204.jpg IMG_20170110_111441.jpg IMG_20170110_111427.jpg IMG-1483801519378-V.jpg IMG-1483801464416-V.jpg IMG-1483801421023-V.jpg IMG-1483801378954-V.jpg
 
That doesn't look to bad.
To check which cilinder is faulty just make it run at idle and jank the ignition leads from the spark plugs on at the time and listen for a change in running.
and look in the oil for traces of water to rule out a faulty head gasket.

Good luck with your white beauty
 
I always get a shock when touching the ignition leads with the motor running :( Maybe I'm unlucky ;) But then again; it always happens by accident, when I'm doing something not related to the electrics. Seems to be a nice car you have bought - Have fun with the tinkering :)
 
No, I don't think that's too bad either. When pulling off HT leads I would wear thick motorcycle gloves or rubber kitchen gloves. The health of the chassis is paramountEverything else is just one more little job to do.
 
A small update.
I've changed the fuel pump yesterday, and managed to get home today, 250 meters.
Now, I have to reach the 4th candle somehow, without removing the alternator(I'm guessing what it is tbh).
Upon more inspection, I concluded that the fuel tank is very rusty:
IMG_20170112_123350.jpg
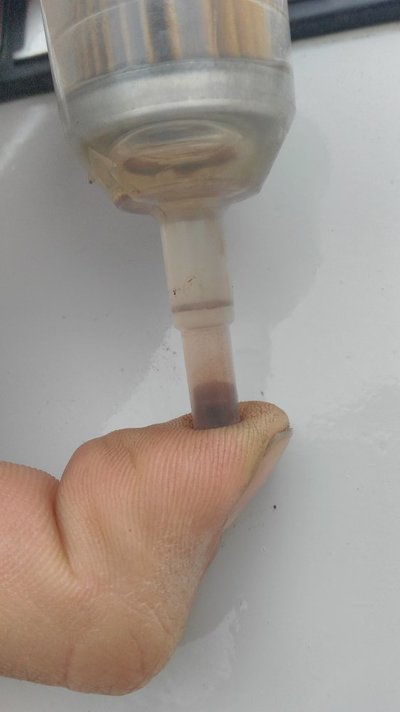
And this is a new filter, it probably didn't even filter more than 0,7l, 1l max.
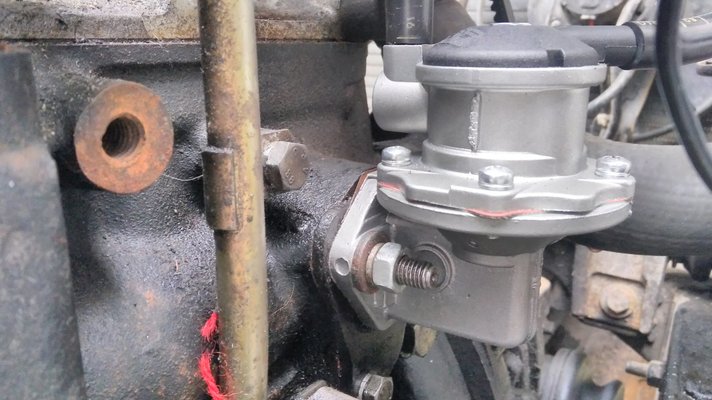
The fuel pump seems to be working fine:
IMG_20170112_125820.jpg
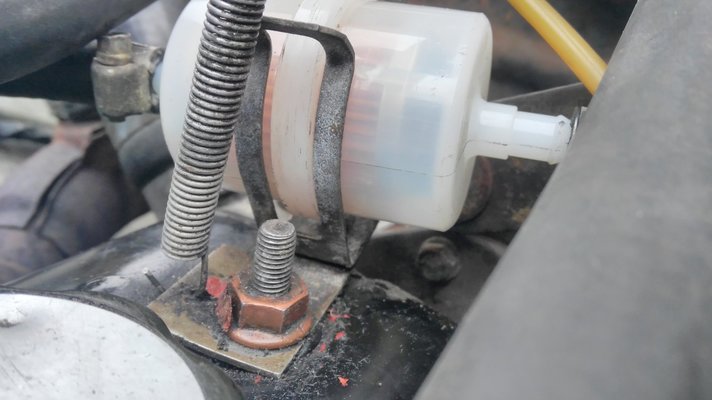
But I am unsure since the filter that's now on, isn't filling up whatsoever:IMG_20170112_125756.jpg

I can get the car running, which I shouldn't be able to do since the filter seems to be completely dry with the exception of a small amount of fuel being pumped(when I disconnect the filter, the pump pumps very well) in, which seems to be enough to keep it running on minimum which is very high for some reason and it shouldn't be. The rhythm seems to be off, also.
I will try to upload a short video and share it somehow.

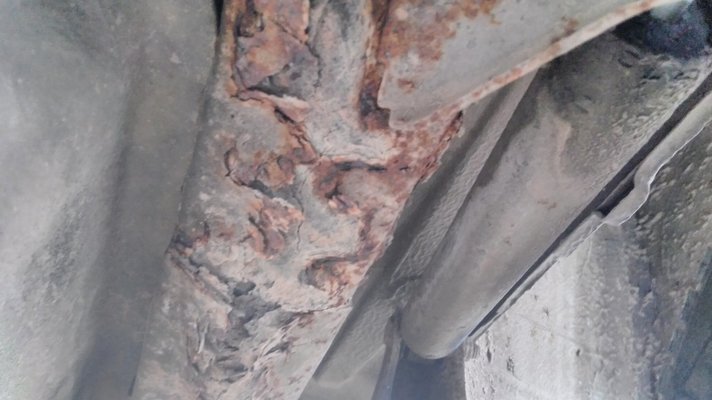
Here's another thing I don't like.
It looks like I'll have to do some disassembling after all.!?
IMG_20170112_133954.jpg

This looks really bad, or does it.? ||

IMG_20170112_133932.jpg
I will refill the liquid since it leaked all out, and change the oil and check for water in it as suggested.

PS: it looks like it's running on two cylinders now.

I'm a bit less enthusiastic about repairing everything myself now...

IMG_20170112_134036.jpg
 
Hello Teodor, perhaps the line from the fuel tank to your fuel pump is blocked.

Remove the inlet tube to your fuel pump and attach a loose plastic tube directly into a container with fresh petrol.
The fuel pump should have an inside filter and also the carburetor has a filter

I've never seen a fuel pump like yours, is it for the R4? Looks very modern

also, don't try to do everything at the same time. First check oil levels and water levels before you carry on.

Secondly, try to get fuel all the way to the carb. Get your old pump and take off the top to look at the filter. Why wasn't it working? Is it blocked?
Check that the pipe from the pump to the carb is also clear. Take out the filter from the carb and clean it also.

Only once you have fuel getting to the carb should you look at your electrics. Thats another problem entirely.
Let us know your progress, you'll get plenty of help here whenever you need it.
 
Hello Teodore
Always exciting.... a new car on the forum and looks to be a great example . I'm sure you can do it all if you want to .A step at a time to eliminate errors and find problems is a good move as Mojo says. That chassis will need some careful welding by the looks of it. But generally very good !
It may be possible to weld it without disassembly but removing the fuel tank is clearly a good idea for safety and access.
Maybe for now get it going well before doing the full restoration.

I'm sure there are loads of us who would like to be there to help. This is as close as most of us can get so keep sending the photos :clapping:
 
Mojo, the old pump looks exactly like this one, they're both not original parts, but made for the R4, I don't know how an original one looks like, to be honest.
I have taken it apart, nothing was blocked, the filter inside was very dirty from rust, but it wasn't blocked and there was no reason for it not to work, the membrane had small cracks tho, so compression was diminished I presume. I will remove all of the tubes and clean them if there's something blocking the fuel, but by the looks of it, the issue seems to be something else, since the pump pumps well when not connected to the fuel filter. I will take a closer look. Maybe the part that makes the pump run is worn out, inside the engine? (Drummer, not mechanic :P)
I shall remove the carburetor and clean it too.
Also, pouring fuel directly into the carburetor, makes the engine run very well(better than when connected to the pump), but with hiccups of course.

JonathanT, well, the idea was exactly that, make it run well so I can register and do what I need to, and work on "cosmetics" and non vital parts little by little.

As for the chassis welding and in general, the only "problem" will be separating everything, and I'd for sure like to remove the tank, for indeed security and access, I'm assuming it's highly corroded.

And I am very thankful for your efforts and your time, so the least I can do is provide you with pictures :)
Today is very windy and rainy, so I doubt I'll be able to do some work.
But as soon as I get it running, I will take it to a mechanic, he said he's overflowing with work and will not take it in, but he will let me use tools and everything I need, as well as point me in the right direction if I miss something. And that's more than I could've asked, since I wanted to do everything myself. Also, I have to be prepared and know everything about it if I want to roam around, if I can't fix it myself if it stops on the road, who will :P :confused: :laughing:
 
Hi Teodor,
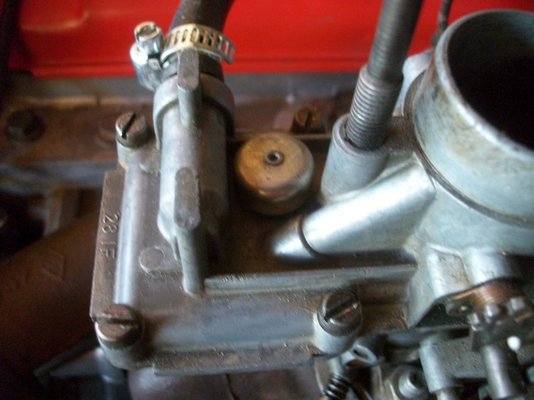
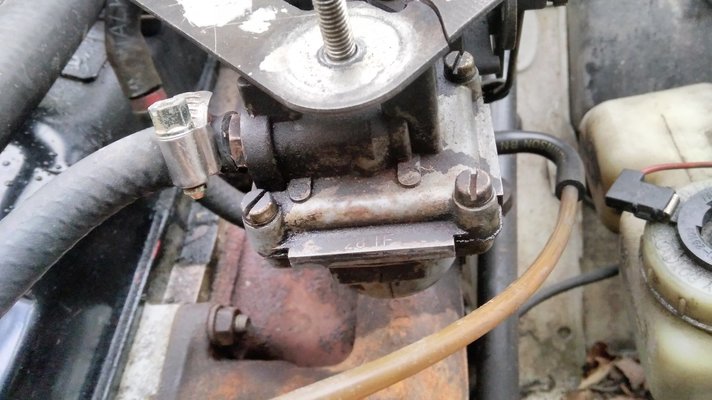
In the below photo, if you have the same carburetor as me (Zenith 28), the filter can be found if you remove the inlet hose. The inlet hose is the hose with the hose clamp on it.
Remove the hose and unscrew the nut and you will discover the filter.

You need to find out where the problem is, either from fuel tank to pump, or pump to carburetor.

You say that the fuel pump works OK without the plastic filter? Then leave it off for now. I have a Coke bottle with fuel and a tube that leads to the inlet of my fuel pump. That way, I don't get dirty fuel coming from the tank.

If you can get the pump to send fuel to the carb, then your problem is obviously between the fuel tank and the carb.Or the sender unit inside the fuel tank which can also be blocked.

You can also take off the fuel pump from the side of the engine and manually pump the little lever which will also suck the fuel.
The fuel pump works directly off the cam shaft but I don't think that will be the problem
IMGP1369.JPG
 
Yes, it is the same carburetor,

IMG_20170113_154321.jpg

I will be doing a rebuild, one of these days.
As at this point I am unsure about any of the components being good.

If the weather allows me, tomorrow I'm taking down most of the components and tubes and inspecting them, as well as changing the fourth candle.

I'll definitely try your method with the fuel, and also unmount the fuel pump to see if it already has traces of dirt and/or rust. If it does, the tank might be rustier than I thought.

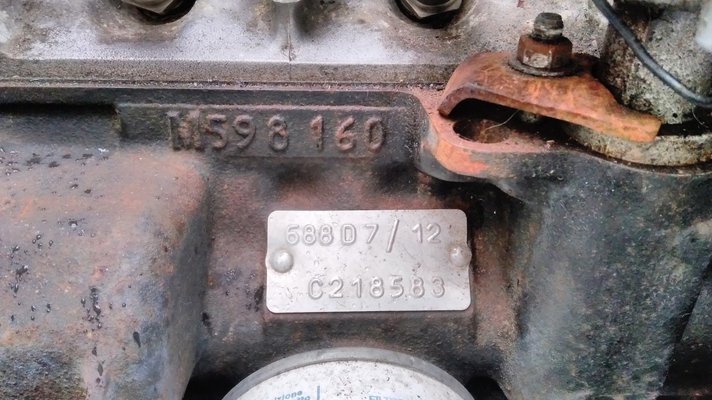
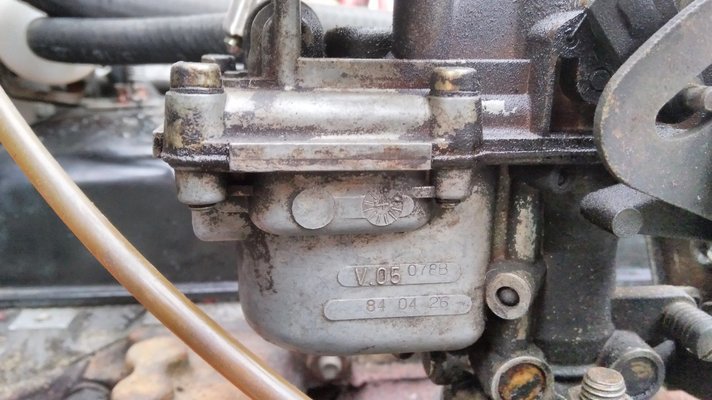
Could you explain the numbers on these photos perhaps?

IMG_20170113_154454.jpg

What do they reveal?

IMG_20170113_154337.jpg

Thank you for your time.
 
Thx jjad, helped quite a bit.
I am in search for another carburetor for Red, since that one(also Zenith 28) is busted completely. And I'd like it to be a different one.
At this point I'd test it on White.
Here, it is not difficult to find car parts, as long as I know what to look for.
 
Only thing that concern me is that rear chassis legs that started to rotten (right more than left) and will definitely need welding.
Floor could be just surface rust but you need to find out where that water is coming. Is it just condensate (because rubber mat does not allow moisture to evaporate)or you have leak somewhere.

I would, in general, be more afraid of rotten parts on body and chassis than mechanical problems (aldo carb, timing, plugs, points can drive you mad - they did me :D)

Good luck with your car...
 
So, hello, a small update.
Resumed working on the car, changed the water pump, and managed to take it to the workshop where I'll be doing more stuff since professional tools are available.
My expert did his thing with the strobe and a screwdriver and now it runs friggin amazing. Still has some power issues, doesn't reach full revs, it is a bit clogged up though.
I'll be changing the suspension, tires, oil, and brakes this week. Perhaps a new exhaust too, but I'll see where this takes us. A bit more of fine tuning and some unclogging on the freeway, and I think we'll be ready to try to get plates and be road legal once again :)
And then, the fun part starts, body work, rust removal, and finally, camper conversion. Oh man.
 
And yet another update, this time with photos and a question.

IMG_20170627_193745.jpg

Changed this one, went pretty hard, they have never been removed I'd say.

IMG_20170627_193634.jpg

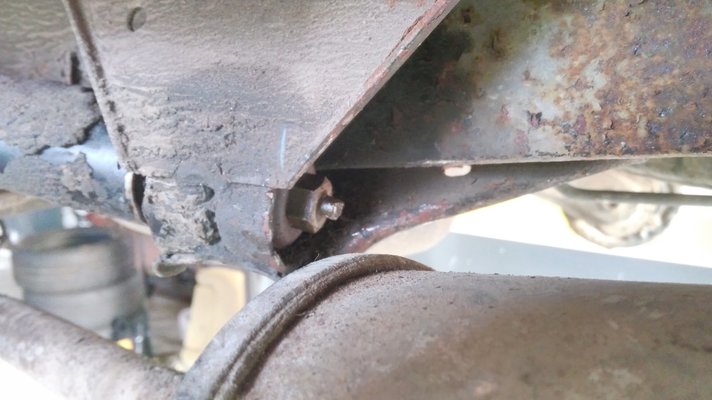
But this one, on the left side, came to this point, and now it is nearly impossible to unscrew. The end is impossible to hold, and cutting it off should be the last resort. Any tips for holding it in place to unscrew it?

Here's a random photo.
.IMG_20170627_193730.jpg
 
And yet another update, this time with photos and a question.

View attachment 18506

Changed this one, went pretty hard, they have never been removed I'd say.

View attachment 18510

But this one, on the left side, came to this point, and now it is nearly impossible to unscrew. The end is impossible to hold, and cutting it off should be the last resort. Any tips for holding it in place to unscrew it?

Here's a random photo.
.View attachment 18509

Hi Teodor
In my modest and naive opinion, you should do something in the chassis first, there´s some rust in there, that i believe it should be care.
In your second photo, i would cut it. Give a lot of doses of wd-40 everyday and try it 8 day´s later, if it don´t unscrew, cut it off (possibly).


Good look for your white beauty.
 
Brute Force was what did it in the end. I jammed a piece of metal on the rod inside and did a few quick turns with the pneumatic torque wrench and voilà.

Definitely, the rust is going to be taken care of, with the body and interior, but my priority now is getting it road legal since I need a car asap, and if it turns out I can't register it, I won't be doing any other thing on it.

Peace.
 
Yes your right with the priority management!

We will see your progress.

Keep up the good work.

And good look!
 
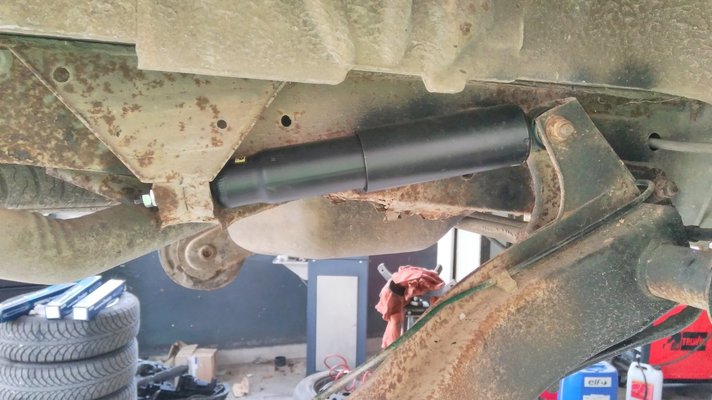
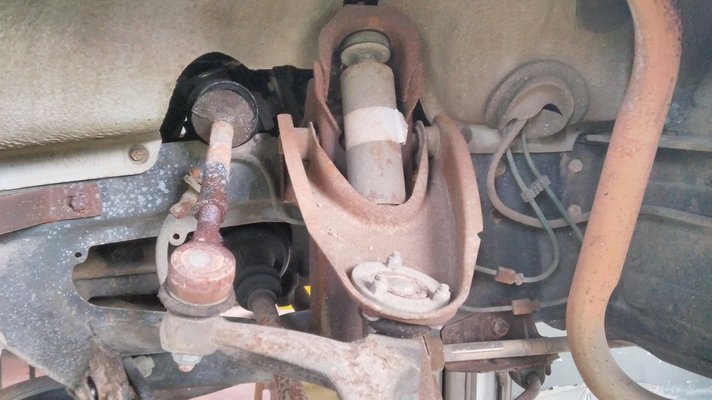
So.. Successfully changed all four shock absorbers, the front ones were the toughest.
Now comes the part of the ball joint covers, as you all know, they're pretty tough to fit on(or maybe it's me, or I am doing something wrong, two snapped while I was trying to pull them over), and I can not unscrew or put apart the steering link, as I'm guessing I have to do, to be able to fit the cover over the ball joint. Any tips on how to do that, without taking apart the other end, since those covers are well preserved and I don't want to create more problems to solve and work to do :D
When I get those on, and put the wheels with the new tires on, I'm going for the inspection to register it and then we'll see what I shall do next.
 
Teodor, not exactly sure which covers you're trying to replace.

Is it the one at the top end of the steering rod, the one that looks like a bellows?

Or is it the cover that goes over the tie rod end ball joint. If it's this one you have to use a lot of grease inside the cover and also on the ball joint.
 
Back
Top