Engine Rebuild (Renault 5 Alpine Engine)
The extremely rotten Renault 5 this engine came from hadn't been run for 10 years. The engine seemed to run OK, but that car came with a spare engine (that's never a good sign). It turned out to have head gasket problems, but replacing the head gasket didn't stop water from getting into the oil. The engine hadn't been apart before and it took a 4 foot bar to move the head sideways to break the head gasket. I think that must have dislodged the liner seals as after the head gasket change even more water made it's way into the oil.
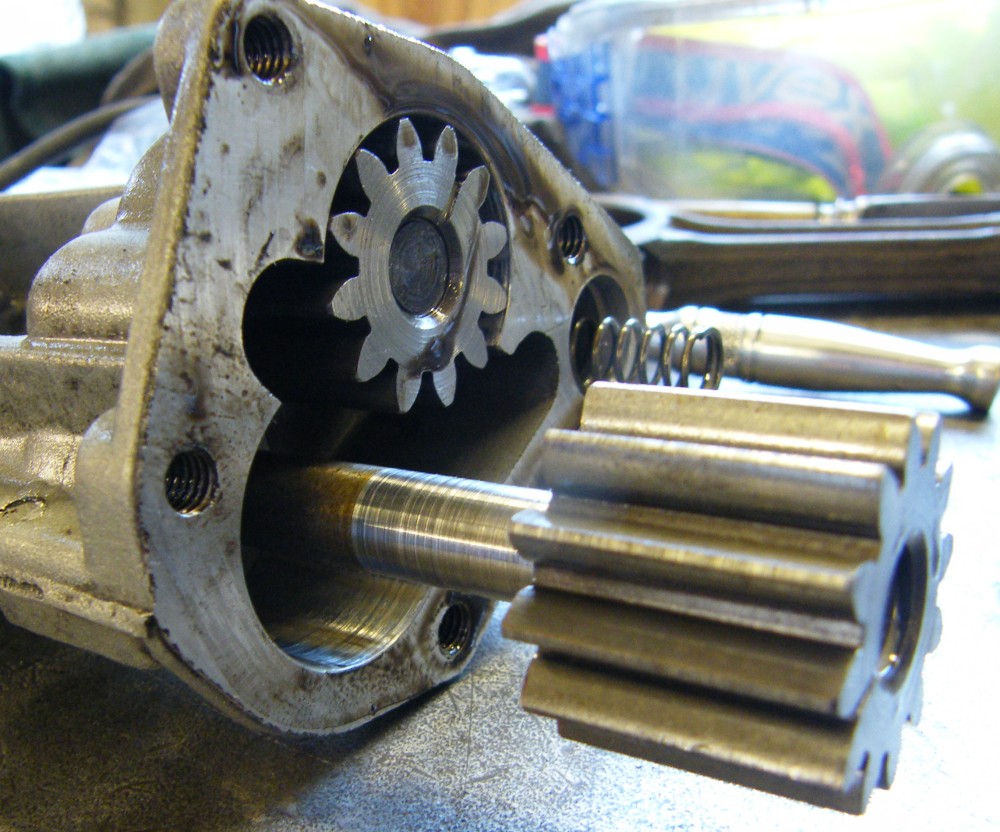
I had intended to remove the engine anyway to fix the timing chain which was making annoying bong noises as it touched the side of the timing chain cover. The oil pump turned out to have wear in it's shaft and a full set of gaskets would be needed. It was only another £400 to buy new pistons, liners and bearings for a full engine rebuild.
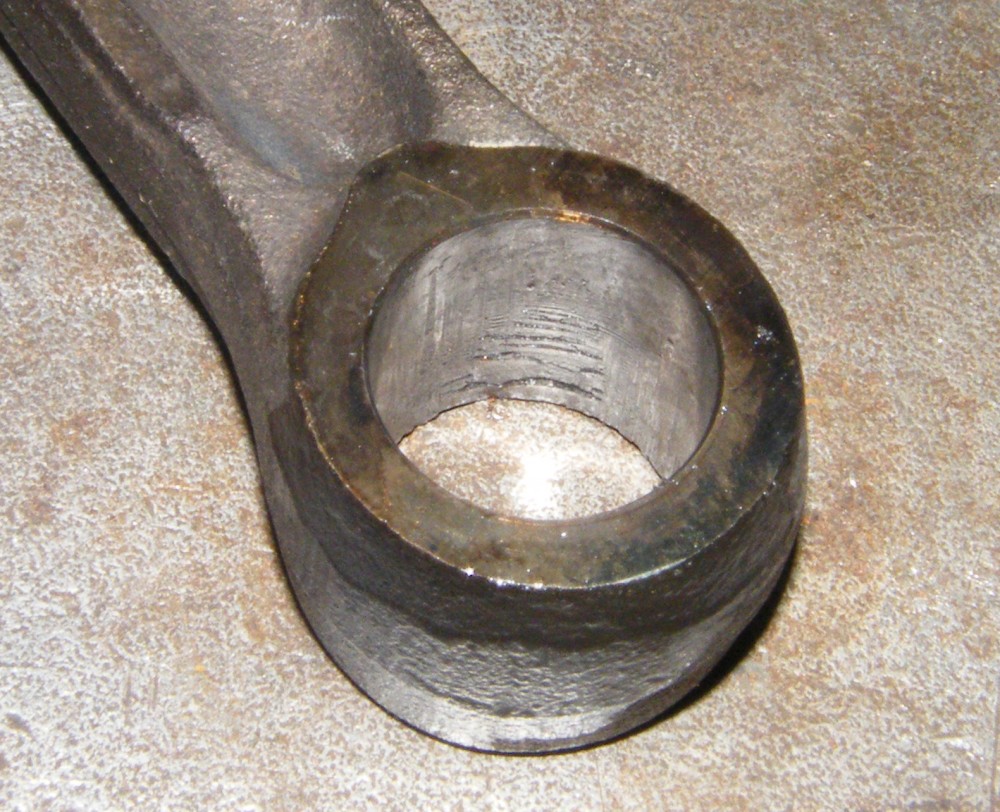
That's the wear in the oil pump shaft in the photo. The shaft has been picking up on the bearing and is quite badly ridged.
I only have a Haynes manual to help with the rebuild and it's not completely accurate. The factory Renault 4 manual offers very detailed information and advice about rebuilding similar engines and between the two most things are covered.
I am comfortable with rebuilding old British engines, but the French engines are a bit more modern and they terrify me. I decided to give it a go so I could learn something new.
If like me you were left scratching your head about the bolt supposedly securing the camshaft sprocket - it's a press fit and needs a puller to remove (I had to modify my puller to make it fit through the holes in the sprocket).

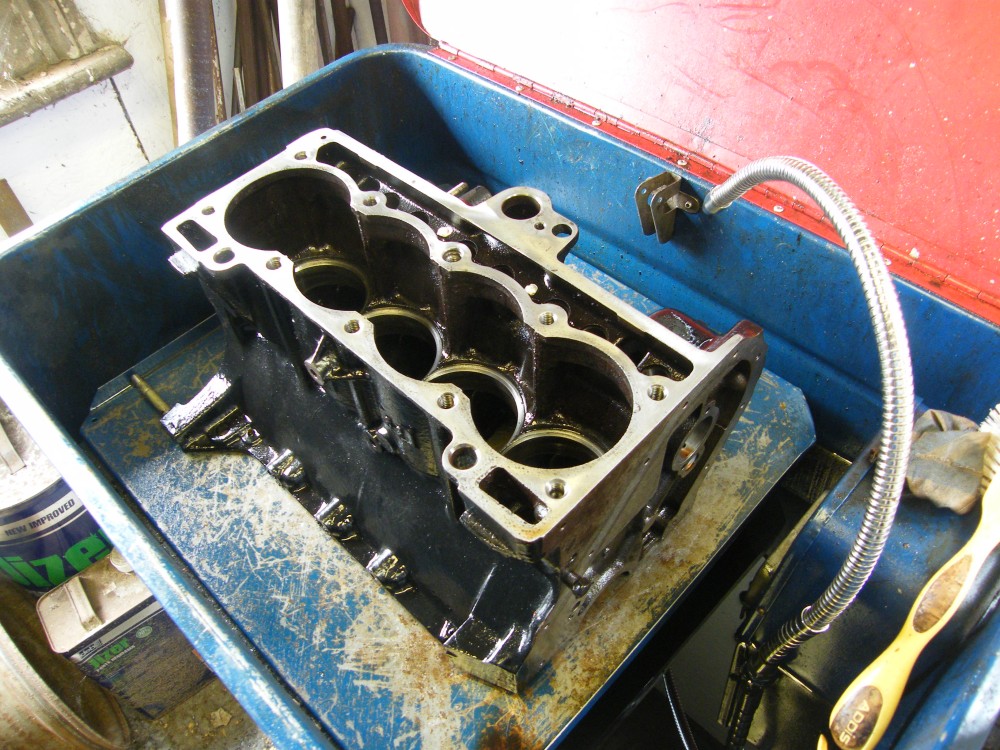
With the engine out the first job was a good clean.
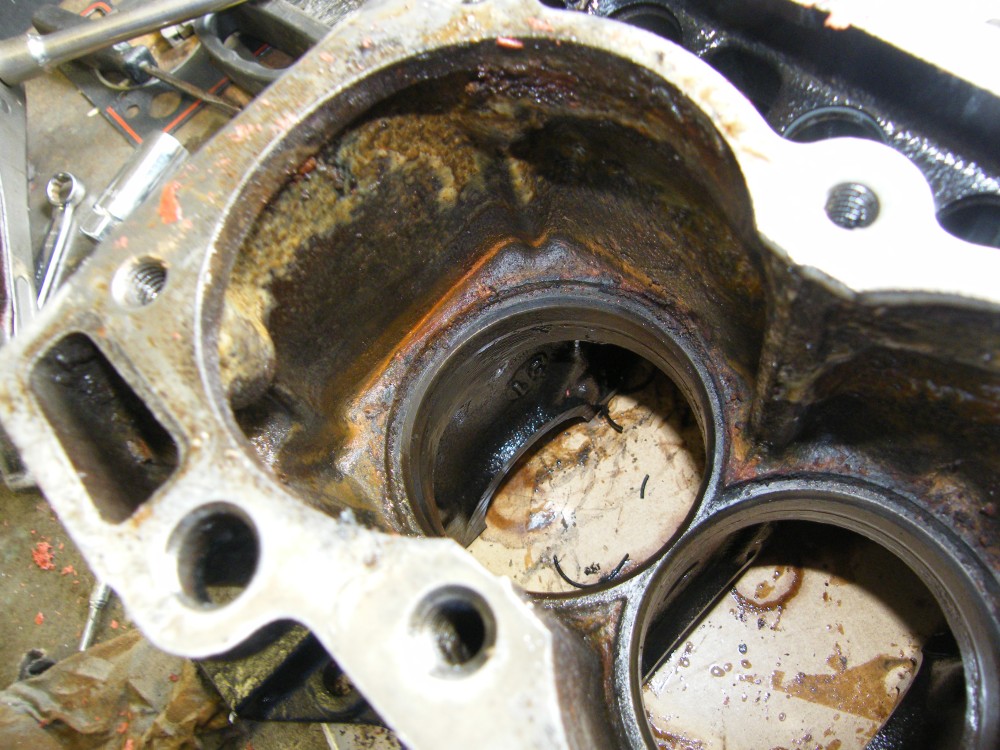
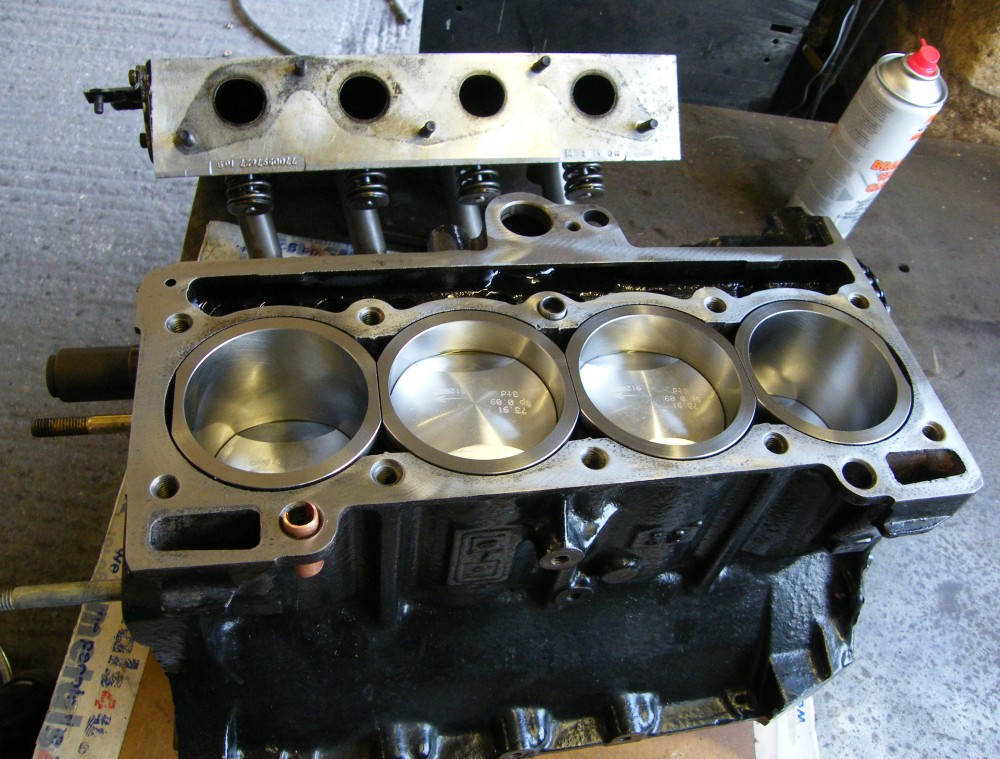
The liner sealing faces are the crucial part of the block in these engines. They can corrode especially if previous owners haven't taken care to add anti-freeze.
These ones were covered in scum, and there is a line of corrosion and pitting just above where the seal would sit, but the sealing face is OK. I reckon the seal sits on the inside of the sealing face.
Cleaning the engine block in a parts washer took most of a morning. They talk about cleanliness in engine rebuilding but don't mention what that means.
Apart from the obvious thing of not getting grit in your bearings I took this approach: First the outside of the block needs to be perfectly clean. Any dirt will find it's way inside as you build. Also it's a great opportunity to get rid of any scum inside the engine. Finally all of the machined faces need to be shiny. I've used scotchbrite to get rid of the last of the old gaskets and the discoloration around the liner seats and seals.
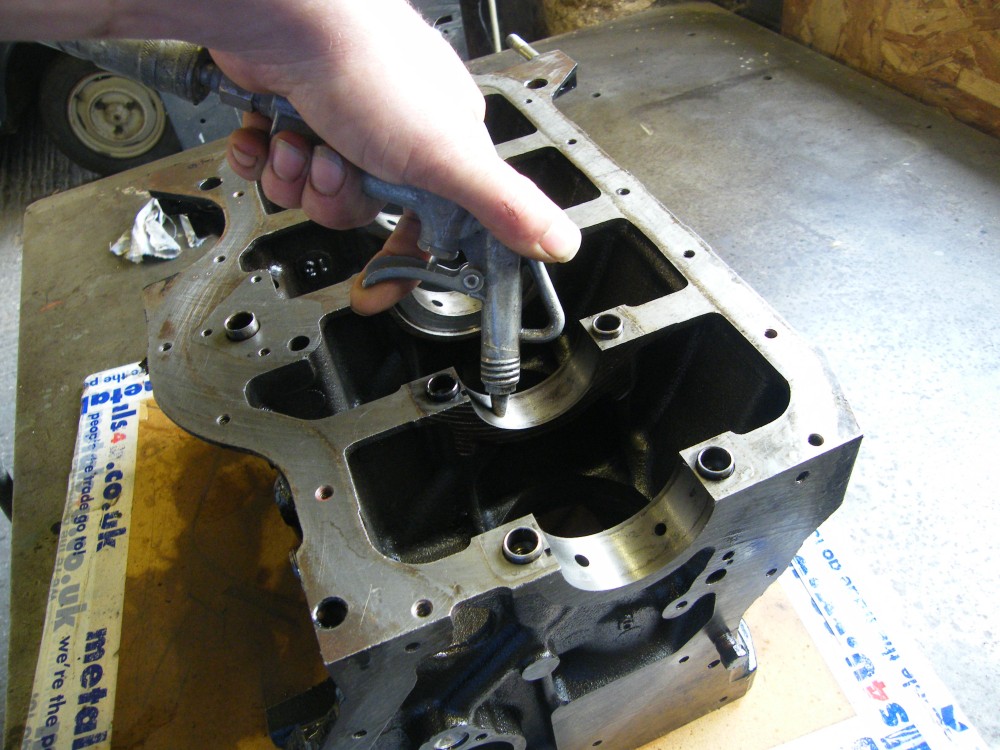
Next job is cleaning out all the oilways and bolt holes. I've just used an air gun for the oil ways - if they are really scummy it's possible to remove some blanking plugs to access the oil gallery to go at it with pipe cleaners, but this engine has been reasonably well looked after and everything seemed clear.
Any bolt holes (especially the head mounting holes) can be cleaned with a rag wrapped around a screwdriver then blown out again. Mine were clear as I've done the job recently.
Finally some rebuilding can happen. This engine didn't really need rebuilding. It's only covered 70,000 miles and everything was in good condition (apart from the oil pump and timing chain). The crank is nice and smooth and measures up nicely, the bearings that came out were not scored, so I've not had the crank reground or polished (polishing being taking the high spots off an otherwise good crank) and have used standard size replacement bearings.
Here they are positioned in the block ready for the crank to be fitted.
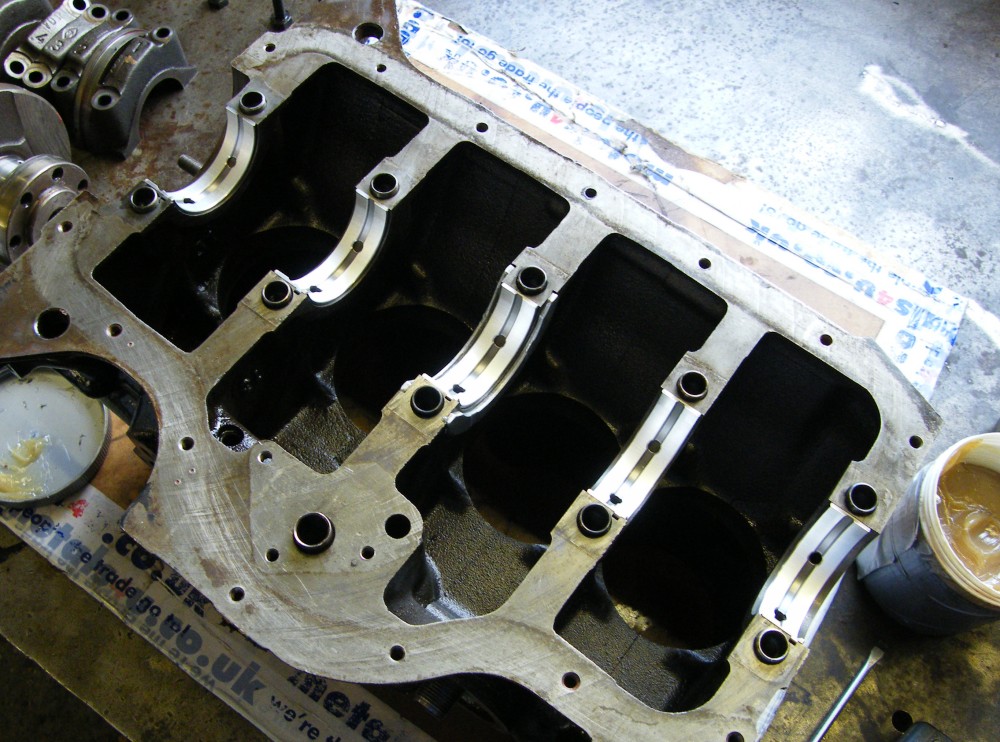
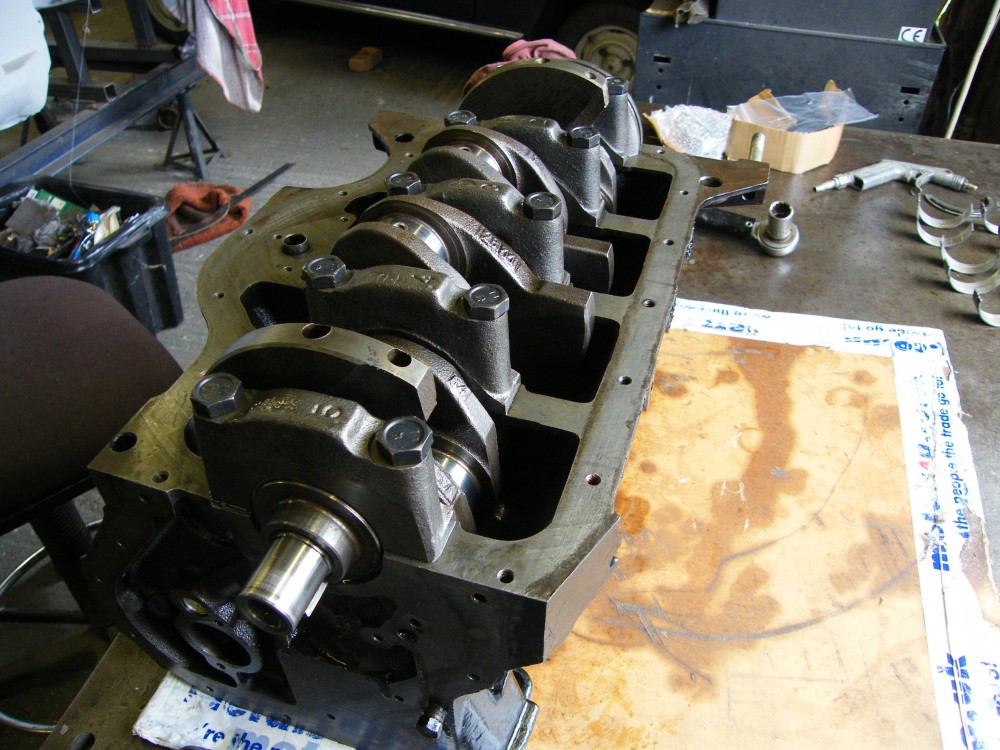
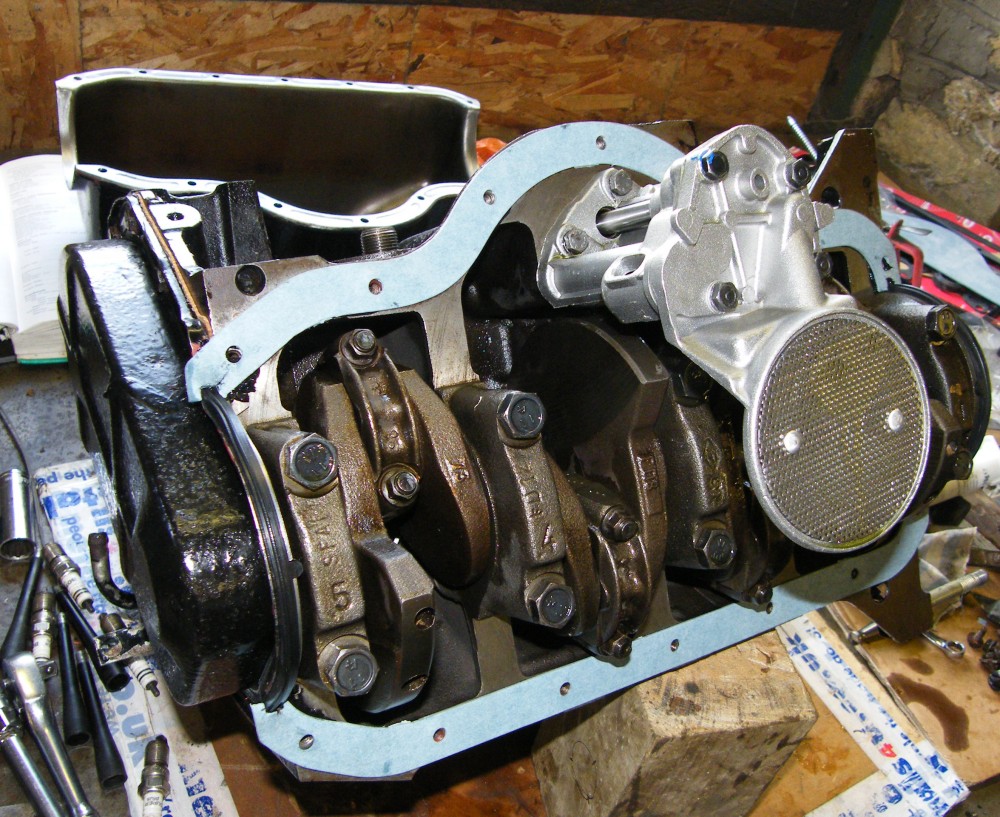
And here's the crank in place (those are the old bearings in the background rather than bearings I've forgotten to fit).
I do like the way the bearing caps have numbers cast into them counting from 1 to 5 from the flywheel end. The conrods also have dots stamped into them to show their order. There has been very little marking up required for this engine, but I have referred to the whole load of photos taken during stripdown just in case.
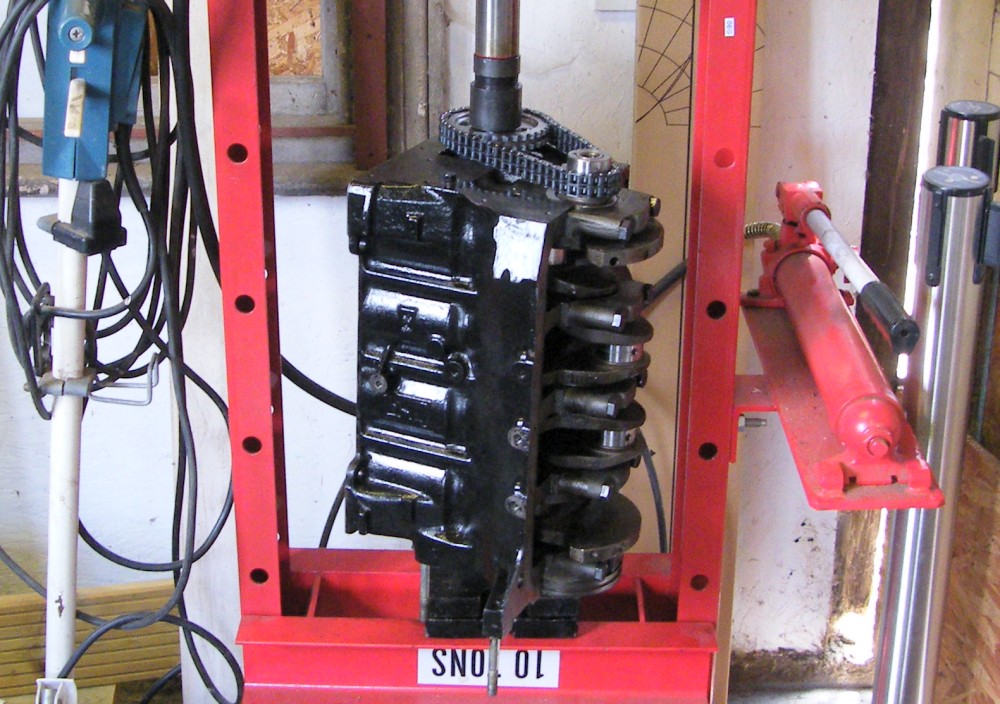
The camshaft sprocket takes a tonne of pressure to fit. Knocking it on with a hammer and a bit of wood isn't an option. The manuals suggest tapping a thread into the end of the camshaft, screwing in some threaded bar, then using a nut to press the new sprocket home.
I used a less conventional approach. The other end of the camshaft sticks out of the other side of the engine, and pressing against that I used the press to push the sprocket home.
I used Loctite on the sprockets as there's not a lot holding them on apart from a press fit. Though the press fit is probably enough for the job.
I could only find the timing chain complete with new sprockets. I didn't feel the old sprockets were bad, but it seems the timing chains are a problem area on these engines so it's worth a belt and braces approach.
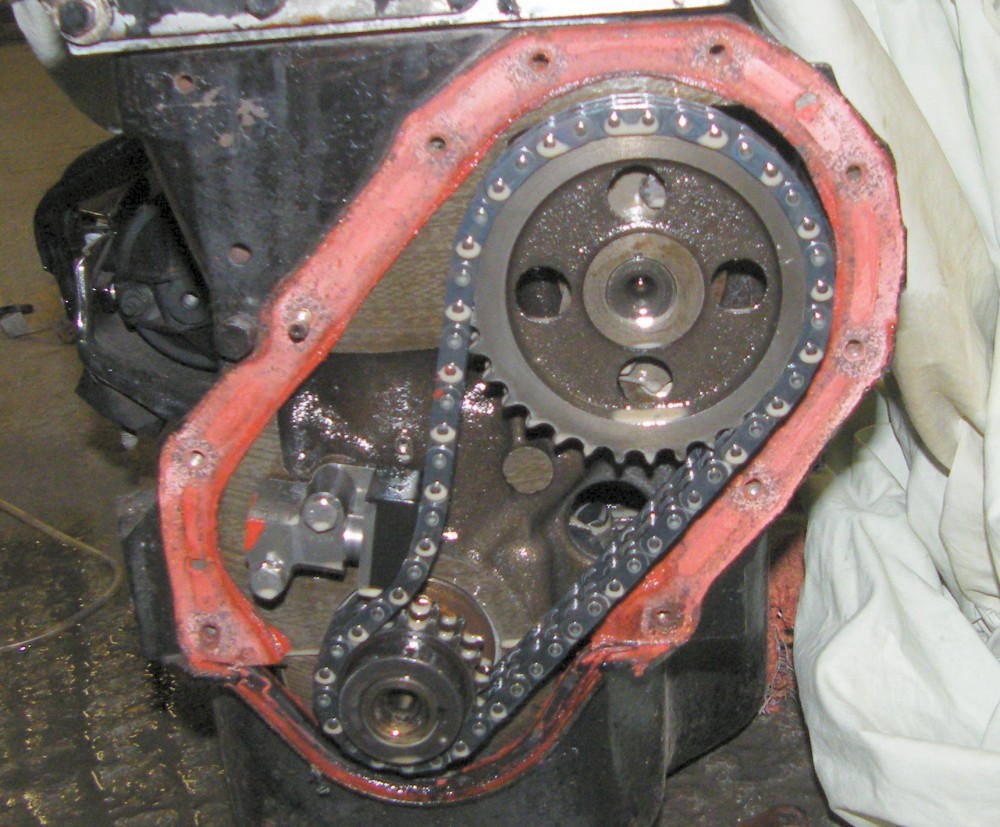
I have two low mileage Renault 5 1397cc engines here with the same "bong bong" timing chain noise at idle (here is a forum thread with a recording of the noise from the Renault 5 TX).

The noise is caused by the side of the chain to the right tapping the rubber guide on the side of the cover. The photo shows the Gordini engine with the old chain and gears and I think the tensioner had just run out of adjustment.
Personally I reckon the tensioner is in the wrong place and runs out of adjustment too early. Also as the bong noise doesn't cause the engine to self destruct I'm inclined to add bitumen damping material to the outside of the cover of the TX which I reckon would stop the noise until it's worth pulling the engine for a rebuild.
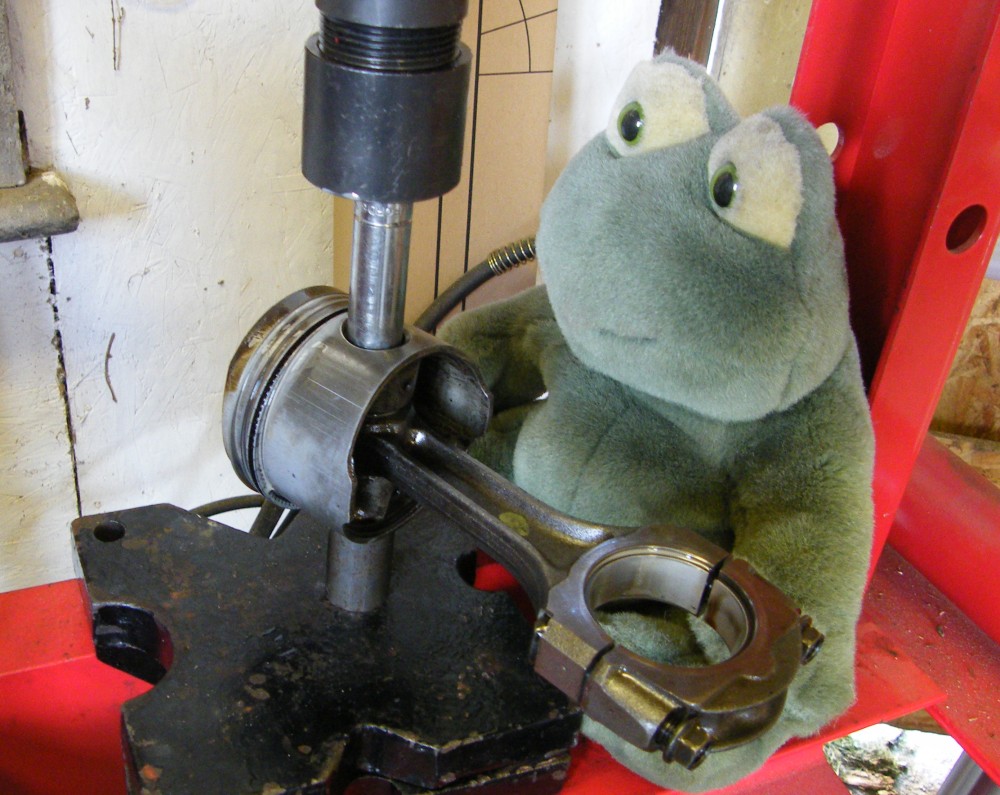
I've bought new pistons and liners for the engine. It's quite easy to push the old gudgeon pin out in a press with appropriately sized spacers.
Haynes says don't try this at home, but the theory for fitting new pistons is to heat the conrods in an oven to 250C which makes the hole at the end expand. Then the new gudgeon pin can be pressed in by hand. Apparently you only have a 10 second time window before the conrod cools down too much.
Turns out Haynes were right. Mine didn't press in by hand so I thought I'd use the press to give them a bit of encouragement. The gudgeon pin picked up on the conrod (the marks to the top of the photo) and ruined the conrod and piston.
I have (another) new piston on order and can pull a conrod from a spare seized engine so it's not the end of the world. I'll take them to the engine shop to be assembled.
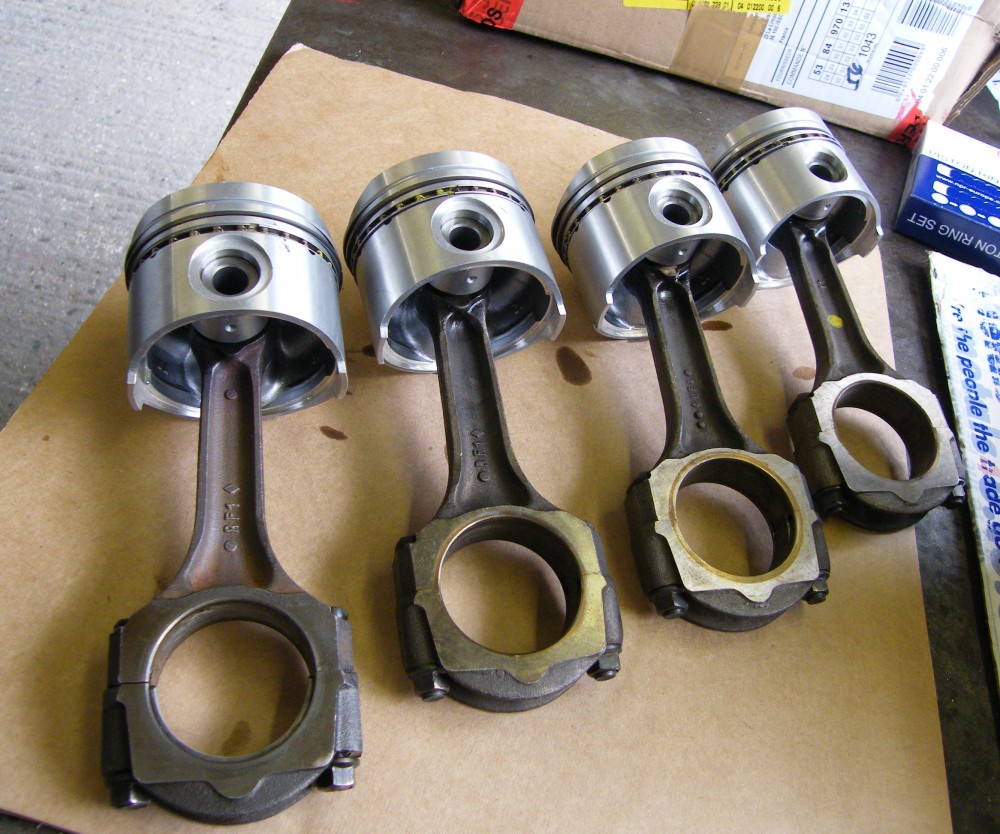
It took a week for the replacement piston to arrive from France, and a further couple of days having the pistons fitted to the conrods. But they are here now and reassembly can continue.
I've fitted the piston rings with the gaps at 120 degrees to one another.
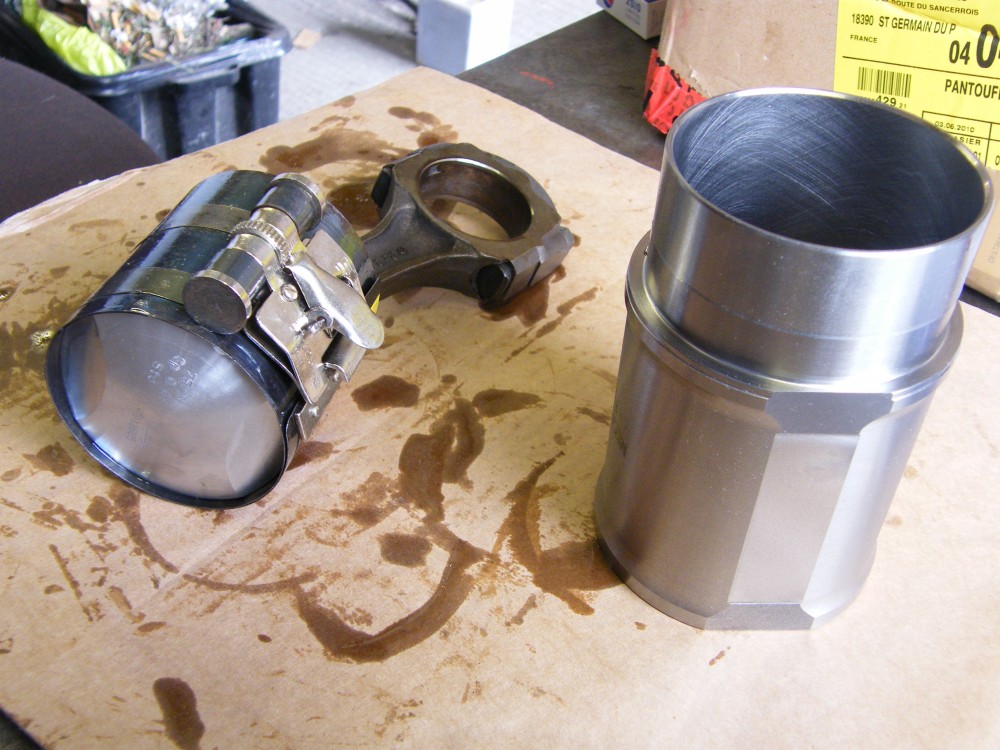
First the pistons need to be fitted to the liners. With everything liberally coated in oil (it'll burn off when the engine is started) a piston ring compressor holds the rings tight into the piston.
The piston goes in through the bottom of the liner and takes a few taps from the palm of a hand against the conrod to push it in.
This is the first wet liner engine I've rebuilt. I like the way the liners come honed and ready to fit.
I did a dry fit of the liners without seals or pistons to measure their height relative to each other and relative to the block. They all checked out so I kept them in that order in case it was a fluke.
The engine shop reckoned it is helpful to fit the liners with a smear of silicone engine sealant around them. This dries fairly quickly, and rather than clamping the liners down to hold them in place I elected to refit the cylinder head immediately after fitting the liners (and to worry about the conrods later). I remembered to refit the distributor drive and cam followers before fitting the head.
The copper part in the foreground is a modified piece of pipe intended to help locate the head and gasket. It's in the wrong hole in the photo - the recess in the head is at the other end.
With the head in place the engine was turned over to bolt the conrods on and fit the oil pump and covers.
The oil pump is brand new and was empty. I primed it by pouring oil into the hole in the top and turning the shaft until it started pumping oil out of the filter at the bottom. Turning the shaft in the other direction had it pumping oil out of the top very effectively.
The sump gasket on these engines is in 4 pieces and needs additional sealant at the corners. Seemed to make a good seal last time the engine was apart.
The valve gear goes on with the cylinder head. All that remained up there was to set the tappet clearances. I chose to refit the flywheel after the sump as it makes it easier to check the seal.
I've gone a bit mad with shiny new parts - the clutch had been replaced in the past and was as new, but the release bearing and clutch plate may have been original. Thought I would fit new ones as they are an engine out job to change.
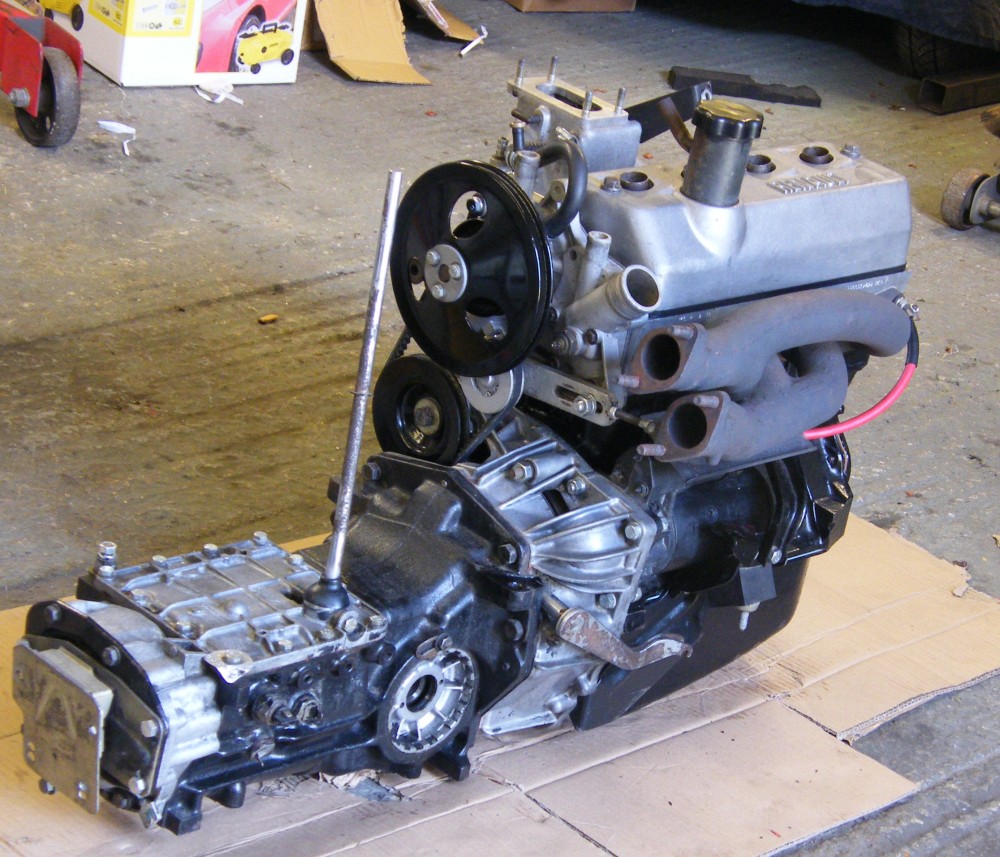
That's the oily bits completed. I really hope the engine works this time. I'm not an expert rebuilder having only rebuilt a couple of BMC engines in the distant past (they are '50s technology and easy). This is the first time I have attempted a wet liner engine and with all the problems earlier I'm terrified of leaks. Perhaps that's a good mindset to be in with these engines.

And Then Disaster Struck...
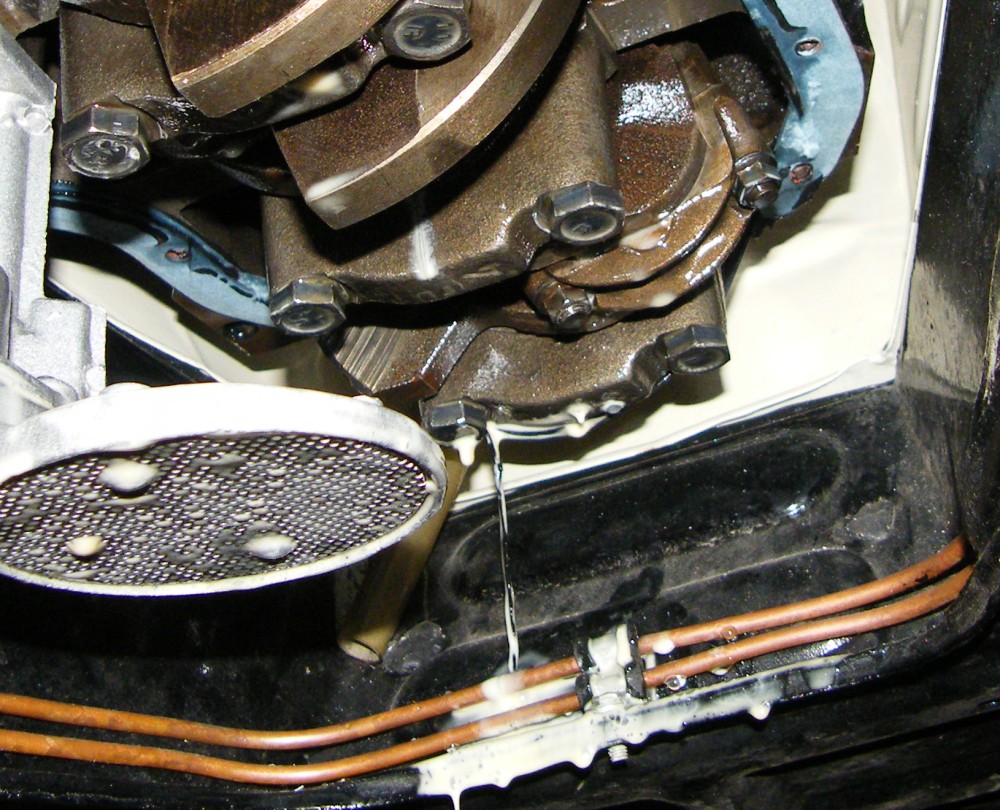
With the engine refitted it took only 20 seconds running to turn the oil into mayonnaise again.
Aw crap!
It's going to the engine shop this time. They should be able to do a leak test to work out exactly where the leak is coming from. It might have a crack in the head or block, though that seems unlikely since it once made it to Kent and back. More likely liner seals will turn out to be things I don't like to mess with.
To help figure out where the leak was coming from I removed the sump and fitted an air line to the expansion bottle hose on the radiator at about 10psi. With the cooling system pumped up water spewed from the oil return behind the rear main bearing.
I left the air line connected until water stopped coming out, then depressurised the system and removed the top hose to check the water level. It was halfway up the cylinder head suggesting the fault is a crack in the head.
Liners were fine after all.
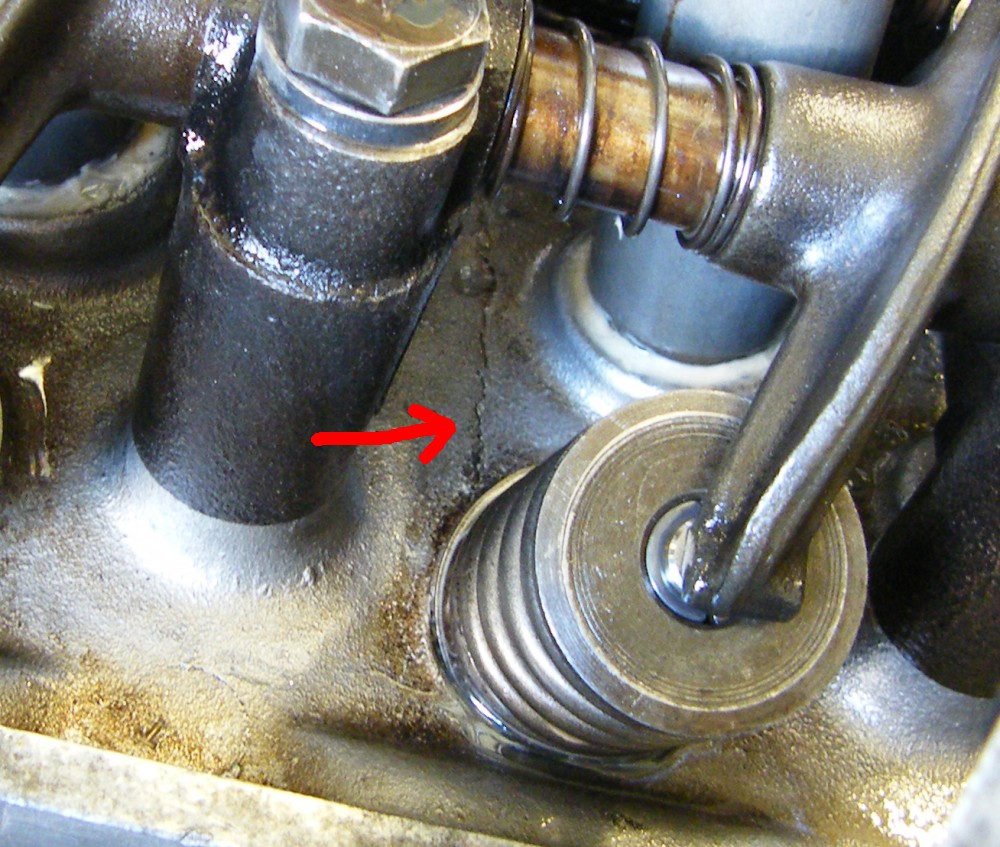
Removing the rocker cover highlighted the cause of the problem. Water was pouring from a great big crack running from one side of the cylinder head to the other.
It is a great relief to find that other than failing to spot a huge crack the actual rebuilding work seems to be good.
I was fortunate enough to have a friend with a spare head. First job was crack testing!
The new head ended up spending several weeks at the machine shop as by now we were into the school holidays. The new valves from the old head were used together with new inlet and exhaust valve seats and it came back looking like new.

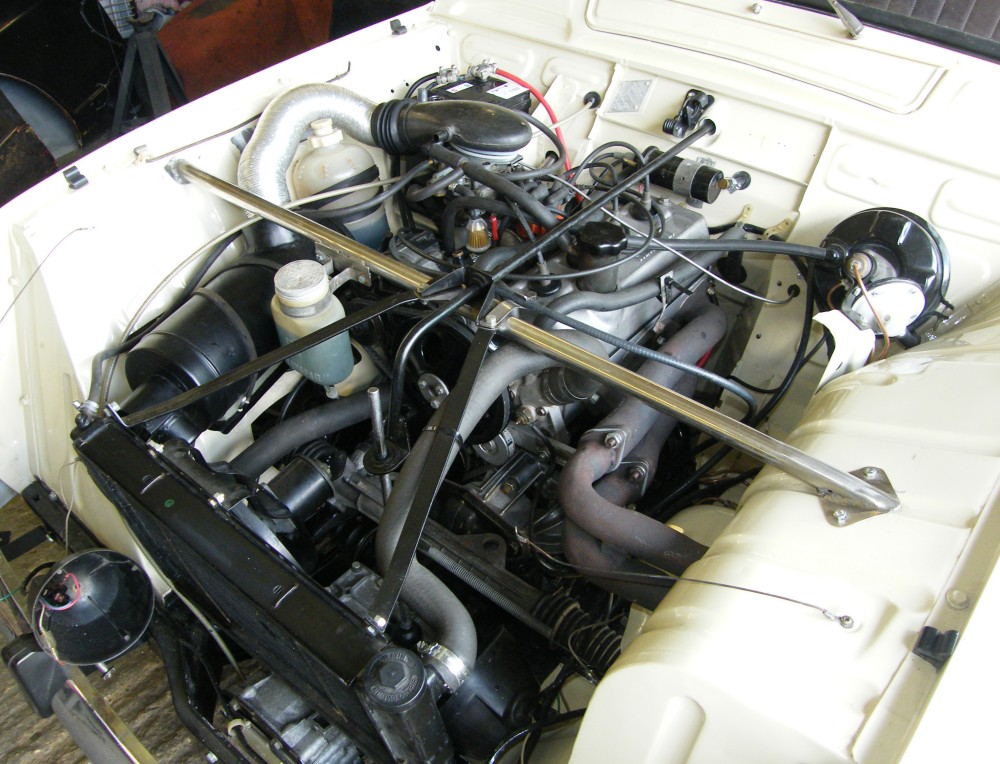
A day later the new head was in place and the engine ready to go.
After first start the oil was again like mayonnaise - despite draining the sump earlier there must have still been water around in there. I let the engine get to temperature then replaced the oil.
The new oil remained oil-like after 2 miles of driving. I would have tested over a longer distance had it not been for a windscreen incident.
Hopefully nothing more later...
Next: Sound Proofing Or back to the Gordini Project


