Renault 5 Mk1 - More Welding
Ideally I would have finished all of the welding before painting, but the weather was getting cold and I wanted to get paint out of the way before winter. The remaining bits of welding are mostly on the front chassis legs so shouldn't damage the newly painted bits too much. It's late December now and I've not been out to the garage much recently.
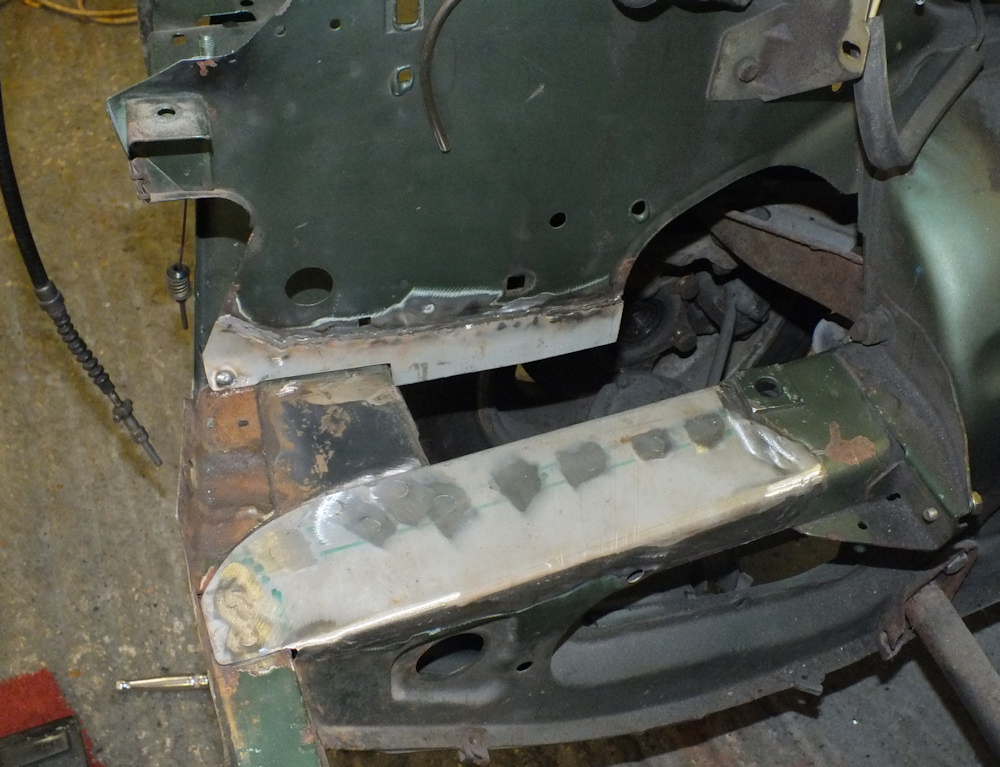
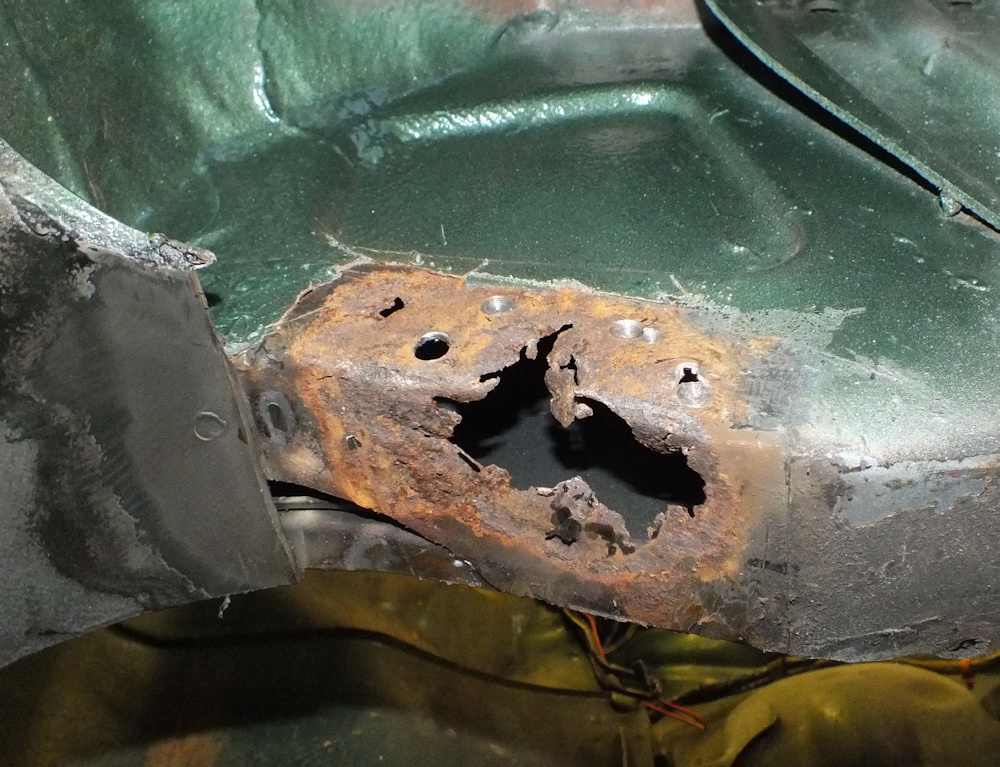
The battery tray was looking crumbly. It sits on top of the front chassis, and it's not leaking battery acid that rots them but water getting between the battery tray and chassis.
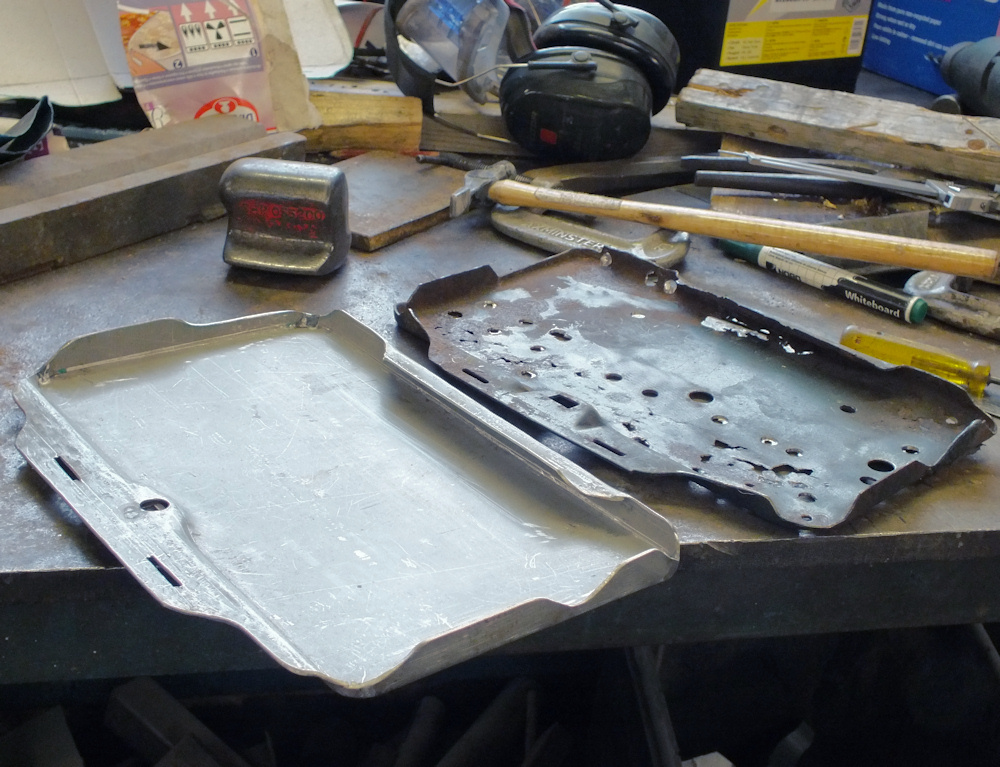
Mine is too perforated to re-use so I drilled out all of the spotwelds so it could be removed in one piece and used as a pattern.
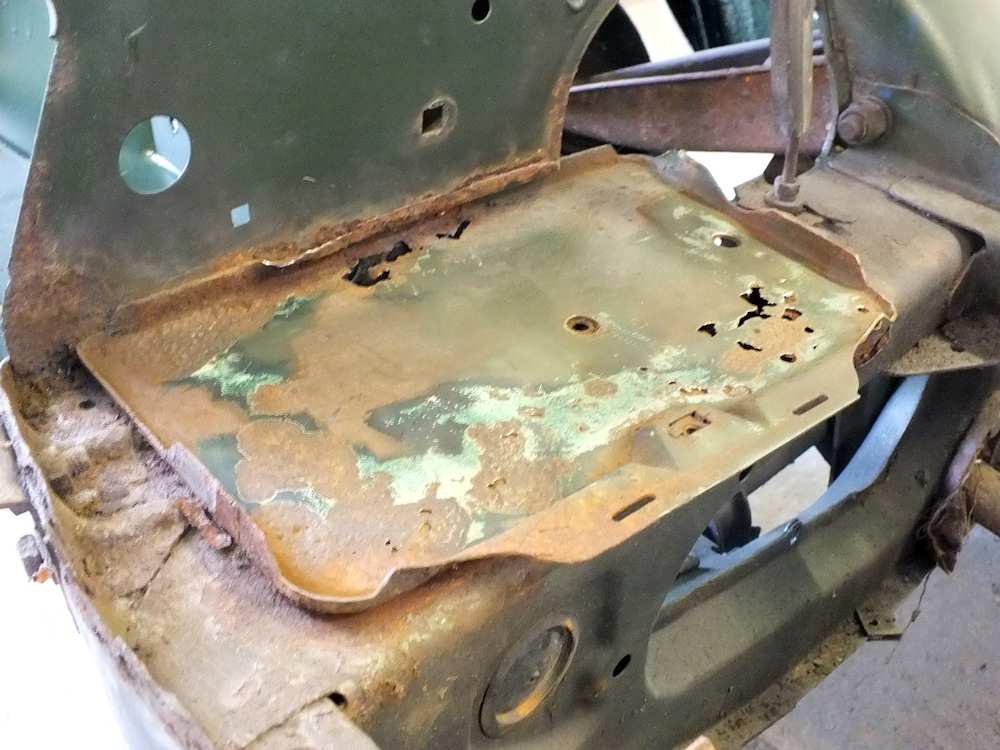
The hole in the top of the chassis had been visible before the battery tray was removed. The bottom of the inner wing will also need a bit of work.
There's a funny bracket to the rear of the battery tray which doesn't appear to offer anything structural. I guess it was there to help align the body panels during assembly. I'll remove it as it's rusty.
If in doubt chop it out!
It amazes me how localised the rust tends to be in this car. You can cut a very rusty bit out and all the other panels nearby are perfect.
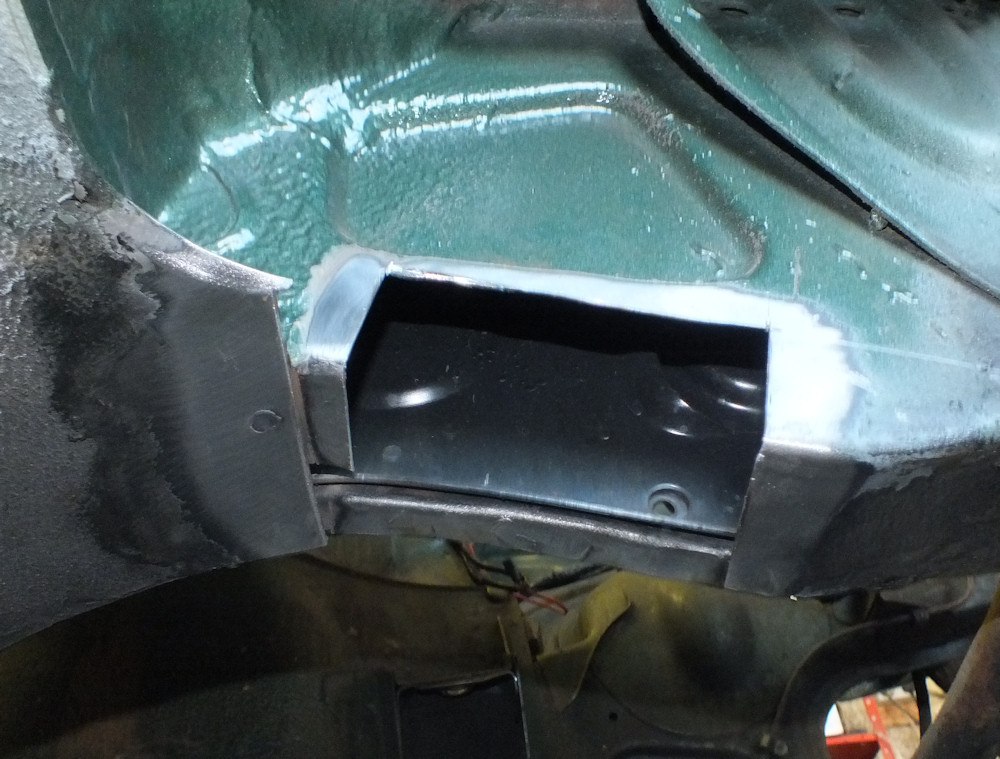
The top of the chassis has a has a large radius bend on the inside edge. I hammered the repair section around some solid bar to match the shape.
The inner wing needed a new section to replace the bottom inch or so. The fresh paint on the wheelarch side seemed especially keen to catch fire - possibly the thinners haven't evaporated completely yet.
The original battery tray was crumbly so I used a template cut from a pizza box and used it to cut out a new battery tray from sheet. You can see the technology I use for metal bending. Didn't use the dolly as it was too big - instead bits of steel plate, block and thick tube (for rounding the corners) that I've collected over time, and a plastic faced hammer that is missing from the photos.
I wasn't all that switched on and started off folding the wrong end in the wrong direction. Some hammering later and it was flat ready to start again. I tend to fold metal over the edge of a steel bench, and a piece of 1/4 inch plate was handy to knock the rear edge around.
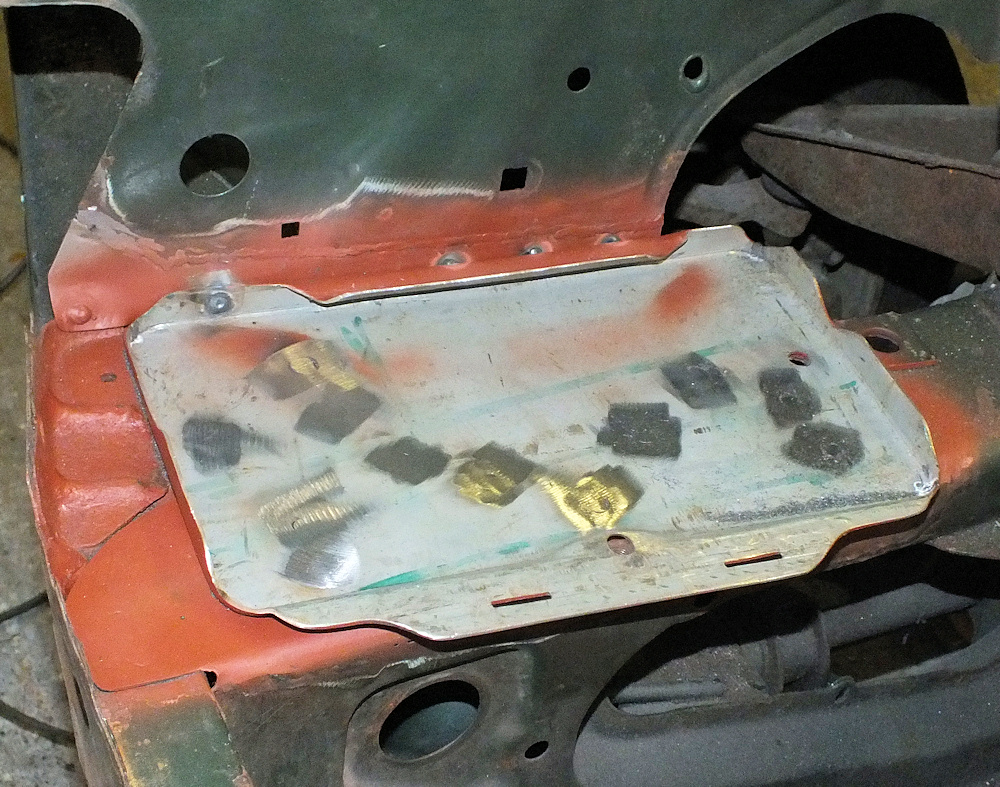
Finally the new battery tray was plug welded to the chassis and inner wing. The yellow colour is a reflection of the striplights not braze!
It will have seam sealer around the edges in an attempt to stop water getting between the battery tray and chassis and causing rust again.
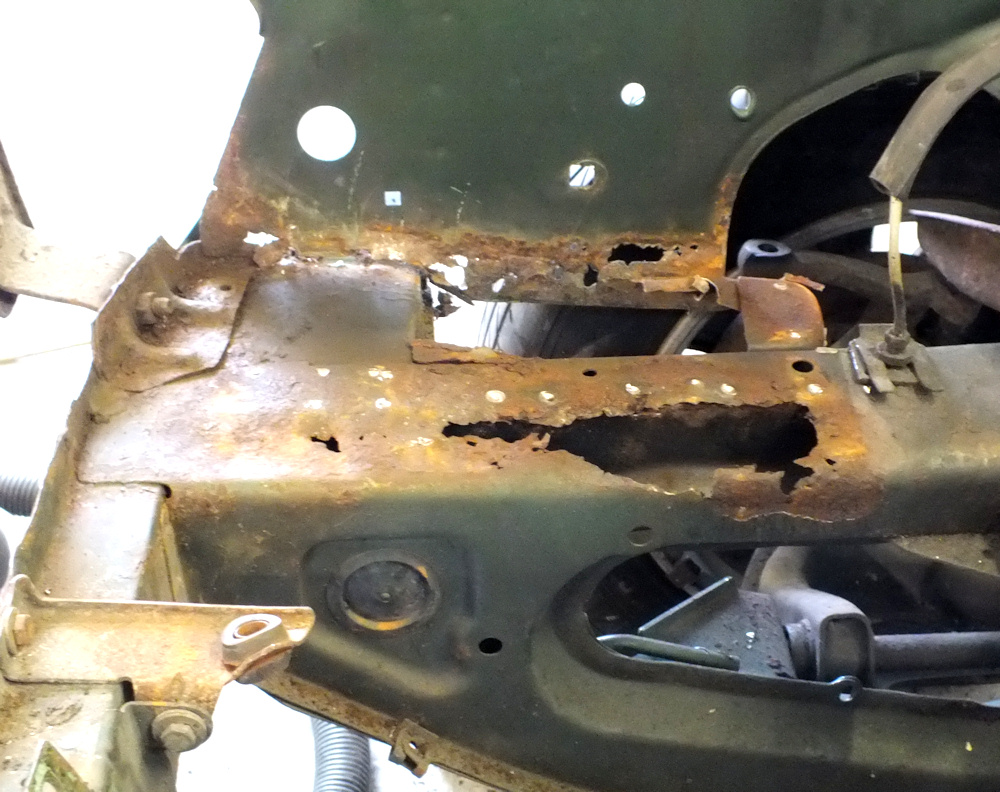
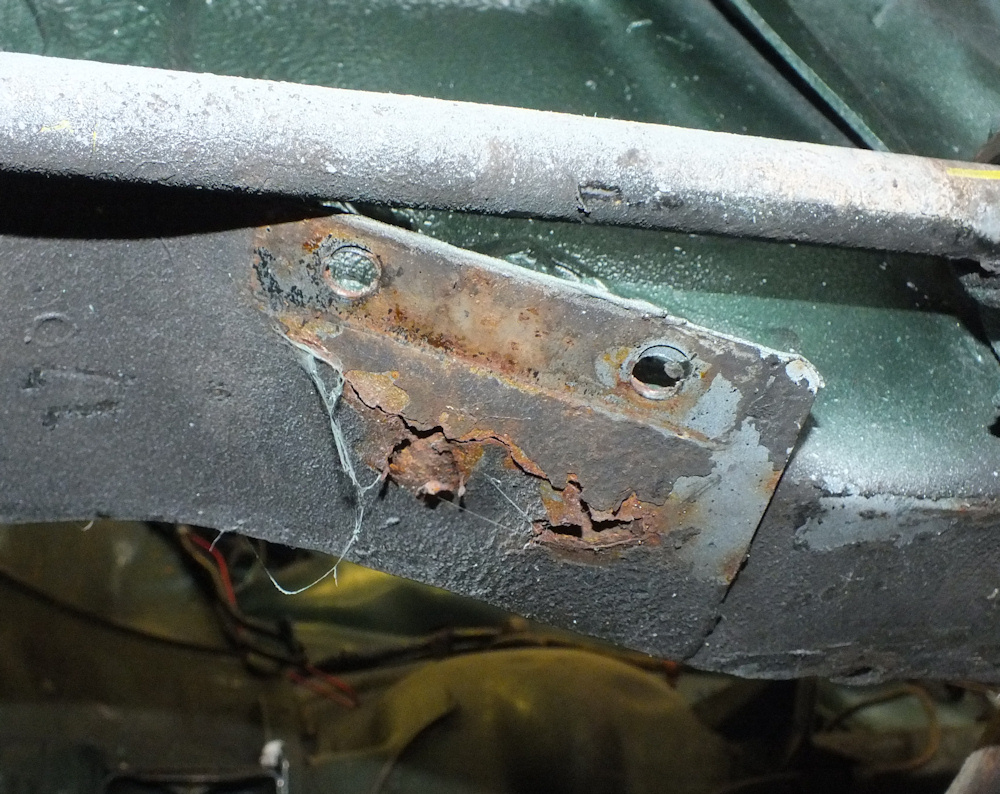
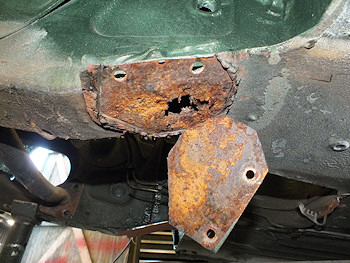
The anti-roll bar mountings on the chassis are also rusty. One side had been patched previously and the other just starting to hole.
These tend to be patched as a proper job involves removing the torsion bar, but poking around with a screwdriver revealed the side of the chassis had started to rust so it really needed a proper repair.
I used a torsion bar tool to unload and remove the torsion bar from it's mounting, but the front of the torsion bar was well stuck in the lower wishbone. I removed the wishbone.
The front of the floor panel was cut out and the anti-roll bar mounting bracket spotwelds drilled out to reveal rust in the side and bottom of the chassis.
It's not all that bad but it is underneath the car which makes it uncomfortable to work on. One of these days I'll invest in a 2 post lift.
The rusty area was very localised once more - the chassis looks perfect with that bit cut out.
After hoovering out the rust flakes inside the chassis I butt welded in some new metal.
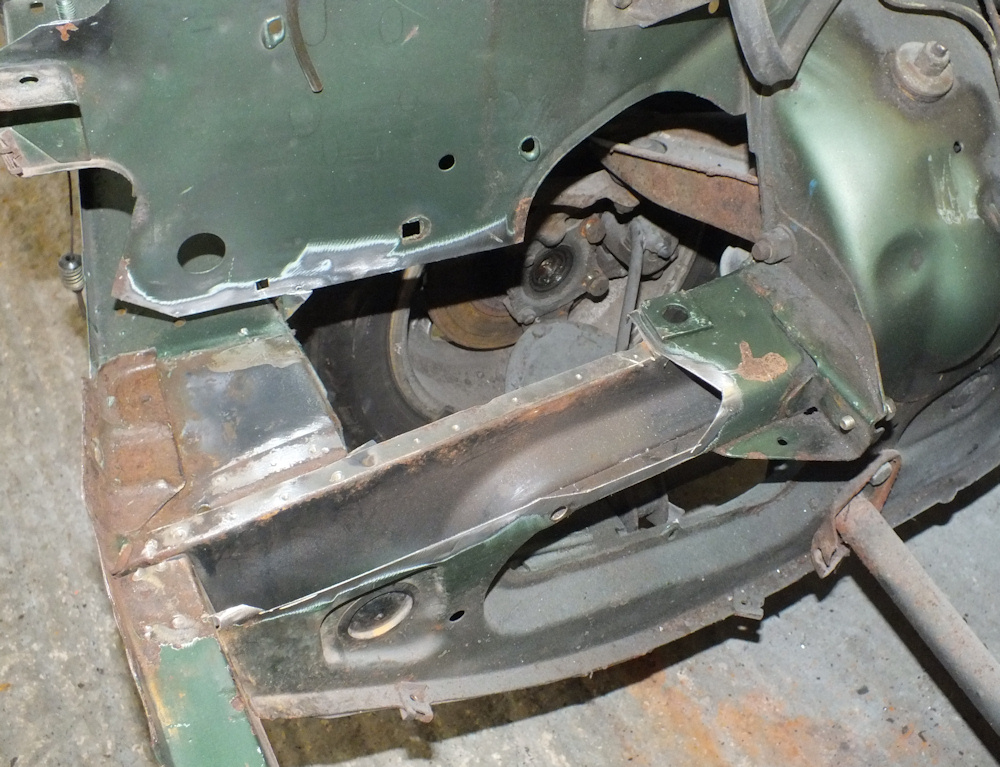
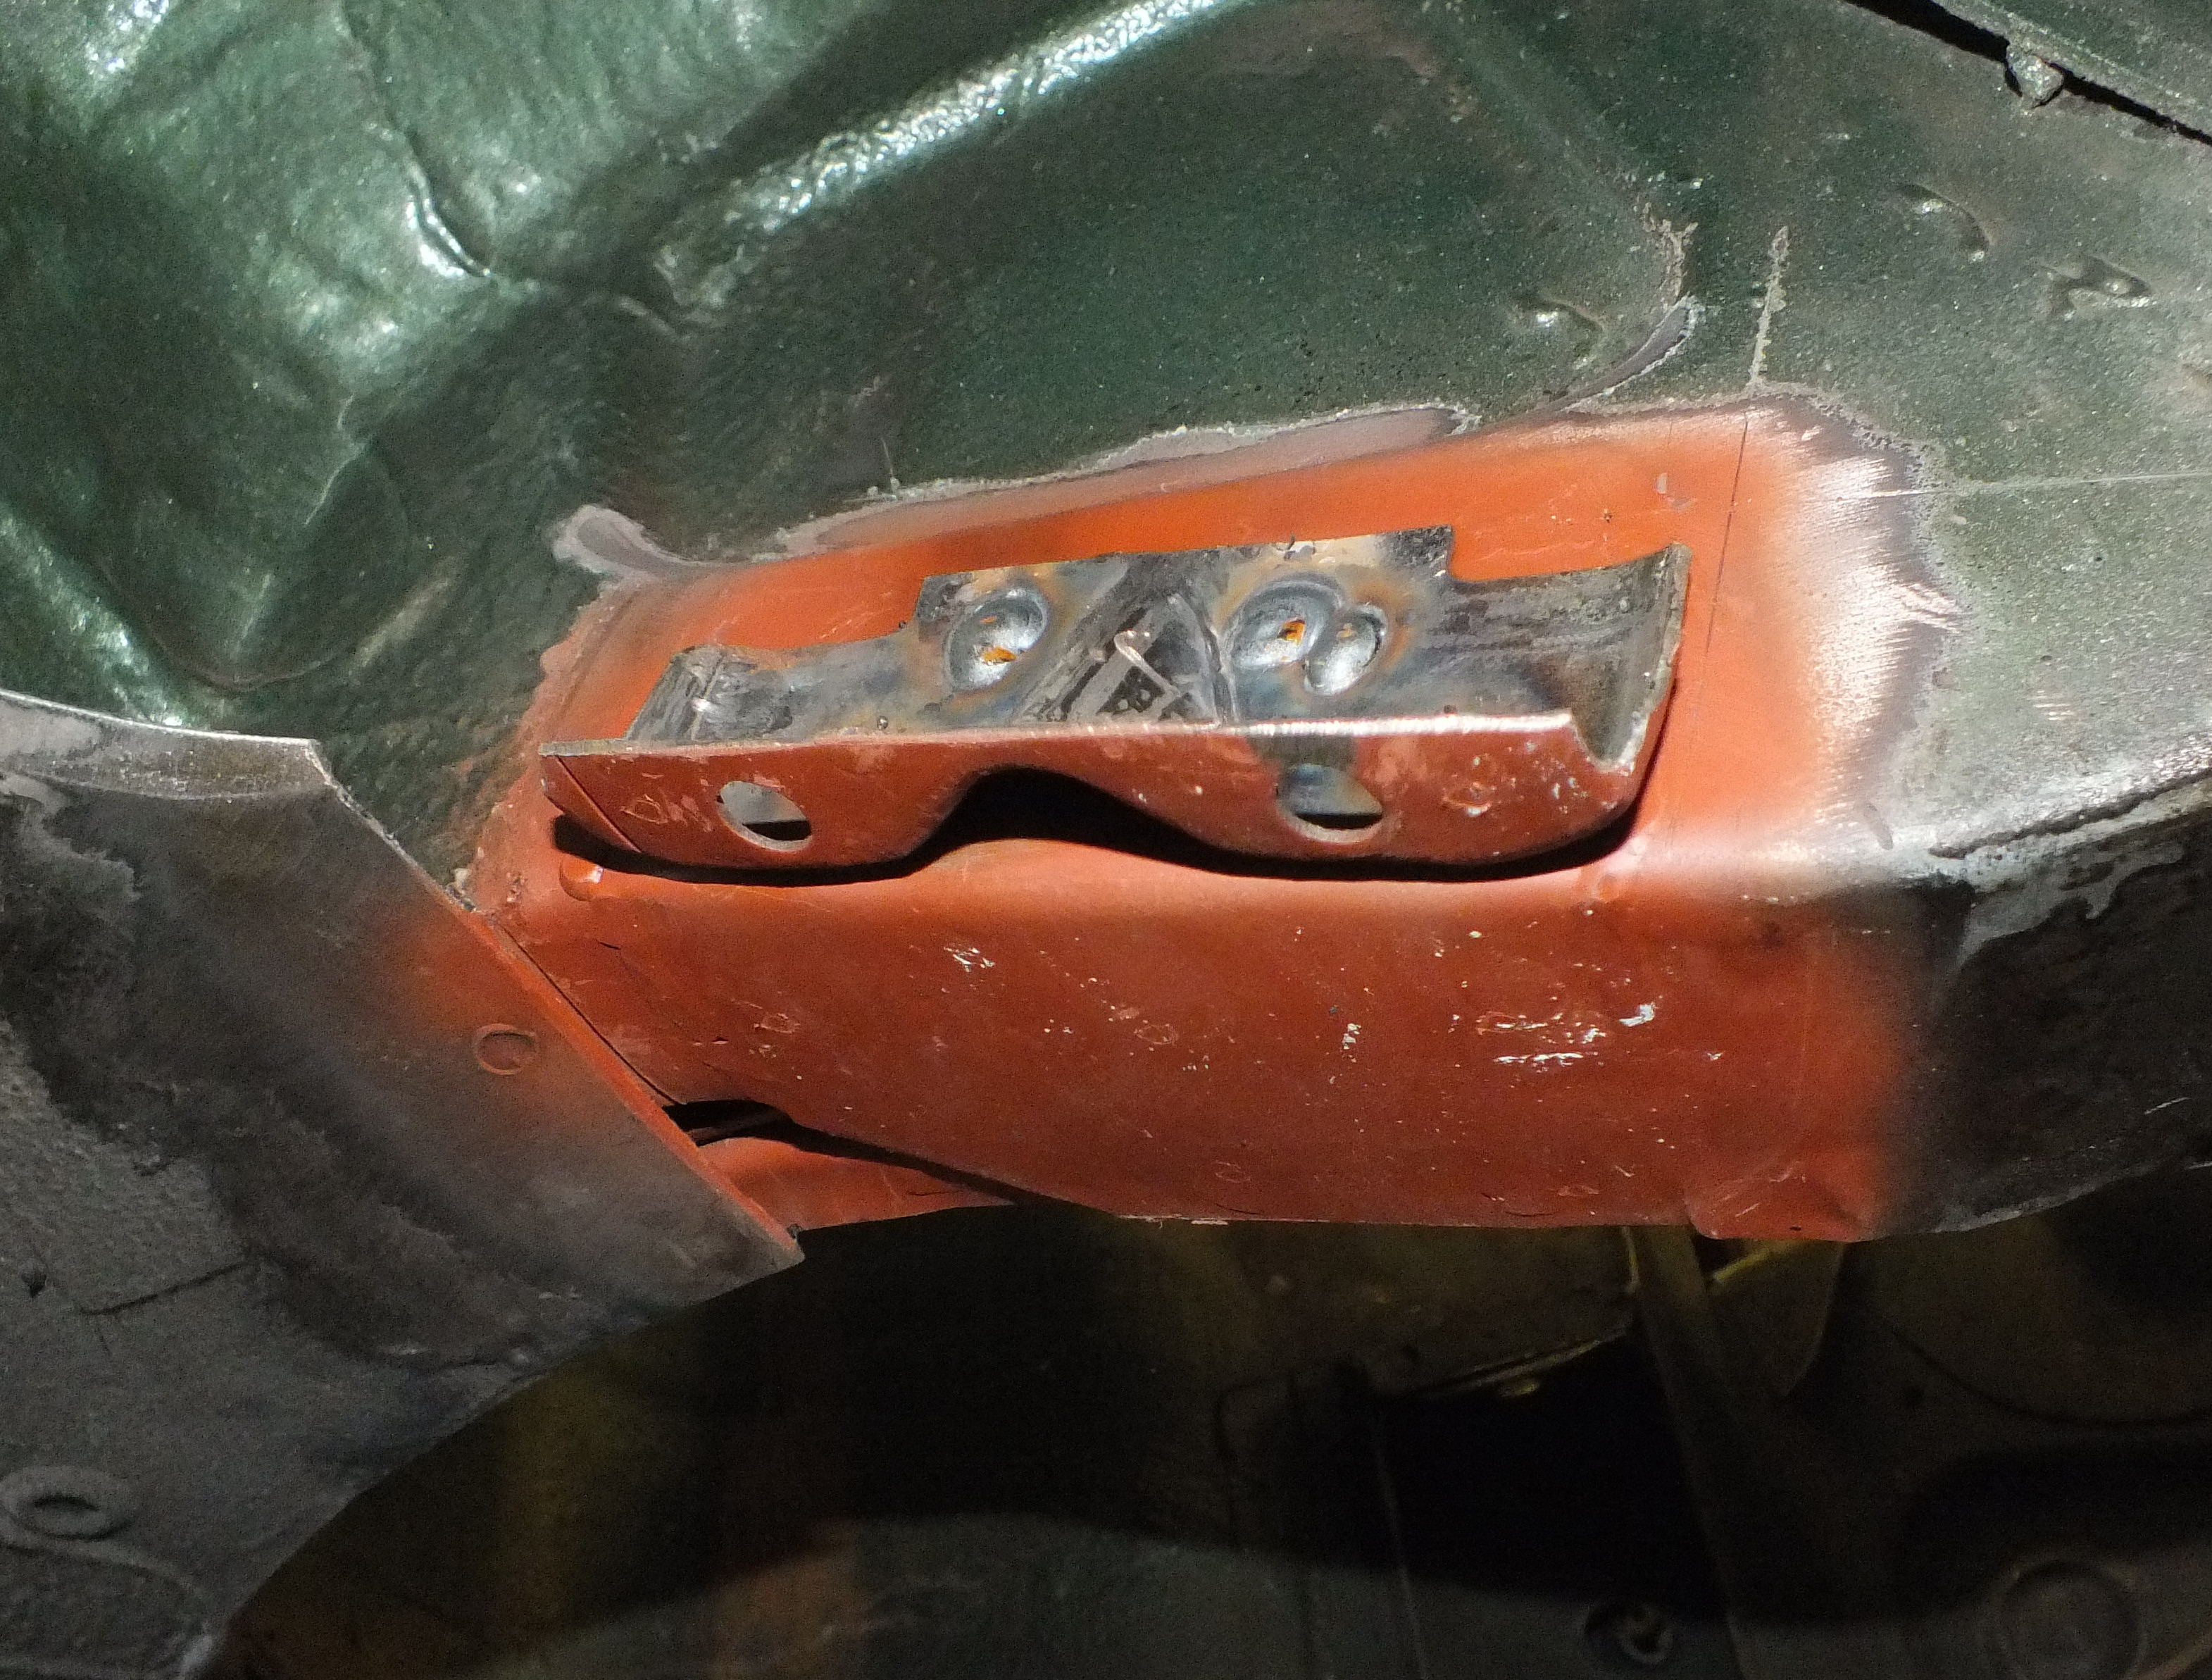
The original anti-roll bar mounting bracket was still in good condition. It needed some rust grinding from the rear and repainting but hadn't thinned too much. I plug welded it back on.
Annoyingly my trusty welding mask has run out of batteries. The cheap spare one takes a lot of getting used to and I keep missing and welding in the wrong place.
The last part was some new metal to replace the section cut out from the front of the floor.
I like to cut out rusty metal before welding in new. The repair should last maybe 20 years. The normal 'get it through an MOT' approach is to hide the rusty stuff with a patch as on the other side of this car. The patch adds a further skin and retains water causing more rot.
Doing a proper repair takes maybe 5 hours. A patch repair would be closer to 1 hour which is why people do them.
This one is being chopped out for a proper repair. It doesn't need anything more than the other side did.
There are more patches where the rear chassis joins the rear floor. I had contemplated leaving them in place until later, then decided to do them while the interior trim was out.
I don't like welding underneath cars. Most of the other work was done from the side.

There was a surprising amount of rust behind the patchon the right hand side of the car. The bottom of the chassis rail had rusted as far back as the suspension mounting.
Renault 4s go in much the same area.

1.2mm sheet was cut to size and butt welded in to repair the chassis rail.

Finally the floor was covered with 1.0mm sheet (I've run out of 0.8mm).
I had to cut through the swages to remove the rusty old bit. Rather than form swages into the new part I hammered out the edge of the swage so I had a flat section to weld to. It's not as elegant a job as I would like but is under the car and nobody will see it.

Last update 25th February 2012. That's it for welding (hoopefully).
Next: Engine Rebuild
Back to: Renault 5 Restoration