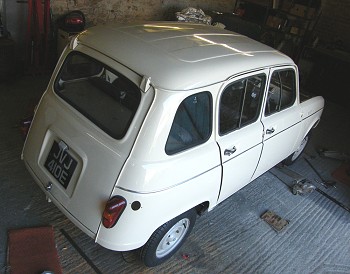
Gordini Project - 1967 R4 Restoration with Gordini Engine
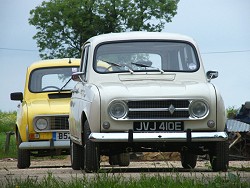
This is the long drawn out story of the completely unauthentic restoration of a 1967 Renault 4.
On the forum we decided an ideal Renault 4 might borrow features from late '60s cars when Renault could still make comfortable seats, funky dashboards, and still attached chrome bits to the outside. But the ideal spec might also include parts from the later cars which make the Renault 4 much more usable in modern road conditions. Also it could be a bit faster - perhaps a Renault 5 Gordini engine and a 5 speed gearbox. This is the story of such a project.
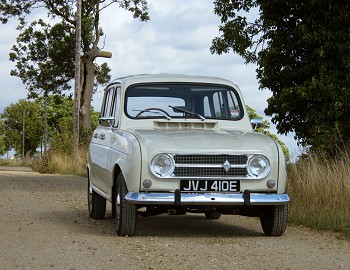
Finished!
No restoration project is ever finished, but the engine now seems to be working and I've covered 200 miles of running in over the last week.
Before that I took a few photos. Those and first impresions are covered on this page.
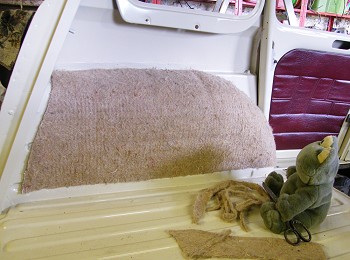
Sound Proofing
The Renault 4 was never really fitted with soundproofing. I'm planning to hide soundproofing where I can without altering the appearance of the interior.
More: Sound Proofing (June 2009 onwards)
Engine Rebuild
The head gasket (covered below) didn't stop the water getting into the oil. If anything even more water made it's way into the oil. I reckoned I had dislodged the liner seals and with the engine out I thought I might as well do a full engine rebuild.
It was only when the engine went back together that I noticed the huge crack in the cylinder head.
More: R5 Alpine Engine Rebuild (June 2010 onwards)

Head Gasket Trouble
Normally a restoration project ends at the MOT, and all of the little bits and pieces that aren't quite finished are left unfinished.
A failed head gasket on the first run provides a rare opportunity to actually finish this project while I wait for replacement parts. This page deals only with the cylinder head but there will be more pages below.
More: Head gasket (May 2010)
Wheel Arch Liners
First on the list of improvements are some wheel arch liners.
I'm planning to make a set of liners from ABS plastic to stop mud from collecting in all the places that give the Renault 4 a bad name for rust.
ABS plastic melts at around 100 degrees C. A little experimentation might be required for the wheelarch with the exhaust.
More: Wheel Arch Liners (May 2010 to July 2010)
Re-assembly
The great thing about rebuilding a Renault 4 is there's not much to them. Reassembly should be quick and straightforward.
At least that's how they appear before you start bolting them back together. This car has the added complication of being a mix of parts from different years, and of course there's the engine which started life in a different car. Nothing much fits.
More: Bolting all the old bits back on (June 2009 to May 2010)
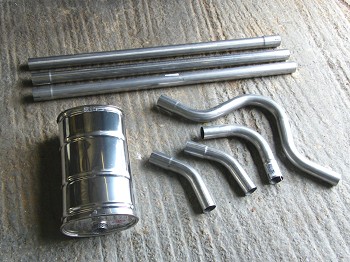
Exhaust
The original Renault 4 exhaust was designed for less than 30hp. Something a bit custom was going to be needed to cope with 92hp. Unfortunately the Renault 5 exhausts don't fit, and most aftermarket parts are aimed at boy racers and are too noisy.
I found a nice silencer and pre-bent parts to weld together.
More > Stainless Steel Exhaust (April 2010)
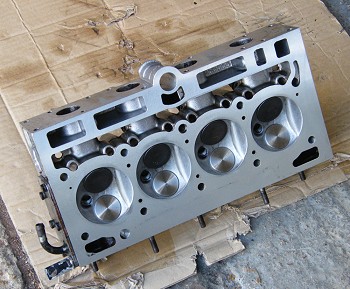
Gordini/Alpine Engine
At last I can put my foot where my mouth is.
Here's the engine and like everything else it'll be fiddled with before it goes in. I'm not planning a rebuild as that sort of thing can get expensive and this one already works, but it does need a good clean out inside.
More: Gordini/Alpine engine (May 2009 onwards)
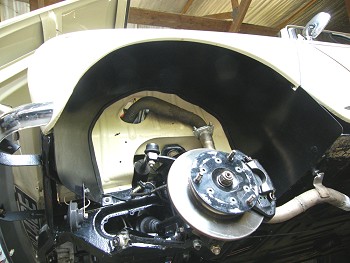
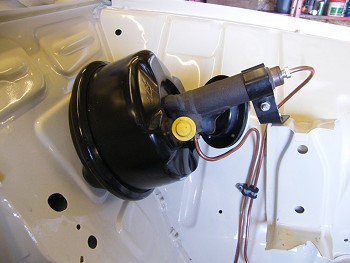
Brakes
There will be plenty of messing around with the brakes on this project. I'm planning a combination of front disc brakes and a bench front seat.
That means the handbrake is going to act on the rear wheels, and the only variant with dash mounted handbrake acting on the rear wheels was built for the Spanish market in LHD only.
On top of that I'm planning to fit a brake servo.
In detail > Brakes
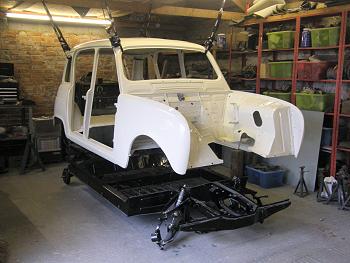
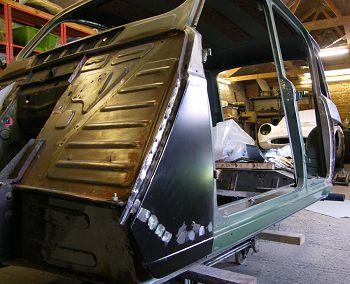
Body Meets Chassis
The project has been mothballed over the winter. After paint disasters and a jolt while on the trailer that bent one of the sills I decided the project was no fun anymore and spent the winter with Ornella instead.
But with the sounds and smells of Spring, and nothing much else to do, the project once again emerges into the sunshine. Some body repairs to do, and a bit more paint, then the body ban be attached to the chassis.
More - Body Meets Chassis (April 2009)
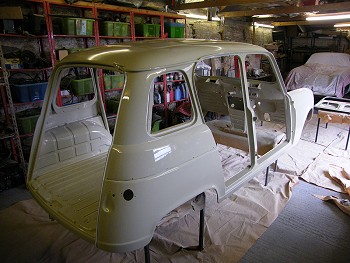
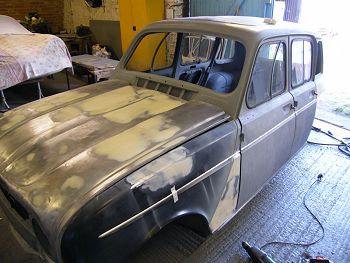
Body Paint
This must be the first time I've ever reached the paint stage during warm weather. Normally the prep goes on and on and it's December before paint. It ain't half hot in a paint mask, gloves and overalls when it's still and 28 degrees.
At long last the car is in one colour. The underneath has been coated in anti-stone chip primer. Two coats of high build 2 pack primer went on before a guide coat, wet flatting to smooth the panels, and finally colour.
More - Body Paint (July - August 2008)
Chassis Paint
I'm keen for the chassis to last longer than your average chassis. Having shotblasted it I'm starting off with a cold galvanising paint followed by anti-stonechip paint underneath, then a 2-pack black paint all round.
You can read about my disaster with stonechip paint, about how I improved my safety equipment prior to using 2K paint, or even find out how it ended up by viewing the detail page linked below.
More > Chassis Paint (June to August 2008)

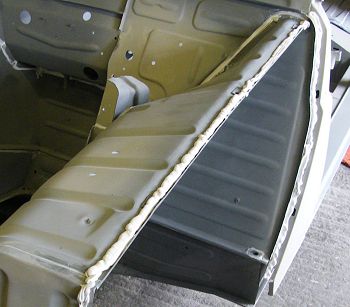
Seam sealing
It might sound daft, but body sealant is one of the most important parts of rust prevention in a Renault 4. Really it is - look behind anything on the body that has rusted and you'll find some sealant that has failed. Or sealant that wasn't there in the first place when it might have been helpful.
There's some painting on this page too - I've finally finished the filler and panel alignment and the panels are now coated with self etch primer. It's the first stage of paint.
More - Seam Sealing (July 2008)
Panel fitting and body filler
Paint is very final in a restoration project. You can't decide to do a little more welding or move a hole somewhere else after the paint has gone on. That's why the final stages of preparing for paint are so time consuming and fiddly.
But before paint I need to make the panels fit. Some tips on this page for aligning the doors and front and rear wings. But first a very cool modification to the front door frames to help reduce wind noise.
In detail: Unrewarding and time consuming work before paint. (July 2008)
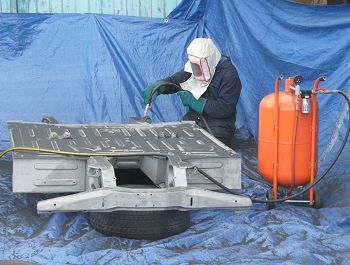
Sandblasting
It takes years to decide if a method of rust proofing works satisfactorily. Normally it doesn't, so I'm getting serious now.
The chassis has been sand blasted and painted in almost pure zinc. It's rust in the seams that will be my enemy so a few plans for those coming up too.
In detail > Sandblasting (June 2008)
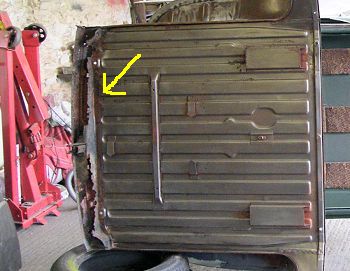
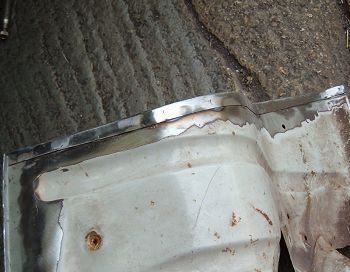
The boot floor
This is fairly well the last bit of welding work to be done before I get on with sand blasting the remains of the paint and then painting.
It's the bit I've been putting off, partly because I didn't have repair panels, but mostly because it's one of the more fiddly jobs to tackle on the car. Work is still in progress.
In detail > Boot floor repair (June 2008)
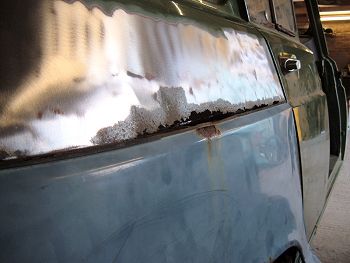
Apex panel repair
Of course stripping paint was a bit of a distraction. There's still plenty of work to do on the bodyshell. A quick repair to the front apex panels between the front door and front wings turned into a complete replacement.
I'm disappointed with myself for losing the line of spot welds along the bottom of this panel.
In detail > Apex panel repair (May 2008)
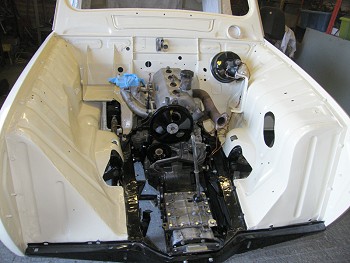
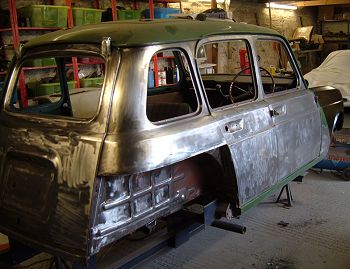
Preparing for paint
The car will be stripped right back to bare metal before painting. This is to sort out defects (rust worms) under the original paint, but should also make for a fantastic photograph when I've finished.
I've assembled all of the bits and pieces into the engine bay, and the page has pics of the layout.
In detail > Preparing for paint (May 2008)
Rear upper wing
This is one of the nastiest areas on the whole car to repair. The upper wing is 0.8mm (at least I hope it's not 0.6mm) and is unsupported at it's bottom edge. It's going to take some technique to stop it from going all wobbly when I weld in the repair section.
I initially thought repair sections weren't available so fabricated the parts for the RH rear upper wing. Then it turned out parts are available, so I used a repair panel on the other side.
In detail > Rear upper wing repair (September 2007)
Inner Wing Welding
While welding the jack mounting to the inner wing I spotted how much rust that inner wing had. It's well past economic repair, but I'd bought some new toys for the angle grinder I wanted to try out.
The result is nothing short of craftsmanship and I'm really pleased with the result, but 3 days repairing a £100 panel is crazy even if it's not actually available in that style any more.
In detail > Inner wing welding (September 2007)
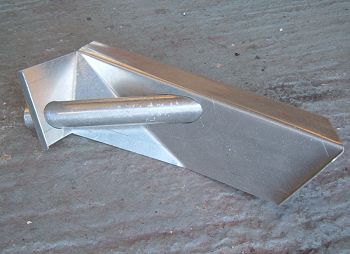
Aluminium Exhaust Heatshield
Every now and then I feel the need to do something completely over the top. The heatshield in the picture and pipe were both formed from sheet aluminium and TIG welded together.
In detail > Aluminium heatshield (September 2007)
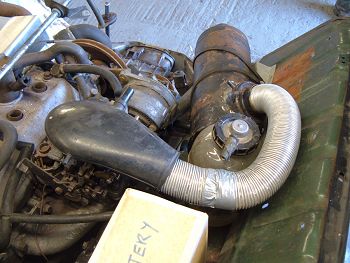
Air Intake
Another case of planning one thing and ending up with another. I wanted to incorporate a hot air feed to the carburetor and the Gordini airbox looked like it would do the job nicely.
Mounting the air intake required some inner wing modifications and a new bracket, but then the carburetor top I'd planned to use wouldn't fit under the bonnet. More modifications were needed to get everything to fit.
In detail > Air Intake System (September 2007)
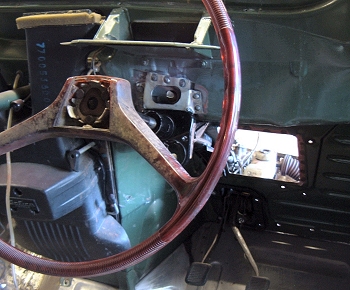
Steering column
I can't believe how fiddly it is to connect a nice transparent tortoise shell steering wheel to a GTL steering rack while avoiding a Gordini carburetor manifold along the way.
I put together a system that works but wasn't happy with it. So I did it again.
In detail > Steering column modifications (July 2007)
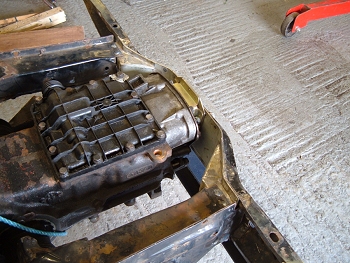
The 5 Speed Gearbox
Renault made a 5 speed gearbox based on the gearbox used in the later Renault 4, but they never fitted it in a production Renault 4. It would be a shame not to include the conversion in this project.
In detail > 5 speed gearbox conversion (May 2007)
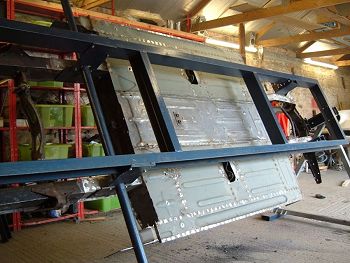
Floor Panel
The floor panels had to be removed early on during chassis repairs for access to all the front and rear chassis. The chassis gets very floppy without a floor, and that's the main reason for the jig.
Complete floor panels are no longer available so I used two half panels.
In detail > Floor panel (March 2007)
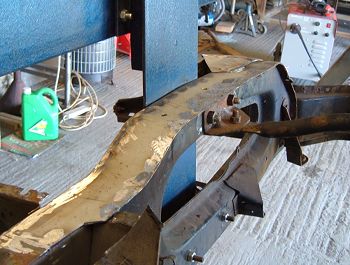
Front chassis repairs
This is the first time I've investigated the wobbly metal often found at the bottom of the front chassis members. The structure can look good from below, but mine turned out to be quite rusty inside.
In detail > Front chassis repairs (March 2007)
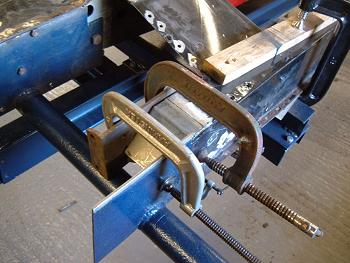
Outer rear suspension mounting
This chassis would have made it through an MOT with a little patching to the outer suspension mounting, but it made sense while the chassis was in the jig to do the job properly. I've redesigned the mounting a little in an attempt to extend it's life.
More > Outer rear suspension mounting (January 2007)
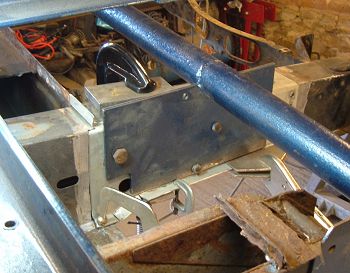
Inner rear suspension mounting
Clementine the cat has been known to repair rear suspension mountings before, but this is the first on an early chassis, and it turned out to be slightly more involved than expected.
In detail > Inner rear suspension mounting (January 2007)
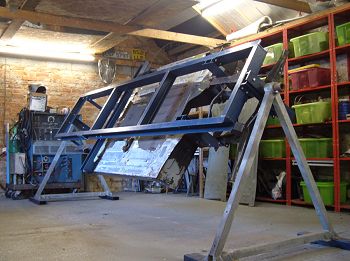
Chassis Jig
But first things first. I've decided I'm getting too old to be messing around welding underneath cars, so decided to bring the chassis up to a handy level.
The chassis jig could also come in handy for keeping the chassis straight while I remove the floor, crossmembers and suspension mountings for repair.
In detail > Chassis jig (June 2006)