Renault 4 Rear Suspension Jig
This jig is for use when welding up Renault 4 rear suspension mountings. The jig is based on dimensions from the Renault 4 factory manual M.R.61 combined with dimensions measured from an actual car. It should be OK to use with any model of Renault 4.
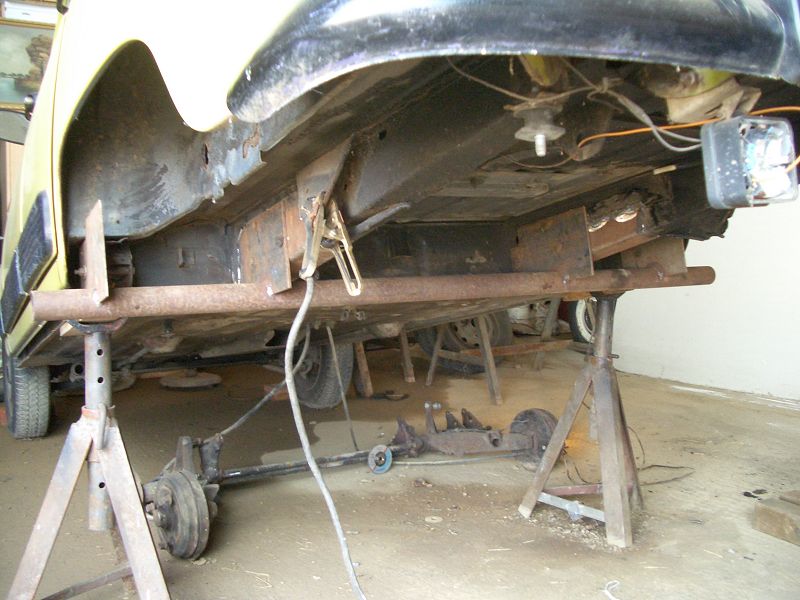
Here's the suspension jig in action. It has holes that line up with each of the suspension mountings to ensure repairs are positioned in the correct place.
The jig is designed so that it can be bolted to either face of the suspension mountings.
I've numbered the bits of jig. The numbers refer to the photos below and the dimensions in the table.

Note that the top and left hand side of all the sections line up. This is so you can put the jig on a flat surface and check it's still straight. It's handy for positioning the sections too.
All the vertical dimensions in the table are from the top face, and all the horizontal measurements are from the left side face.

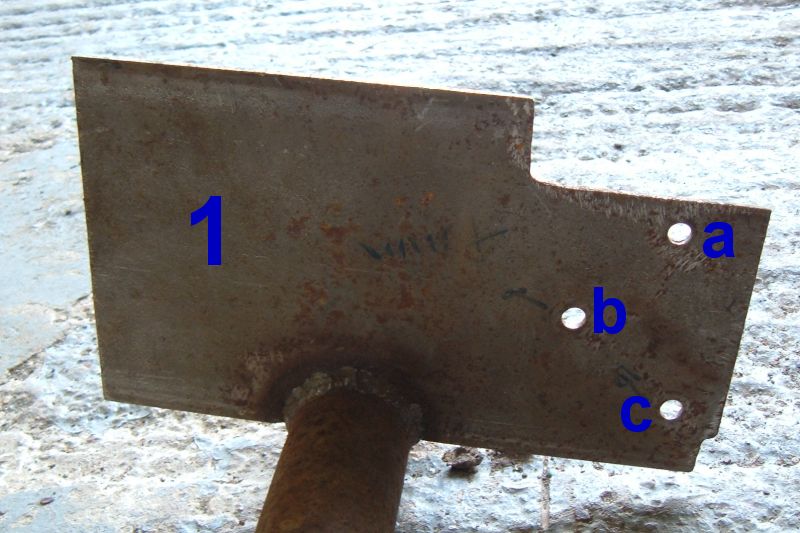
Here is section number 1. I'm numbering the holes a, b, and c. The positions of the holes are in the table below.
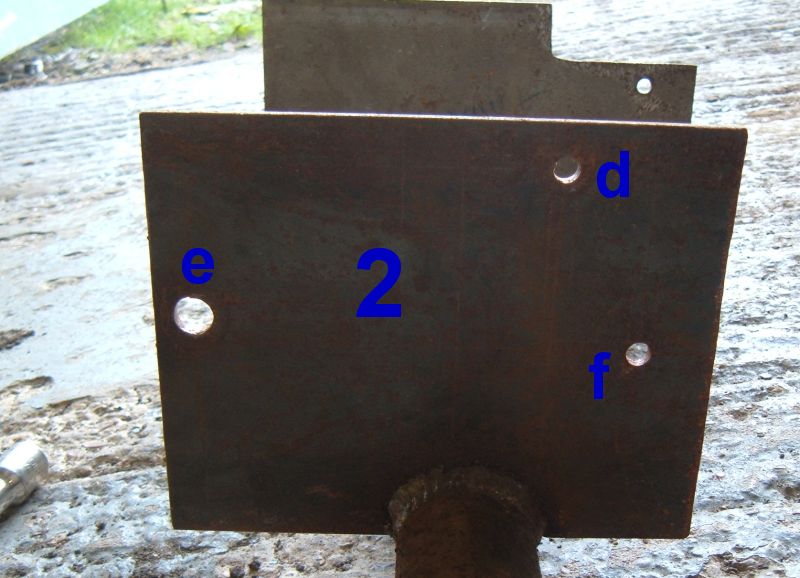
Section 2...
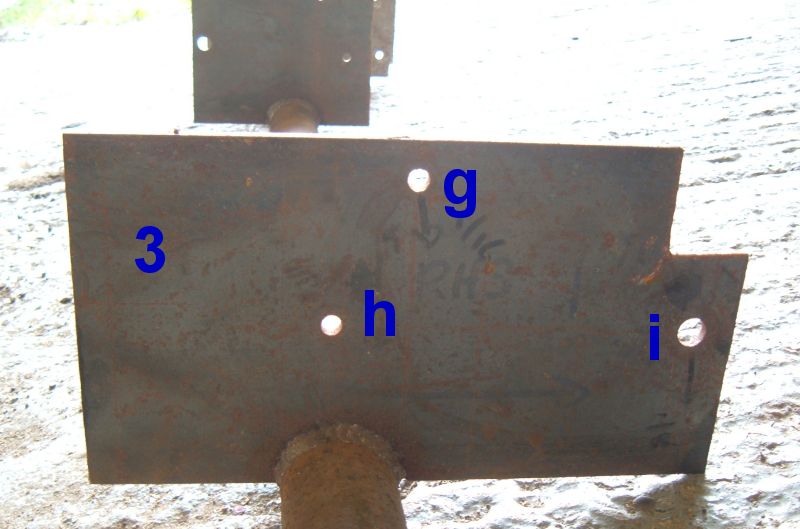
...Section 3....
...and section 4...
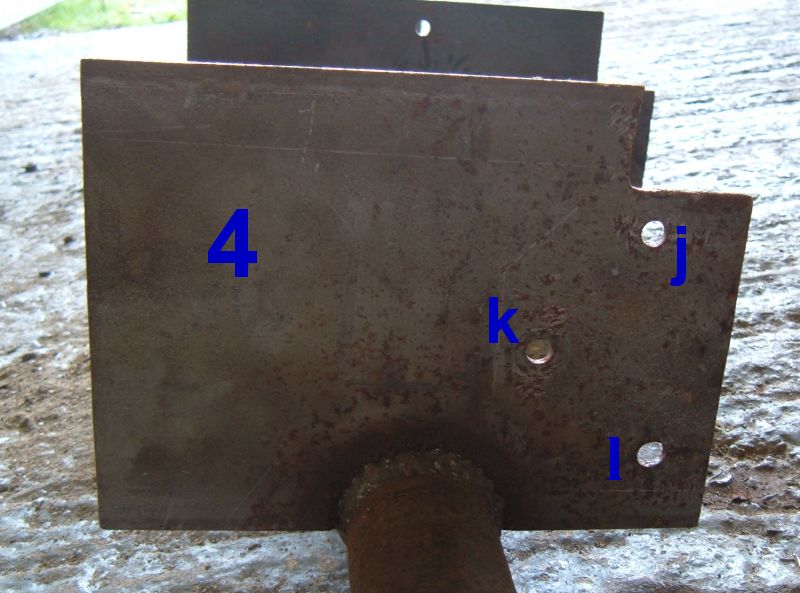
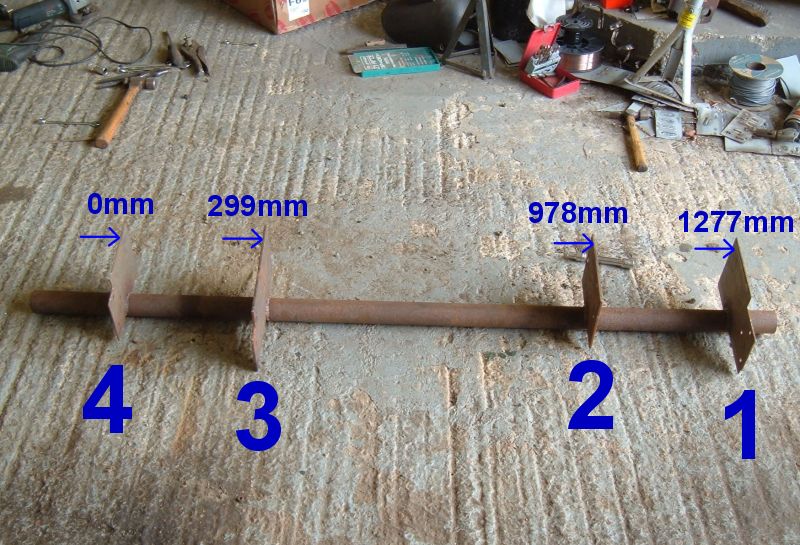
Some more dimensions here. Starting from the left face of section 4 I've included the distance to the left face of the other sections.
Note that the two outer sections are 3mm thick and the two inner sections are 5mm thick. This is because the inner and outer chassis rails are different thicknesses and the jig needs to work on both sides of the chassis rails.
Onto the dimensions. The width and depth of the each section is shown in the table below. Some of the sections have bits cut out to clear flanges and bits of body on a fully built car, so the dimensions for the cutouts have been included too. The outer chassis rails are 4mm wider than the inner rails, so for the jig to work the middle two sections need to be 5mm and the outer two 3mm. (That way the jig can be used to align both the inside and outside of each chassis rail.)
Section |
Thickness of steel (mm) |
Width (mm) | Depth (mm) | Cut out depth (mm) | Cut out width (mm) |
1 |
3 |
245 | 148 | 28 | 85 |
2 |
5 |
185 | 148 | 0 | 0 |
3 |
5 |
270 | 148 | 42 | 35 |
4 |
3 |
200 | 148 | 30 | 43 |
All the holes in the photographs above have been marked with a letter. The table below shows the position of the center of each hole, and the diameter of each hole measured from the top and left side reference faces (which all line up).
| Hole letter | Distance from left face (mm) | Distance from top face (mm) | Hole diameter (mm) |
| a | 219 | 44 | 8 |
| b | 186 | 84 | 8 |
| c | 229 | 120 | 8 |
| d | 130 | 15 | 8 |
| e | 14 | 66 | 12 |
| f | 159 | 75 | 8 |
| g | 130 | 15 | 8 |
| h | 99 | 76 | 8 |
| i | 251 | 78 | 12 |
| j | 171 | 44 | 8 |
| k | 138 | 84 | 8 |
| l | 181 | 120 | 8 |
I used a 50mm diameter scaffold pole to hold the sections together. The centre of the scaffold pole is 105mm from the left face, and is 148mm from the top face (in line with the bottom face). Be careful when welding the jig together - the scaffold pole will tend to bend, so weld slowly and check everything out against a flat surface when you've finished. Something a lot sturdier than a scaffold pole would have been better. I'd go for 100mm * 50mm box section with 5mm wall thickness as a replacement for the scaffold tube if I were to build the jig again.
If you have any problems with the jig dimensions, or if there any missing dimensions please report them on the forum.
Anyone who has seen this page will surely have a Renault 4 and presusmably will be a little worried about how the rear chassis rust is progressing. Go sort it out! Renault 4s don't rust nearly so thoroughly as Renault 5s, so go build the jig and save your car (4s are getting rare now). Welding help is freely avaliable at the mig welding website.
Back to Tech Tips