Clementine's Garage
Clementine the Cat
 
Image of flower
Yellow R4
 
Réparateur d'automobiles

Rodeo Rebuild

simonandjuliet

Enthusiast
Messages
146
As with many of us, I started 2 restorations at about the same time thinking that each one would be quick and simple .......

Anyway, the Rodeo has taken a back seat (or not, since it is only homologated for 2 seats !) due to the Sinpar arriving. However I have done a few bits that may be worth a new thread.

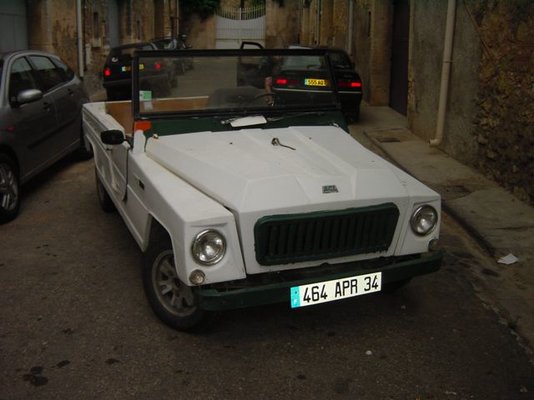
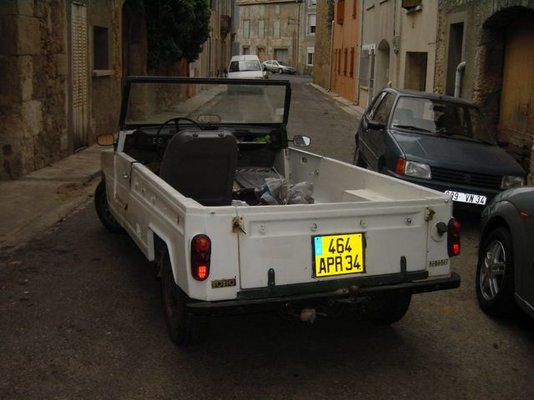
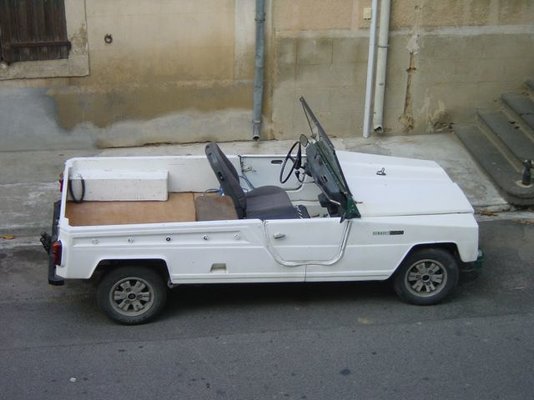
I have owned her for several years after having been given the car by a friend because the CT to-do list was excessive. I did the minimum to get the CT, put it onto a carte grise de collection and then just kept it going. This was in the good old days when a CG de collection meant no MOTs again ! However once they changed the rules it meant I had to do something more serious.

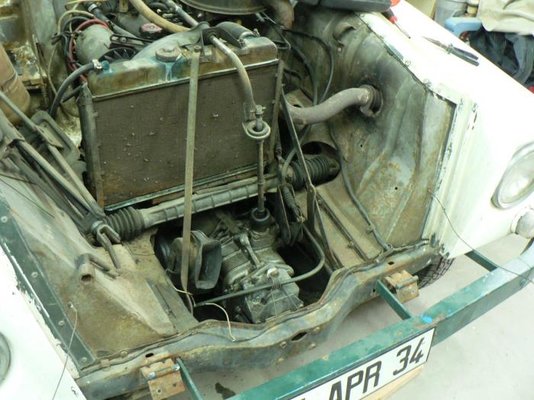
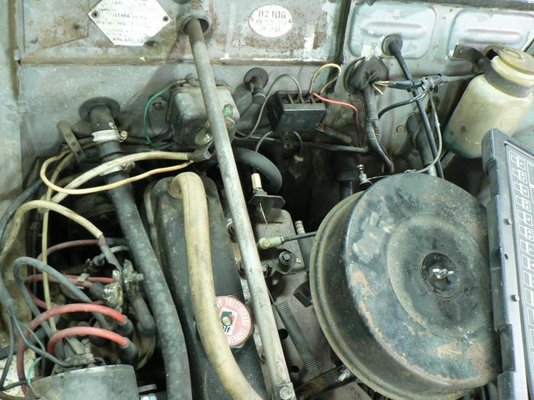
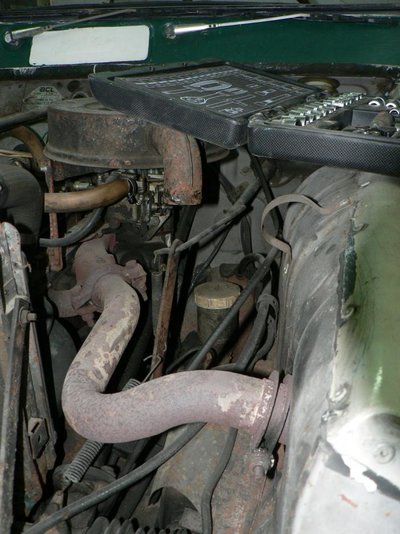
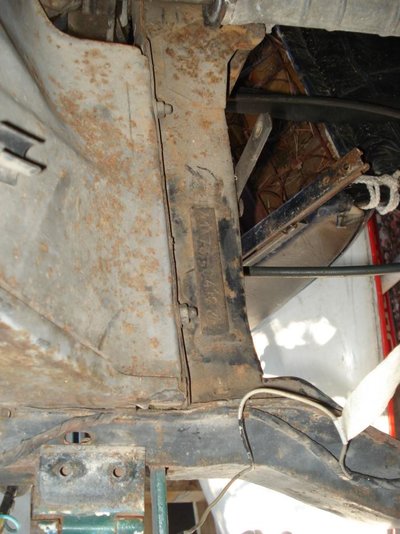
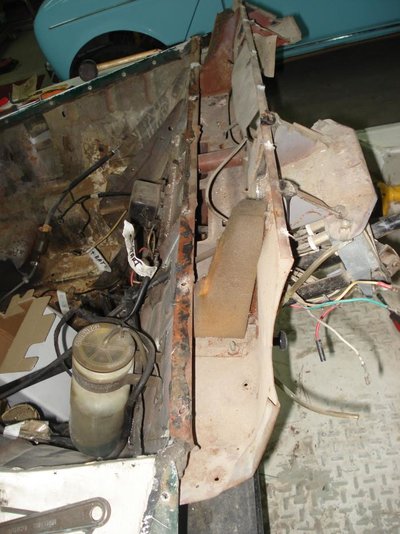
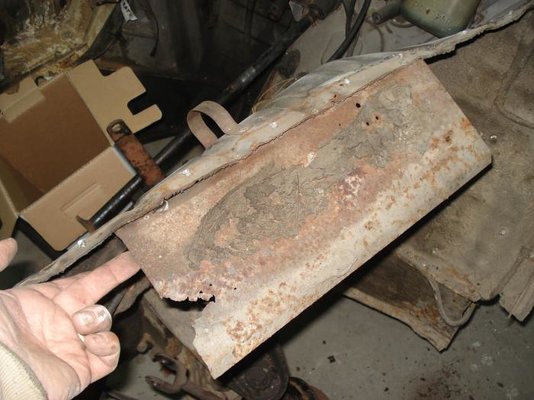
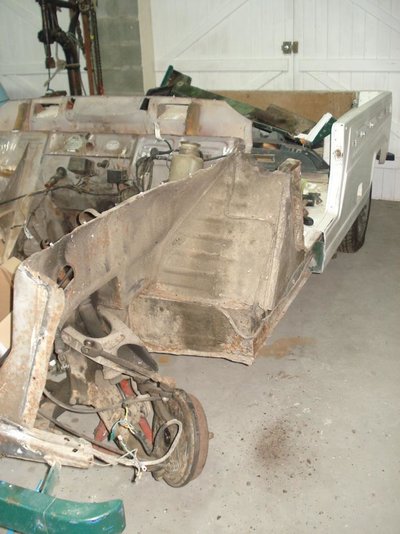
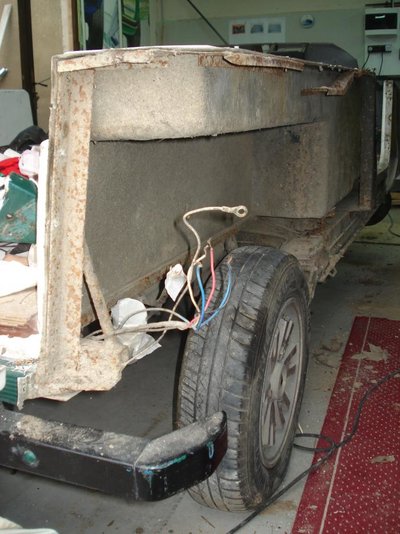
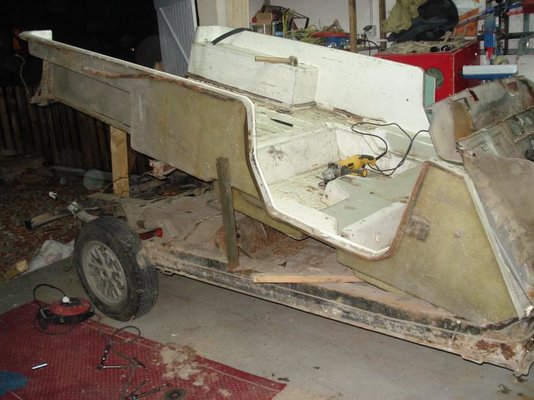
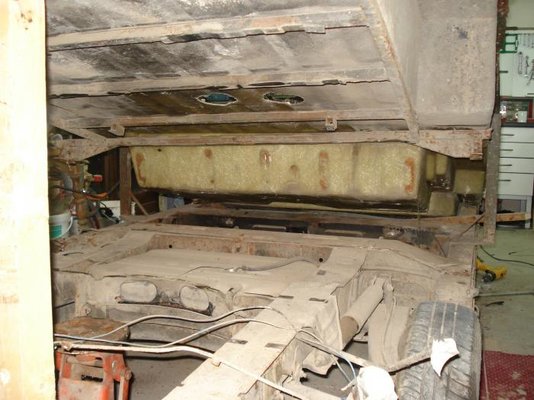
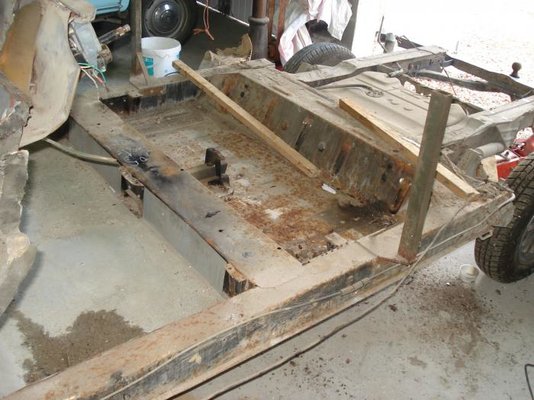
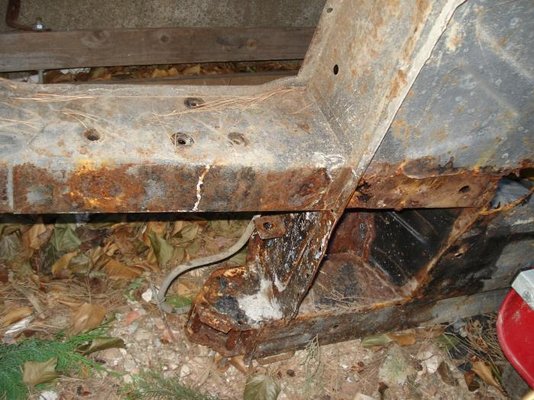
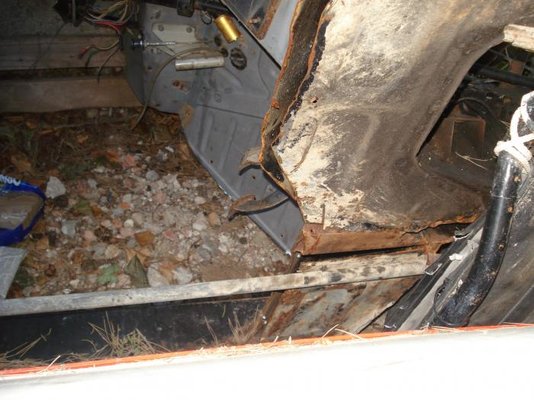
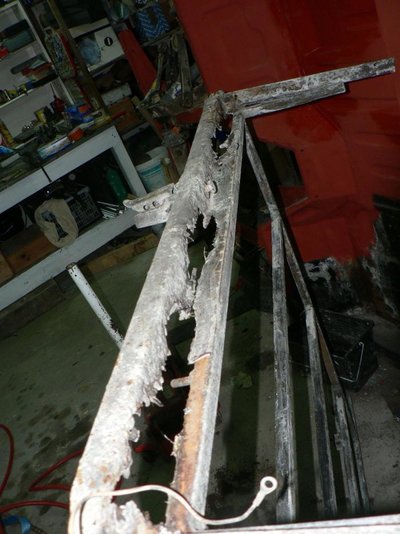
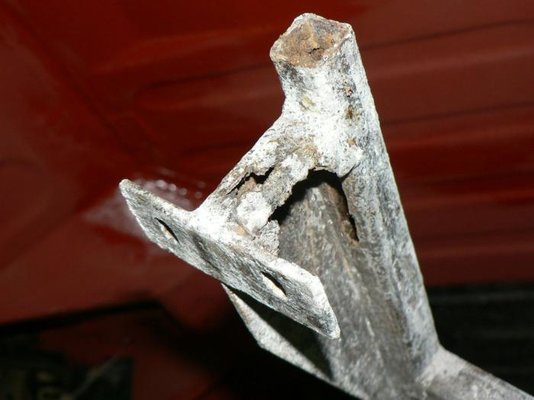
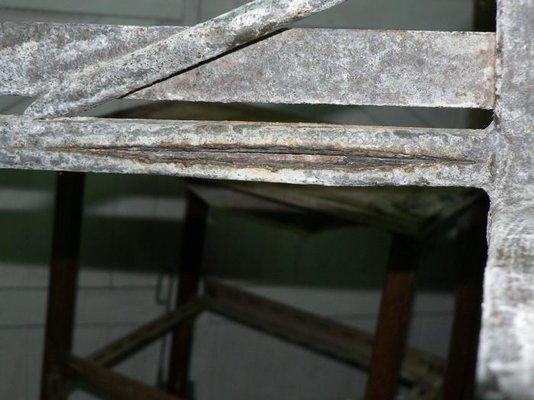
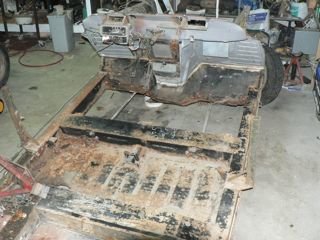
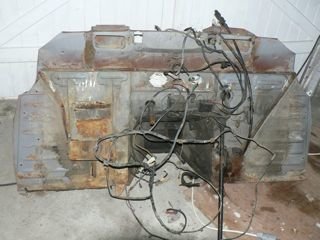
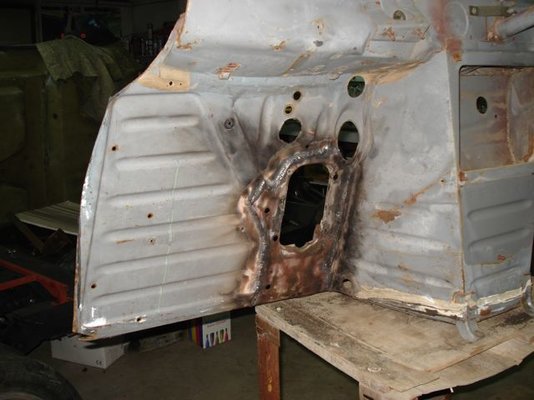
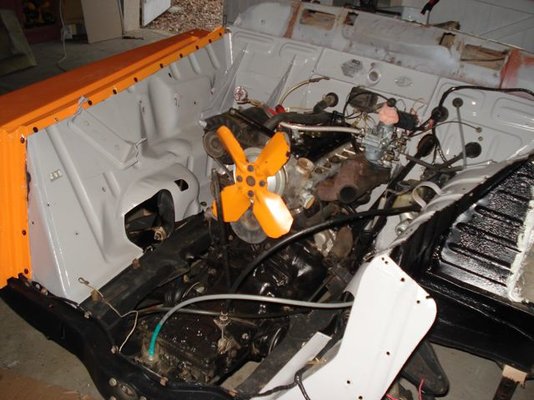
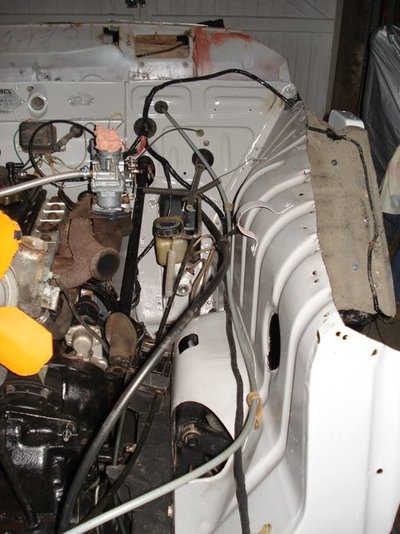
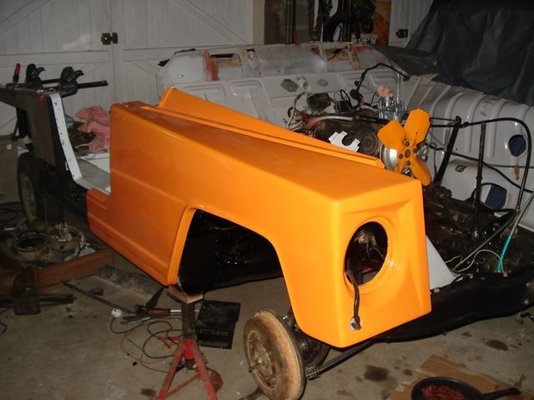
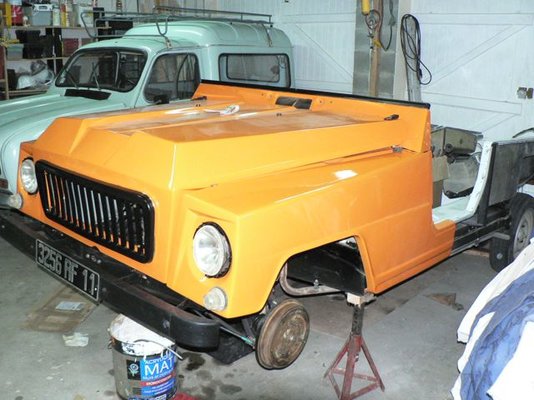
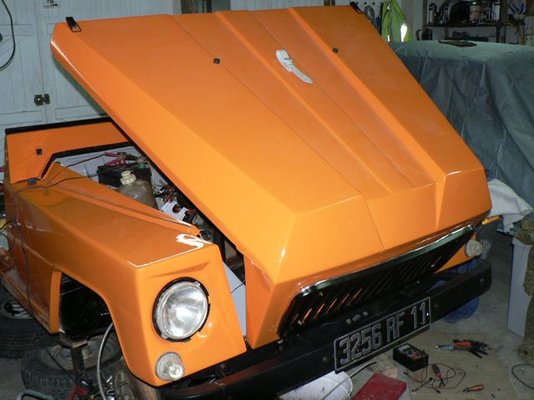
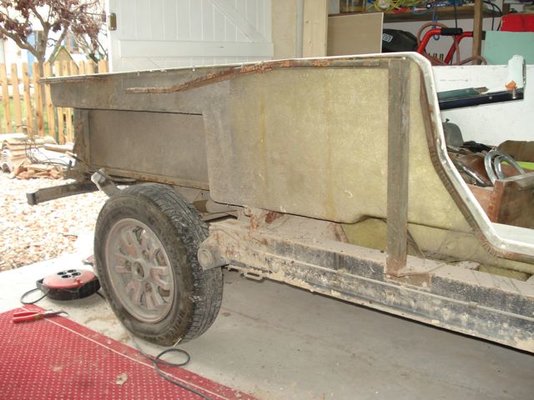
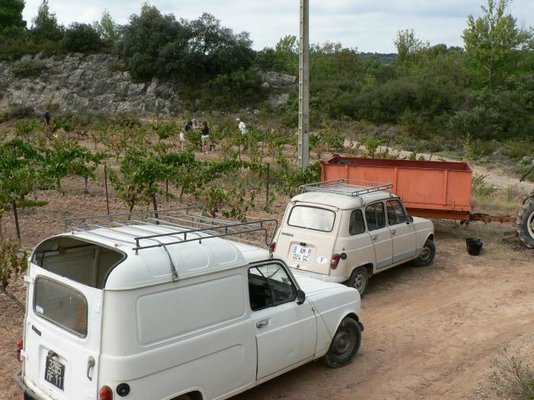
This car has had a tough time - growing up on the beach near Perpignan did the chassis no favours , then it was used as a builder's run-around as well as a wine-makers run-around so salt, sand, cement and mud have taken their toll as did a very crude brush paint-job a few years ago ....

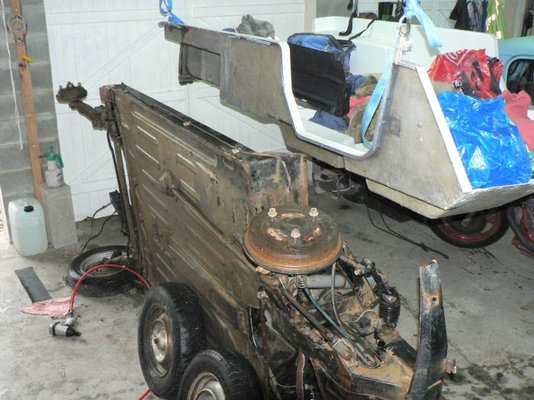
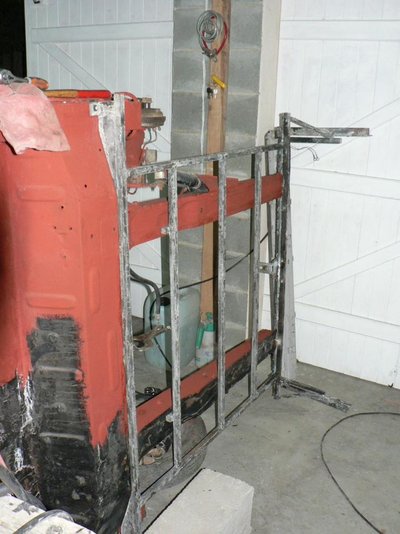
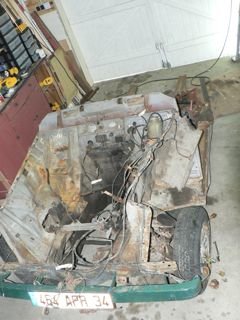
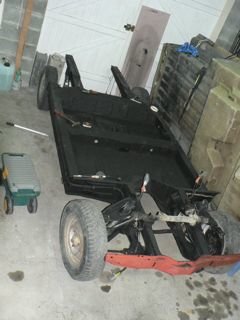
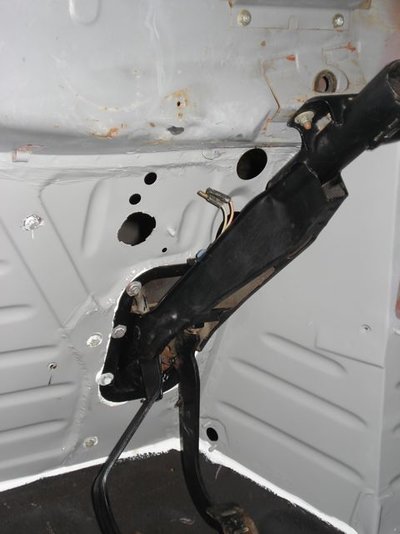
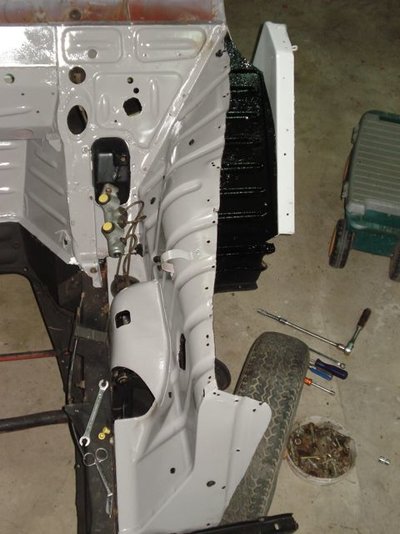
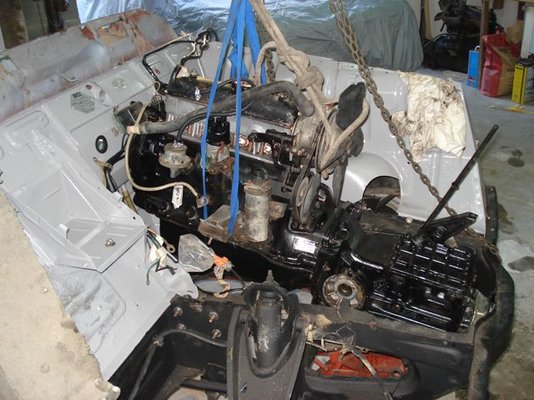
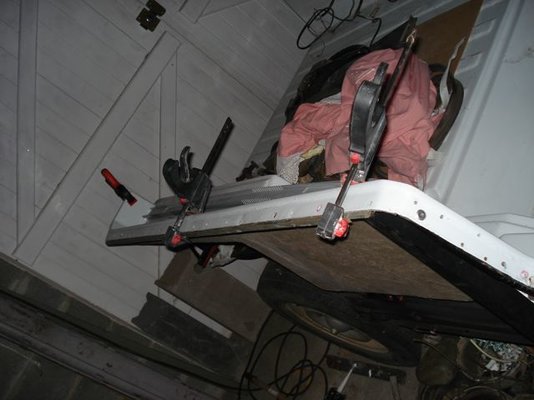
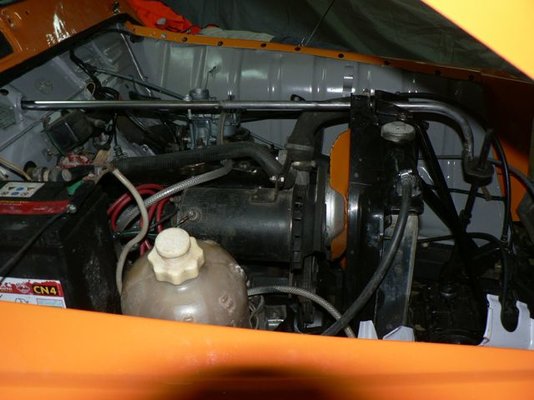
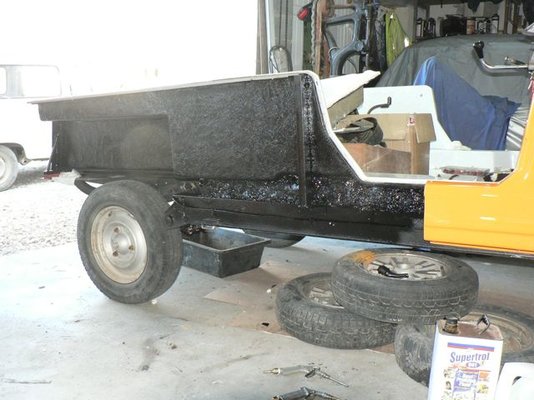
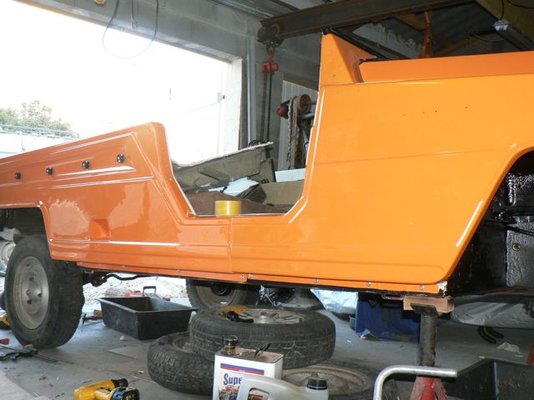
First job was to take it to bits !
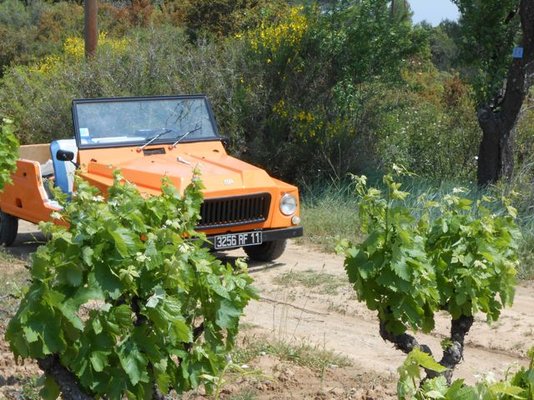
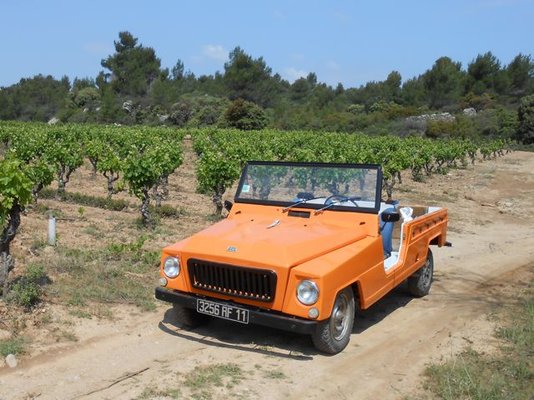
 
  • DSC00016.jpg
    DSC00016.jpg
    43.7 KB · Views: 572
  • DSC00017.jpg
    DSC00017.jpg
    46.7 KB · Views: 589
  • DSC00038.jpg
    DSC00038.jpg
    43.6 KB · Views: 581
Go on - what was next? :D

Mine is still in France. Plenty still to do on the R5 but there's a space in the garage now for a second winter project. Mine has an extra plywood floor in the back too - worried about what I'll find underneath.

What year is yours? Looks quite an early one.
 
Sorry - didn't mean to tease !

I haven't had much time recently, we have done our first "vendages" or grape picking.

Picking the grapes is the easy bit - the following days are very intensive with settling and decanting the rosé and then "pumping-over" the red , so will post asap.

But as you can see 4L's doing what they were designed for ..... plus the track to the vineyard is very bad and the only vehicles that can get there are tractors, Land Rovers and 4L's !
 
  • P1230786.jpg
    P1230786.jpg
    56 KB · Views: 521
  • P1230790.jpg
    P1230790.jpg
    72.4 KB · Views: 516
Here goes ...

This car is a reasonably early ACL 1a from July 1973 and has an 850 engine although I am not sure it is the original (must check numbers one day !) with the back to front 4 speed round 'box. Very confusing because reverse is where first usually is ,very embarrassing at the lights! Unfortunately the 'box is cream-crackered, even double de-clutching has no effect - just prolongs the agony. So that has to go !

Other problems are the carb/inlet manifold which come from , I think, an R5, but someone out there will tell me (and they will be available in the future because I am going back to a standard manifold and carb) ! The manifold rubs against the steering column and ruins that lovey 4L feel - so it's got to go as well .

I checked out the chassis and it is a "bit" tired so guess what, it has to go .... but that isn't a major problem because there are still some very good chassis available down here for little money. The donor car is the one in the middle , not the wheel-barrow.

Interestingly the Rodeo does not have a stamp in the usual place (next to passenger seat), it is a welded tag by the gearbox because it can not be seen due to the fibreglass body.

Apart from the above, the car is in fine fettle ....... just needs a bit of TLC !
 
  • P1220543.jpg
    P1220543.jpg
    64.8 KB · Views: 495
  • P1220544.jpg
    P1220544.jpg
    72.7 KB · Views: 498
  • P1220545.jpg
    P1220545.jpg
    69.8 KB · Views: 489
  • P1220546.jpg
    P1220546.jpg
    97.6 KB · Views: 493
  • P1220553.jpg
    P1220553.jpg
    94 KB · Views: 510
  • DSC00390.jpg
    DSC00390.jpg
    88.3 KB · Views: 495
Carb looks a lot too big and complicated for an 850cc so likely a R5 one.

Spotted the chassis number up front on mine and it didn't occur to me it was because the normal one isn't visible.
 
Horrors revealed

Body off ! Lots of rivets so cordless drill and bit .....

Top of dash removed

First take off the wings, then ....

Hidden heat shield ......

Fibre-glass extensions to inner wheel arches .....

Support frames for the inner body - showing rotten frame under the top edge - there was NO protection for any of the metal frames, just pieces of sponge to hold the water and mud !

Lifting the body - there are several bolts that are different to berlines/F4s - there is a bolt which attaches the subframe in the middle of the body to the front petrol tank mount which I had to cut off with an angle grinder because it was spinning and not accessible from above. The sub-frame has a couple of other bolts into the sill at each side which were seized and need to be cut off

In retrospect, I should have left the subframe attached to the chassis and just remove the fibre-glass. I didn't because some repairs had "glued" the body to the frame !

Run out of photo space so will continue on another post .......
 
  • DSC00314.jpg
    DSC00314.jpg
    97.2 KB · Views: 454
  • DSC00317.jpg
    DSC00317.jpg
    56.1 KB · Views: 451
  • DSC00319.jpg
    DSC00319.jpg
    86 KB · Views: 452
  • DSC00321.jpg
    DSC00321.jpg
    59.9 KB · Views: 447
  • DSC00322.jpg
    DSC00322.jpg
    96.9 KB · Views: 440
  • DSC00324.jpg
    DSC00324.jpg
    55.6 KB · Views: 448
More Horrors

Further horrors

I found a stash of nuts between the fibre-glass and floor pan - very thin squirrels ???

The body had obviously been off before because there was a floor repair panel pop riveted in

All very nasty !
 
  • DSC00325.jpg
    DSC00325.jpg
    60.5 KB · Views: 444
  • DSC00330.jpg
    DSC00330.jpg
    63 KB · Views: 446
  • DSC00386.jpg
    DSC00386.jpg
    78.3 KB · Views: 449
  • DSC00388.jpg
    DSC00388.jpg
    61.9 KB · Views: 438
  • DSC00389.jpg
    DSC00389.jpg
    66 KB · Views: 442
What a nasty design - all fibreglass and angle iron with a great big hole to direct mud into the gap between the fibreglass body and floorpans. Modifications needed! I'll copy yours :D
 
I've still got the original gearbox from the departed blue van if you need one Simon, though I'm sure you've got a stash. Still no word from the old boy about the '64 I'm afraid
 
Chassis and sub-chassis

Have been concentrating on cleaning and repairing the new chassis and sub-chassis.

The chassis is remarkably good, making me wonder if it is a replacement because there is no number stamped on it - although I have seen this before. The original Rodeo chassis is not stamped either, just the welded plate near the radiator - Maybe the inch-thick layer of mud has protected it !

The sub-chassis is another matter, having no protection originally and the ends of the tubes being open to the elements , it means that a number of fiddly repairs are needed. Most of the repairs have been done off the car but for the forward mounting points I re-attached the frame to make sure it will fit later !!!

It is possible to buy the frame new from 2CA for 160€ but since I already have a long list, I am trying to prioritise

So a couple of coats of anti-rust paint, body seal and waxoyl and it can start to go back together
 
  • P1240059.jpg
    P1240059.jpg
    65.4 KB · Views: 437
  • P1240066.jpg
    P1240066.jpg
    85.8 KB · Views: 442
  • P1240068.jpg
    P1240068.jpg
    82.6 KB · Views: 431
  • P1240069.jpg
    P1240069.jpg
    38 KB · Views: 433
  • P1240070.jpg
    P1240070.jpg
    50.7 KB · Views: 433
  • P1240076.jpg
    P1240076.jpg
    84.2 KB · Views: 434
Chassis work

The original chassis has now been dispatched, it was a real mess ! Some of you could have restored it, but beyond my capabilities !

The new chassis only needed a small patch on one rear floor section , amazing really for a '78 car - still wonder if it was a replacement chassis.

A couple of unique RODEO Rot-Spots, under the vertical body supports and underneath the master-cylinder box

The box section under the support frame was rotten and completely invisible from the outside. A particular problem if you plan to use this frame for mounting a seat belt !!

The other problem was under the M/C where a piece of foam was glued in - it just holds water and mud and then rots !

The bulkhead has been modified for the plastic body, it seems to have been done with a pair of pliers and a hammer !
 
  • P1240106.jpg
    P1240106.jpg
    21.7 KB · Views: 400
  • P1240107.jpg
    P1240107.jpg
    17.2 KB · Views: 399
  • P1240109.jpg
    P1240109.jpg
    22.9 KB · Views: 400
  • P1240110.jpg
    P1240110.jpg
    21.5 KB · Views: 397
  • P1240112.jpg
    P1240112.jpg
    21.8 KB · Views: 397
  • P1240113.jpg
    P1240113.jpg
    19.8 KB · Views: 399
  • P1240116.jpg
    P1240116.jpg
    22.1 KB · Views: 397
Required mods

Starting to put it all back together now with a few mods:

'T' piece instead of bolt to hold the sub frame down since the bolt is not accessible from above

Waterproof foam strip between sub frame and chassis

New pedal box and steering column - requires mods to bulkhead; having decided to use the better brakes from the new chassis and a "square" gearbox instead of the old round one, it meant that I had to replace a few more bits !

The old pedal box is lower on the bulkhead, therefore the master cylinder is lower as well. What this means is that the pedal arms are shorter and the travel for clutch and brakes are different. Along with this there is a more pronounced exit angle for the clutch cable,so all in all, I decided to cut out the mounting plate from a later bulkhead and weld it in place in order to fit the later pedals and column. Hopefully this means that there will be sufficient pedal travel to get full brake and clutch effect.

Anyway once done it all looks "right" so hopefully no probs with Mr Controle Technique man !

A nice aside - these ACL cars were obviously handbuilt, on the bulkhead you can see where some-one has written the build number/chassis number in pen
 
  • DSC00487.jpg
    DSC00487.jpg
    47.2 KB · Views: 373
  • DSC00489.jpg
    DSC00489.jpg
    50.5 KB · Views: 360
  • DSC00490.jpg
    DSC00490.jpg
    47.4 KB · Views: 362
  • DSC00491.jpg
    DSC00491.jpg
    63.6 KB · Views: 363
  • DSC00501.jpg
    DSC00501.jpg
    36 KB · Views: 354
  • DSC00502.jpg
    DSC00502.jpg
    50.1 KB · Views: 357
  • DSC00492.jpg
    DSC00492.jpg
    33 KB · Views: 360
Progress-but not always visible !

Lots done , but it isn't always obvious - brakes refitted, new lines, flexibles, new brake limiter/master cylinder, refit wiring loom and dash, driveshafts etc etc etc

But also fitted first piece of bodywork which is very satisfying and I think the black rivets look great with the orange !

Due to a bizarre problem with the cylinder head I had to put a different (rebuilt) engine/box in. Connect a battery, pipe to jerry-can and turn the key - it runs ! (no radiator or exhaust but a good test.....)

The replacement metal frames from 2CA are very accurate but come undrilled so you have to drills holes for the rivets and drill and tap the threads for the rear frames and door furniture, not a 2 minute job.

Still looking for a waterproofing solution for the chassis to body gap but that will have to wait because I am starting on a friend's Citroen HY next week !
 
  • DSC00511.jpg
    DSC00511.jpg
    69.9 KB · Views: 429
  • DSC00519.jpg
    DSC00519.jpg
    61.6 KB · Views: 321
  • DSC00524.jpg
    DSC00524.jpg
    62.1 KB · Views: 327
  • DSC00526.jpg
    DSC00526.jpg
    48.8 KB · Views: 320
  • DSC00523.jpg
    DSC00523.jpg
    48.6 KB · Views: 316
  • DSC00521.jpg
    DSC00521.jpg
    41.9 KB · Views: 321
Is there no general difference between Rodeo chassis, Vans and the standard R4 we all love?
 
Chassis

Certainly, the Rodeo chassis is identical to an F4 chassis, the mounting holes are all the same, no additional holes are needed. The bulkheads are different (but they bolt on anyway) and the chassis plate is in a different place (see previous posts).

The biggest difference is the lack of rust protection and the additional water collection points !

I cannot confirm that it is exactly the same as a berline because I have never taken one totally to bits !
 
Sun's coming soon !

Sun is on its way so I need to get on with the Rodeo

This next bit you will LOVE or HATE !

The bodywork is going back together nicely, lots of drilling and riveting - considering the new chassis it fits remarkably well, but tolerances are big !

A few small mods such as a new hanging bracket welded onto the exhaust pipe where it goes under the floor at the front. It means that if the silent block fails you don't have to remove the false floor to change it. The other option is to weld a fixed nut in the original place by the sill, but I would rather have full access.

The engine runs nicely but I have yet to try driving it - brakes need a final bleed

The bit I have been deliberating about is the seal between wings and inner wings and also preventing water ingress into the floors via the sills and rear wheel arches

Instead of the original sponge which held water and added no strength, I have used expanding foam.

It is waterproof, seals well and has the added advantage of being rigid, effectively gluing the pieces together as well as adding support to the plastic box sections. If it needs to be removed it can be cut easily and cleaned off with acetone.
Over the top of this I have sprayed underbody sealant to improve further the waterproofing

There shouldn't be an increased fire risk because it would all go up in a flash anyway !

Thoughts anyone ?

Next jobs are to finish the other side, fit the back end and then the "interior" - just need to find the time .....
 
  • P1240308.jpg
    P1240308.jpg
    62.4 KB · Views: 276
  • P1240309.jpg
    P1240309.jpg
    49.3 KB · Views: 267
  • P1240311.jpg
    P1240311.jpg
    49.3 KB · Views: 257
  • P1240446.jpg
    P1240446.jpg
    56.2 KB · Views: 260
  • P1240451.jpg
    P1240451.jpg
    50.2 KB · Views: 260
  • DSC00321.jpg
    DSC00321.jpg
    60.8 KB · Views: 261
starting to look good, keep at it guys
 
CT booked

Controle booked for Thursday next week, just need to finish a few bits so fingers crossed. Need the CT booked to give the focus for a final push .... and the sun is shining !
 
Straight to work

Little (orange) "Gina" passed her CT this morning and went straight to work. Bit of a tyre nightmare but that's another story. Not planning to fit the doors or roof bars, I like the simplicity ......

Just need to refurb. the wheels and she is perfect !
 
  • DSCN0029.jpg
    DSCN0029.jpg
    92 KB · Views: 154
  • DSCN0030.jpg
    DSCN0030.jpg
    71 KB · Views: 159
Back
Top