You are using an out of date browser. It may not display this or other websites correctly.
You should upgrade or use an alternative browser.
You should upgrade or use an alternative browser.
1979 4GTL - Sybil
- Thread starter Tripyrenees
- Start date
Tripyrenees
Enthusiast
- Messages
- 391
- Location
- Luscan, France
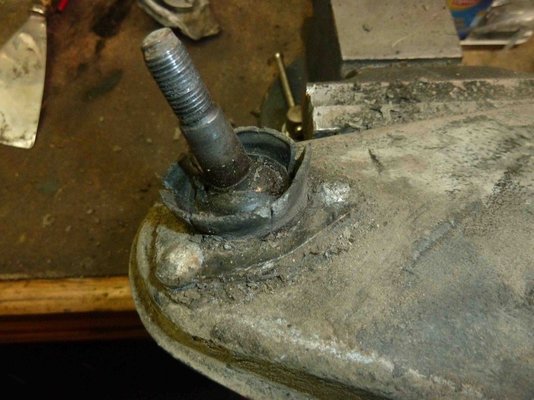
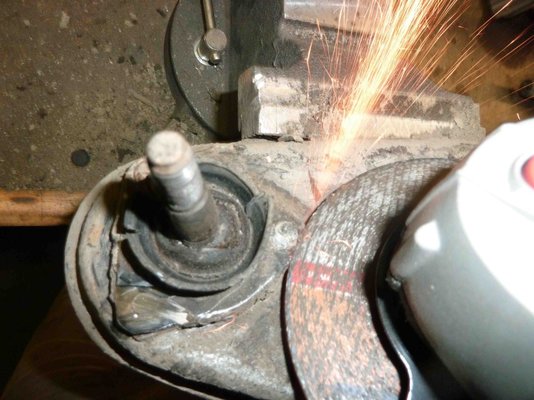
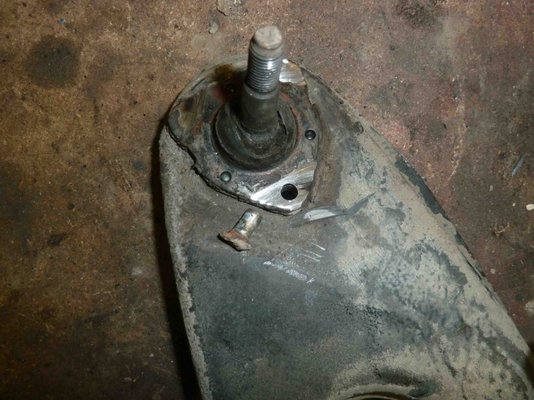
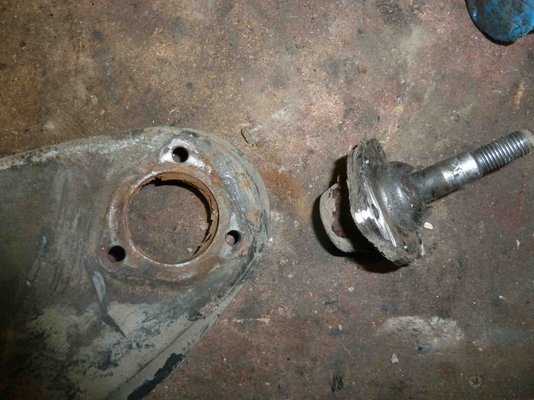
Here is a quick photo story of me changing the top ball joint. It was not too hard after I made a ball joint splitter.
I took the top plate off totally to hold it in a vice on the bench. The bottom unit I did in place after removing the wheel hub (using my home made ball joint splitter).
I was surprised they had riveted them in and they were tough to remove.
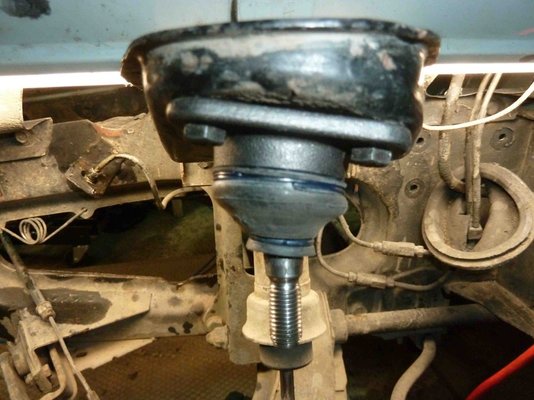
It is not the only thing clean on the car now - work is progressing.
I took the top plate off totally to hold it in a vice on the bench. The bottom unit I did in place after removing the wheel hub (using my home made ball joint splitter).
I was surprised they had riveted them in and they were tough to remove.


It is not the only thing clean on the car now - work is progressing.
Tripyrenees
Enthusiast
- Messages
- 391
- Location
- Luscan, France
I have been 4 days on the rebuild so far. It is trying to remember where everything goes as you NEVER take enough photos when taking it all apart. But I think I am getting there.
I put her tags back on (good reason to buy a nice new Facon pop riveter )
)
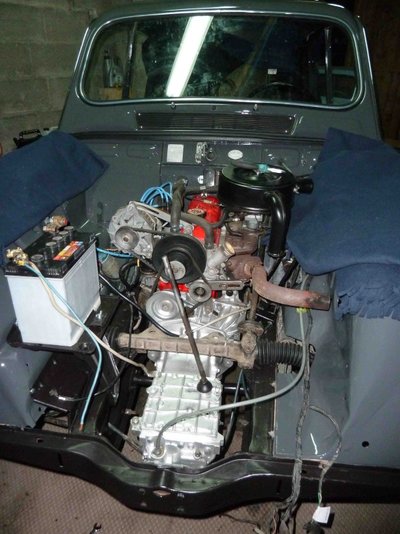
The engine bay is now full and the dash board is complete. I even managed to get the windscreen in last night - that was a right bugger of a job - but if it is super tight it must mean no leaks o_O
Engine was no bother getting in - now I know all the mounts etc (taking it apart was guesswork)
So today is driveshafts, exhaust, radiator, filling her up with water, oil etc and maybe even try starting her.:eek:
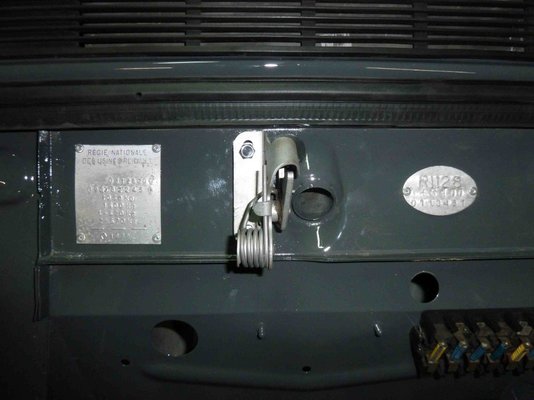
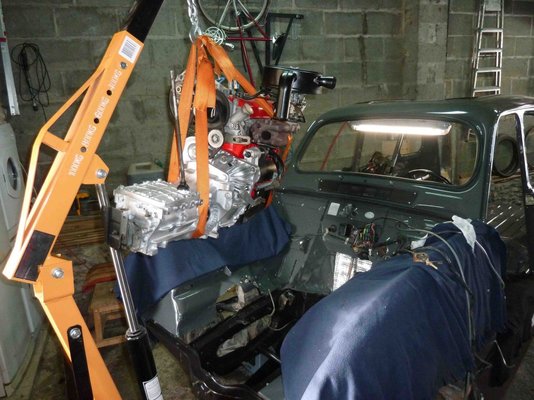
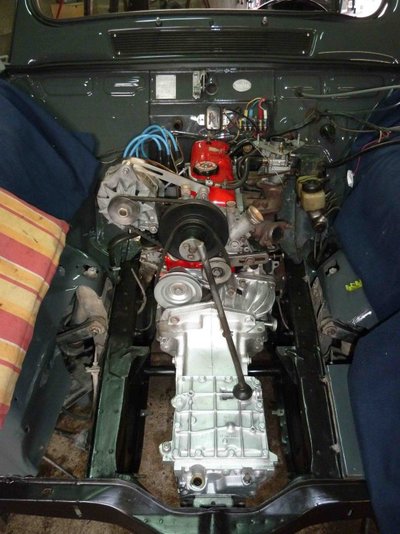
I put her tags back on (good reason to buy a nice new Facon pop riveter
 )
)The engine bay is now full and the dash board is complete. I even managed to get the windscreen in last night - that was a right bugger of a job - but if it is super tight it must mean no leaks o_O
Engine was no bother getting in - now I know all the mounts etc (taking it apart was guesswork)
So today is driveshafts, exhaust, radiator, filling her up with water, oil etc and maybe even try starting her.:eek:


Tripyrenees
Enthusiast
- Messages
- 391
- Location
- Luscan, France
We thought about some brighter colour but decided everyone has that so chose a Citroen grey which we saw on a Traction with lots of chrome. It is a risk but I think it will work. We will do the other R4 in a brighter colour when I get round to it.
But we do seem to be going down the darker path - my 2CV van will be grey and the Traction will be black.
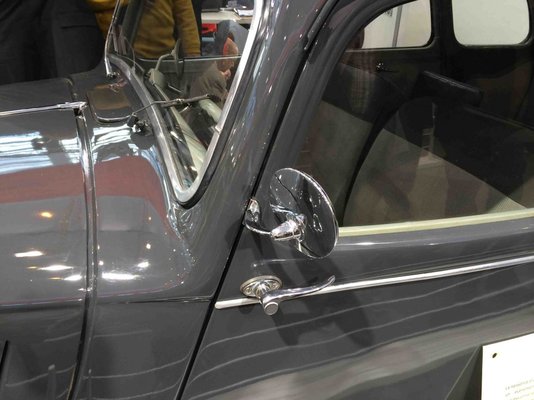
But we do seem to be going down the darker path - my 2CV van will be grey and the Traction will be black.


Last edited:
Tripyrenees
Enthusiast
- Messages
- 391
- Location
- Luscan, France
I managed to get a lot done yesterday.
I then just wanted to see if the starter motor worked and turned the key. It turned over nicely and then suddenly fired up :eek:. I was a little shocked as I had not put the exhaust system on at this point so it was a bit noisy and more unexpected than anything.
I was expecting to spend a day or so going through why it wouldn't start since I had stripped down all the peripheral parts on this engine including the rebuild of the head. Very pleased with myself

Here it is - let me know if you hear anything or you think anything needs adjustment (other than running slightly fast )
)
- Radiator and water system connected.
- Front bumper installed (with original fogs)
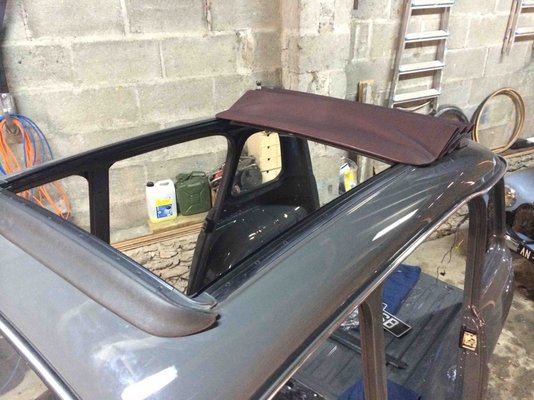
- Sunroof installed (fully sealed and bolted)
- Filled with coolant
- Filled with oil
- Topped up battery with distilled water
- And all those little springs, bolts and fiddly things that seem to be everywhere on a 4L.
I then just wanted to see if the starter motor worked and turned the key. It turned over nicely and then suddenly fired up :eek:. I was a little shocked as I had not put the exhaust system on at this point so it was a bit noisy and more unexpected than anything.
I was expecting to spend a day or so going through why it wouldn't start since I had stripped down all the peripheral parts on this engine including the rebuild of the head. Very pleased with myself

- So on went the exhaust system to quieten things down a little.
- I even managed to put some primer paint on the wheels as it was such a nice day.

Here it is - let me know if you hear anything or you think anything needs adjustment (other than running slightly fast
Tripyrenees
Enthusiast
- Messages
- 391
- Location
- Luscan, France
Another full on day - had all the troubles with the alternator but that is now sorted and after removing the dashboard and checking all the connections I put everything back to normal.
Tomorrow, I will fill and test the brake system, put wheels back on, drop the car and start on the interior.
- Installed electric washer button
- Put on the front spoiler for the sunroof (correctly)
- Final paint of the wheels
- Windscreen wipers installed and tested
- Front lights and side lights "softly" installed and tested (have to wait for bonnet for final install)
- Tested all electrics and all OK (finally)
- Installed new battery - old one wouldn't hold charge.
Tomorrow, I will fill and test the brake system, put wheels back on, drop the car and start on the interior.
Last edited:
Tripyrenees
Enthusiast
- Messages
- 391
- Location
- Luscan, France
Right, I managed to fix the one fog light (which will now become my sidelight) which was a dodgy connection behind the dashboard (after chasing earths and cables in the engine bay :eek: )
Filled the brake system and bled them, adjusted the fronts - can't see anyway of adjusting the rears, the two square adjuster nuts don't exist
Put the wheels back on and the new (for me) hubcaps.
The engine bay is now complete and finished. I do have one annoying little oil leak coming from the rear of the engine (hardest place to see) so I will trace that later.
Next the interior carpet and reinstall the seats and under dash shelves.
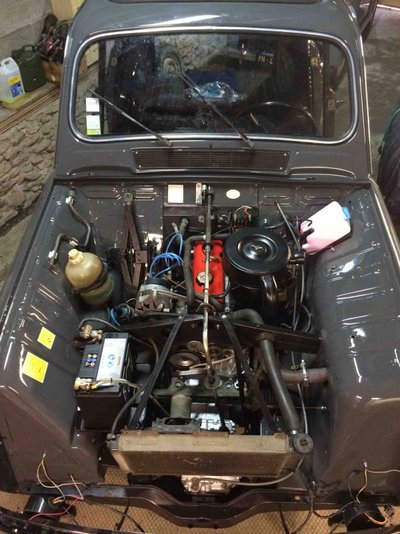
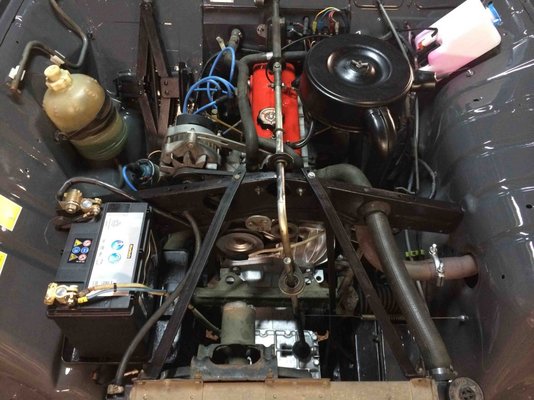
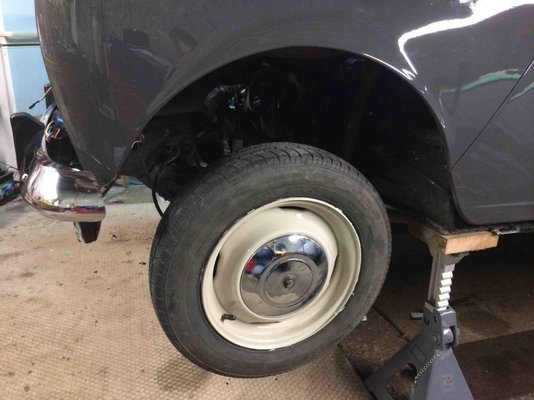
Filled the brake system and bled them, adjusted the fronts - can't see anyway of adjusting the rears, the two square adjuster nuts don't exist

Put the wheels back on and the new (for me) hubcaps.
The engine bay is now complete and finished. I do have one annoying little oil leak coming from the rear of the engine (hardest place to see) so I will trace that later.
Next the interior carpet and reinstall the seats and under dash shelves.


Tripyrenees
Enthusiast
- Messages
- 391
- Location
- Luscan, France
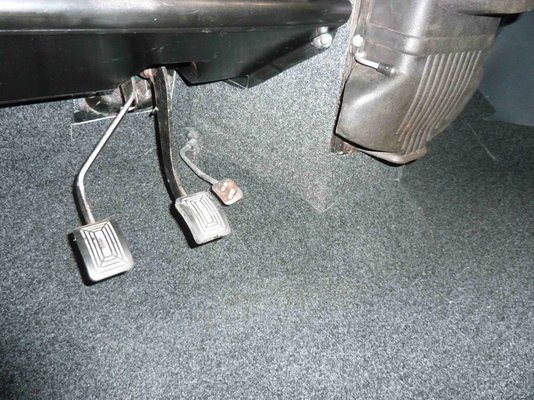
Started fitting the carpet - I decided to do this myself as I want the carpet to cover the complete floor, including the sills. I couldn't find any carpet sets that did this.
Off to Comptoir de la Carrosserie (Toulouse) tomorrow to get some sound proofing underlay and some sticky back felt to do the parts of the head lining around the sunroof and the rear quarter cards. I am covering the existing solid headliner which is tatty and cracked.
6 days so far for the rebuild - wish I had the doors and bonnet to finish it off

Tripyrenees
Enthusiast
- Messages
- 391
- Location
- Luscan, France
Interior is now complete. That was a big job to do the headlining around the sunroof and the carpeting. In all a day and a half of constant effort.
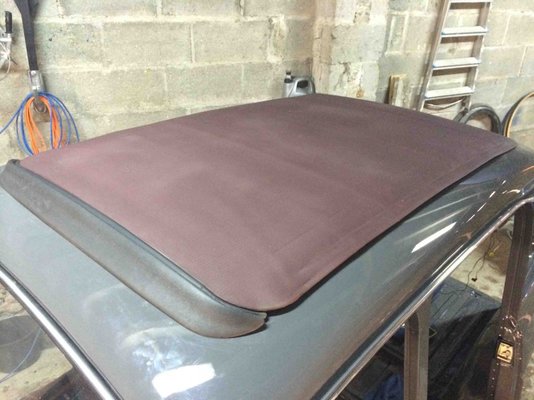
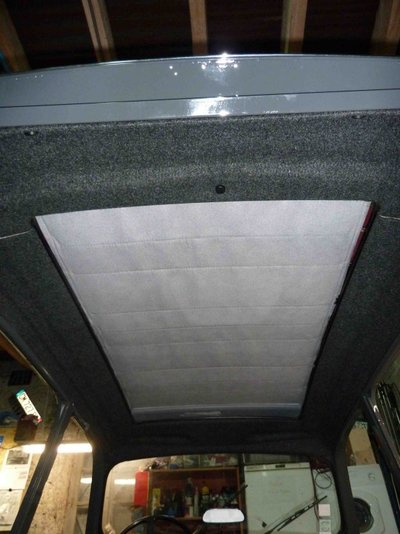
I decided to cover the sunroof surrounds (came with Twingo Sunroof) with the same fabric as I did the headlining (solid type). I think it looks better although it was a chaff trying to get it all clicked in and held in as there was a couple of mm of extra material.
Carpet went in OK including a good helping of underlay, hoping it will be a little quieter now.
As you can see the headliner needed covering - I just wish I had cut the opening bigger around the bolts, it made the job harder when fitting it back on.
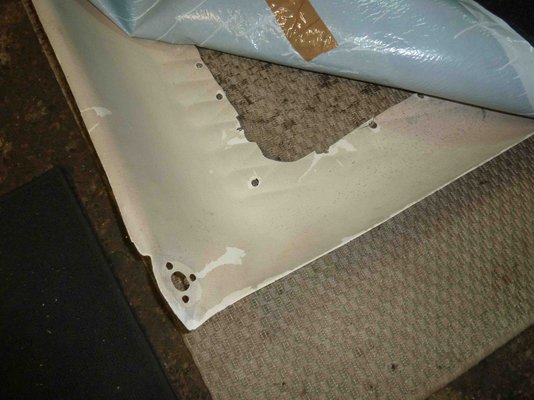
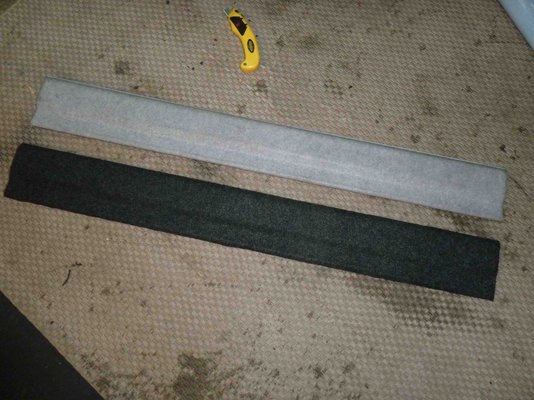
I used a sticky back felt, quite expensive at €27 per metre but it was easy to work with and matched the carpet really well.
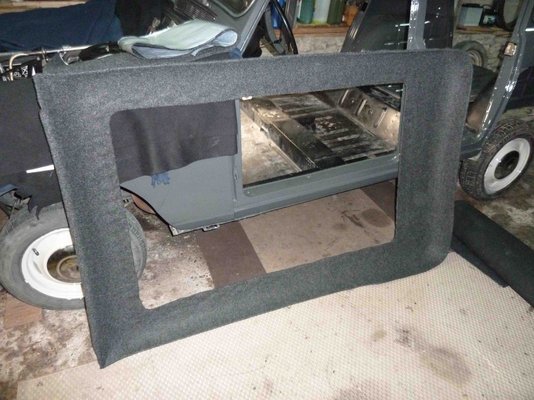
I also covered the surround strips in the same felt.
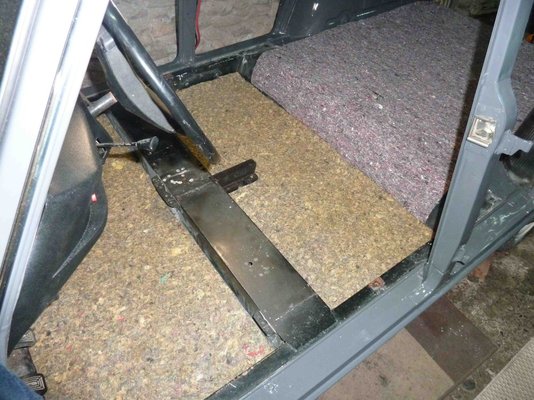
Put in thick underlay in the front and rear and some thinner in the boot.
Rear was easy - picked up a tip to make the holes. I used an old soldering iron and that just melts the perfect hole and stops the carpet strands spinning into the drill or screws.
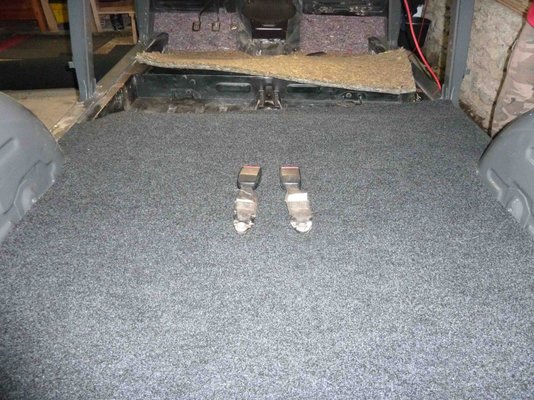
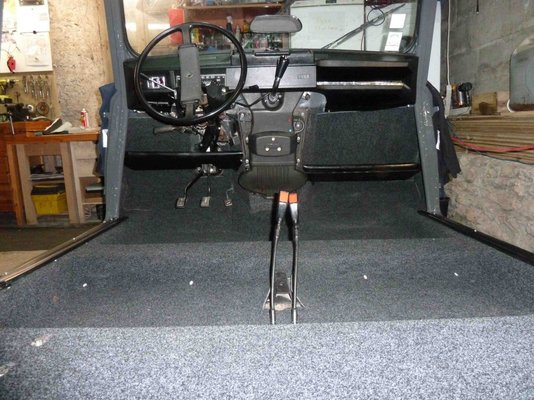
Finished the front - not too bad.
Roof matches - we seem to be very grey but goes well with the black interior and grey paintwork.
Shelves look neater and I have put carpet up on the bulkhead, again for some noise dampening.
I decided to cover the sunroof surrounds (came with Twingo Sunroof) with the same fabric as I did the headlining (solid type). I think it looks better although it was a chaff trying to get it all clicked in and held in as there was a couple of mm of extra material.
Carpet went in OK including a good helping of underlay, hoping it will be a little quieter now.
As you can see the headliner needed covering - I just wish I had cut the opening bigger around the bolts, it made the job harder when fitting it back on.

I used a sticky back felt, quite expensive at €27 per metre but it was easy to work with and matched the carpet really well.

I also covered the surround strips in the same felt.

Put in thick underlay in the front and rear and some thinner in the boot.

Rear was easy - picked up a tip to make the holes. I used an old soldering iron and that just melts the perfect hole and stops the carpet strands spinning into the drill or screws.

Finished the front - not too bad.

Roof matches - we seem to be very grey but goes well with the black interior and grey paintwork.

Shelves look neater and I have put carpet up on the bulkhead, again for some noise dampening.

Tripyrenees
Enthusiast
- Messages
- 391
- Location
- Luscan, France
Off to Auch tomorrow to a Bourse d'Exchange. Hoping to pick up a new interior light and a new horn (mine seemed to not work after I overhauled it  ).
).
Looking for a new set of rear wing rubber matts too - does anyone have some good ones - too tough to try and carpet these.
 ).
).Looking for a new set of rear wing rubber matts too - does anyone have some good ones - too tough to try and carpet these.
Tripyrenees
Enthusiast
- Messages
- 391
- Location
- Luscan, France
I have come to the end of what I can do without the doors, bonnet and rear door. The little things seem to take the time but I think I am there now.
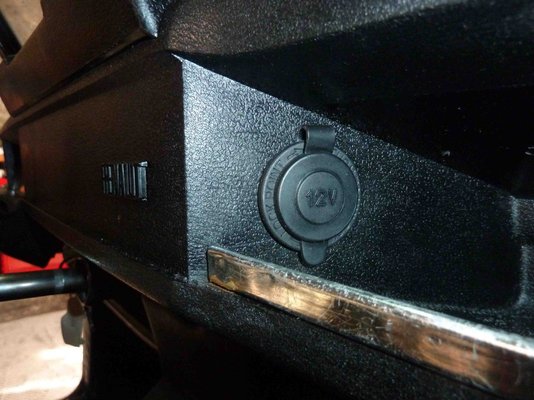
When you come to fit the little things and realise you need to clean and paint them - takes ages
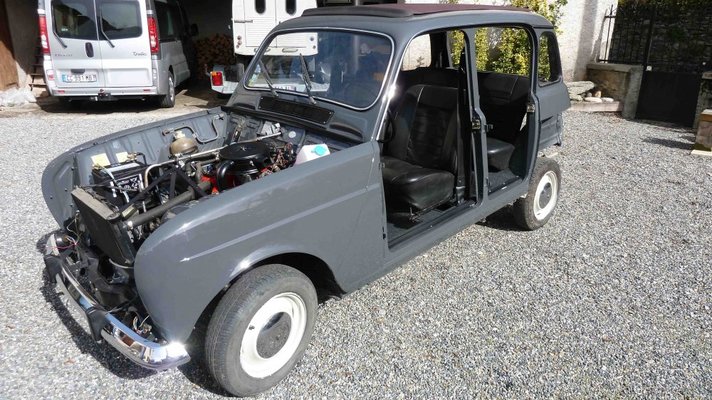
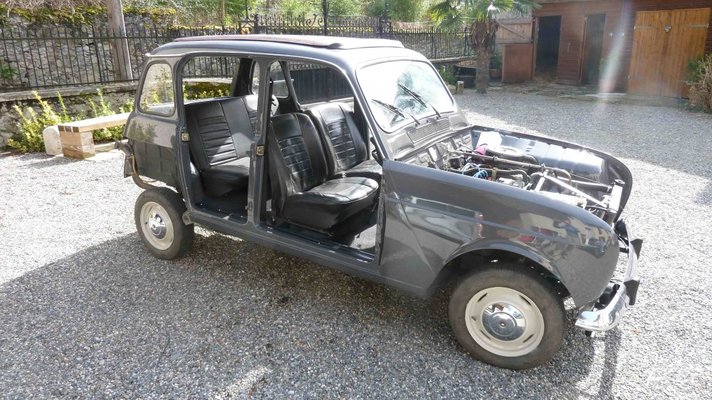
Outside for the first time - under its own power too
- I put in a 12Volt socket inside the glove compartment for my USB charger.
- Put in the seats (made harder now I have the fitted carpet)
- Put in the seat belts (made even harder now I have the fitted carpet)
- Put in the rear parcel shelf.
- Put in the spare wheel and fittings on the rear.
- Adjusted the handbrake (pretty crap, so will change all the shoes)

When you come to fit the little things and realise you need to clean and paint them - takes ages


Outside for the first time - under its own power too


Tripyrenees
Enthusiast
- Messages
- 391
- Location
- Luscan, France
First road test up and down the village. She pulls pretty well and the brakes screeched her to a halt too. Once the engine had warmed a little I did the timing, fuel mixture and idle speed so it is not running as fast as it is in the video.
Cover is now on her and I will await the doors
Cover is now on her and I will await the doors

Tripyrenees
Enthusiast
- Messages
- 391
- Location
- Luscan, France
I am picking up the doors and taking the car back for the rear wings to be installed next week, so by next weekend it should be complete. Just tinkering at the moment;
- Installed new fuse box (sealed with modern fuses)
- Installed NOS interior light
- Installed felt on rear inner wings - all looks complete now
- Installed aluminium strip to rear to cap the carpet in the boot - I think it works o_O
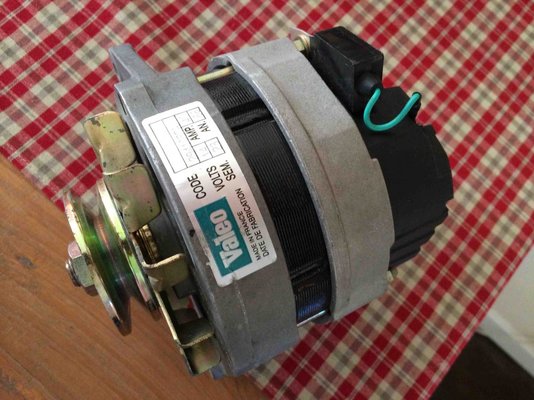
- About to install a new Alternator - I am not 100% convinced mine is working so I found this brand new one on Le Bon Coin for €40 in shipping so I thought I would try it.

Tripyrenees
Enthusiast
- Messages
- 391
- Location
- Luscan, France
Bollocks 
Well, I proved that my original alternator is not working. But the new one does not fit well. I can adjust it with a file and make a bracket and that would be fine BUT it has a D+ connector where my old one has a DF connector. Now I thought they might be the same thing but when I go to turn off the engine it just carries on.
I have to disconnect the D+ connector to stop the engine. So this is either how the new Alternator is wired OR do I also have a dodgy regulator.
Any ideas

Tripyrenees
Enthusiast
- Messages
- 391
- Location
- Luscan, France
I managed to get another alternator today from a local scrapyard. So instead of a shiny new Valeo, I have an original dirty Ducelier. But the Ducelier unit works perfectly although I had to modify the bracket a little. So my regulator works too which is good news.
So I have a working charging circuit to go with my new fuse box.
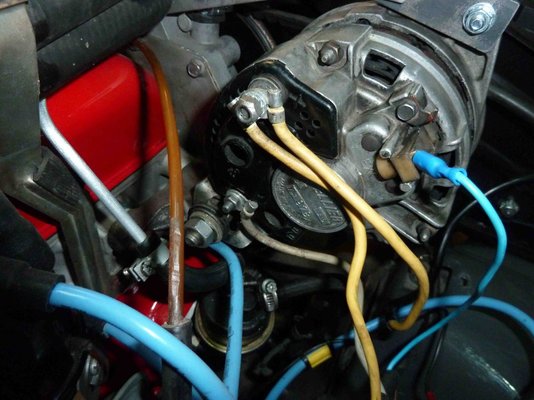
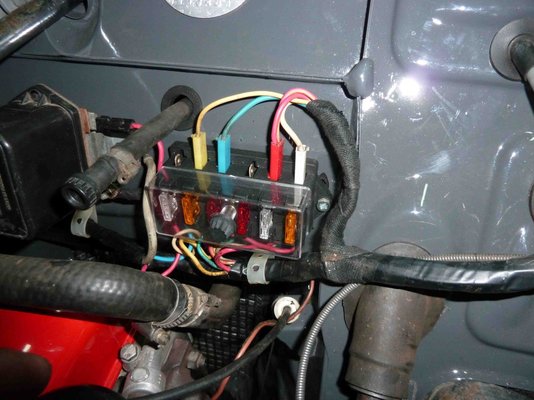
So I have a working charging circuit to go with my new fuse box.


