harbourseal
Renault R4 Lunatic
- Messages
- 1,049
- Location
- Breda The Netherlands
Because of a strange thing happening to one of the driveshafts of my F6 I changed them today.
The other day after I had to avoid an other car that made a sudden brake maneuver My F 6 started to shudder like mad. At a speed of 50kph My teeth rattled out of my mouth
I was close to home so I made the choice to ride it out at 30kph.
In the last turn to my house I heard a soft plop and the shuddering was gone.
That night I ordered new driveshafts from Mister auto.
They arrived last Thursday. Today was the day for putting them in.
For the members that did not tackle this job before here is a small report with pics to illustrate it.
First undo the nut that holds the driveshaft to the wheel assembly and undo al the wheel nuts at the front.
Jack up the front and put the car on blocks and remove the wheels.
Undo the brake assembly leave the brake hose attached to the brake assembly and hang it out of the way. don't let the assembly hang by itself from the brake hose. I have Girling brakes, but most R4 with disk brakes have the Bendix type. so no pictures of undoing these.
After removing the brake assembly you are left with the bare wheel assembly. withe the brake disk still on
Remove all the nuts you can find. drive shaft nut (24mm) top and lower balljoint nut (17mm and 19mm)
and the steering balljoint nut (17mm)
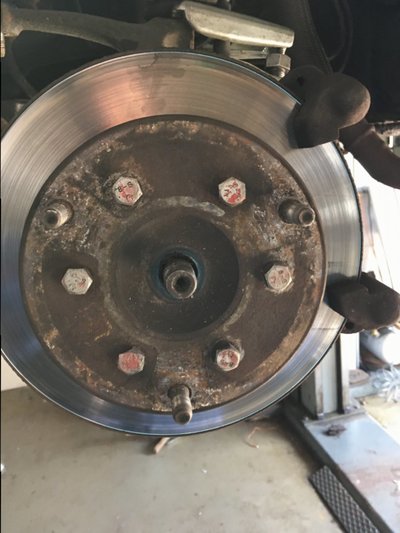
Then the tricky bit undoing all the ball joints.
I use a Balljoint splitter.
You can do it with a hammer if you are brave.
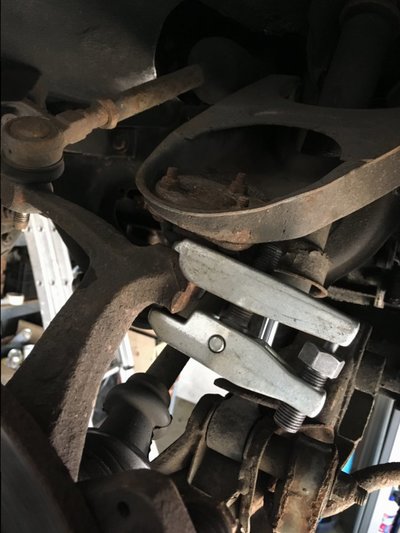
If you undid all the balljoints you need to be care full that the whole thing isn't coming down with a crash.
Today I had a friend helping me. He held the driveshaft in place at the gearbox while I undid the wheel assembly from the driveshaft and the lower wishbone.
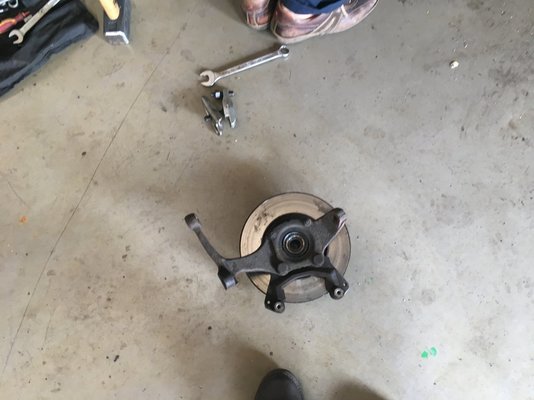
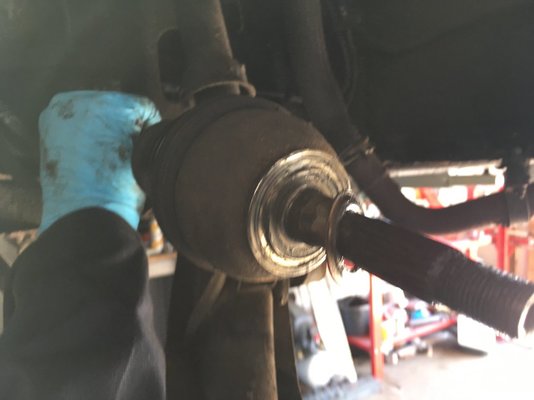
After that we worked in unison. I had made a wad of a piece of cloth and put that in a plastic bag.
The wad needs to be about 3cm in diameter. It is to plug the hole in the gearbox once you remove the driveshaft. So the oil doesn't end up all over the workshop floor.
If you look at the picture above you can see a bronze washer. Be careful not to lose it.
It either falls of and ends up underneath something or it stays glued to the head of the drive shaft invisible underneath a layer of grease.
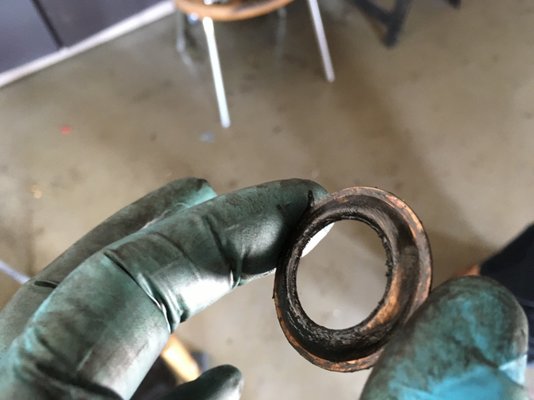
The broze washer prevents the driveshaft from rattling and wear if you are going round a corner I am told. So it needs to be there.
After all this, it is working your way back in the reverse order to put in the new shafts.
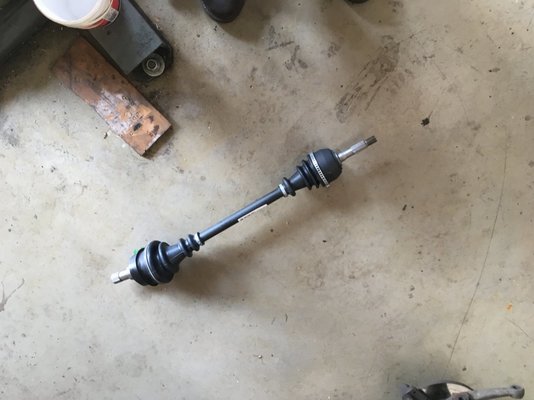
In all it is about an hour of work that is easily done by yourself.
The other day after I had to avoid an other car that made a sudden brake maneuver My F 6 started to shudder like mad. At a speed of 50kph My teeth rattled out of my mouth

I was close to home so I made the choice to ride it out at 30kph.
In the last turn to my house I heard a soft plop and the shuddering was gone.
That night I ordered new driveshafts from Mister auto.
They arrived last Thursday. Today was the day for putting them in.
For the members that did not tackle this job before here is a small report with pics to illustrate it.
First undo the nut that holds the driveshaft to the wheel assembly and undo al the wheel nuts at the front.
Jack up the front and put the car on blocks and remove the wheels.
Undo the brake assembly leave the brake hose attached to the brake assembly and hang it out of the way. don't let the assembly hang by itself from the brake hose. I have Girling brakes, but most R4 with disk brakes have the Bendix type. so no pictures of undoing these.
After removing the brake assembly you are left with the bare wheel assembly. withe the brake disk still on
Remove all the nuts you can find. drive shaft nut (24mm) top and lower balljoint nut (17mm and 19mm)
and the steering balljoint nut (17mm)

Then the tricky bit undoing all the ball joints.
I use a Balljoint splitter.
You can do it with a hammer if you are brave.

If you undid all the balljoints you need to be care full that the whole thing isn't coming down with a crash.
Today I had a friend helping me. He held the driveshaft in place at the gearbox while I undid the wheel assembly from the driveshaft and the lower wishbone.


After that we worked in unison. I had made a wad of a piece of cloth and put that in a plastic bag.
The wad needs to be about 3cm in diameter. It is to plug the hole in the gearbox once you remove the driveshaft. So the oil doesn't end up all over the workshop floor.
If you look at the picture above you can see a bronze washer. Be careful not to lose it.
It either falls of and ends up underneath something or it stays glued to the head of the drive shaft invisible underneath a layer of grease.

The broze washer prevents the driveshaft from rattling and wear if you are going round a corner I am told. So it needs to be there.
After all this, it is working your way back in the reverse order to put in the new shafts.

In all it is about an hour of work that is easily done by yourself.


