Clementine's Garage
Clementine the Cat
 
Image of flower
Yellow R4
 
Réparateur d'automobiles

The mongrel R4 renovation ...

Bertl

Goißatreiber
Messages
173
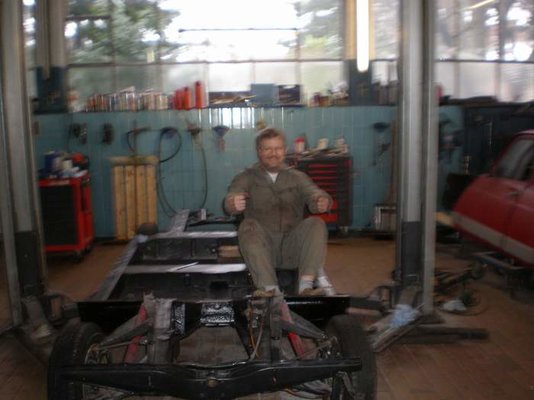
... mongrel but very much loved!

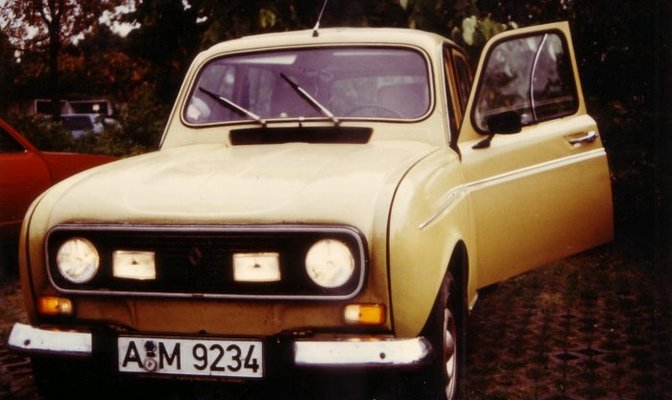
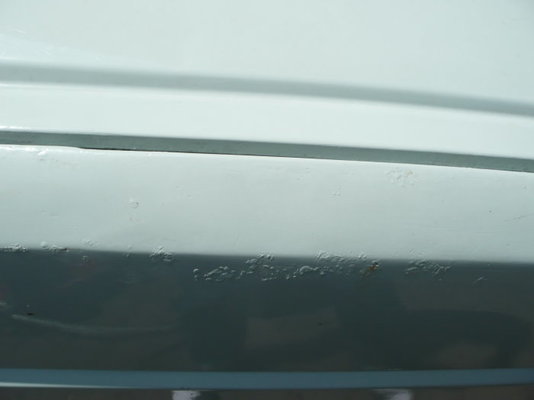
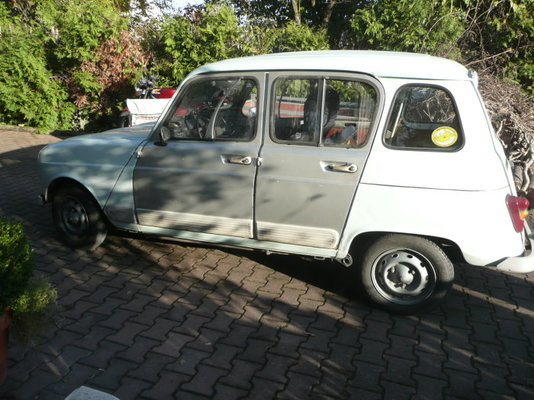
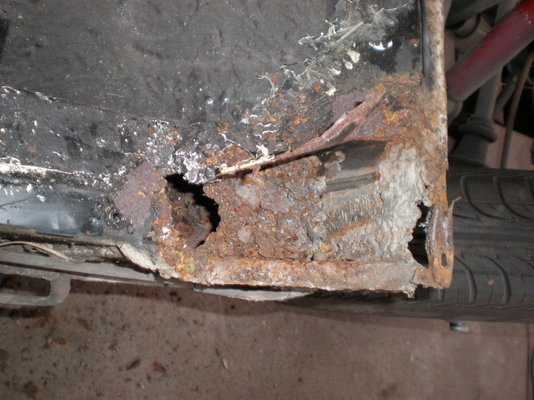
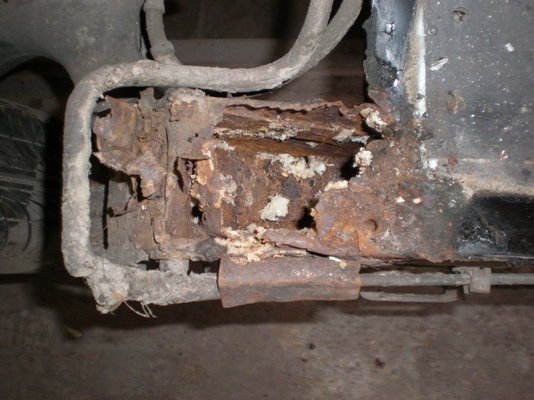
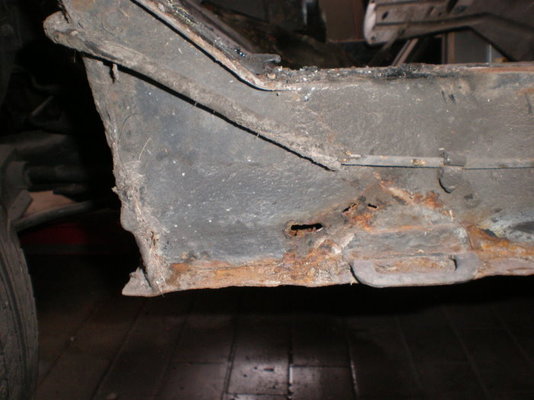
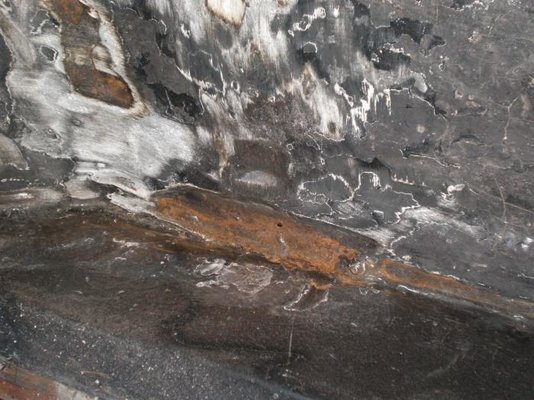
The first car I owned was a R4, a beige '81 TL that silently crumbled away during the two years I had it ... who knows, maybe it could have been saved ...

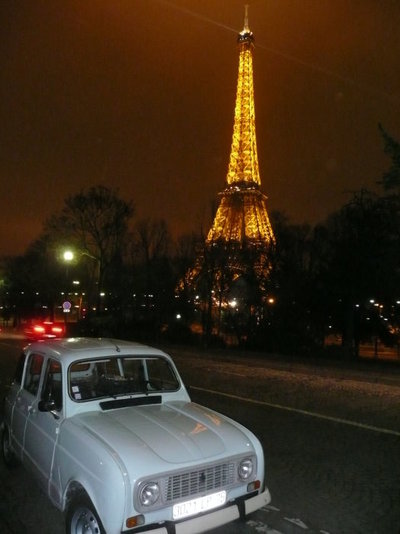
Took me to Taize/France, my (then girlfriend, now) wife and me to Assisi/Italy ... lovely memories!

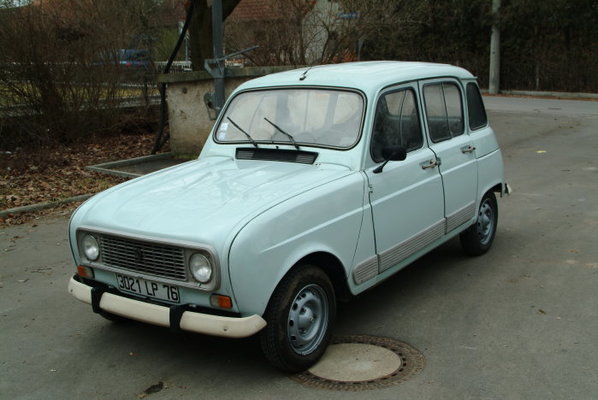
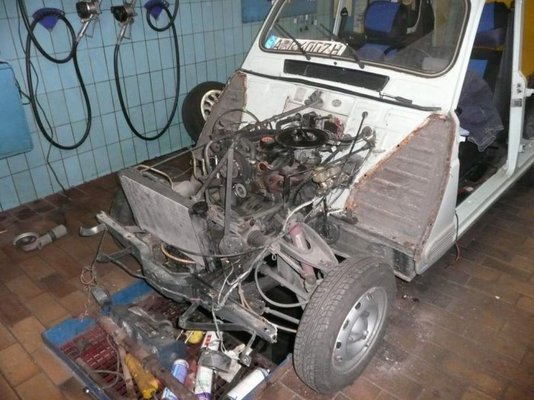
I had another two R4's during the 90's but only for a short time - one was sold with carb trouble and I wrecked the other one in an accident. :mad:

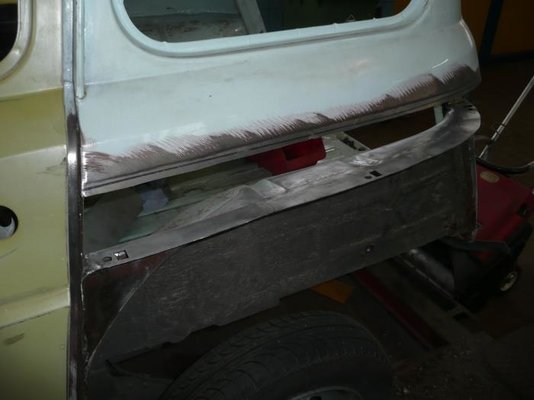
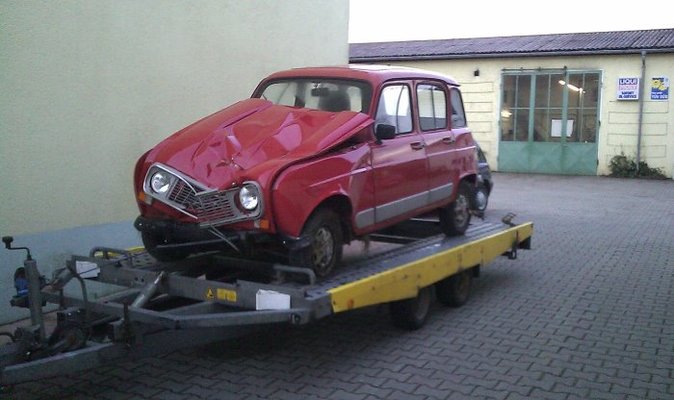
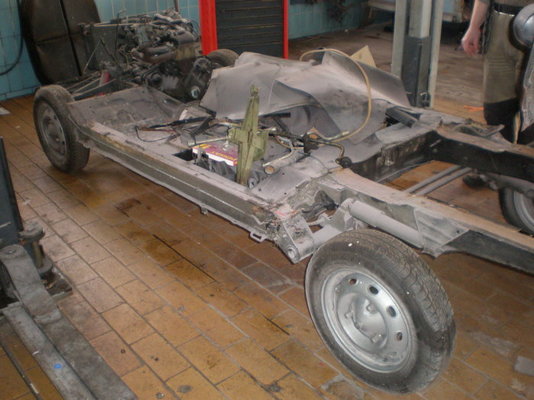
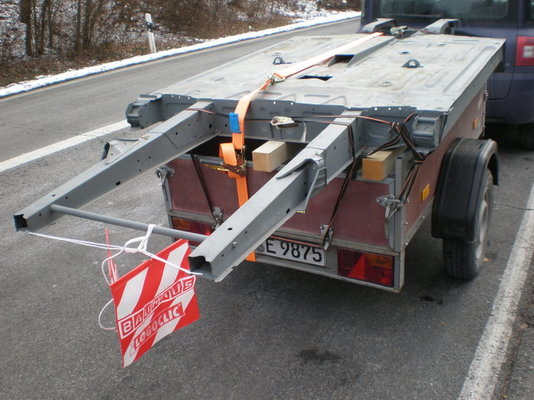
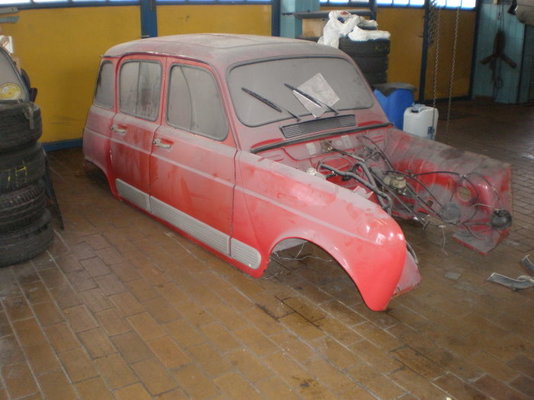
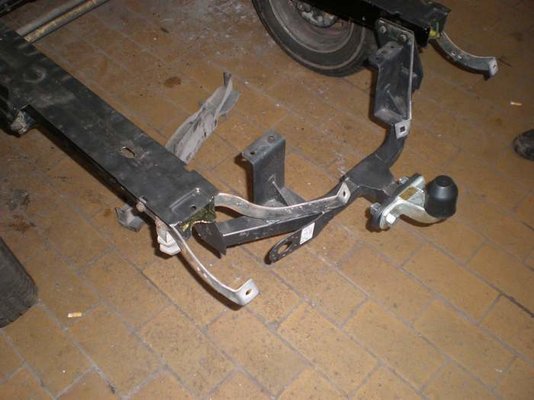
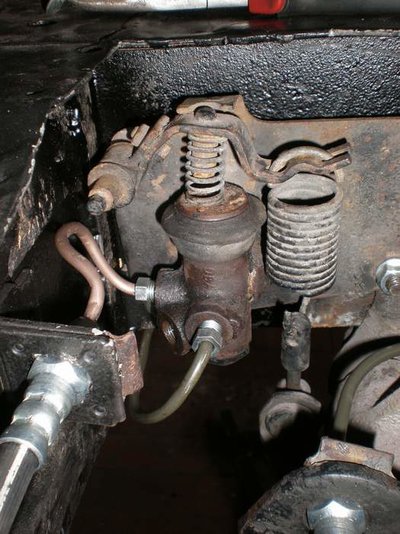
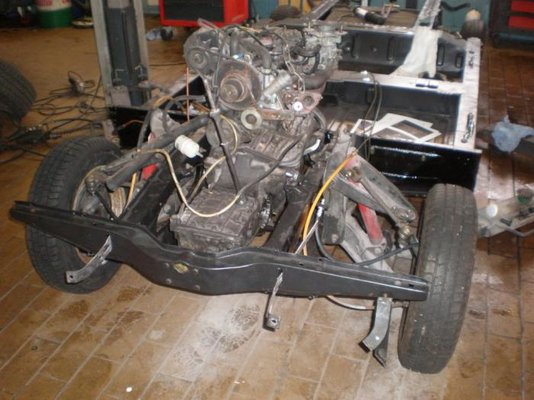
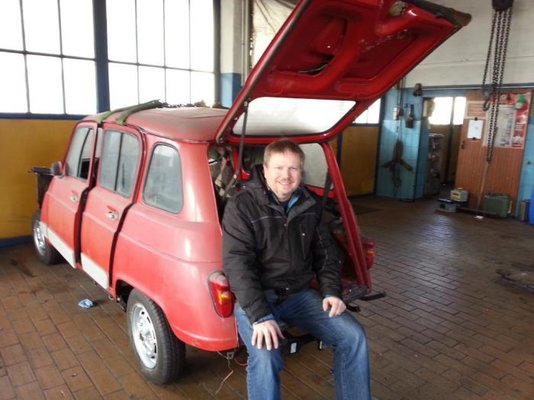
So when for my 40th birthday the chance came up to own another R4, I couldn't let it pass.
 
  • R4 TL '81.jpg
    R4 TL '81.jpg
    54.9 KB · Views: 523
After some searching on leboncoin, I found the car I wanted - a GTL to have the bigger motor, but with the early style dashboard I missed from my first car.
I found one in (seemingly) good condition in Rouen/France, negotiated short term insurance with a French company and took the train to Rouen at the end of January 2009.

The seller picked me up at the station and gave me a short sightseeing tour of the town before we made the deal. I got the car and a whole load of spares.

The car had been used for almost 20 years as a family vehicle, and had been some sort of "rolling renovation", that much I understood.

I declined the offer to stay the night and started immediately back home with the intention to stay the night in Paris.

A wrong turn initiated by a sluggish satnav turned out to yield a grand view.

I made it home safely, got the car through German MOT without much trouble and registered it as a historic vehicle with every intention to make repairs only as necessary and just have fun driving.
 
  • 03 - Paris 2.jpg
    03 - Paris 2.jpg
    66.3 KB · Views: 517
  • 15 - Gesamtansicht vorne links.jpg
    15 - Gesamtansicht vorne links.jpg
    70.7 KB · Views: 516
In the autumn of 2009 it became apparent, that not all was well, though.

A few weeks in German climate had been enough to send bubbles through a seemingly fine coat of colour ... which when sanded away revealed corrosion typical for a R4 - oh well!

I began to hunt for spares (doors, bonnet, wings ...) to have them sandblasted and painted.

I should maybe add that I'm fine with tinkering, but by no means capable of restoring the car by myself.

Incidentally, the wing shown in one of these pictures was like wet cardboard when it was finally removed. :mad:
 
  • P1010783.JPG
    P1010783.JPG
    77.2 KB · Views: 514
  • P1010784.JPG
    P1010784.JPG
    32.6 KB · Views: 508
  • P1020104.JPG
    P1020104.JPG
    115.2 KB · Views: 517
Friends of mine are the owners of a Garage in Augsburg, and in December 2009 they agreed to do the necessary welding and painting to get the car back on the road in time for spring 2010.

So with much enthusiasm I ripped the car apart in their garage ... it became clear, that in order to have a car that was both technically sound and aesthetically pleasing, a full renovation including a full respray was in order. :eek: I bought even more spares, including NOS doors, inner wings, some mechanical bits and pieces and more.

Fortunately (for them) and unfortunately (for me) their business is doing rather well, so they never really got round to starting work on my car.

The car sat in that sorry state in the garage until January 2011.
 
  • 4L.jpg
    4L.jpg
    91.1 KB · Views: 511
  • P1020238.jpg
    P1020238.jpg
    32.3 KB · Views: 507
Through all that time I kept going through a series of "temporary" cars, but I wanted the R4 back on the road - fast.

When the chance came up to buy a later R4 that had been in an accident (an elderly lady had slipped on icy road and had drifted into a ditch), I got the car and thought I only had to swap the body shells, have some minor welding performed and would be good again.

Unfortunately, swapping the shells revealed more dilapidation :mad: Again, nothing unusual, certainly fixable, but not with my abilities.

That last picture is no modern painting, but the evidence of a mat of fibre glass that was spread in the front footwell and painted over with - now crinkling - paint.

Again the project ground to a halt, with me waiting for the guys to start on the welding, but I think they were intimidated by the task - plus, their business was thriving.
 
  • i00047.jpg
    i00047.jpg
    102.6 KB · Views: 523
  • i00049.jpg
    i00049.jpg
    95.5 KB · Views: 519
  • i00052.jpg
    i00052.jpg
    77.5 KB · Views: 515
  • i00068.jpg
    i00068.jpg
    70.1 KB · Views: 516
  • IMAG0038.jpg
    IMAG0038.jpg
    180.9 KB · Views: 522
Again a phase of hibernation followed ...

... until in December 2012 the chance came up to buy a chassis that had already been welded and then zinc coated.

I weighed the money I would have to spend for the restauration of my old chassis against the cost of the "new" one, and the zinc coated one came out favourably.

We started work last Monday (Jan 7th) to paint the chassis and then seal it. The periods that are needed for the paint to dry give us plenty of time to actually use some of the spare parts I had bought in advance (don't ask!) - clutch, water pump, suspension rubber parts, gaskets ...

The red body shell needs only minor repairs to be servicable, I got a red bonnet and left wing to replace the ones damaged in the accident, so my mongrel R4 should be on the road really soon now ... :rolleyes:

It's about time, too, because my current "temporary" car needs major repairs, and I'm rather spending the money on the R4 than on the one that needs to be sold anyway.
 
  • PC170007.JPG
    PC170007.JPG
    95.4 KB · Views: 515
  • PC070104.JPG
    PC070104.JPG
    109.4 KB · Views: 513
  • PC170008.JPG
    PC170008.JPG
    81.1 KB · Views: 509
  • PC170023.JPG
    PC170023.JPG
    112.4 KB · Views: 500
I took the wheels from the red R4 because I like the rims, and because the still have a good, current set of winter tyres on them that are almost new.

I had a nice game of cards with my car's wheels :D

Oddly, though, there were three wheels with 145x80/13 tyres, but the fourth one was 155x80/13 ... :shock: I now ordered the same tyre and we'll replace it and balance the set tomorrow.
 
  • P1040031.JPG
    P1040031.JPG
    81.7 KB · Views: 497
I've seen some lovely renovations here in the forum, and my mongrel R4 (three donors) will certainly be no match for them, but for me it's a lot of fun to work on the car under the supervision of a mechanic, I've certainly learned a lot already.

The plan is to get the mongrel on the road and then start saving money to have the original bodyshell restored properly as my original goal was to have the old style doors and dash. I'll let the original chassis go, as I'm running out of storage space.
 
I like the colour of your early GTL.

Your ownership experience sounds like the bittersweet nightmare many of us have had.
 
@RichardIRL: It's an odd colour that takes a lot of brown in the mix to achieve the faded baby blue look, but I like it a lot. A very similar colour has recently appeared on the Fiat 500.

In today's picture, morning mists are rising from the cavity sealant that is liberally applied through every orifice available :rolleyes:

Tomorrow afternoon we're having a go at patching the rotten LHD passenger side back door corner, and after that we're waiting for an opportunity to put the old and new chassis side by side on the two car lifts you can see in the background to swap over the bits one by one and replace as necessary.
 
  • P1090001.JPG
    P1090001.JPG
    32.6 KB · Views: 431
I've seen some lovely renovations here in the forum, and my mongrel R4 (three donors) will certainly be no match for them, but for me it's a lot of fun to work on the car under the supervision of a mechanic, I've certainly learned a lot already.

Salute to this statement! There are manny different restorations, but the best and most valuable are those in which YOU continually enjoy and learn. The rest is about the budget ...available
 
We've put the body on planks to be able to lift it properly and gain access for welding. As expected, it's not only the rear corner on the passenger side that needs work, but a small patch is also required on the driver side back door corner and the passenger side rear wheel arch ... oh well!

Just a thought: A R4 body would make a nice carport :rolleyes:

Robert
 
  • P1100008.JPG
    P1100008.JPG
    38.5 KB · Views: 404
Nice and original carport, indeed :p It's a real pleasure to work when the access is as easy as that...
 
Progress at last!

Work on the car didn't continue for four weeks because my mechanic first caught the 'flu and then something along the lines of the Noro virus, we tried to work last Saturday, but had to stop around lunchtime because he was feeling so poorly. :(

Anyway, we had managed to get the rear axle out last Saturday, and halfway in. I was pleasantly surprised today that he managed to (almost) finish the rear part of the car, including the brake lines during the week.

I was chuffed to bits when we managed to swap over both sides of the front suspension today. It caused us less hassle than the rear axle.

As I hope it's going to be a straight swap we kept the torsion bars in their mountings, so there should be no adjustments of ride height necessary.
 
  • Hinterachse.jpg
    Hinterachse.jpg
    39.9 KB · Views: 266
  • Vorderachse.jpg
    Vorderachse.jpg
    35.5 KB · Views: 262
The old chassis is looking less and less like a car as work continues, but the new one sat on its wheels for the first time.

As you can see from the blur in the last picture, it's going to be a pretty fast car :D
 
  • Chassis alt.jpg
    Chassis alt.jpg
    44.7 KB · Views: 262
  • Chassis neu.jpg
    Chassis neu.jpg
    44.2 KB · Views: 263
  • Erste Probefahrt.jpg
    Erste Probefahrt.jpg
    35.1 KB · Views: 260
We're left with quite a few bits and bobs, and it will be a lot of work combining all these into a complete car.

Today's speedy work gave me the chance to fit the tow bar that I had ordered via Ebay France after the MOT man had given his OK - it's carrying proper European control number, and tow bars are original equipment, so (he said) it'll be fine.

http://www.ebay.fr/itm/ATTELAGE-REN...3941?pt=JG_FR_Auto_Pièces&hash=item2c51ec2e95

I'm not sure we put the bumper brackets on correctly, but this can be easily fixed once we try to fit the bumpers.

Does by any chance anyone know if this Franzose item fits my brake distributor? I fear it'll be leaking when we fill the brake lines:

http://www.franzose.de/de/Renault/R4/Hauptbremszylinder/ANR84240/

In case it doesn't, is this the correct replacement part:

http://www.franzose.de/de/Renault/R4/Hauptbremszylinder/ANR84096/

As the car will be mix and match, we're carrying over the early GTL's braking equipment (drums front and rear).

Robert
 
  • Anhängerkupplung.jpg
    Anhängerkupplung.jpg
    37.9 KB · Views: 261
  • Bremskraftregler.jpg
    Bremskraftregler.jpg
    59.5 KB · Views: 262
Robert, the bumper brackets should be positioned the opposite way round-straight (small) one on the inner side of the crossmember. If I remember correctly the folded part with the hole should be towards the inside for the small ones, and outside for the large ones.
The pressure limiting valve looks OK (and so does the repair kit, too) for your car, when I saw "68 onwards" on the Franzose site, I was expecting to see the early fixed type of valve, indeed.
 
Building up momentum

More work yesterday and today, and it's fun to see the heap of spares and parts disappear slowly as they're being integrated.

Speaking of spares, I bought the repair kit for the brake compensator as per my question in my last post, and while I was able to fit the outer rubber cap, the little grommet that goes inside turned out to be too small in diameter, so the original part was retained as the rubber was still OK.

The ... (dare I say it) ... CAR now has a fuel tank and a brand new fuel line, and today we fitted the motor and steering.

This forum once again proved to be invaluable, as petak had resurrected an old thread about the orientation of the screws holding the rear shocks ... we had fitted them the wrong way round, but this was easily remedied today.

A perfect opportunity to say thanks to Malcolm for the forum and to everybody contributing in this thread and elsewhere.

Robert
 
  • Tank.jpg
    Tank.jpg
    39.5 KB · Views: 206
  • Motor.jpg
    Motor.jpg
    58.6 KB · Views: 205
Another weekend has passed, and although we had made good progress, the disappointment on Saturday evening was hard to bear - I was convinced we were going to be able to finally fit the body to the chassis ... only to find that I hadn't bought enough body sealant tape. Grrrrr!
With the evening light playing on the still seperated bits (lyrical, innit?) we left ... I was lucky to get the tape first thing Monday morning, and even before starting my regular work, we were able to mate body and chassis with suspiciously little resistance.
 
  • Antriebswelle.jpg
    Antriebswelle.jpg
    60.8 KB · Views: 167
  • Letzte Schweissarbeiten.jpg
    Letzte Schweissarbeiten.jpg
    45.8 KB · Views: 164
  • Dichtband.jpg
    Dichtband.jpg
    48.5 KB · Views: 165
  • Abendlicht.jpg
    Abendlicht.jpg
    56.9 KB · Views: 164
  • Beieinander.jpg
    Beieinander.jpg
    51.2 KB · Views: 163
Back
Top