Clementine's Garage
Clementine the Cat
 
Image of flower
Yellow R4
 
Réparateur d'automobiles

1975 Export restoration

angel

Enthusiast
Messages
2,439
Location
Athens, Greece
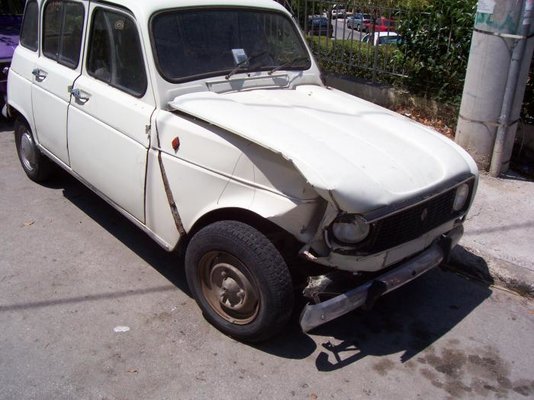
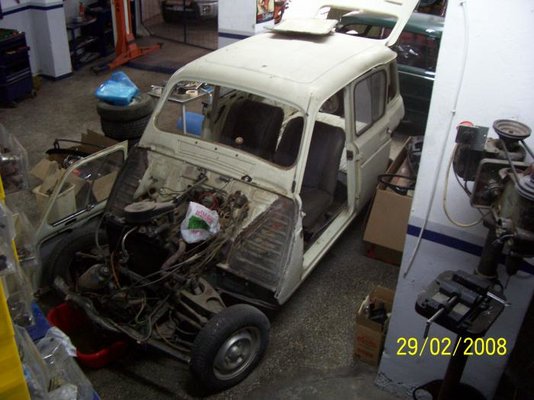
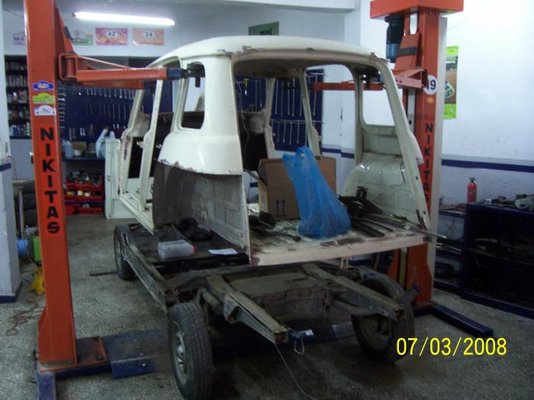
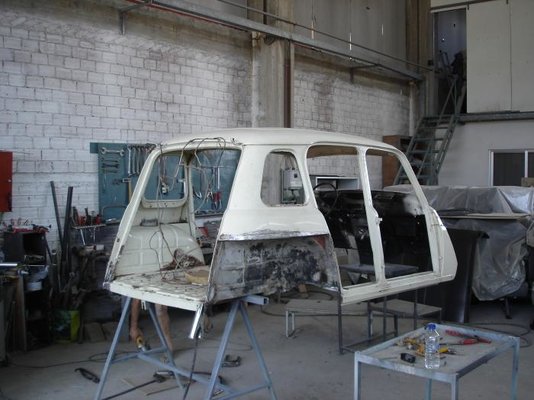
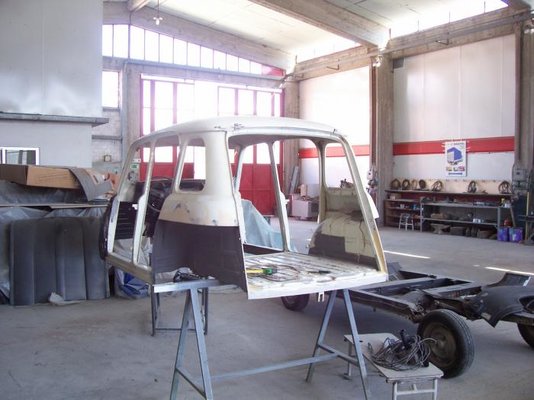
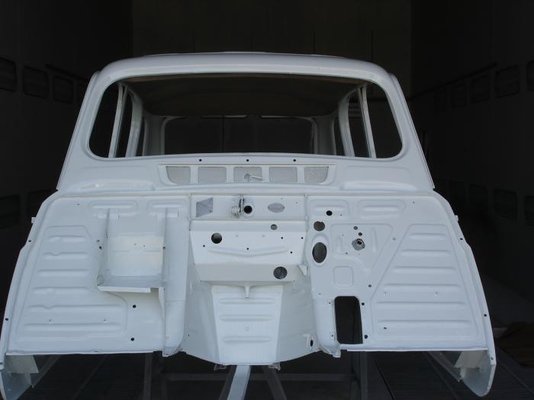
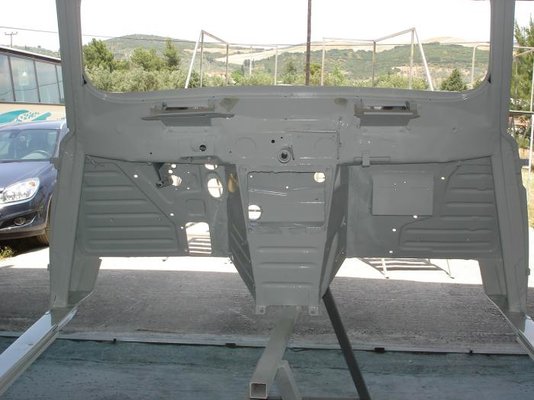
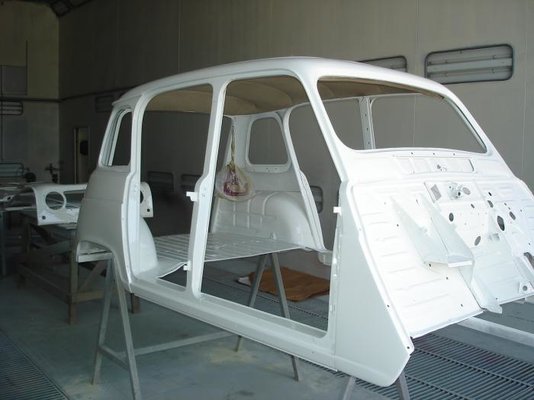
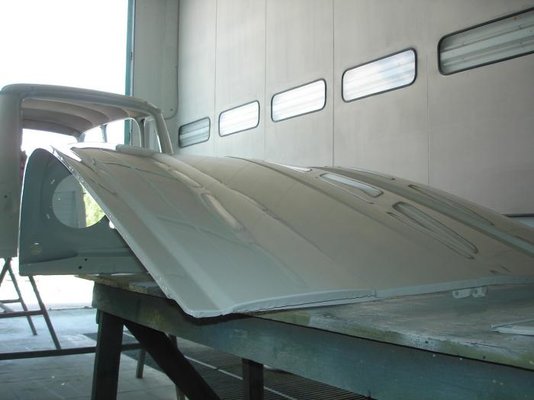
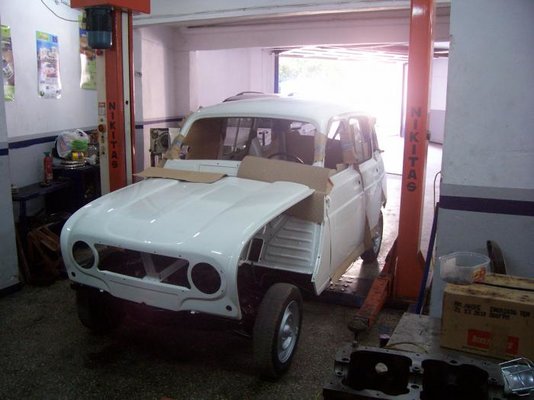
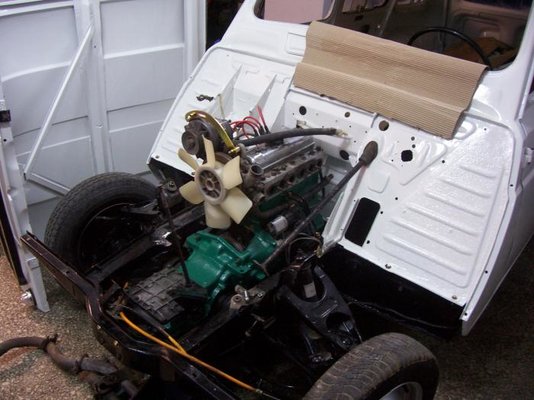
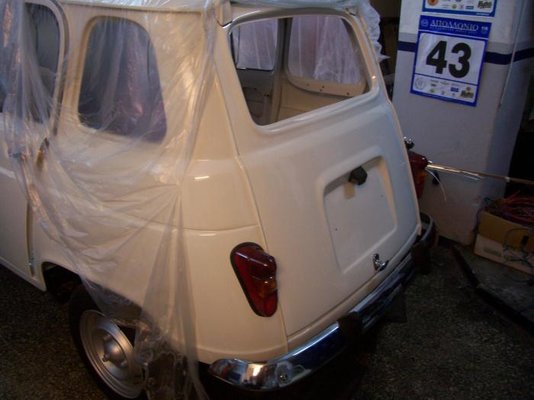
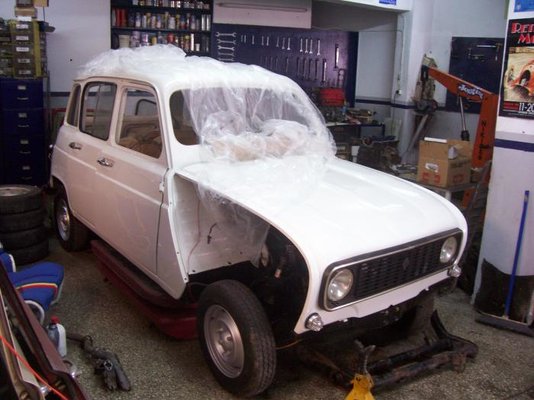
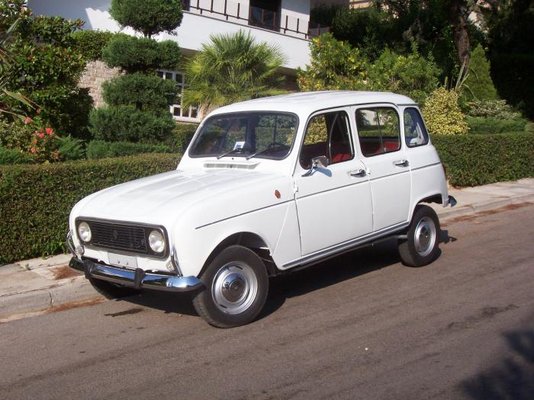
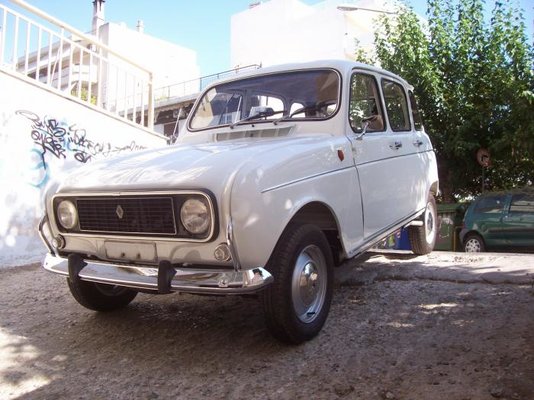
It's finally ready for the road...here is the story of the body-off restoration of my faithful 1975 R1123 Export.

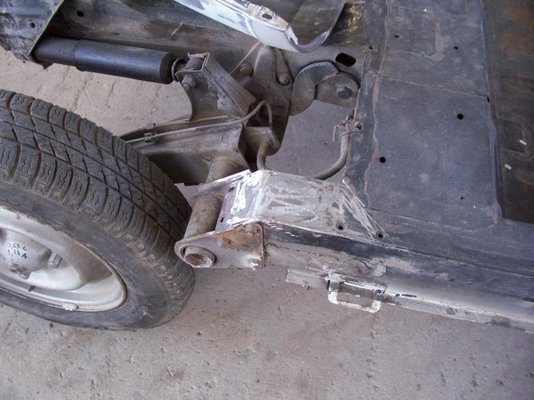
All started (well, not so nicely) in the summer of 2007, just as it had completed 100.000 kilometers in my own hands...

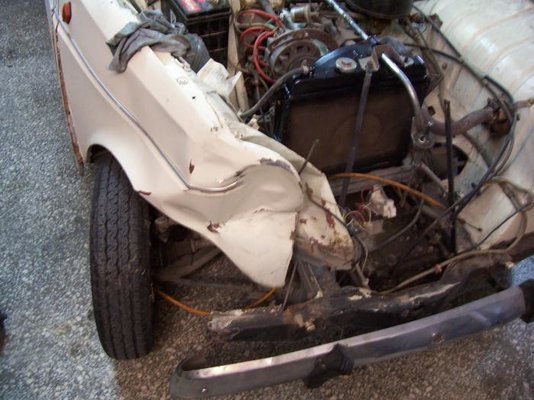
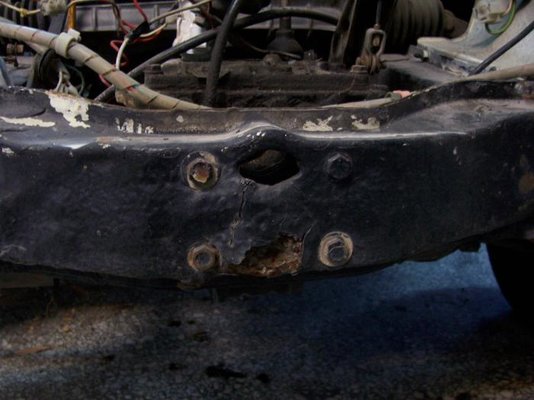
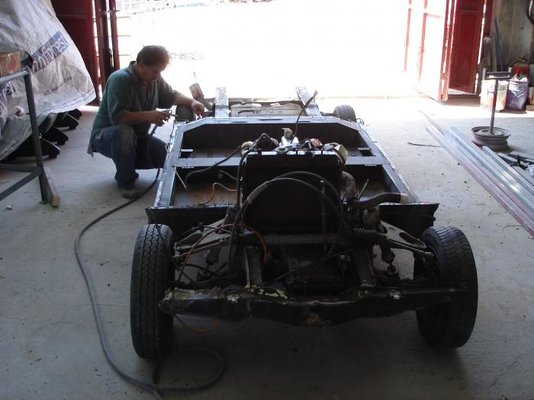
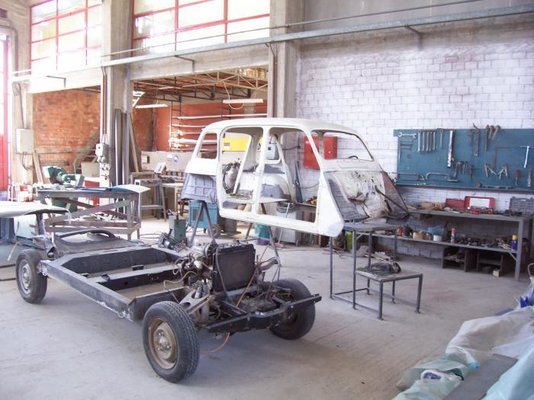
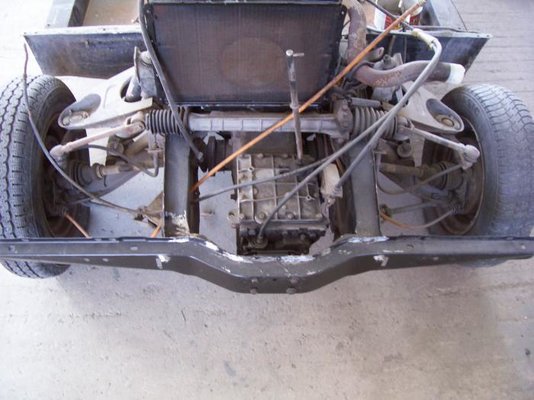
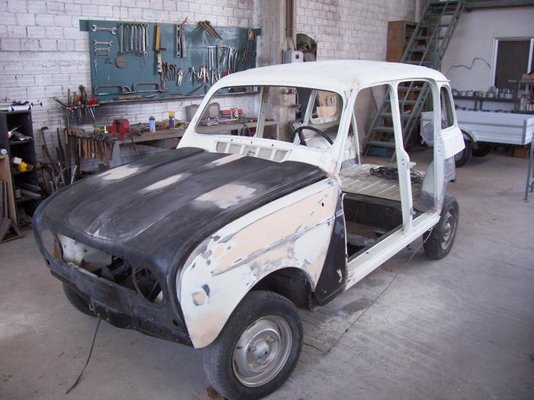
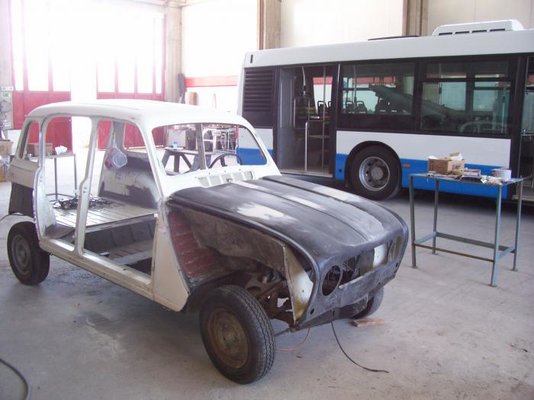
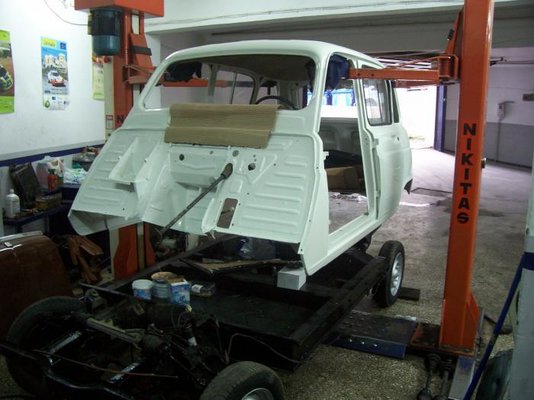
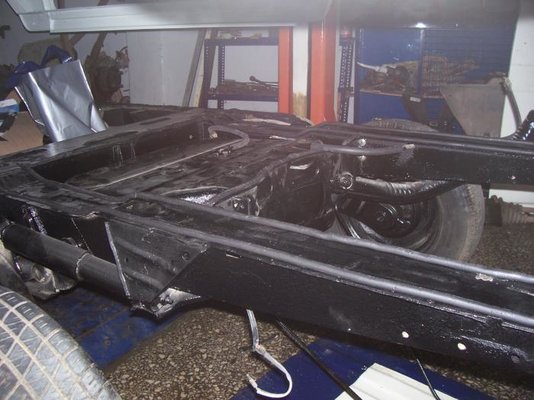
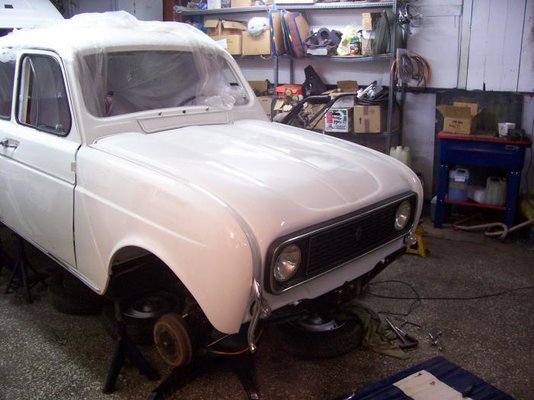
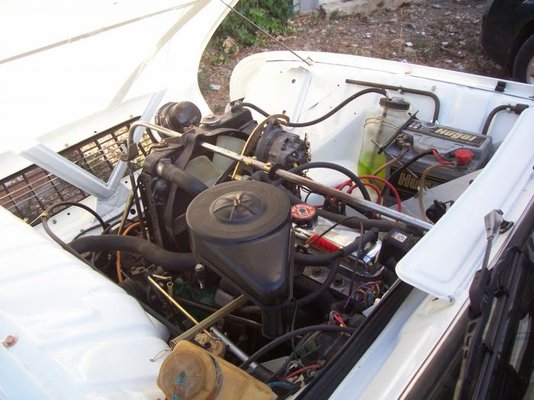
The damage was not that severe, I took measurements on the front part of the chassis and I found it to be spot-on. What's more, I had replaced the front floorpan a year earlier, so the chassis was in excellent condition (except for the crossmember, which was rusted on the center section).

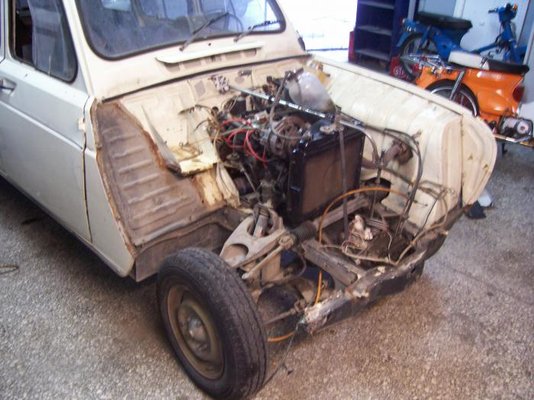
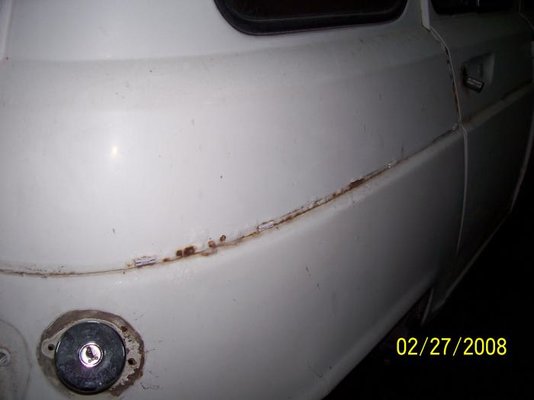
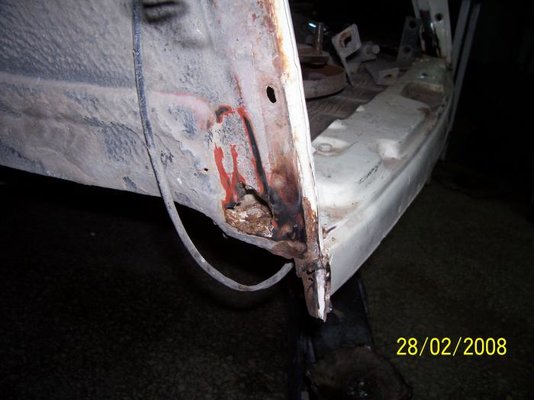
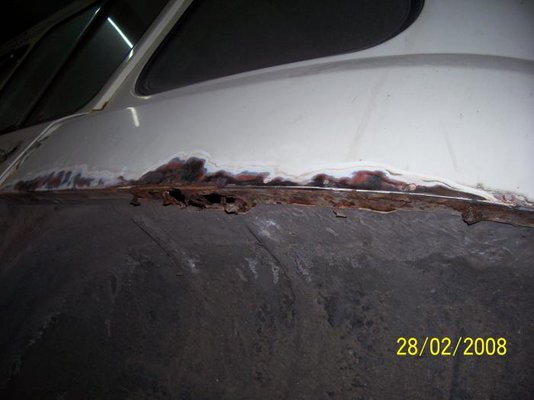
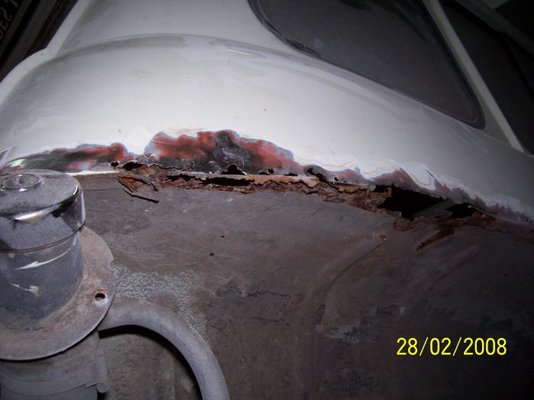
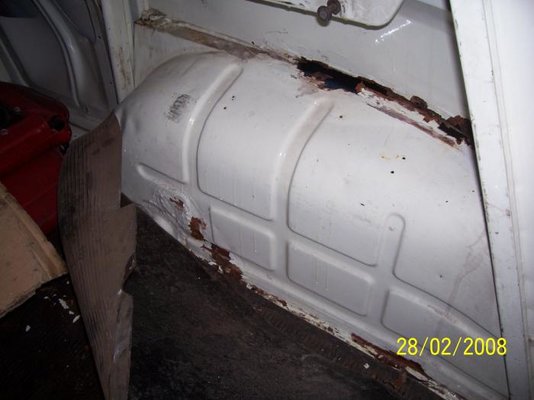
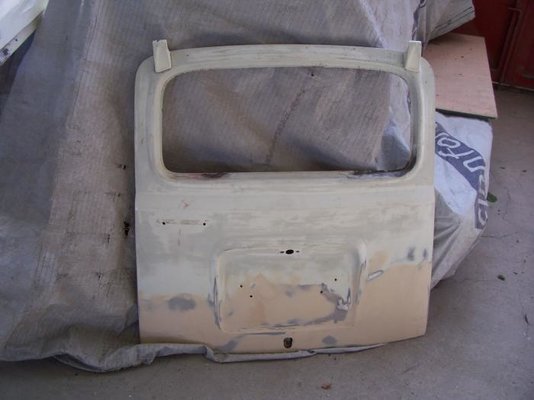
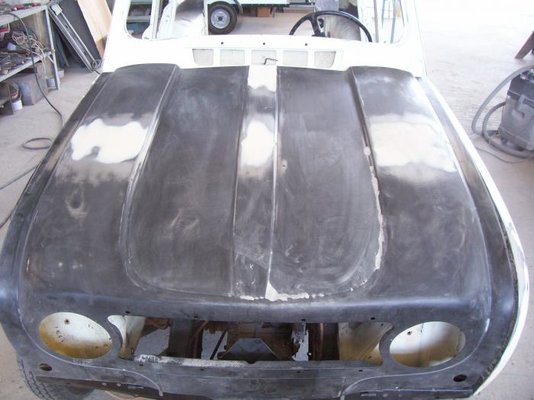
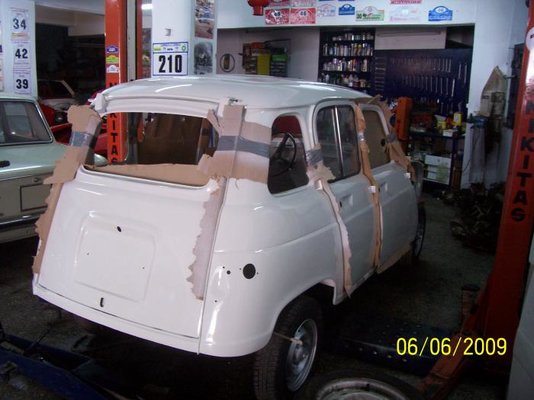
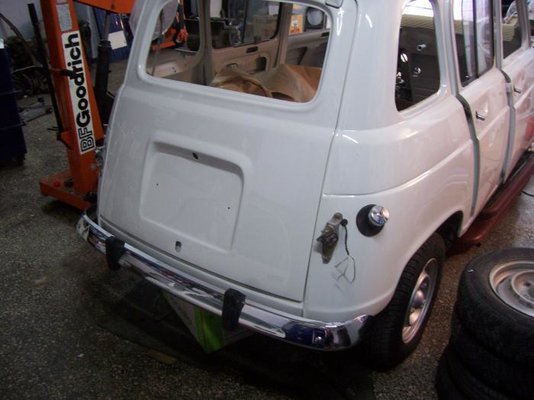
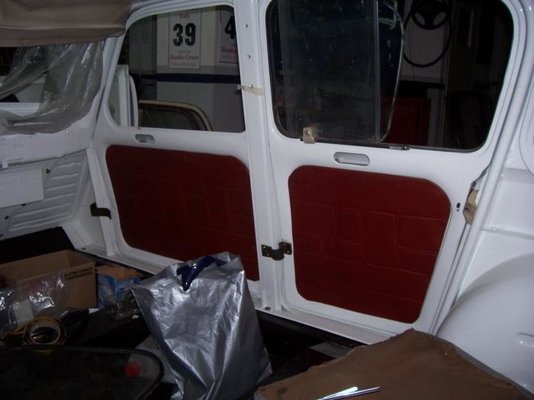
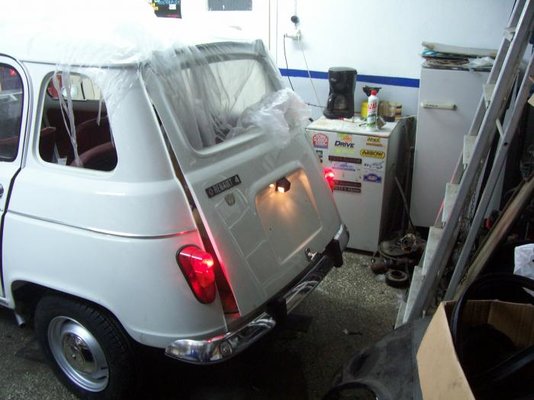
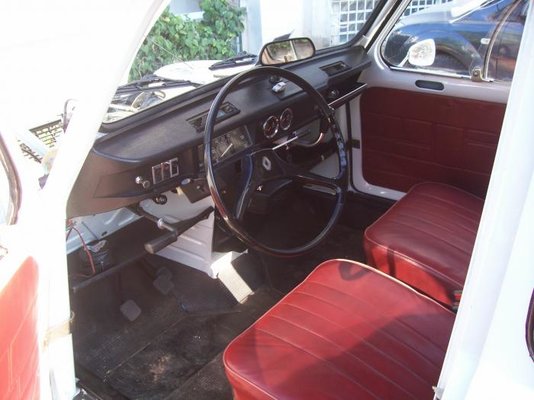
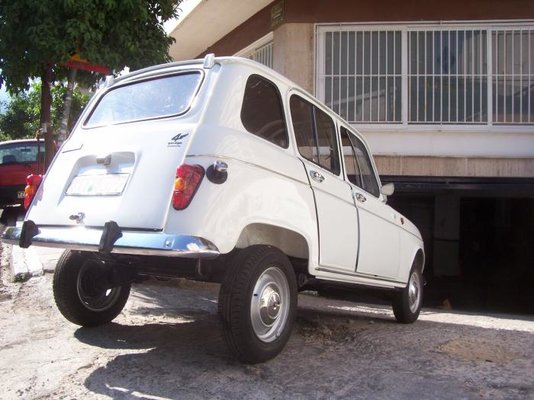
The body, however was another story as it had started rusting on the usual places (rear wing mating faces, rear wheel arches, rear door and tailgate corners...), kept on leaking water no matter what I did, and had also signs of poor minor repairs, such as cracked filler, mis-matched colours etc.

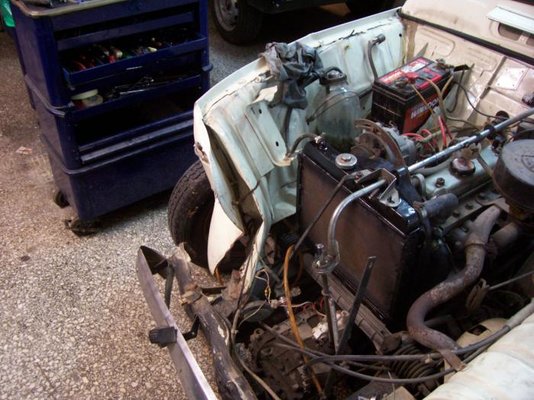
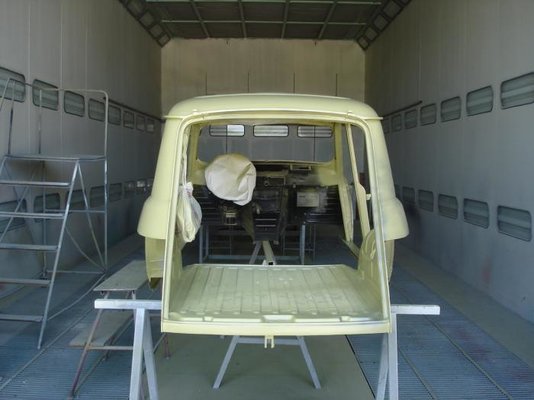
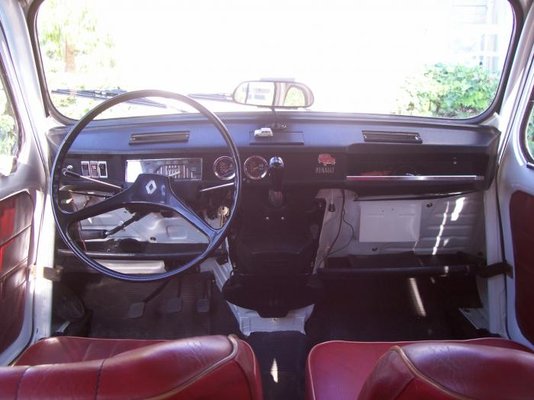
So, as I had just found a nice place for my workshop, I decided to restore it in detail, in time-is-no-object mode.
 
  • 100_1310a.jpg
    100_1310a.jpg
    58.9 KB · Views: 492
  • 100_1478.jpg
    100_1478.jpg
    61.3 KB · Views: 491
  • 100_1480.jpg
    100_1480.jpg
    70.6 KB · Views: 491
  • 100_1482.jpg
    100_1482.jpg
    64.1 KB · Views: 485
I started dismantling, and soon realized it would be a shame not to lift the body off the chassis, especially as I had a two-post lift...
 
  • 100_1681.jpg
    100_1681.jpg
    23.7 KB · Views: 484
  • 100_1483.jpg
    100_1483.jpg
    47.3 KB · Views: 479
  • 100_1690.jpg
    100_1690.jpg
    43.7 KB · Views: 464
  • 100_1692.jpg
    100_1692.jpg
    35.6 KB · Views: 483
  • 100_1694.jpg
    100_1694.jpg
    39.5 KB · Views: 473
  • 100_1696.jpg
    100_1696.jpg
    38.6 KB · Views: 469
  • 100_1705.jpg
    100_1705.jpg
    54.5 KB · Views: 469
  • 100_1715.jpg
    100_1715.jpg
    51.9 KB · Views: 479
So I was ready to decide what should be done. I had a new bonnet (important, as it was the last one here), and i obtained rather easily the rest of the body spares needed (new front right and rear left wings, A-panel, crossmember, secondhand front inner wing, tailgate, both front doors). I had a useful stock of parts like grille, bumpers, front round (correct at last!) indicators, headlamps... so no problem at all.
The chassis was OK except for a small part over the rear right suspension mounting. I didn't have to bother about the engine (55.000 kms since major overhaul), the gearbox (replaced in 2001 with one of way smaller mileage), front end (completely rebuilt in 2006), brakes etc, as the car was in daily use.
I had already found the correct red seats (from a very low mileage '75 that had been painted purple and they certainly didn't match the body colour!), and had also bought earlier a set of red door trims without cardboards from Dutch Wind Classics. Minor issues like tidying-up the electrics, replacing the broken speedometer and so on were easy to sort as I would assemble the body.

So I set up to find a good body repair workshop (rather difficult here...). It turned to be easier than I expected, as my good friend Dionysis Tsokos of Tsokos Vehicle Body Construction agreed to do the body restoration in his company. They actually specialize in repairing/restoring bus and coach bodywork, but they had no problem at all working on my R4.
So away we go in the summer of 2008...
 
  • DSC01962.jpg
    DSC01962.jpg
    55.4 KB · Views: 485
  • DSC01963.jpg
    DSC01963.jpg
    48.6 KB · Views: 470
  • 100_2594.jpg
    100_2594.jpg
    66 KB · Views: 485
  • 100_2595.jpg
    100_2595.jpg
    54.2 KB · Views: 462
  • 100_2596.jpg
    100_2596.jpg
    56.6 KB · Views: 473
  • 100_2598.jpg
    100_2598.jpg
    31.9 KB · Views: 468
  • 100_2601.jpg
    100_2601.jpg
    50.7 KB · Views: 470
  • 100_2605.jpg
    100_2605.jpg
    52.3 KB · Views: 472
  • 100_2609.jpg
    100_2609.jpg
    36.1 KB · Views: 469
  • 100_2612.jpg
    100_2612.jpg
    52.9 KB · Views: 461
It stayed there until the following summer, as it was not their first priority to work on it (and I didn't have space in the workshop to begin assembling it...). A lot of the rotten body parts were fabricated from scratch.

After completing the repairs on the bare body, it was time to trial-fit the bolt-on parts, and it started looking an R4 once again.
 
  • 100_3521.jpg
    100_3521.jpg
    58.7 KB · Views: 524
  • 100_3530.jpg
    100_3530.jpg
    48.7 KB · Views: 455
  • 100_3531.jpg
    100_3531.jpg
    53.3 KB · Views: 460
  • 100_3532.jpg
    100_3532.jpg
    48.8 KB · Views: 458
I decided to have the body sprayed in the 355 Arctic White, as it was its original colour according to the "fiche d' usine". However, I thought it would be better to spray the inner bulkhead area in body colour (as opposed to black on post-73 R4s). It makes the inner room somewhat brighter.

Note that, the only part not removed from the bodyshell was the headlining, as it was in perfect order even if a little dirty, and I didn't want to destroy it.

Spraying the bodyshell and all of its parts was a piece of cake when the paint booth was originally designed for coaches...
 
  • DSC02489.jpg
    DSC02489.jpg
    41.3 KB · Views: 472
  • DSC02491.jpg
    DSC02491.jpg
    29 KB · Views: 458
  • DSC02493.jpg
    DSC02493.jpg
    43 KB · Views: 459
  • DSC02515.jpg
    DSC02515.jpg
    29.9 KB · Views: 459
  • DSC02516.jpg
    DSC02516.jpg
    48.3 KB · Views: 462
  • DSC02517.jpg
    DSC02517.jpg
    40.2 KB · Views: 456
  • DSC02518.jpg
    DSC02518.jpg
    35 KB · Views: 459
  • DSC02520.jpg
    DSC02520.jpg
    36 KB · Views: 456
The R4 returns now to me, for the hard part...especially if one gets fed up with all sorts of classic and modern cars, either for restoration or for simple repairs, for the whole day...I had some free time late in the evening and on Sundays, so progress was slow. But I had decided not to rush it and not leave anything for "later"...

On the lift again, for the body/chassis to be sealed and bolted properly... some jobs like rear brake hose replacement are so easy with the body off!

It was also time to paint the engine/gearbox, and generally do some detail work in the engine compartment. The engine colour turned to be too light a shade, but i had no other option than scanning a photo from the Gazoline magazine, as i could not find a code for the green Renault used in the 60s

I had some parts like air filter housing, radiator stays, pedals etc sand-blasted and then powder coated in satin black. All minor sheet metal parts, springs, screws, nuts etc were plated in that goldish plating used by the factory. I also left the rocker cover chrome plated, as I had it done back in 1996, even it is not correct...
 
  • 100_3671.jpg
    100_3671.jpg
    45.1 KB · Views: 465
  • 100_3676.jpg
    100_3676.jpg
    49.7 KB · Views: 452
  • 100_3756.jpg
    100_3756.jpg
    53.2 KB · Views: 459
  • 100_3768.jpg
    100_3768.jpg
    57 KB · Views: 459
  • 100_3789.jpg
    100_3789.jpg
    56.7 KB · Views: 460
  • 100_3829.jpg
    100_3829.jpg
    46.3 KB · Views: 457
  • 100_3906.jpg
    100_3906.jpg
    40.9 KB · Views: 464
  • 100_3967.jpg
    100_3967.jpg
    38.4 KB · Views: 451
  • 100_3839.jpg
    100_3839.jpg
    54.4 KB · Views: 455
  • 100_4587.jpg
    100_4587.jpg
    53 KB · Views: 456
Final stages of assembly are always the most time-consuming...I spent two weeks trying to find a front windscreen seal for example.

Finally, after one year's Sundays and holidays, it is ready for tha road and even more enjoyable trips!
 
  • 100_4590.jpg
    100_4590.jpg
    52.6 KB · Views: 453
  • 100_4690.jpg
    100_4690.jpg
    48.4 KB · Views: 459
  • 100_4893a.jpg
    100_4893a.jpg
    72.3 KB · Views: 450
  • 100_4894a.jpg
    100_4894a.jpg
    66.8 KB · Views: 461
  • 100_4896.jpg
    100_4896.jpg
    60.9 KB · Views: 440
  • 100_4899.jpg
    100_4899.jpg
    47.3 KB · Views: 451
  • 100_4901.jpg
    100_4901.jpg
    47.3 KB · Views: 456
  • 100_4912a.jpg
    100_4912a.jpg
    68.7 KB · Views: 449
  • 100_4909a.jpg
    100_4909a.jpg
    60.6 KB · Views: 457
A very impressive job. It looks brand new and with recently overhauled mechanicals it will drive well too I guess. Congratulations!


Cheers,

David
 
Amazing job, well done,

1 question, how did you get it to sit up higher?
 
Thanks for posting the restoration - I've wanted to see that since you posted a photo of the panels in the paint shop. Looks great, and I'm sure it'll drive better than most too.

I notice the seats changed colour during the restoration. The red ones look very original - did Renault make them in that colour or have you done something clever?

Mike put it better than me. Why is it so high at the back? :D
 
Amazing job, well done,

1 question, how did you get it to sit up higher?


By re-setting the torsion bars :-). I am lucky, as 1967-77 models had adjusting cams on all four wheels, so it's a piece of cake to set the ride heights.
Up front it is set on the factory height, rear it is 20mm higher. It is not that high, it look so on the photos as it had almost no fuel on the tank, and on the last ones it is parked on a steep incline.


Normally, all white R4s around 1975 had red upholstery. I was lucky enough to find a set of such seats on a low mileage 1975 R4. What's more, the owner wanted to re-trim them (as the car had been re-sprayed purple and they looked out of place). So I offered him a set of black ones I had...and both of us were happy!
The colour is not that bright, I may describe it as bordeaux, but it may have faded a little.
 
Back
Top