Clementine's Garage
Clementine the Cat
 
Image of flower
Yellow R4
 
Réparateur d'automobiles

'83 4TL - Runabout

Tripyrenees

Enthusiast
Messages
391
Location
Luscan, France
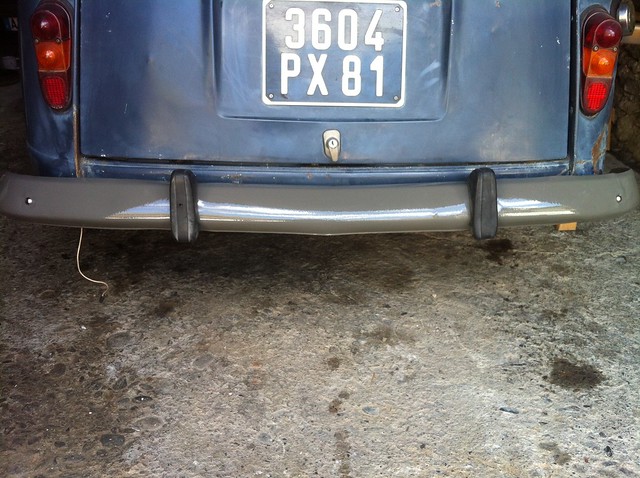
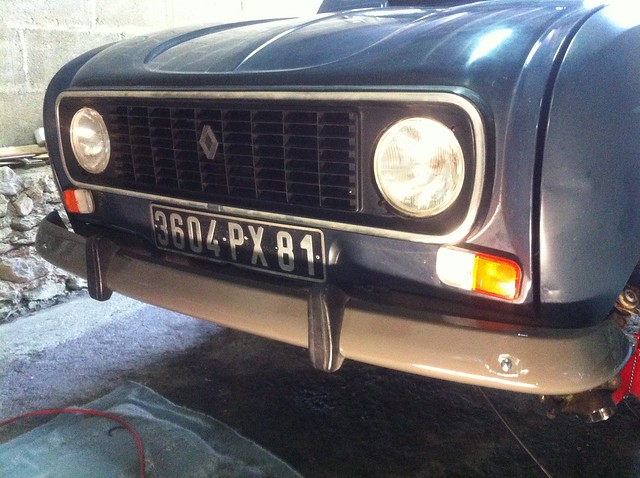
I bought my 4TL a couple of weeks ago as a quick runaround for my kids whilst they visit us in the holidays (one at Uni and one a Teacher). We bought this little 1983 from an old guy in Toulouse knowing it was a project but not knowing how much there was to do.

It was cheap at €600 and he transported it down to us on a trailer so not a bad deal. He promised me the engine worked perfectly but it WAS a project in the meaning it had no brakes and had not been driven for the past 10 years.


Screen Shot 2013-04-02 at 3.21.54 PM by Tripyrenees, on Flickr

I put a decent battery on (and put the this one on charge) and tried to start it - smoke came from the alternator and water poured from the water pump. Good start I thought and mentioned to the kids they would have to stick to the Solexes for their transport this holiday. :?

So changed the alternator and put a new water pump on.


Untitled by Tripyrenees, on Flickr


Untitled by Tripyrenees, on Flickr


Untitled by Tripyrenees, on Flickr

A good learning experience and even though it was a pain I enjoyed replacing duff parts with new. Engine started and purrs like a dream - I need to put some engine cleaner in and then change out the oil and filter before running it much longer.


Untitled by Tripyrenees, on Flickr

So next job - the brakes which I have all the parts for.


Untitled by Tripyrenees, on Flickr

I also have a 2CV AZU '57 in pieces, the gear box is out for repair and hoping to get this back soon so at least I have only one car to worry about.


Untitled by Tripyrenees, on Flickr
 
That looks like a bargain to me, it's nice and clean and I reckon it came from a good home. When it's on the road, Thenay in July? I've got a bit of a soft spot for old commercials so I love your 2CV. Regards Brian.
 
As do I ! And the tiny back windows
 
René the '57 AZU

Here is the little fourgonnette. So happy when I found this for sale and actually sold a 1970 AZU just so I could get this one.

Untitled by Tripyrenees, on Flickr
 
Back to the 4TL and the Brakes

The 4L did not have any brakes whatsoever which was a bit of a shock when I eventually started it up and accelerated in the driveway only to find I was heading to the wall pumping at the brake pedal without hope. Luckily the gravel slowed me to a stop.

As you can see there was not much left on the pads and no handbrake cables at all.

Untitled by Tripyrenees, on Flickr

And very very dirty

Untitled by Tripyrenees, on Flickr

I actually took the hubs off to make a good job of it, but when I did the rear rubber boot on the wheel bearings shattered :eek: - so next job will be to take off the driveshaft and replace the rubber boots (is this a tough job:?:)

Untitled by Tripyrenees, on Flickr

But changing out the slave cylinders, shoes and flexible was so much easier on the bench.... after a good clean :)

Untitled by Tripyrenees, on Flickr
 
Steering arms

While I was inspecting it all I noticed the steering bushes were knackered and I needed to change the rubber boots on the steering arms so have decided to change out the steering arms as well.

Untitled by Tripyrenees, on Flickr

How do you disconnect the steering arm from the steering rack - cannot find it in the Haynes manual :?::?:

Untitled by Tripyrenees, on Flickr
 
Steering Arms

I got them off with a little heat on them. They were pretty worn but a quick measure to get the right "ballpark" length for the new ones.


Untitled by Tripyrenees, on Flickr

And on with the new ones and the new rubber boots after a full grease up as there was not much in there.


Untitled by Tripyrenees, on Flickr

The steering rack is back in the car ready to be bolted in. Next are the driveshaft boots.
 
Ah, you've really started something havn't you, all good stuff though, and you'll have a great little car when it's all done. The little 2CV van is drop dead gorgeous, I love it.:hug:
 
Wheels off - so why not paint them

Have got all the wheels off while I am doing the brakes, steering arms etc etc and thought I may as well tidy them up. Took them to the local Norauto and they took the tires off and I will have new tires put back on this Tuesday.

Found one rim to be totally knackered with rust eating away at the valve hole, so I will scrap that on and use the spare.


Untitled by Tripyrenees, on Flickr
Will paint them tomorrow. :D
 
Driveshaft Boots

Has anyone any tips or handy hints on how to get new rubber boots onto the driveshafts, both ends.

I nearly did one but I was afraid I would split it so took it off again. This is now delaying the rest of my work (for such a simple task in theory)


Untitled by Tripyrenees, on Flickr
 
Bit of Painting

While I wait to figure out how to put on the driveshaft boots I have put a quick primer coat on the wheel rims (the tire is coming off, don't panic) and the bumpers (after a quick knocking out of the bumps and bashes).

Sun is out so hope to put a couple of coats of 2pk AC118 (2CV fourgonnette grey) on them this afternoon.


Untitled by Tripyrenees, on Flickr
 
Hi there,

a good job you did so far!
And the car you got seems like a nice bargain to me!

Re the driveshaft ...

You can easily remove the outer part of the driveshaft using a small screwdriver to unclip the triangular metal clamp that holds the outer piece to the rod.


Achswelle.jpg


(Additional info in this link ...)

Now you "just" have to get the new seals over the relatively small knuckle shaped end of the rod using preferably a special tool.

nh-12-20-2-sauer-werkzeug.jpg%3Fw%3D450%26h%3D160


Putting the clamp back on requires a special tool or just 3 M6 nuts, placed right underneath the clamp and then some pushing the parts back together. (It's a try and error thing, will take a few attempts, but you'll figure that out ...)

Good Luck!

Cheers,

David
 
Driveshafts

I took the easier option and took them to my local garage - which in fact is a Norauto but the guys in there are 4L, 2CV and Solex enthusiasts which helps a great deal. They started putting on the boots but found one joint to have excessive movement so ordered a replacement and will be all done and dusted to pick up tomorrow along with my wheels which after painting (yesterday) are having new tires fitted.

:hug:
 
Rear Brakes Done!

I managed to do a lot of work on the little bugger over this weekend. I replaced the servos and shoes plus the flexibles on the rear brakes.

Although the shoes looked ok the whole system was rusty and dirty so I changed it all out and regreased everything (not the brakes)

Untitled by Tripyrenees, on Flickr

New servo and shoes

Untitled by Tripyrenees, on Flickr

And new flexible

Untitled by Tripyrenees, on Flickr
 
Bumpers Done

Painted the bumpers yesterday and fitted them back on taking out all the bends in the brackets - I think they fit now and look a little better for a quick job.


Untitled by Tripyrenees, on Flickr

Also fitted a new Black Grill and new indicator lights that came in a box with the car. I made one good grill out of 3.


Untitled by Tripyrenees, on Flickr
 
Indicators

So, went to test the indicators as they are nice, shiny and new. BUT NOTHING :mad::mad::confused::confused::(

I have a feeling it is the flasher unit. I have checked the switch and it has continuity left and right when switched.

I have put volts through the switch plug to the indicator lights and all work OK.

I have tried figuring out the flasher unit but no luck yet. Will try and get a new one tomorrow when I pick up my driveshafts and wheels.

But if anyone has any ideas then let me know :hug::hug:
 
Indicators DONE (it is 22:30 at night but I could not let it lie)

Checked the volts at the fuse and nothing. Put volts onto fuse from another source and the indicators worked from the switch - perfectly.

Pulled the hazard light off and opened it up on my desk. full of spiders eggs and green gunk. Cleaned all the terminals and put it back together. Ran out to the barn and plugged it in. IT WORKED :D:D:D

Time for bed :hug:
 
I think I might have the indicator lights the wrong way round - I am sure they are not supposed to slope - it did have a Left and Right on each one. :?::?:

Will do it in the morning
 
Back
Top