


You are using an out of date browser. It may not display this or other websites correctly.
You should upgrade or use an alternative browser.
You should upgrade or use an alternative browser.
Sinpar - some of the greasy bits
- Thread starter simonandjuliet
- Start date
simonandjuliet
Enthusiast
- Messages
- 146
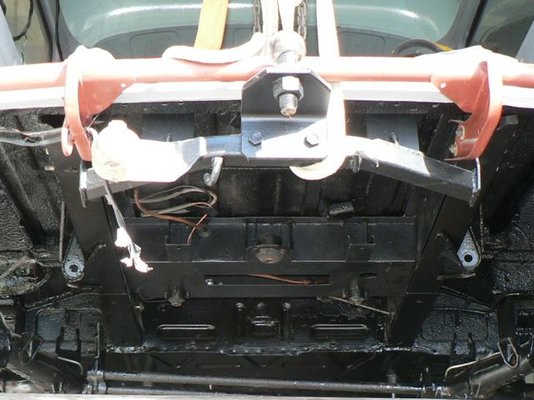
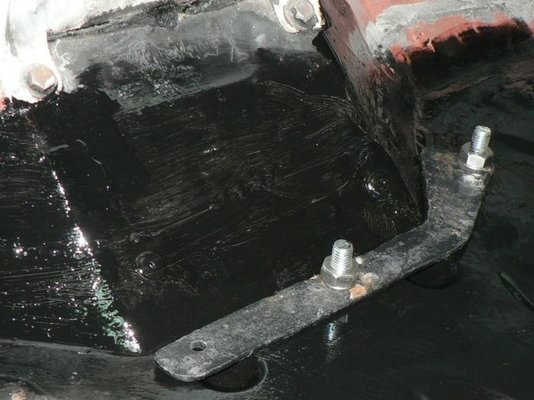
Engine wedges
Angel, as far as I am aware they were always fitted. I have read a few French-forum threads that refer to them as having been fitted and the need to make up plates if they are missing.
It is quite tight for the transmission shaft to get past the anti-roll bar bar so I am sure it is to give a tiny bit more space !
simonandjuliet
Enthusiast
- Messages
- 146
Pain in the bum !
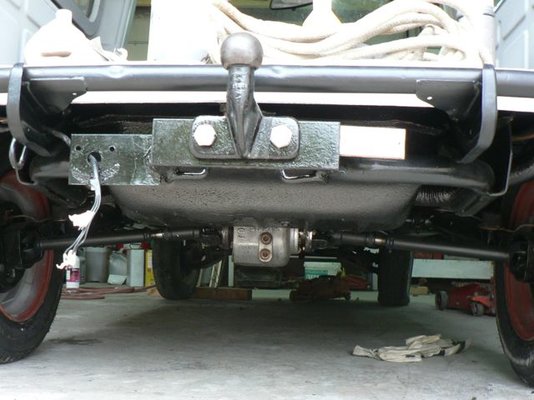
Fitting a tow bar has been a real pain!
The first one I fitted (homologated tow bar) goes inside the rear chassis arms and has secondary braces to the floor. Unfortunately it restricts the width between the chassis arms, so even with the secondary supports removed it was just too tight !
The second one (another homologated tow bar) which I swapped with Vanessa (white F4) fits on the outside of the chassis arms and uses the third row of holes - first 2 sets for the bumper - as well. Problem with this one was that it fouled the filler pipe. So "un coup de diskeuse" - or attack with angle-grinder - and it is JUST possible. The tow bar tubes are very close to both the bumper brackets and the fuel tank.
Now all nice and snug and ready for the final coat of paint.
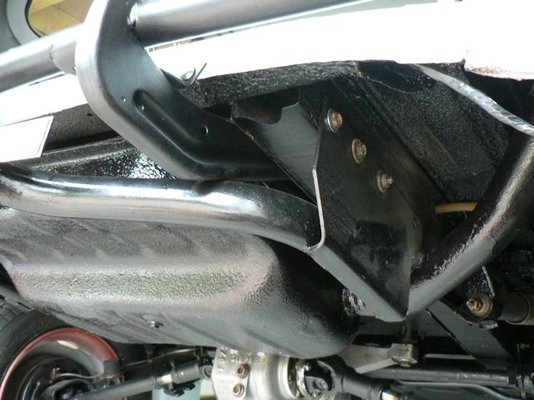
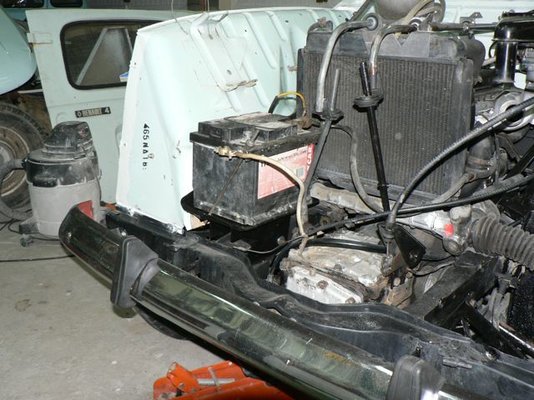
At the other end, I have had to remake the battery tray because the one that came with the car was a nasty, mocked up, sheet aluminium affair , probably due to the original rusting. I cut down a standard tray so it gives clearance for the transfer box arm and re-welded to take a decent sized battery. I opted for retaining "arms" rather than the clamping plate because it gave more room.
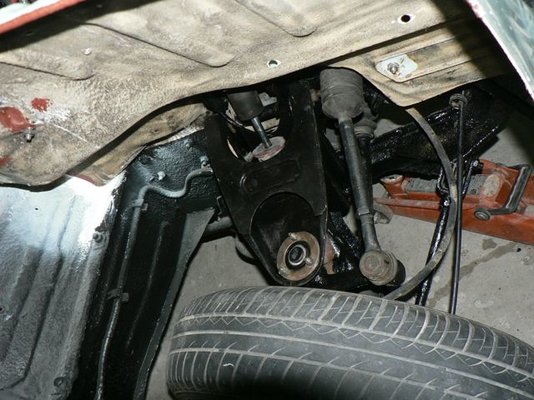
Final job was finding and refitting a reinforced upper wishbone. These were standard on Sinpars and one had been replaced with a standard 4L piece
Once done it means I can start to put the front end back together.
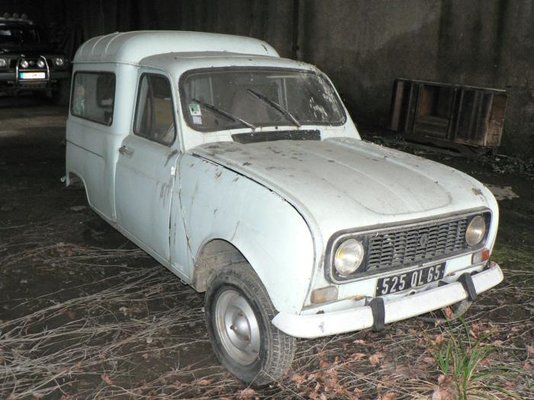
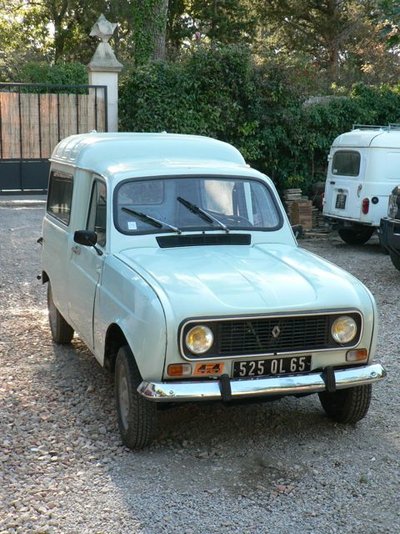
The chrome bumper is not standard but is the best I have and it looks great - not perfect, few scratches and dings like the rest of the car but should retain the character I am after.
Fitting a tow bar has been a real pain!
The first one I fitted (homologated tow bar) goes inside the rear chassis arms and has secondary braces to the floor. Unfortunately it restricts the width between the chassis arms, so even with the secondary supports removed it was just too tight !
The second one (another homologated tow bar) which I swapped with Vanessa (white F4) fits on the outside of the chassis arms and uses the third row of holes - first 2 sets for the bumper - as well. Problem with this one was that it fouled the filler pipe. So "un coup de diskeuse" - or attack with angle-grinder - and it is JUST possible. The tow bar tubes are very close to both the bumper brackets and the fuel tank.
Now all nice and snug and ready for the final coat of paint.
At the other end, I have had to remake the battery tray because the one that came with the car was a nasty, mocked up, sheet aluminium affair , probably due to the original rusting. I cut down a standard tray so it gives clearance for the transfer box arm and re-welded to take a decent sized battery. I opted for retaining "arms" rather than the clamping plate because it gave more room.
Final job was finding and refitting a reinforced upper wishbone. These were standard on Sinpars and one had been replaced with a standard 4L piece
Once done it means I can start to put the front end back together.
The chrome bumper is not standard but is the best I have and it looks great - not perfect, few scratches and dings like the rest of the car but should retain the character I am after.
simonandjuliet
Enthusiast
- Messages
- 146
Some of the shiny bits
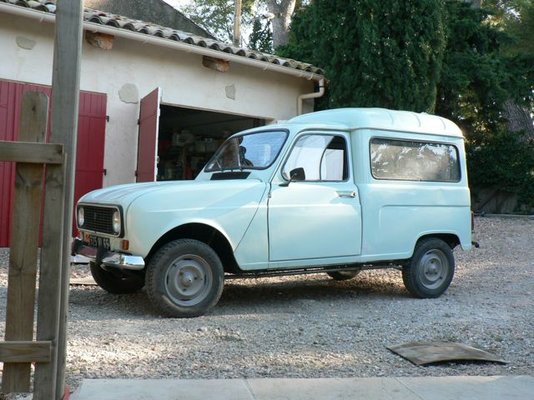
Starting to do some of the finishes now.
Having decided not to respray the car because the paint was just too sound with very little body rot, it means that a LOT of elbow grease has been needed to remove several years worth of barn dirt. The car was under a leaky roof with birds roosting on the beams above so lots of guano. Also a vigorous ivy had worked its way through and over the bodywork leaving suckers and leaf prints, as well as an additional "wiring" loom in the engine compartment !
I know some out there would have decided to repaint, but as mentioned previously, I want to retain as much "character" as possible and even if it means a few scratches , dents and mismatched paint, personally I would rather that than a car that I was frightened of using.
I do not wish to open a can of worms here because I know we all have different ideas about "restoring" cars and I am constantly amazed at the lengths we all go to complete our projects ....
I have gone over the original paintwork by hand with 000 wire wool and then using a machine, an O3B fine abrasive before final protection with a silicon resin polish (I like Autoglym products but they are not cheap !)
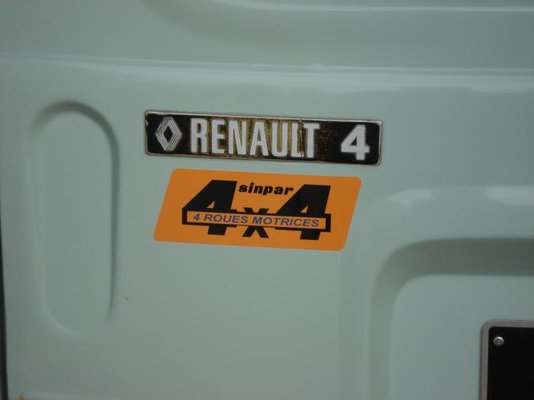
Finally, I have added one of the 2 Sinpar 4X4 stickers which originally adorned these cars, it always makes me feel that I have made progress when I do something like this !
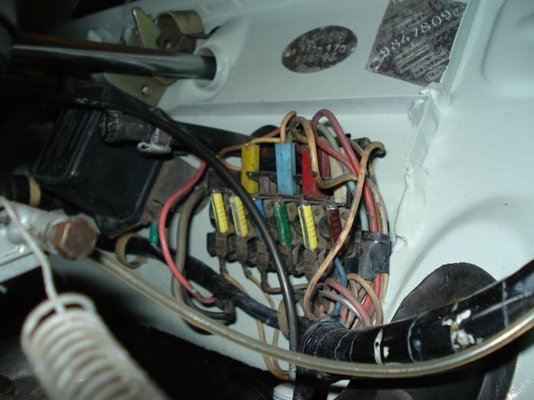
At the other end, I cleaned the fuse box using a Dremel and small wire brush. The front and rear lights had had additional wires between the side lights suggesting that there had been previous problems, so now with all the contacts cleaned and new fuses fitted it all works.
Starting to do some of the finishes now.
Having decided not to respray the car because the paint was just too sound with very little body rot, it means that a LOT of elbow grease has been needed to remove several years worth of barn dirt. The car was under a leaky roof with birds roosting on the beams above so lots of guano. Also a vigorous ivy had worked its way through and over the bodywork leaving suckers and leaf prints, as well as an additional "wiring" loom in the engine compartment !
I know some out there would have decided to repaint, but as mentioned previously, I want to retain as much "character" as possible and even if it means a few scratches , dents and mismatched paint, personally I would rather that than a car that I was frightened of using.
I do not wish to open a can of worms here because I know we all have different ideas about "restoring" cars and I am constantly amazed at the lengths we all go to complete our projects ....
I have gone over the original paintwork by hand with 000 wire wool and then using a machine, an O3B fine abrasive before final protection with a silicon resin polish (I like Autoglym products but they are not cheap !)
Finally, I have added one of the 2 Sinpar 4X4 stickers which originally adorned these cars, it always makes me feel that I have made progress when I do something like this !
At the other end, I cleaned the fuse box using a Dremel and small wire brush. The front and rear lights had had additional wires between the side lights suggesting that there had been previous problems, so now with all the contacts cleaned and new fuses fitted it all works.


Geoff in the Gully
Getting it together
- Messages
- 283
- Location
- Upper Ferntree Gully, Victoria, Australia
What a superb clean up job you've done. Right call to not re-paint 
Geoff
Geoff
simonandjuliet
Enthusiast
- Messages
- 146
Final piece of the jigsaw
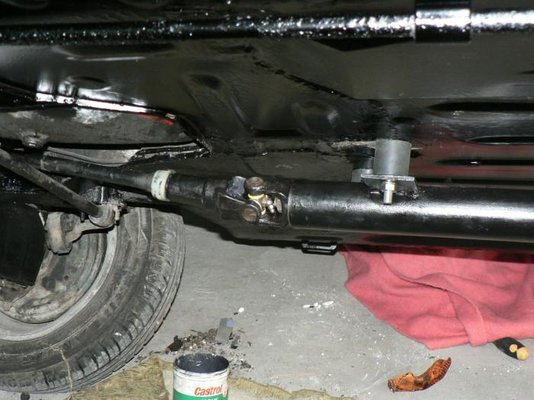
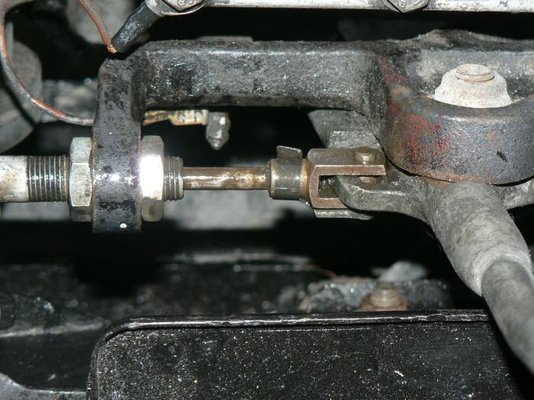
Fitted the transmission tunnel and prop shaft today, as you can see there is not a lot of room between the antiroll bar and prop (>1 inch) and even less between the prop and transverse chassis bar (about 3/8ths) - hence the engine wedges.
The silent blocks have an additional brace at the front, sitting on the floor under the heater, I just need to cut off the excess thread before final painting
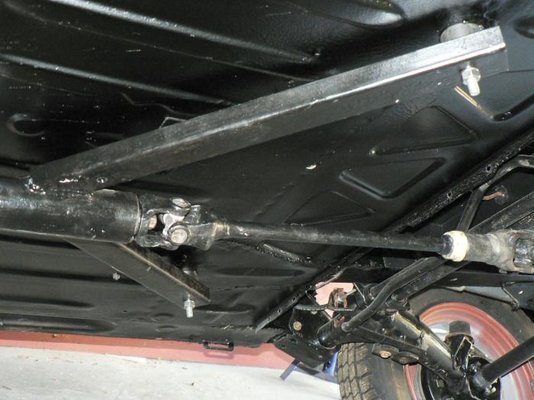
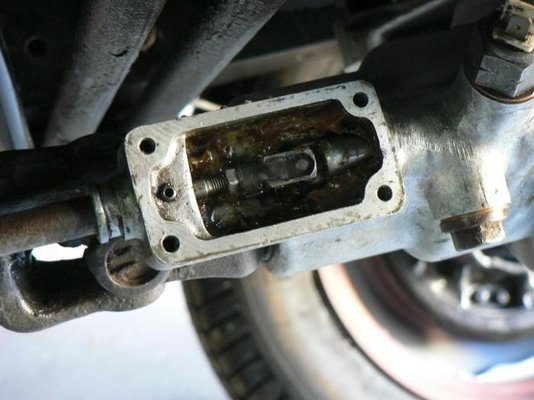
The final piece was the actuator rod between the transfer box and rear diff. At the diff end it sits in a nice box of grease, but is open to the elements at the other end. However with the undertray fitted it does get some protection.
And it all works - drove in and out of the garage in 4wd !
Just 8 grease nipples to fill - where did I put the grease-gun ?
Fitted the transmission tunnel and prop shaft today, as you can see there is not a lot of room between the antiroll bar and prop (>1 inch) and even less between the prop and transverse chassis bar (about 3/8ths) - hence the engine wedges.
The silent blocks have an additional brace at the front, sitting on the floor under the heater, I just need to cut off the excess thread before final painting
The final piece was the actuator rod between the transfer box and rear diff. At the diff end it sits in a nice box of grease, but is open to the elements at the other end. However with the undertray fitted it does get some protection.
And it all works - drove in and out of the garage in 4wd !
Just 8 grease nipples to fill - where did I put the grease-gun ?
simonandjuliet
Enthusiast
- Messages
- 146
Finished ! - well nearly .....
Controle Technique (CT) done this morning !!!!!!!
A few days intensive to get everything cleaned, refreshed and bolted back together.
So decided to try the CT and then do anything on the fail/advisory list before the final cleaning and finishing
Amazingly she sailed through ! An advisory on a worn rear shock, an oil leak (I had changed the oil filter this morning and some dripped !) and that was it.
After the shenanigans I had with the brakes I was surprised, briefly another new master cylinder and limiter ,thanks Steve, and manually adjusting the automatic brakes and I had a pedal at last.
Now , off to find some hills and some mud !

Rutger-peer
The restoring Dutchman.
- Messages
- 260
Looks awesome man! Great job.
Steve Hennessey
Moderator
- Messages
- 1,406
That looks great Simon - glad to see that the brake parts solved the problem ")
politeperson
The restorator
- Messages
- 159
- Location
- Boston
Good Job
Absolutely excellent. Well done.
Over your way at the end of November for Grannys birthday (Limoux).
FAB
Absolutely excellent. Well done.
Over your way at the end of November for Grannys birthday (Limoux).
FAB
simonandjuliet
Enthusiast
- Messages
- 146
Glass of Wine
If you are in the Minervois (near Olonzac) come and have an apéro !
Send me a pm and I'll give you phone numbers .
If you are in the Minervois (near Olonzac) come and have an apéro !
Send me a pm and I'll give you phone numbers .