Right then, here we go....
In setting the points gap by measuring the dwell angle you have set it extremely accurately, and we don't want to disturb that! But by adjusting the gap you have changed the time in the firing cycle at which the spark occurs, and it is this which we'll deal with next. There are TWO methods; static (with the engine off) and dynamic (with the engine running)
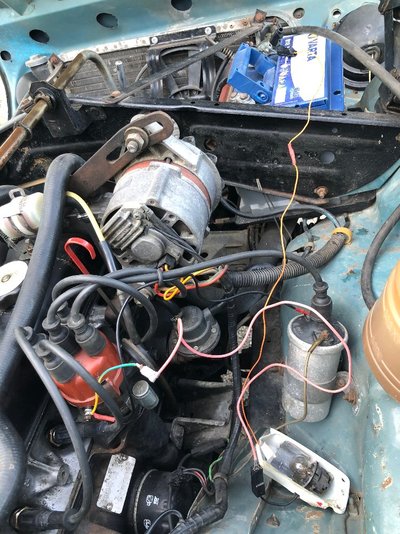
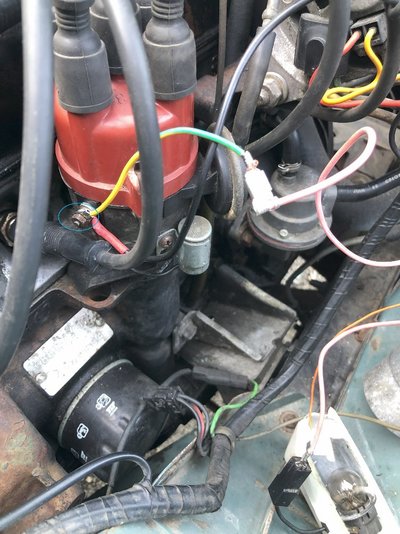
STATIC: Make up a 12 volt 5 watt bulb with 2 leads attached to each side of the bulb, with clips on each end of the wires. Attach one end to earth and the other to the "CB" side of the coil, but don't disconnect the wire that's already there. If you're unsure which coil wire this is, it's the one which has the thin wire running into the distributor. Now I will explain what will happen: when the ignition is switched on and the points are CLOSED the 12 volts will run from the battery, through the ignition switch, to the coil, out of the coil, into the points inside the distributor, and to earth. As the distributor turns the points will open, and at the point at which they open the current will stop flowing through the points and will run through the light bulb instead, and it is this precise point you need to find. And this is how to do it....
Remove the spark plugs (it makes turning the engine much easier!) Using the fan belt turn the engine until the timing marks you have already identified as precisely lined up on the flywheel casing. If you turn the engine too far, keep turning it in the same direction until the marks come round again-DON'T turn the engine the "wrong" way! Once the marks are in line, loosen the distributor clamp, so that the distributor can be turned BUT DON'T TURN IT YET! Now connect the bulb as explained above, remove the HIGH tension lead from the distributor, switch on the ignition and then c-a-r-e-f-u-l-l-y twist the distributor one way and the other and in one direction the bulb will go out. Now twist the distributor the other way to the point at which the light bulb j-u-s-t begins to light up (this is when the points are just opening) Use the fan belt to turn the engine through one complete revolution to confirm the bulb lights as the timing marks and if they do, tighten the distributor clamp, remove the bulb and go for a drive.... (Oh, and pray!)
That's enough for one go! I'll explain dynamic timing tomorrow! I hope this isn't too complicated!


youtube.com