


You are using an out of date browser. It may not display this or other websites correctly.
You should upgrade or use an alternative browser.
You should upgrade or use an alternative browser.
1985 Renault R4 F6 restoration project
- Thread starter DavidN
- Start date
DavidN
Enthusiast
- Messages
- 488
Thanks Mike!
Keep us posted when you are beginning your project!
Meanwhile I started with the body.
I plan to work myself step by step from the front to the back...
The remaining "engine compartment" is finished.
There has been surprisingly very little rust, so I had to weld only 2 minor spots.
Keep us posted when you are beginning your project!
Meanwhile I started with the body.
I plan to work myself step by step from the front to the back...
The remaining "engine compartment" is finished.
There has been surprisingly very little rust, so I had to weld only 2 minor spots.
Last edited by a moderator:
Maciek R4 (PL)
Enthusiast
- Messages
- 39
wow...I see that your R4 is in much better condition than my ")
DavidN
Enthusiast
- Messages
- 488
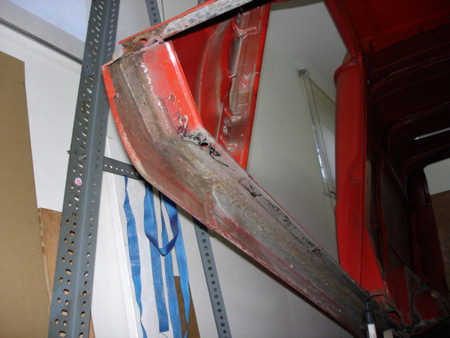
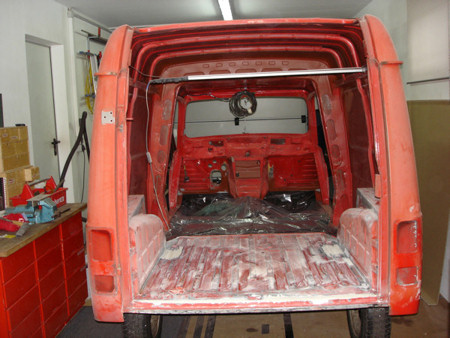
Currently I'm working on the rear floor of the body.
The whole floorboard was pretty beaten up.
The van was first owned by some small business who did installations of any kind.
I guess the workmen just didn't care about their company car.
The whole bed was extremly bent and dented so it took me half a day of banging and bulging to get it reasonably straight again.
Nevertheless the floorboard still is no beauty so I have to work out something to hide it when the van is finished.
I thought of covering the floor with wooden parquet planks (I still have some left from our house construction).
What do you think, is that crazy? :mrgreen:
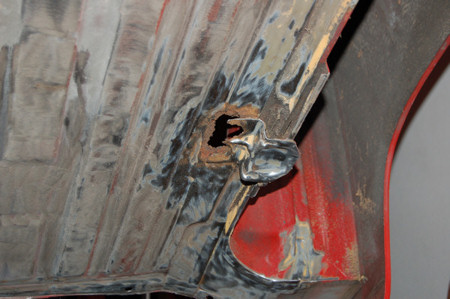
Of course there are a few areas that need some serious welding too...
Here are just a few of them...

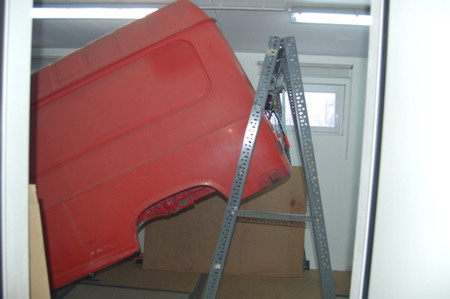
I would have preferred to put the whole body onto it's side, but as I have to do all the work by myself I wouldn't have been able to do that without damaging it.
So I lifted the body up and have to work from underneath... :neutral:
The whole floorboard was pretty beaten up.
The van was first owned by some small business who did installations of any kind.
I guess the workmen just didn't care about their company car.
The whole bed was extremly bent and dented so it took me half a day of banging and bulging to get it reasonably straight again.
Nevertheless the floorboard still is no beauty so I have to work out something to hide it when the van is finished.
I thought of covering the floor with wooden parquet planks (I still have some left from our house construction).
What do you think, is that crazy? :mrgreen:
Of course there are a few areas that need some serious welding too...
Here are just a few of them...
I would have preferred to put the whole body onto it's side, but as I have to do all the work by myself I wouldn't have been able to do that without damaging it.
So I lifted the body up and have to work from underneath... :neutral:
Last edited by a moderator:
hI David..
im doing a post of my motor starter problem.. and youre first image of it is verry usefull I had to use it for my post.. hope you dont mind, and if you can.. plz help mee xD
http://www.renault4.co.uk/forum/showthread.php?p=18843#post18843
good luck, and by the way.. nice renault !!!!!!
im doing a post of my motor starter problem.. and youre first image of it is verry usefull I had to use it for my post.. hope you dont mind, and if you can.. plz help mee xD
http://www.renault4.co.uk/forum/showthread.php?p=18843#post18843
good luck, and by the way.. nice renault !!!!!!
Maciek R4 (PL)
Enthusiast
- Messages
- 39
DavidN - if You will drive with some stuff (boxes or sth like them) just make the wood flor -> sometime ago, I've on back floor made by floor panels and they're good for this ")
DavidN
Enthusiast
- Messages
- 488
Okay, I will open up my mind again what to use to cover the rear floor... :neutral:
Maybe a rubber mat or a custom fitted carpet will do.
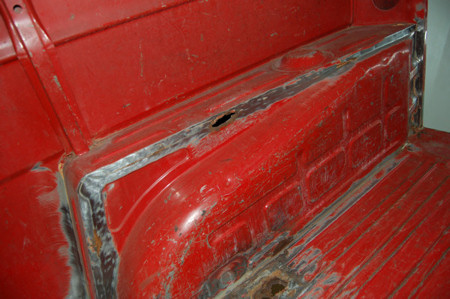
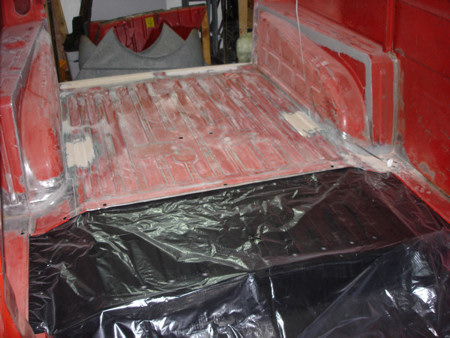
Meanwhile I finished all the welding on the body.
I straightened out the rear floorboard as good as possible and began to level it out using body filler.
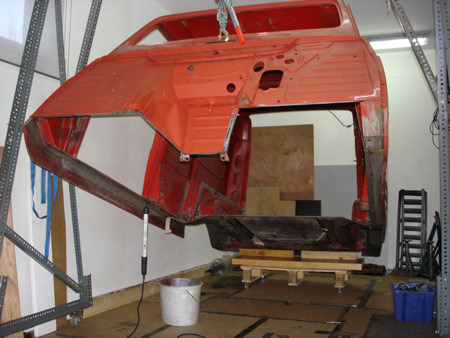
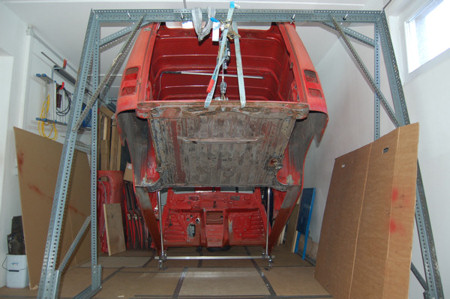
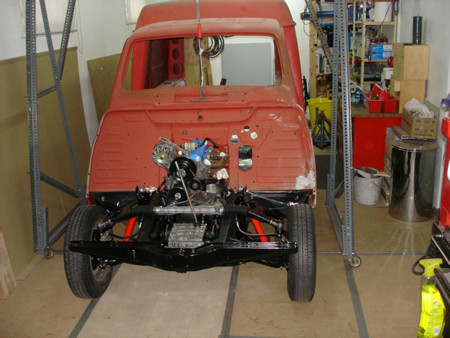
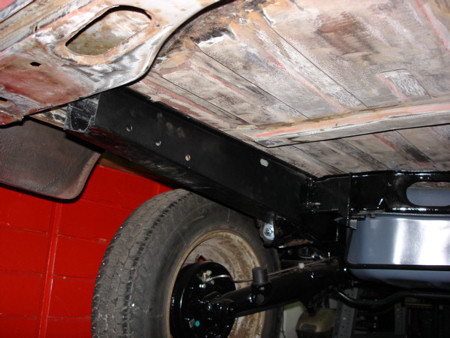
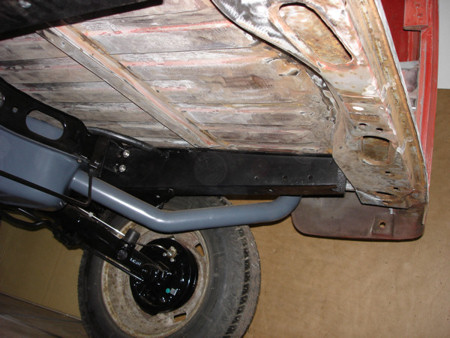
Today I had to verify that the measurements I took when I replaced the rear frame parts of the chassis were correct.
I was pretty sure that I measured it right, but as it is with theory and practice... You never know.
My worst fear was that the angle of the rear frame was totally wrong and that the body won't sit on the chassis properly.
I decided to do a little "dress rehersal" and put the yet unfinished body onto the chassis.
I was very, very reliefed to see that everything lined up perfectly!
Maybe a rubber mat or a custom fitted carpet will do.
Meanwhile I finished all the welding on the body.
I straightened out the rear floorboard as good as possible and began to level it out using body filler.
Today I had to verify that the measurements I took when I replaced the rear frame parts of the chassis were correct.
I was pretty sure that I measured it right, but as it is with theory and practice... You never know.
My worst fear was that the angle of the rear frame was totally wrong and that the body won't sit on the chassis properly.
I decided to do a little "dress rehersal" and put the yet unfinished body onto the chassis.
I was very, very reliefed to see that everything lined up perfectly!
Last edited by a moderator:
DavidN
Enthusiast
- Messages
- 488
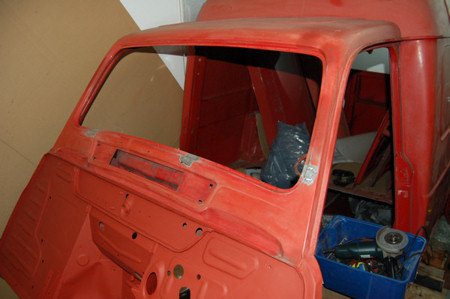
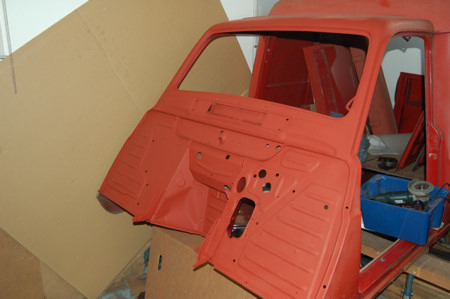
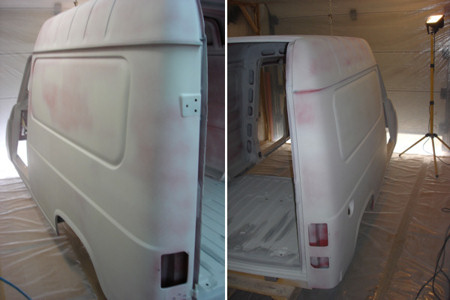
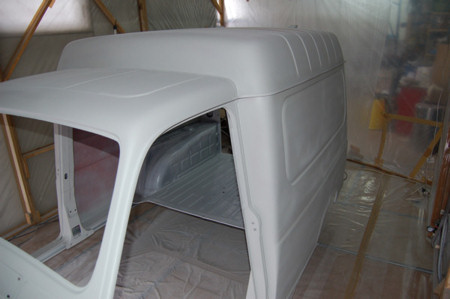
After days of grinding, applying body filler, grinding, applying body filler, and again, and again the body is finally ready for it's undercoat with primer.
The finish is not really perfect, but the work with body filler has never been one of my strenghts. :neutral:
I even tried Malcolm's steel ruler guide but somehow it didn't work too well.
The rear end just had too many dings and dents from stuff being loaded and unloaded in the past 25 years.
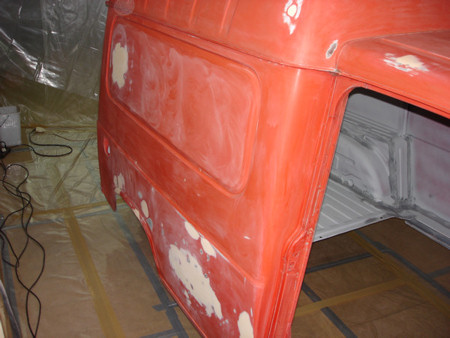
But in the end it is not that terrible, because I planned to do the car's finish in silk-mat anyway so the little imperfections will be barely noticeable.
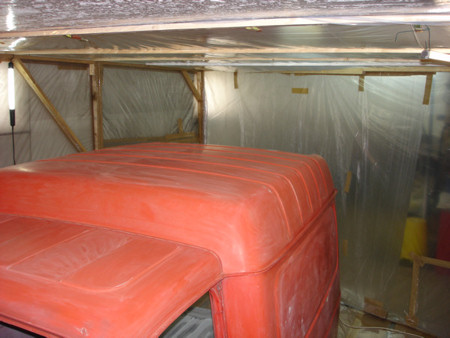
First of all I had to transform my garage into a paint shop...


The finish is not really perfect, but the work with body filler has never been one of my strenghts. :neutral:
I even tried Malcolm's steel ruler guide but somehow it didn't work too well.
The rear end just had too many dings and dents from stuff being loaded and unloaded in the past 25 years.
But in the end it is not that terrible, because I planned to do the car's finish in silk-mat anyway so the little imperfections will be barely noticeable.
First of all I had to transform my garage into a paint shop...
Last edited by a moderator:
DavidN
Enthusiast
- Messages
- 488
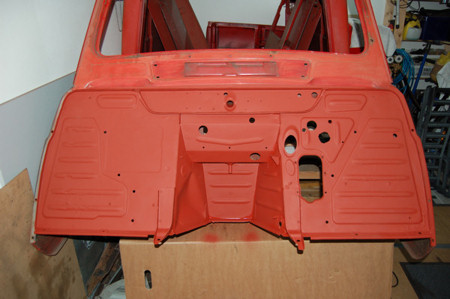
To cover up the remaining dents and bents of the rear floorboard I sprayed the complete bed and the inner rear wings with a thick layer of anti-stonechip primer.
I already used the stonechip primer on the bottom of the chassis, it is paintable and has a nice evenly orange peel finish.
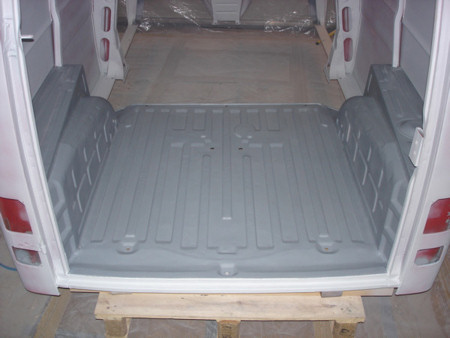
I already used the stonechip primer on the bottom of the chassis, it is paintable and has a nice evenly orange peel finish.
Last edited by a moderator:
Snoopy1974
Enthusiast
- Messages
- 412
 very nice job David, I dream of the day I will be at the same stage as you, many job again before thinking of primer or stoneship on my body !...
You have the same idea than me concerning the stoneship primer on the floor at the rear of the body, I do like the look of the orange peel finish and I also thought maybe it's interesting to soundproof the passager compartment ?... You have an opinion of this subject ?
DavidN
Enthusiast
- Messages
- 488
You have the same idea than me concerning the stoneship primer on the floor at the rear of the body, I do like the look of the orange peel finish and I also thought maybe it's interesting to soundproof the passager compartment ?... You have an opinion of this subject ?
Thanks Alexandre!
I'm pretty sure that the stonechip primer is a good (and fast) solution for soundproofing. But I think you have to apply at least two coatings of it to get the optimal thickness for this purpose. (Let the first coating dry thoroughly before applying the 2nd.)
theoldbeeman
New Member
- Messages
- 1
that's not a garage!
It's an operating theatre!
Anyone who has those sort of facilities will make a great job of their restoration-just keep telling yourself that !
Good Luck and keep posting those pictures!!
It's an operating theatre!
Anyone who has those sort of facilities will make a great job of their restoration-just keep telling yourself that !
Good Luck and keep posting those pictures!!
DavidN
Enthusiast
- Messages
- 488
Thanks Beeman!
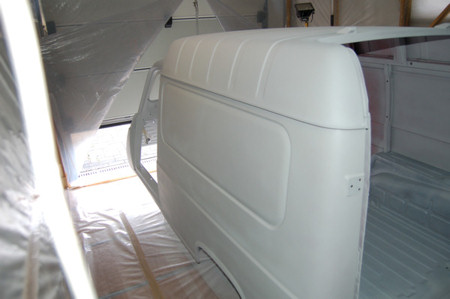
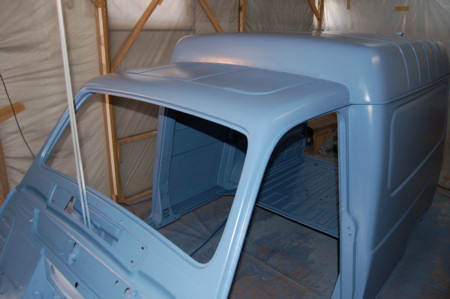
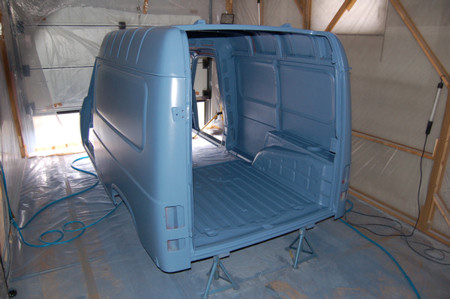
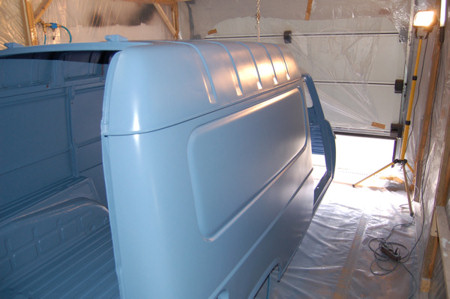
In the couple last days I applied sprayable body filler on the "not so perfect" parts of the body.
Then I sanded it down until I got a nice evenly surface finish.
After that I applied one final coating of 2K Epoxy primer.
Next comes the wet-sanding and then COLOUR...
In the couple last days I applied sprayable body filler on the "not so perfect" parts of the body.
Then I sanded it down until I got a nice evenly surface finish.
After that I applied one final coating of 2K Epoxy primer.
Next comes the wet-sanding and then COLOUR...
Last edited by a moderator:
Maciek R4 (PL)
Enthusiast
- Messages
- 39
Completely blue as Smurf's - the Peyo cartoonbut - it's look's great - gratulations
Do You think about make the color with "diamond dust" ?