Clementine's Garage
Clementine the Cat
 
Image of flower
Yellow R4
 
Réparateur d'automobiles

1985 Renault R4 F6 restoration project

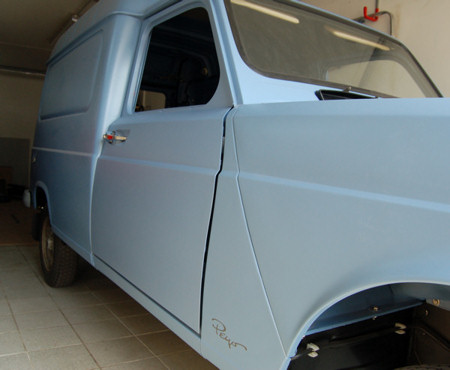
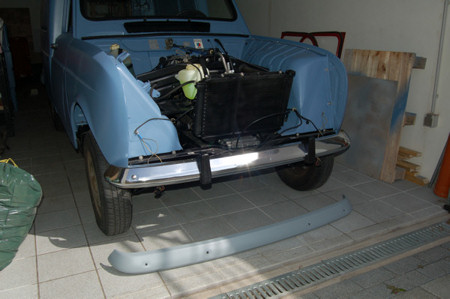
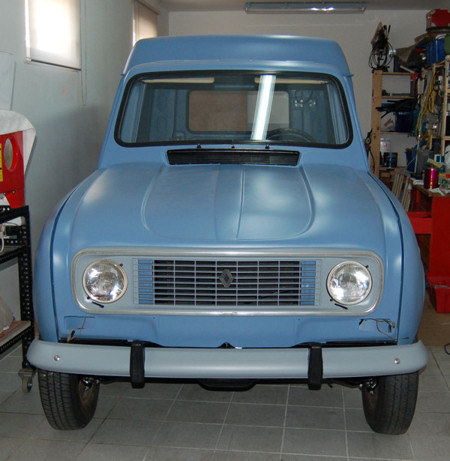
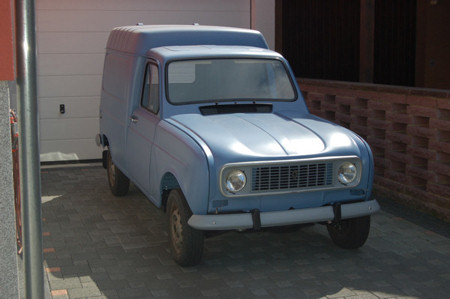
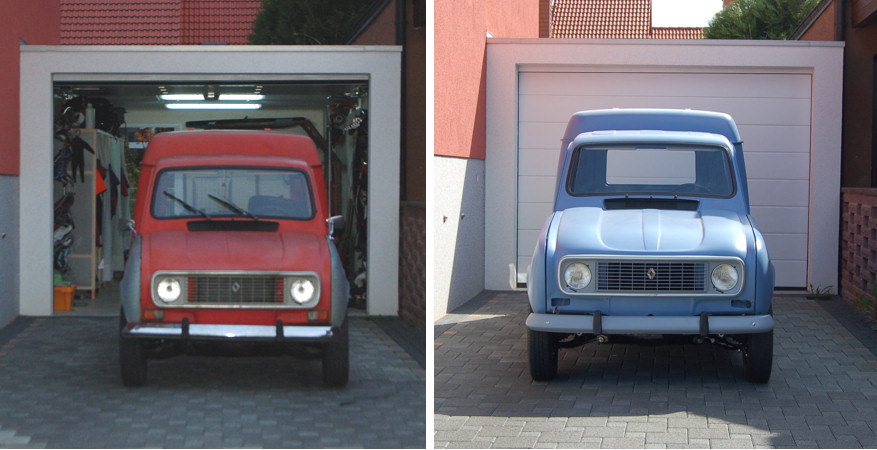
Renault 4s are a nightmare for panel alignment anyway. They were cheap cars designed so whatever parts they produced had a chance of fitting.

Look at the door gaps. Most modern cars have even 4mm gaps all round. The R4 allowed at least 10mm for each gap, and depending on how things went in the build process they could end up with one 15mm gap and two 7mm gaps.

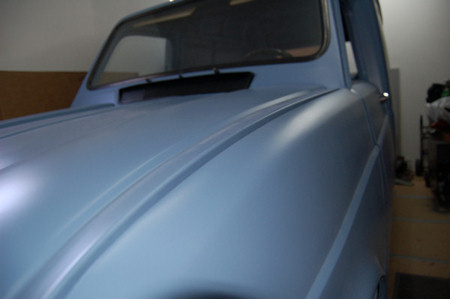
It's all part of the heritage. Aftermarket parts will encourage us to embrace that heritage, but it's not easy to get things perfect even with original parts. Don't try to bend the hood - it won't bend.
 
Renault 4s are a nightmare for panel alignment.

Well said... :neutral:

Restauration-179.jpg


Meanwhile I mounted the front doors...

Restauration-178.jpg


... created the Peyo Special Edition... :D

Restauration-180.jpg


... added some parts in the engine compartment ...

Restauration-181.jpg


... completed the rear end ...

Restauration-182.jpg


... and asked myself which front bumper would fit better. :roll:
The chrome one or the grey one, matching the rear bumper? :confused:
What do you think?

Restauration-183.jpg
 
Last edited by a moderator:
Grey bumper definitely. It matches the other end and there's no point spending time looking after chrome if you don't have to.

I fitted a bonnet this week - same even with original panels. A bit low at the front and a bit high further back. Shorter spacers are the answer!
 
Hi DavidN! Any ideas if the reardoor-seals you used would fit the F4 as-well? I've been searching for a set for years to no avail-ended up making my own,but would be nice to have some"proper"ones.......
are yours sponge-type or with "skin" on them? What does the Profile look like?
-You're making a very good job there as one or two has commented
b4 c",) -R.

I really don't know as I haven't seen a F4 close enough.
The place Alexandre ordered the seals for me - melun retro passion - offers a set for the F4 as well!

The seals are hollow - exactly like the original ones.
Really good quality!

I could make a picture of the profiles if that would help, just let me know...

David

P.S.
Here's the status quo...
Grey front bumper mounted, grille painted in matching colour, engine is running, some minor electrical issues (fuel gauge not working, some of the indicator lights in the instrument cluster not working...), and a leak in the fuel tank, where the filler pipe enters the tank itself. :neutral:

Restauration-184.jpg
 
Last edited by a moderator:
Great looking! These grey parts match the body paint really well!
 
Looks like a great job - keep up the good work!
Couldn't resist adding something as I appeared to be the 10,001 st viewer - is this a record!
 
Hi again davidN! yes a close-up photo of profile would be very useful! -R.

See your Thread "Two simple Questions" ;)


Took the F6 out today for a test ride. :D
I couldn't resist, even if it has still no registration and some missing parts... :rolleyes:


Restauration-185.jpg


Restauration-186.jpg


The engine runs, but behaves not nice. :neutral:
Maybe you experts could give me some advice on what to fine tune.
I try to describe it's behaviour as good as I can...

-1-
First of all, when the engine is cold (even @ 22 degrees outside temp) it only starts and runs with the choke pulled out.
Pushing in the choke and the engine dies instantly (when cold).

-2-
When starting to drive (engine still cold) it has only power with the choke pulled out.
(No choke = no Power, with choke = lots of power.)

-3-
At some point (when the engine has warmed up) I am able to push in the choke.
The engine is running at idle just above dying away (engine now warm).
When I now slightly touch the pedal it dies immediately! (Engine warm, no choke.)
Revving up the engine by "pumping" at the pedal is possible though.

-4-
When the engine (warm, no choke) is revved up (high RPMs) and I let the pedal go it dies when falling back to idling RPMs.

-5-
All in all it seems that the engine simply "doesn't want" to get to higher RPMs without choke.
I cannot explain right, but the engine just seems to be reluctant to revving up (without "pumping" at the pedal).
Just slowly increasing the load on the pedal will make the engine die. Strange behaviour!

Again, all this behaviour is just without choke. With choke the engine behaves pretty normal.

-6-
And it stinks!
I mean the exhaust fumes.
Terrible as if it runs too rich (even with no choke).

David
 
Last edited by a moderator:
Did I already mention that I love before and after shots ? :D

Restauration-186b.jpg
 
Last edited by a moderator:
Looks fabulous - and really fast work.

I suspect you have a blocked main jet. There is a brass plug on the front of the float chamber. Undo that and use a screwdriver through the hole to remove the main jet. It sits in the bottom of the float chamber and may be full of sludge. A good clean and blow out with an air line should improve things.


Malcolm, are you able to point me in the right direction regarding that brass plug?

Here are 2 Pictures, I have no clue, which plug/screw I should remove. :confused:

Thanks !!!

David


Carb-01.jpg


Carb-02.jpg
 
Last edited by a moderator:
The main jet is hiding behind the plug arrowed below. The plug is just for access and you'll also need to unscrew the jet to clean it properly.

Sneaky little things - I'm sure mine was somewhere else.
 
  • Carb-02.jpg
    Carb-02.jpg
    177.9 KB · Views: 1,135
Choke use for starting from cold on 28IF equipped cars is 100% normal, no matter if outside temperature is 30 degrees. The other problems you describe, are not, however.

I think the idle jet, not the main jet, is blocked. It is the one protruding from the top of the carb on the last photo. It has a tiny orifice and it can get blocked if it is left unused for some time (exactly as happened on yours).
I assume you tried to adjust the idle speed/mixture, even roughly. Do this and see how it behaves afterwards.

Thanks Angel!
I will have a look at the idle jet as well.
I haven't adjusted the mixture so far.
I'm a bit confused on how to do it right, as the M.R.175 sais something different than the Haynes.
Adjusting the idle speed set screw however had nearly no effect on how the engine runs on idle. :confused:

Is there a rule of thumb on how many turns the mixture screw has to be undued (from closed position)?

I think I have to do a little more cleaning on the carb first before I can play around with the settings...
 
The rule of thumb I use is 1.5 turns out from fully in. Generally seems about right.
 
The carb really needs to be cleaned thoroughly and all jets removed. I use cellulose thinners to clean carbs and help the process by using an old toothbrush. I then use high pressure air to blow every last piece of dirt out. Use a flat edge on the carb flange to check that it's not bowed. If it is then stuff some rag into the venturi and carefully draw file until it's flat. Then remove the file marks by using wet or dry paper and WD40 on a sheet of plate glass. Clean up again and blow all the filings out.

Rebuild the carb using the new parts you have. Fit back onto the car using new gaskets and a smear of gasket sealant. Open the mixture screw by 2 turns. Start the car up and run it until the engine is hot. Use a rev counter wired to the points side of the coil and the other end to earth - turn the mixture screw until you achieve the highest rpm and then adjust the tickover screw until the engine settles at about 700 to 800 rpm.

If turning the mixture screw makes no difference to the rpm then you have other issues such as a defective manifold gasket, the valves leaking, the tappets too tight etc.

The carb should be the last thing you need to adjust so at this point make sure all is well with the ignition side (timing, points, plus, leads, vacuum unit, condenser) and once you're happy with that then readjust the carb. Do make sure the air filter is not blocked and the narrow pipe from the carb to the inlet manifold is free from sludge and carbon.
 
Thanks Malcolm and thanks Steve, an excellent how-to-do script!

I cleaned the carb again, paid special attention to the jets and think that the main jet had indeed some sludge in it.
(Couldn't remember if I had it unscrewed the last time I cleaned the carb.)

I adjusted the mixture screw to 1.5 from closed position to start with.
(It was at 0.75 from closed.)

Unfortunately I could do no test run today because it's the 1st of May and that is one of the more serious bank holidays over here. :roll:

Instead I took two pictures of the engine compartment. :D

Restauration-187.jpg


Restauration-188.jpg
 
Last edited by a moderator:
So, here's a quick update...
After the 2nd cleaning of the carburettor the engine is running MUCH better now! It even starts without choke!
I still have to do the fine tuning of ignition & carb as I have to organize the required instruments first.

Thanks again Steve & Malcolm!
And sorry for your bad luck with the Gordini headgasket!


David
 
Back
Top