Clementine's Garage
Clementine the Cat
 
Image of flower
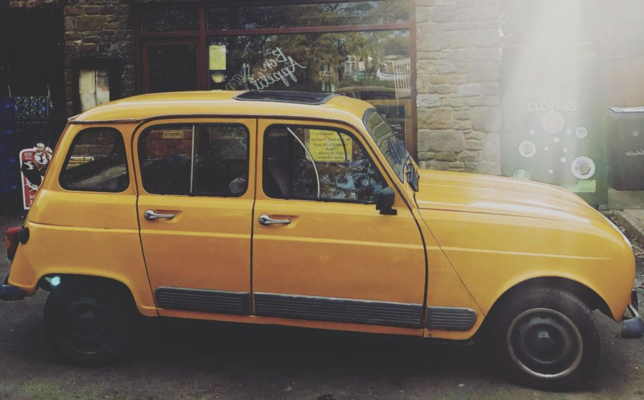
Yellow R4
 
Réparateur d'automobiles

Advice needed on fitting a softop to R4

Whatcanacatmando

New Member
Messages
2
Location
London
Hi everyone - Just joined the forum and was wondering if anyone has any tales to tell regarding fitting a soft top to an R4? I'm thinkinking of cutting the hole and fitting the slide or roll back type. I've heard that a Clio soft top might be suitable but also that leaks are to be expected? Any clues as to where to start would be useful.
 
Twingo is the way to go, do a search here for Twingo Sunroof and you will find plenty of information from people who have done it.
 
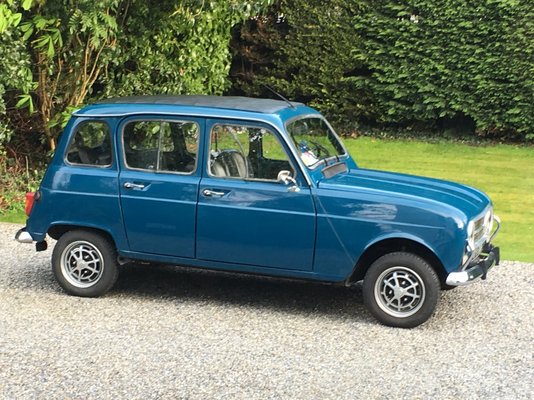
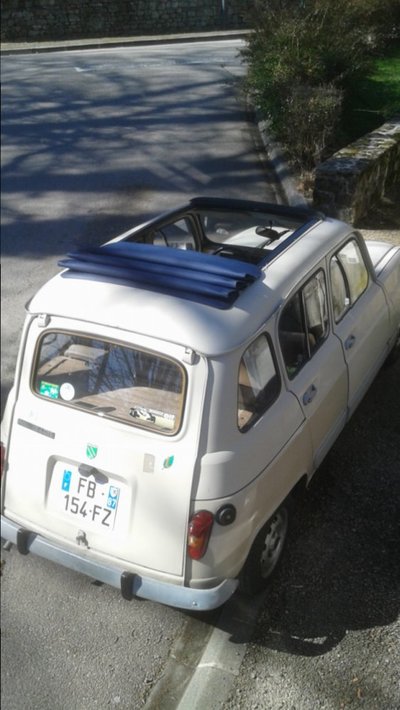
This is my 1987 GTL on which Derek Renospeed installed a full-length sunroof in 2012.

It is a Tudor Webasto (not Webasto), of the kind that used to be installed on Volkswagen Beetles, MGB-GTs, etc

I think it made out of wood and probably a lot more expensive than a Twingo.

It looks possibly slightly more period-correct than the Twingo ones, as it doesn't have the plastic air deflector lip at the front
 
  • IMG_8664.jpeg
    IMG_8664.jpeg
    310.5 KB · Views: 24
  • IMG_7235.jpeg
    IMG_7235.jpeg
    318.5 KB · Views: 25
  • IMG_6287.jpeg
    IMG_6287.jpeg
    202.4 KB · Views: 24
Hi 'W',
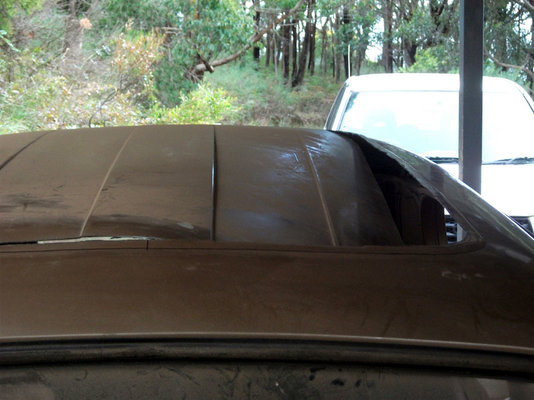
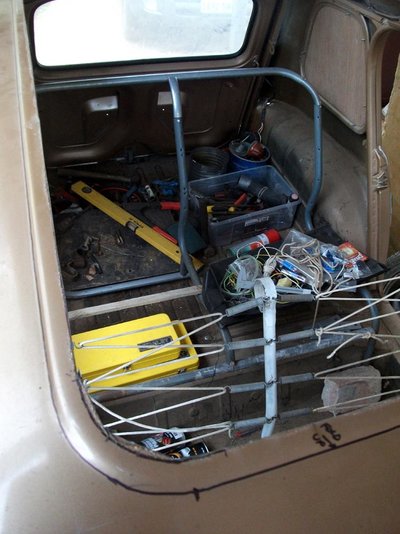
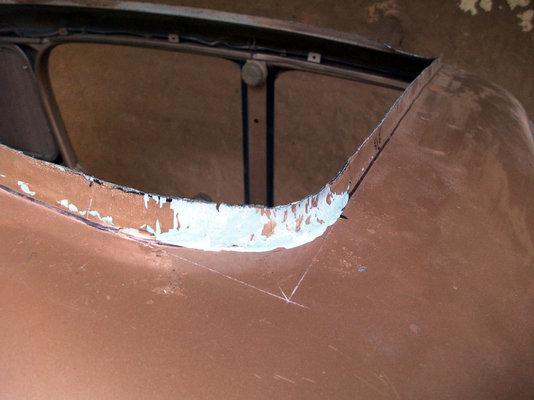
I believe the Twingo option is the most favoured option but here in South Australia Twingo sunroofs are few and far between so I have opted to make up a 'replica' of the original factory roof, with some mods. I'm almost there with the installation of the frame and I am expecting a delivery of some suitable UV resistant black vinyl for the cover.
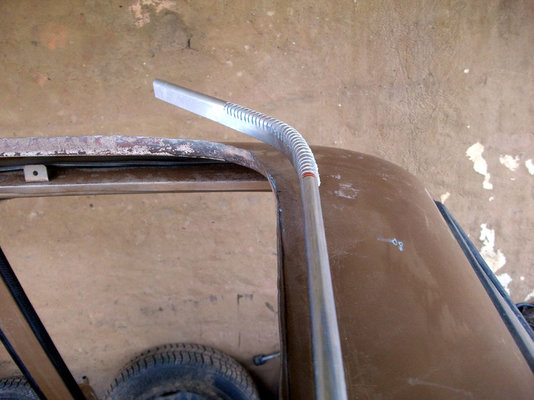
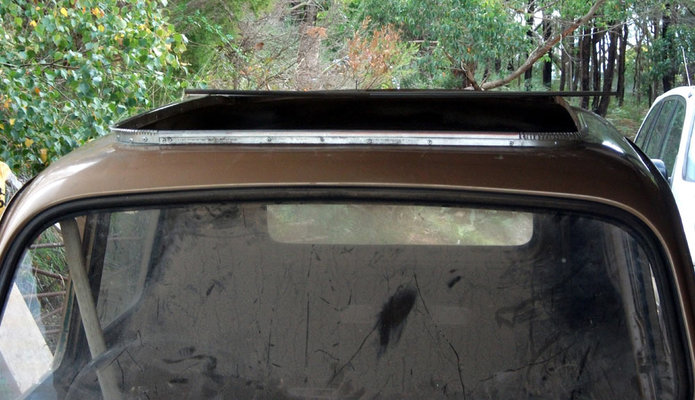
I am attaching some pics of the early work. After studying as many photos of these set ups I realized the raised rim was a seperate piece welded to a turned up flange around the edge of the cut out hole. As I don't have access to anyone that could make the add on edge I opted for an aluminium extrusion that was pretty close to the original profile. My other major problem is that I have no welding tools ('cause I can't weld!) so most of my bits are either riveted or bolted where appropriate. Since taking these pictures I have now made up the two swing arms, the central cross brace and the two movable supports (I'll post pics of these parts soon).
I believe there will be leaks no matter what option I took so I opted for a more 'authentic' look.
Ronsunroof-2-web.jpgsunroof-6-web.jpgsunroof-8-web.jpgsunroof-10-web.jpgsunroof-11-web.jpg
 
Thankyou all - i will give Derek Renospeed a call and do some digging on the Twingo route. I'll keep you posted. Lovely car Richard - are they french plates? can you run on them? I still have french plates and would like to run on them but currently have uk plates.
Great work Ron - i like your DIY style - good luck with the install.
Stay safe everyone!
 
Lovely car Richard - are they french plates? can you run on them? I still have french plates and would like to run on them but currently have uk plates.
Thank you - it's the Irish registration number on French-made plates

The car lives in Ireland, where silver-on-black is permitted for cars registered before 1991.
 
Hi everyone - Just joined the forum and was wondering if anyone has any tales to tell regarding fitting a soft top to an R4? I'm thinkinking of cutting the hole and fitting the slide or roll back type. I've heard that a Clio soft top might be suitable but also that leaks are to be expected? Any clues as to where to start would be useful.
Hi there. Like the others say here, the Twingo roof is the way to go. I did mine last year, and use my car in all weathers. No leaks, no problems. Great addition to the car. Make sure you make a good template - I made a template from cardboard, which wasn't quite rigid enough and meant the opening we created wasn't quite big enough … so there was a lot of time taken up making the opening the correct size. We used a sealant manufactured for use on boats, which we bought at the local DIY centre. The whole process took us 6 hours, two of us working together. Good luck!
20190328_103724.jpg
 
Hi there. Like the others say here, the Twingo roof is the way to go. I did mine last year, and use my car in all weathers. No leaks, no problems. Great addition to the car. Make sure you make a good template - I made a template from cardboard, which wasn't quite rigid enough and meant the opening we created wasn't quite big enough … so there was a lot of time taken up making the opening the correct size. We used a sealant manufactured for use on boats, which we bought at the local DIY centre. The whole process took us 6 hours, two of us working together. Good luck!
View attachment 26048
Hello! I'm so impressed with your sun roof, it's exactly what I would like for my '85 GTL, but please tell me...was it really easy to find the roof for sale in France? Do you have any hot tips for where I might search for one, pretty please....
 
Hello! I'm so impressed with your sun roof, it's exactly what I would like for my '85 GTL, but please tell me...was it really easy to find the roof for sale in France? Do you have any hot tips for where I might search for one, pretty please....
Hi there "happybutsimple". I bought my roof through a website called opisto.fr - it's kind of like a scrap yard online. At the time (March 2019) they had a choice of 3 twingo 1 roofs. I paid 119,00 euros for mine. Before that, I was looking on Leboncoin.fr, which again at the time had a selection of 3 or 4 within 200 km of me. Good place to start your search. Good luck!
 
Hi there "happybutsimple". I bought my roof through a website called opisto.fr - it's kind of like a scrap yard online. At the time (March 2019) they had a choice of 3 twingo 1 roofs. I paid 119,00 euros for mine. Before that, I was looking on Leboncoin.fr, which again at the time had a selection of 3 or 4 within 200 km of me. Good place to start your search. Good luck!
Thank you so much! I will have a look.
 
We've found one!
My husband found four on eBay, they are in Germany, this is a link to one of the ones left....It was a similar price to the one you bought quatrelle87, plus the delivery charge
Thank you for your assistance!

 
We've found one!
My husband found four on eBay, they are in Germany, this is a link to one of the ones left....It was a similar price to the one you bought quatrelle87, plus the delivery charge
Thank you for your assistance!

Excellent news happybutsimple. And when you finally receive it, the fun can start! I can't tell you how nervous I was when we began the process - but everything went smoothly. Top tip - if you're making a template from cardboard, make sure the cardboard is stiff and firmly held in position on the roof before you start marking out the cutting area. My cardboard template ended up distorting slightly, which meant lots of rubbing down of the edges etc. Good luck :laughing:
 
Excellent news happybutsimple. And when you finally receive it, the fun can start! I can't tell you how nervous I was when we began the process - but everything went smoothly. Top tip - if you're making a template from cardboard, make sure the cardboard is stiff and firmly held in position on the roof before you start marking out the cutting area. My cardboard template ended up distorting slightly, which meant lots of rubbing down of the edges etc. Good luck :laughing:
Thank you! Luckily for my R4 and her new roof, I'll be handing it all over to the professionals! this is waaaaaay beyond my skill-set ;):laughing:

I do appreciate all your tips though, please dont stop with those : )

....and just to point out for anyone who disagrees with cutting up the roof there is already a terrible after market sunroof on her, so the Twingo will be a HUGE improvement!

Screenshot 2021-05-20 at 12.37.38.png
 
Ok-I admit,
I clicked on the link above to a German scrapyard advertising a complete Twingo roof.
Then I clicked the "buy it now" and bought the last one.
Then I paid VAT and import Duty last week.
So it stands me in at £350 delivered.
It is in very nice condition, no damage and came with all the fittings. Nicely packaged.
It arrived this afternoon. I drilled the bolt holes and cut the big hole (runs very close to the 30 or so smaller bolt holes required).
I lined the inside of the car. Hot sparks wreak havoc on glass and interiors!
Fits a treat to the shape of the R4 roof.
Yes-I do have the front trim (not fitted).
No-I have not bolted in the inner frame yet. This will pull in down slightly.
Yes, it did come complete with the headliner trim. Lovely.
I will line the aperture with body sealer before dropping in in for the last time and doing up the bolts from the inside.
Just what I wanted, thanks.

R4 GTL Roof.jpg
 
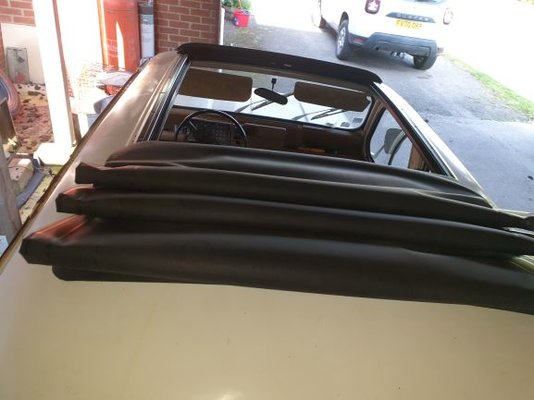
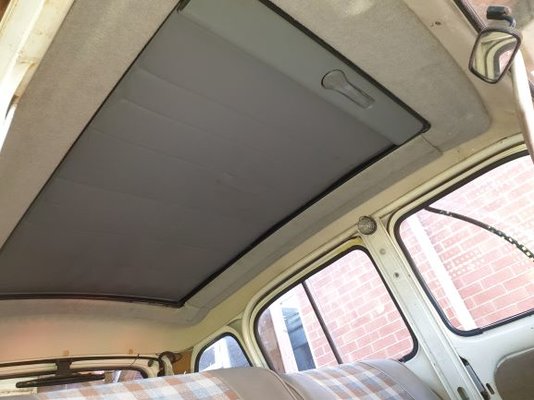
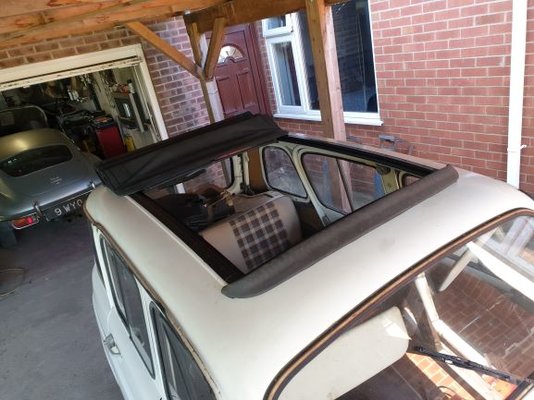
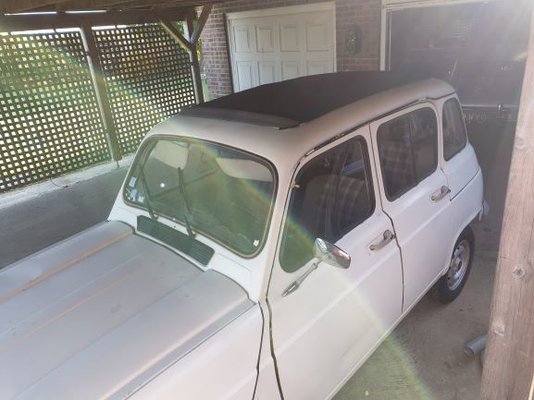
OK, I had time to finish it off yesterday evening. Here is the result, open, closed, inside and out side. Fits very well.

These are my instructions for those who are not used to doing thing like this! If you are used to doing tings like this I suppose it is straightforward enough.

To do the job I used a marker, a ruler, an angle grinder with 1mm cutting discs (x4), 2 inch wide masking tape, one inch wide masking tape, a drill with 10mm drill bits, one tube of automotive sealer some gloves, double sided foam tape and a 10mm ratchet.

The roof is a complete unit comprising the main sliding section in its rails, a separate inner alloy frame comprising the 4 sides and finally the front plastic air dam. and 4 inner trim pieces.

Around 30 studs are welded to the main roof structure. These pass through the car roof skin, then a new alloy inner frame and is secured with special metric nuts with built in washers, from inside the car.

The new roof has to drop into an accurately cut hole in the cars roof skin. More importantly, the roof bolts through the skin and also the inner alloy frame, so you have to drill the holes (about 30 of them in the correct place).

This is slightly easier than it sounds, as long as you get the holes drilled in the correct place!

To do it this was the order of events.

I covered up the seats and taped up the inside of the windows to prevent damage. Any iron fillings need to be vacuumed up within a few hours otherwise they will turn to rust and stain.

First I placed the main roof unit on top of the car in the correct position, using a ruler to centre it and also ensure it was in the correct position front to back.

This was without the alloy frame in place and also without the special nuts used to secure the roof. This is easier than it sounds because the roof has symmetrical pressings in it, of course.

The main folding roof unit is rigid, so will not go out of square.

I strategically taped the new roof to the car roof with 2 inch tape to make sure it could not move out of the correct position.

I could then accurately mark the contact points of all the studs to the car roof with a dot from the marker, making a large rectangle in total.

I then drilled the 30 ish 3mm holes, then opened them right up to 10mm, to ensure enough wiggle room for the 30 odd studs.

I then "joined the dots", making a large rectangle on the inner edge on the 10mm holes. This is the cutting line.

I then cut out the large rectangle of the roof, the cut out touching all the 10mm holes I had just drilled. You can just miss the holes with the cut but the hole you have to run the cut very close otherwise the main folding roof frame will not seat correctly on the roof skin.

The headline now needs cutting back an inch inside the car. Used the one inch tape to create a line for the cutting disc to follow. The will allow the studs and their nuts to be completely clear of the headliner panel when the roof is dropped in place.

I then carefully dropped it all in place for a final clearance check, then removed it for the bonding.

Using the black silicone (£6 a tube) and a pair of rubber glover, I beaded an even line around the outside of the hole.

It was then a matter of dropping the roof in, attaching the inner frame, and bolting it all down tight.

Finally I placed the front air dam in place, marking the 4x10mm holes required and attached it.

The inner trim is in 4 pieces with needs double sided foam tape to attach at the outer edges.

Then a good clean up.
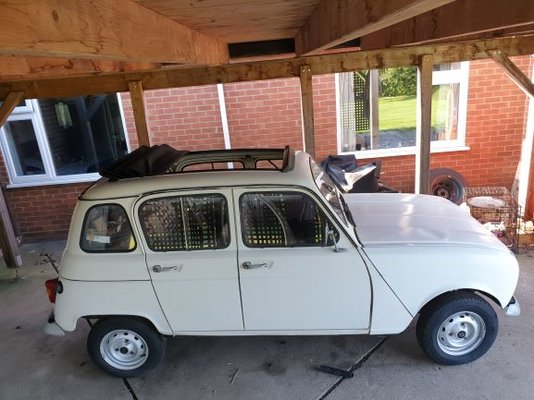


R4 Open Roof Side.jpgr4 Open Roof.jpgR4 Open Roof Inside.jpgR4 Open Roof Front.jpg R4 Open Roof Closed.jpg
 
Fabulous! I'd love one but even though I think I'm capable, my nerve would be lacking. One day!
 
as you Will drive in All weather-conditions with the top open -Do not make the same mistake so many topless
owners do..DO take a selfie just to be on the safe side-as this might well be your LAST season with own hair... :whistle:
-When it's gone you'd otherwise have a hard time convincing the rest of us you had own hair in the past
-Reid.
PS: roof looks spiffy!
 
(That looks fabulous! My new roof is still in the box)

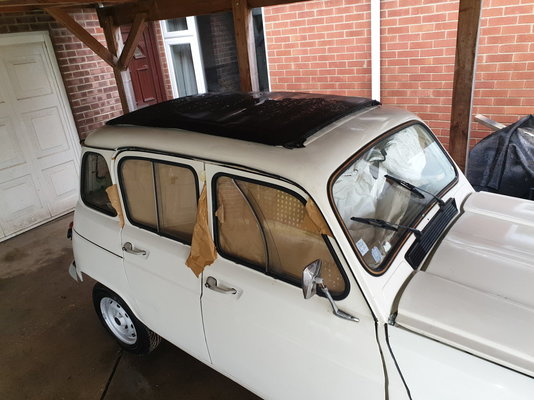
9 months on and the roof is now in! not without some major issues involving the fact the dodgy lift up sun roof that came with 'Titch' wasn't set square, very skilled restorers had to rebuild one of the edges of the roof to support the twinge roof
The end result is fabulous!
 
Last edited:
Back
Top