Clementine's Garage
Clementine the Cat
 
Image of flower
Yellow R4
 
Réparateur d'automobiles

Renault 5 Alpine

angel

Enthusiast
Messages
2,439
Location
Athens, Greece
I recently bought this, my first non-R4 car!
It's a TL bodyshell, fully converted to Alpine atmo. Not a single rust spot on it, and the only panel that has been replaced is a 30x30 cm section on the passenger's floorpan.
Now I'm starting gathering bits, as my thought is to build a Group 2 spec "toy" (and not have to worry
about sacrificing a real Alpine body).

DSCN1405.JPG .

DSCN1403.JPG
 
Hi there angel! your new-found R5 looks really nice and solid. To find these with literally no rust is a Rare treat these days for sure.
Hope you'll be happy with it and also hope you will share any improvements and upgredes you be doing to it. The wheels looks Proper
on this one.
-There's a guy selling all his gp2 parts (engine/gearbox)dual sidedraft carbs etc etc (all exept body) here in Norway at the moment.
said to be of Dutch heritage (the car not the guy)
All the best angel/-Reid.
 
There is a guy here specializing in plastics / composites that has the wing extensions moulds. I hope he has the fascia panel mould too, otherwise I have to source it from abroad.
I'm looking for the "swan neck" manifold for the dual carbs, is there a chance that he will sell it separately?
Also looking for a pair of front vented discs, and a pair of Bilstein rear shocks. Can you ask him for the above parts?
Hi angel I know where there may be the manifold you need
Plus some very rare gotti 5 coupe rims
Not cheap though 20180802_163303.jpg20180802_163303.jpg
 
Hi Paul, nice to hear from you again! Can you please ask abouth the manifold if it is still available, and its price?
I'm also still interested in the wing extensions (nobody here has the moulds), Gr.2 dashboard and rear Bilstein shocks.
 
Manifold and linkages brand new original parts available 300£gbp
Been told mecapart's do the wide arches
 
Well done sorry it took such a long time to negotiate the manifold deal unfortunately my friend and who is a severe clutter hoarder recently had had health
 
Here is a summary of the last four months' occasional work on the car.

Front brakes are ready according to Gr.2 spec (vented discs and 54mm calipers). Making them fit to the standard Alpine stub axle carriers and hubs needed measuring, spacing, milling, and some thin spacers to be fabricated. I decided to go to 12mm wheel studs, both because 10mm ones seem fragile for such use, and to have more choices with spacers, and longer studs.

DSCN1960.JPGIMG_20191222_133808.jpg

After searching a lot here, I found the correct 20,6mm master cylinder at an old brake parts shop.

IMG_20200213_150439.jpg

I fitted a cheap adjustable rear brake limiting valve, but gave it that "works" look, with a well known part - the same as Renault Sport used back in the 70s!
IMG_20200318_201553.jpg

In the meanwhile I had some braided hoses fabricated.
IMG_20200118_102444.jpg
The rear brakes were a bit of a hassle for me. I had to find a complete Alpine turbo kit, as the car had drums on. This proved to be hard, but in the end I spotted the discs, hubs and caliper mounting plates in a city 500km far from me, and picked them on my summer holidays on my motorcycle. But I was still missing the calipers. A friend of mine gave me a pair of Fiat 124 ones that proved to be unsuitable, since the handbrake lever comes at the wrong place (the calipers on the 124 are fitted in front of the axle). Plus, they have 32mm pistons while Renault ones are 36mm, and I wanted to keep the factory sizing wherever possible. I had a Lancia Beta rear caliper in hand, also using the same Bendix layout, and by experimenting with this I found that, if I reversed the caliper body in the steel caliper carrier, I could bring the handbrake lever (and bleed valve...important) to the correct position on the car, and as a bonus, it had 36mm piston. I decided to use the 124 brake pad carriers, as spacing between the caliper dovetails on the DBA/Bendix system seems to be universal, so I bought a set of EBC pads:

IMG_20200214_103420.jpg

Now I had to search for a second rear Beta caliper which I thought it would be easy, because there were thousands of Betas here, with a lot of specialists. But I was wrong in the end, and I gave up after some two weeks of calls and searching the whole Athens area, without any good result. Considering that the Renault models which were equipped with these Bendix rear brakes (R5 AT, R25, R12 Gordini, R17 TS) were exotic for our market, to say the least, and convinced that no one would had kept spares, I didn't look for the obvious in the first time. But after searching more carefully after the Beta disappointment, I found that there were some newer Renaults that still used these calipers: some few R21s and almost all of the Mk1 and Mk2 Espaces. A few calls to scrapyards later, and I found an Espace at a town far away from me, but the scrapyard owner was more than happy to take the calipers off and send them to me.

IMG_20200310_195655.jpg

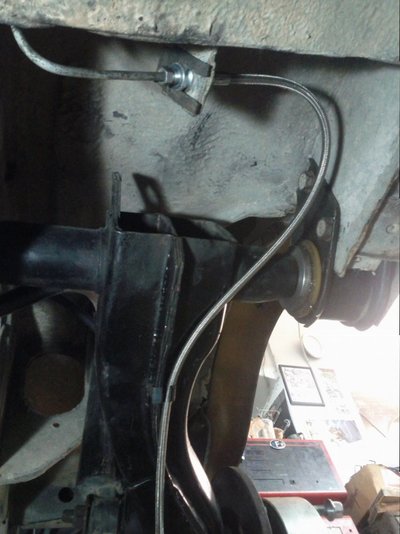
And after a bit of work...

IMG_20200314_133659.jpg

IMG_20200314_145011.jpg
 
  • IMG_20200318_195406.jpg
    IMG_20200318_195406.jpg
    107.8 KB · Views: 0
Rear hubs are noticeably wider on the works cars, but I couldn't find the exact measurements. So I made some thick spacers to experiment with. I decided to turn them down to 30mm thickness.

DSCN1827.JPG

Then I turned my attention to the rather sloppy gearshift lever:

IMG_20200105_140846.jpg

IMG_20200106_155116.jpgIMG_20200120_104110.jpg

I got two expired bucket seats, as I don't plan to compete in FIA events. They were an instant hit with my workshop partners...

DSCN1712.JPG

New water pump

IMG_20200205_213305.jpg

Re-cored 3 row radiator...

IMG_20200229_155323.jpg

...and twin fans will (hopefully) cope with our hot weather.

IMG_20200319_202957.jpg
 
  • IMG_20200120_094303.jpg
    IMG_20200120_094303.jpg
    262.7 KB · Views: 0
I like working on electrical systems so I decided to build the installaion from scratch with new fuse layout, and addition of relays where needed. My goal was to simplify the system so that eventual repairs and fault tracing can be performed easily. Most of the wiring had to be re-routed or re-fabricated, in order to accomodate new parts (additional lights, a new instrument panel, twin fans, twin fuel pumps, retrotrip etc.). For start I fitted a 90 ampere Bosch alternator, both powerful and easy to repair since parts are widely available.

2 SEV Marchal spotlights and 2 Cibie Oscar driving lights fitted with 100W lamps should be more than adequate for night events:

IMG_20200302_203132.jpg

The instrument panel is my own attempt of approaching the works fibreglass one, which is rather pricey and would need an adapter base to be fitted on the 1980-on bodyshell. Instruments are a mix-and-match of factory speedometer, Simca Rallye tacho, factory warning light lenses and oil pressure gauge, unknown Renault water temperature / voltmeter panel...but end result is more than satisfying.

IMG_20200107_205414.jpg

IMG_20200308_112125.jpg

IMG_20200308_115010.jpg

IMG_20200308_120713.jpg

IMG_20200308_134141.jpg

IMG_20200328_143049.jpg

Now the fun begins. The engine side of the wiring harness had two layers of tape and plastic spiral on top of this. I'm using most of the wires as they are in good shape, but I'm going to rewire the headlamps, and of course add lines where needed.

IMG_20200321_135610.jpg

IMG_20200327_192112.jpg

IMG_20200328_114807.jpg
 
I found a set of Gotti two piece wheels on ebay - the perfect addition to the car!IMG_20201224_210947.jpgIMG_20201225_142313.jpg

I checked them and they were all straight exrept for one, but I had it repaired easily and cheaply. Then I split them to make life easier.

IMG_20210315_134658.jpg

The result:

IMG_20210325_144517.jpg
IMG_20210325_175214.jpg

New correct center cap stickers and new stainless hardware made them look really nice.

IMG_20210325_175224.jpgIMG_20210403_125434.jpgIMG_20210403_125545.jpgIMG_20210403_125734.jpg
 
The R5 seems completed at the last photos, but that's half the truth. It still has no exhaust and final stages of debugging, testing, adjusting, re-testing and so on can be time consuming. Having this in my mind, and lots of work on customers' cars, I decided to participate in the Pindos Historic Rally, a two day / 800 km regularity rally programmed for September 3rd.
After lots of efforts and having to cut an inner arm mounting in the end, I finally got the torsion bars off an F6 rear axle I had. They are interchangeable with the R5 ones, and are just 1mm smaller in diameter that the Gr.2 / Coupe spec bars.
IMG_20210503_130647.jpgIMG_20210503_130655.jpg

Fitting them and setting initial ride height was a piece of cake. I also set the front ride height, which was too tall, after having to take off both lowar wishbones in order to be able to free the torsion bars from their splines.

Renault Sport used to fit a solid bronze steering rack bush instead of the flexible one of the standard cars. I decided to follow the same way, fabricating it in Acetal instead:

IMG_20210508_102054.jpg

It was time to try to start the engine. It started without any trouble but with lots of noise - no silencer fitted yet! The exhaust was the only part of the car I had to entrust to somebody else. Luckily he is a friend and did a very good job of fabricating a complete stainless exhaust on the Turbo pattern (silencer behind the left rear wheel), with smaller diameter pipes. All joints are of the V-band type, very handy for easy disassembly / assembly.
It's back in the "Batcave" in the first week of August:
IMG_20210805_182005.jpg

Last jobs are engine tune up, fitting a fire extinguisher and various hooks in the boot area to secure the spare tyre, toolbox etc and spraying the side strips in place of the temporary vinyl sheet.

IMG-71cd0c8eb79c8366412b28893889e8db-V.jpg

With only one week remaining for the rally, I decided to make a trip to Nafplio, southern Greece as a shakedown. i had to set wheel alignment "by eye" as the local alignment specialist was still on holidays, but the car completed the 400 km trip without missing a beat.

IMG_20210829_120349.jpg

The 450 km trip to Ioannina, start city of the rally, was also free of troubles, except for the starter solenoid terminal coming loose and the rear wheels fouling the wheel arches - it was the first time I was testing the car fully laden. No worry though, setting the ride height the evening before the start was fun!

IMG-b5f0d87c8954f4a017c5d00098dc7f1c-V.jpg

The rally was wonderful, the R5 performed better than I expected and we managed to finish in the 12th place out of 24 cars.

IMG-30f55b4c90c2dd3e1cfc0f552b9e6419-V.jpg
IMG-47fcb921d1254c050f8bcd329b892140-V.jpg
IMG-61e8d447de8ab447b3f88276c5eac6f5-V.jpg
 
Back
Top