Clementine's Garage
Clementine the Cat
 
Image of flower
Yellow R4
 
Réparateur d'automobiles

R4 restoration made in France

Very, VERY well done !!!

(I liked the red though, thought that it would stay that way...) :wink:

As I said earlier ... I wish I would be that far ...

Keep on posting pics of your progress!

Regards,

David

P.S.
As a "frenchman" :wink: do you by chance have access to rare R4 parts?
I'm in a need of the rubber sealants for the back-door and the ladder-bonnet (échelle-volet (?)) as well as the rubber around the windshield of my R4 F6 van.
I couldn't find new parts anywhere, are you able to help out?
 
Thanks you my friends for these compliments :rolleyes: :rolleyes:

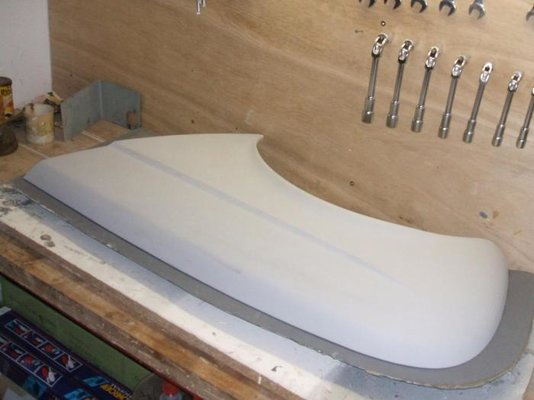
John, I started the first part of the first mould few days ago, I also sprayed a primary coat on my front wings to have the best surface as possible before moulding them. I will post pictures when the work will be at a more advanced stage.

David, the pictures I post today were taken about one month ago, so you beleive I work very quickly... but I started the restoration of my chassis in june 2009 :D Good luck for yours ;)
Concerning the rare parts, of course I already said that I can help anyone here to find special parts if you're not able to find them in your countries. Maybe you'll find what you need here:
http://www.comptoir-carrosserie.fr/...f4/index.php/cPath/236_265_267/sort/2a/page/1

http://www.melun-retro-passion.com/accueil.asp

I've been told that Melu Retro Passion have exactly what you need, but perhaps you will have to phone them...
 
Hi Alexandre!

Thanks so much for the links!
Incredible they both have exactly what I was looking for. (And many many more niiice items.) :D
Unfortunately my French is absolutely substantial and I didn't practised it for at least 25 years. :(

When I'm ready for all that nice stuff, do you think ist is possible that I contact you for a little help with these sites?

That would be awesome!!!

Thanks,

David
 
;) No problem David, let me know what you want exactly or maybe do you prefer my private email ?
 
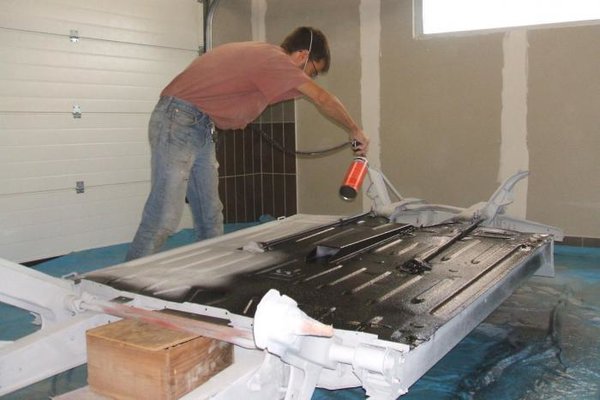
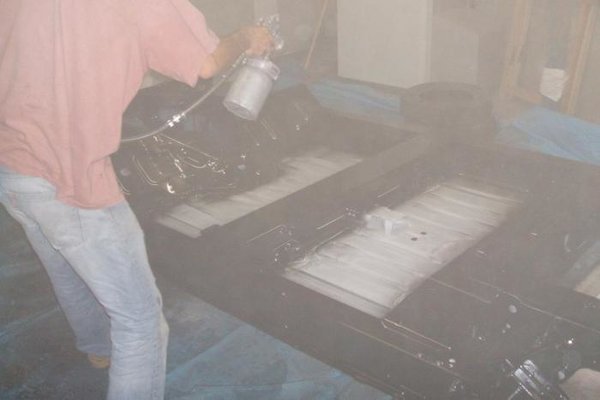
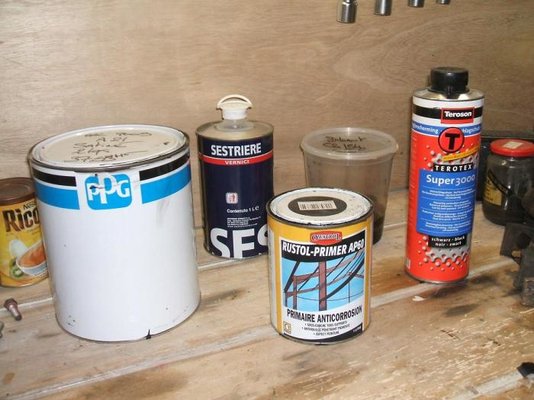
;) Hi all, here are the first stages of the painting of my châssis. At the beginning of september the primary coat was dry, before painting it I sanded it with 320 dry paper. Then I applied a stoneship primer (Teroson is the best mark we can find in France, used by many coachbuilders) on the underneath of the chassis.
:mad: Some people don't agree with this treatment, considering that this product can crack during the years and permit the rust spreading. Personnaly as my floor is in very good condition, I think there is no risk and the stonechip primer will offer a best protect to my chassis than a simple paint...
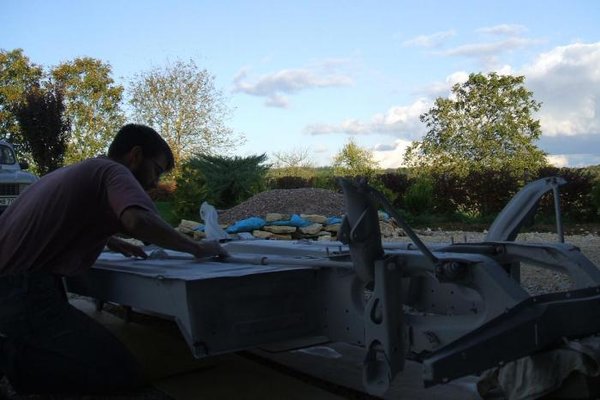
127 Dernier ponçage.jpg
128 Produits utilisés.jpg
129 Antigravillon 1.jpg
131 Séchage.jpg

:cool: :cool: 24 hours later the stoneship primer is dry, the final touch is for the next time !
135 Antigravillon sec.jpg
 
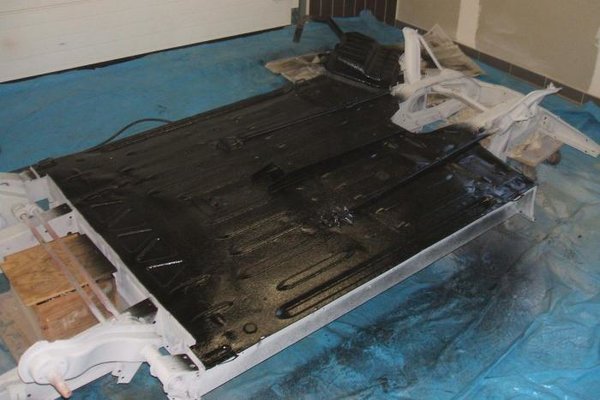
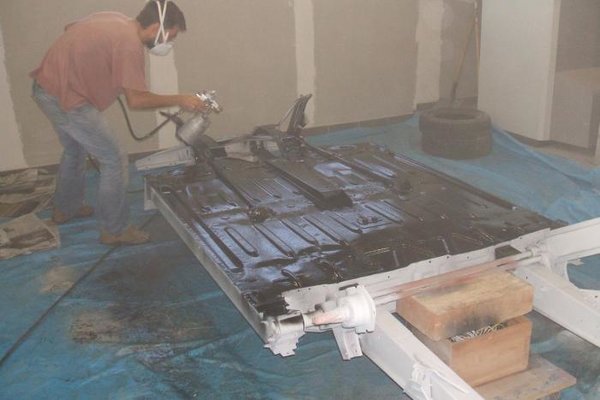
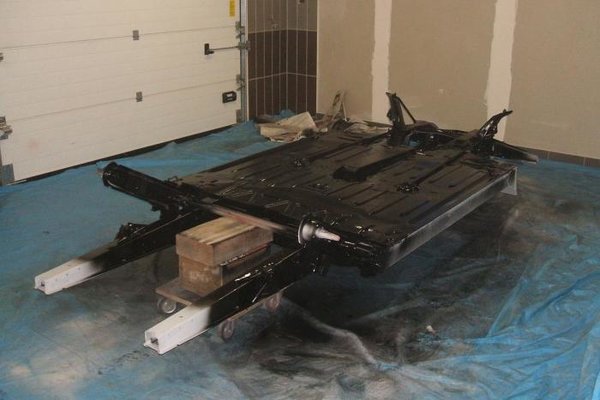
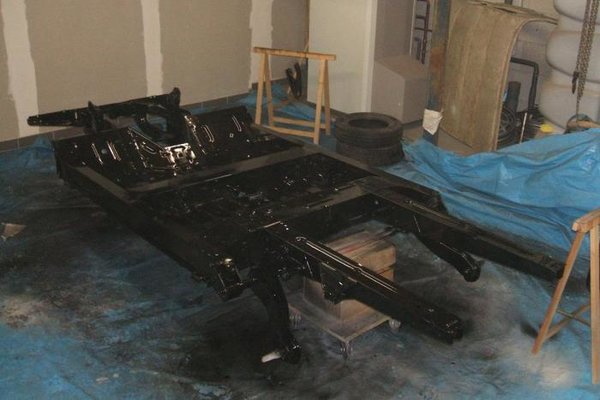
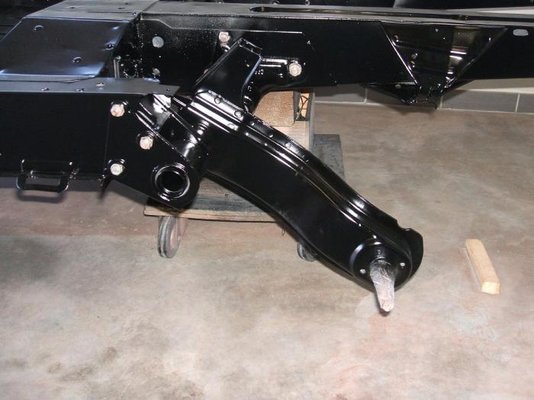
;) Hi all, the day after apply of stoneship primer, I started to paint my chassis with silk-finish black paint, I started with the underneath of the chassis, on the stoneship primer, with the paint the surface will be totally watertight.
136 Noir 1ère couche.jpg
I didn't paint the extremities of the chassis to be able to return it.
137 Séchage.jpg
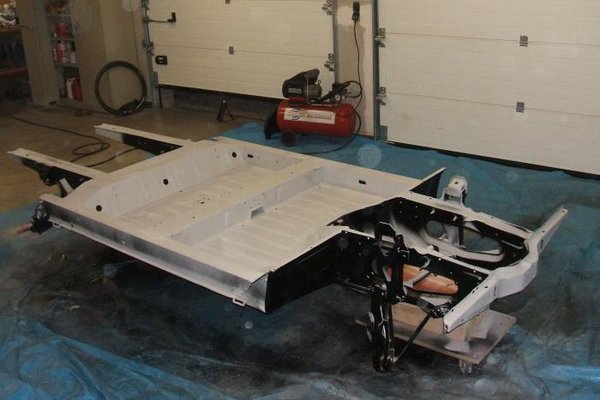
After being carefully returned, the top of the chassis was now ready to be painted.
138 Retournement.jpg
139 Peinture dessous.jpg
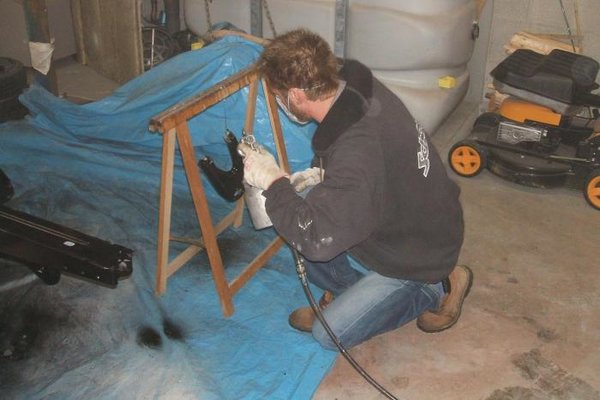
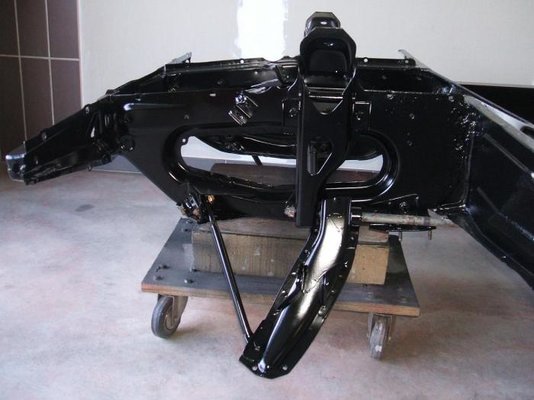
My little brother helped me for few places and for the front wishbones, he's actually looking for a second car, and I persuaded him to buy a R4, youpeeeeeeeee :rolleyes: :rolleyes:
140 Peinture triangle.jpg
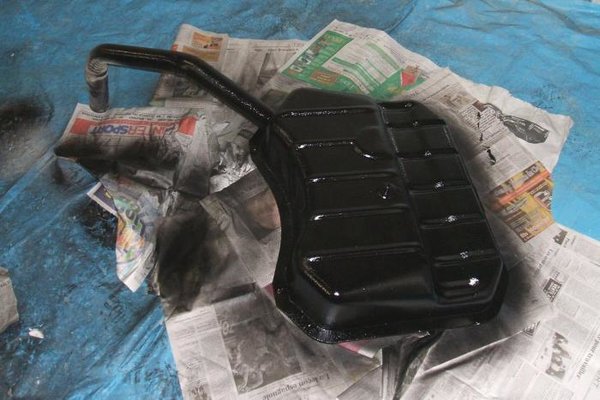
The paint work is finish, the fuel has received the same treatment than the underneath of the chassis: stoneship primer before paint.
141 Séchage.jpg
142 Réservoir.jpg
 
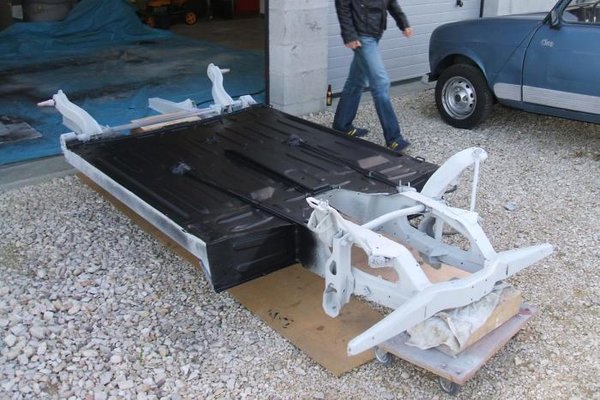
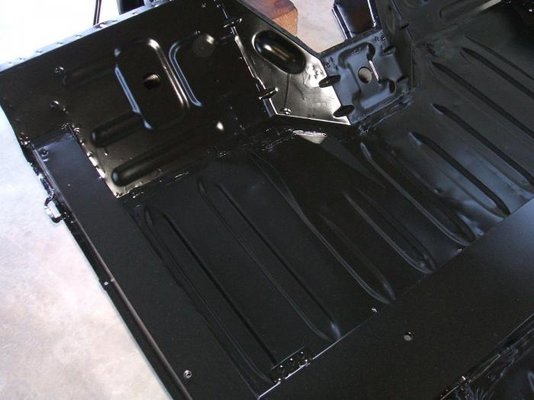
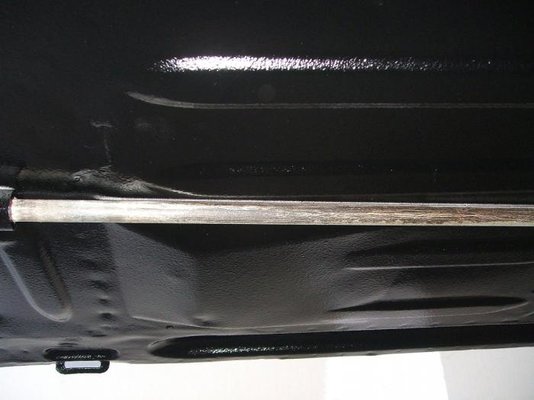
:) End of the paint work; 2 weeks ago, the chassis is now absolutly beautiful, I'm sure in 1986 it wasn't as nice as it is today.
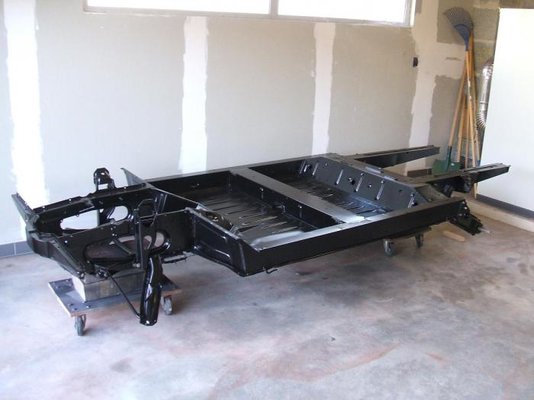
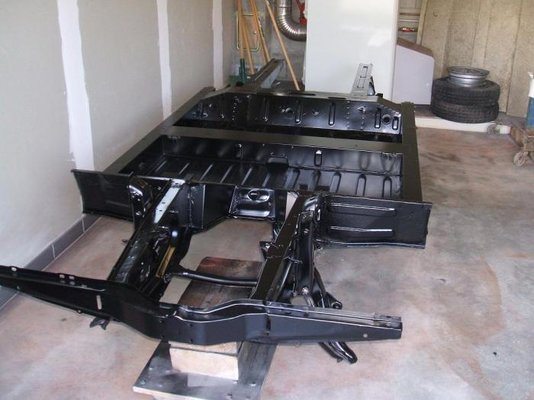
145 Châssis peint.jpg
147 Châssis peint.jpg
I removed the scotch tape I apply on every bolt or nut, and the chassis looks like a new one !
rtrtrtrtrtrtrt.jpg
150 Détail 3.jpg
149 Détail 2.jpg
152 Dessous 2.jpg

The next stage of my work is to refit all the elements on my chassis, but before starting this job, these elements will be restored, painted, or treated by specialized companies, or by me...
 
A question

It is impossible to sess or know the condition of the suspension bushes in the photos so this may be a redundant enquiry. Did you consider replacing the front/rear suspension bushes while you have easiest access to them?
The work that you are doing looks fantastic and must fill you with pride!
Keep posting with pictures!

Regards,

David
 
;) Hi David,
the car which gave me the chassis had only 51000 km, I went for a short ride with the car before buying the chassis, and all seemed to be ok. I chose not to remove the torsion bars because I feared not to be able to refit them correctly. When I removed the front wishbones I showed the bushes to my garage mechanic who told me they were in very good condition, so I think -I hope- the other ones are in good condition too...

Thanks for the compliments on my work :cool:
 
Stunning!!!

These suspension bushes fail only after 200.000+ kilometers, in my opinion it is too much of a hassle to bother with them, especially when you know the car history...
 
;) That was exactly what I thought about this question, and I decided to let all the bushes on my chassis !

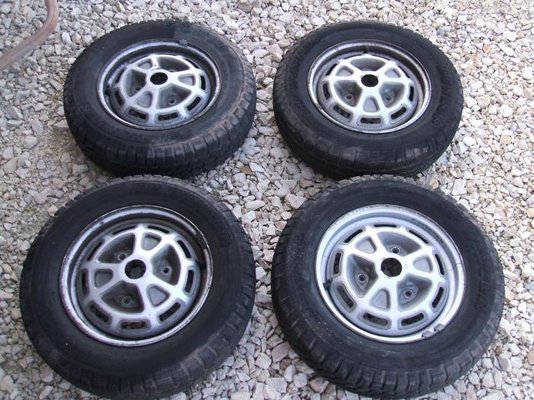
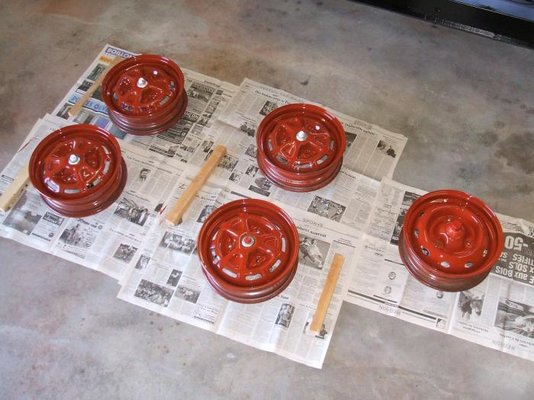
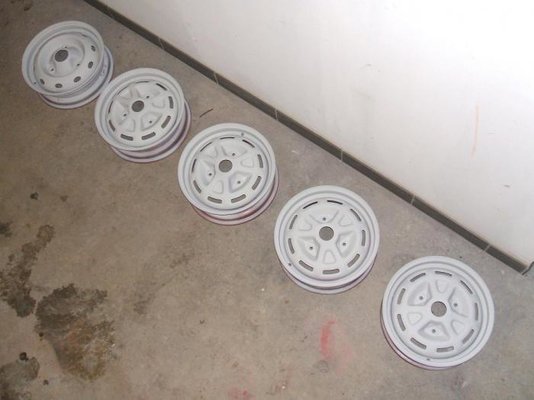
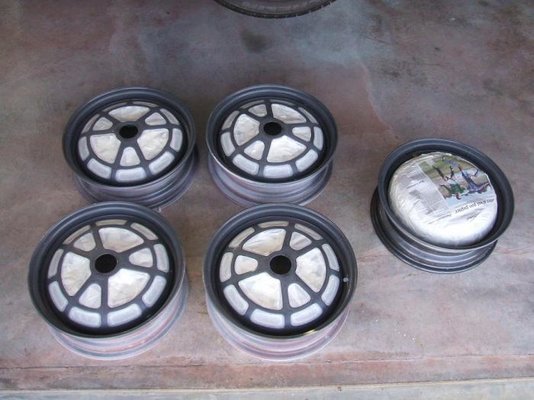
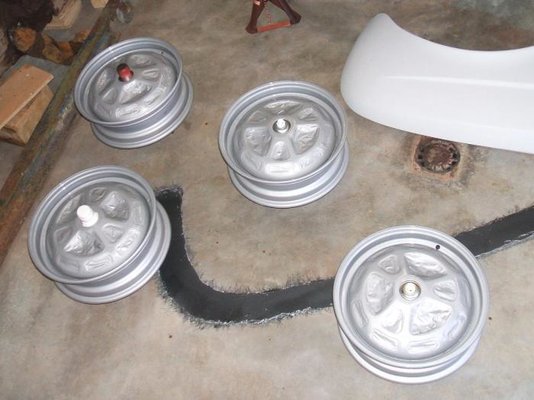
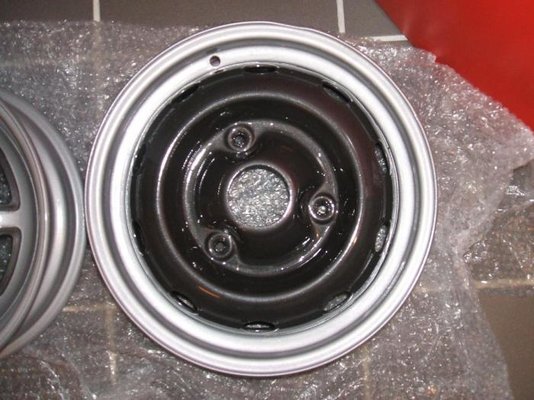
Today I will tell you the story of... my wheels ! When I bought the chassis I was lucky to see there were the nice rims (Fergat) fitted on only the 1986 and 1987 R4 GTL. At first sight they seemed to be in good condition, but looking them carefully, rust was appeared at many places, and finally they also needed a good restoration before beeing replace on my (new) chassis :rolleyes:
056 Jantes nettoyées.jpg

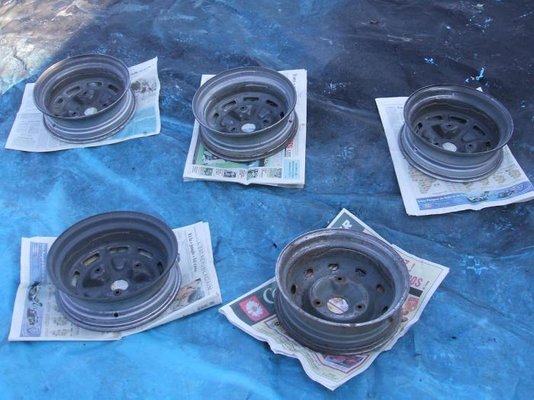
1. After removing the tyres (and throwing all of them) I started to sand them with dry 80 and 120 paper. I wish to make it clear that in all the following pictures I restored the outside of the rims AND the inside of them, I love the good job :D :D
155 Jantes poncées.jpg

2. Then I applied a first coat of Rustol CIP (two weeks waiting for a good drying). You can notice that the spare wheel is unfortunatly a normal rim, but I decided to "customize" it...
156 Jantes Rustol CIP.jpg

3. I continued with a coat of PPG primer (one weeks of drying);
157 Jantes Koba PPG.jpg

4. After sanding the rims with 800 and 1200 water paper, I applied the charcoal grey paint, sorry I didn't take picture of this step :eek: :eek:

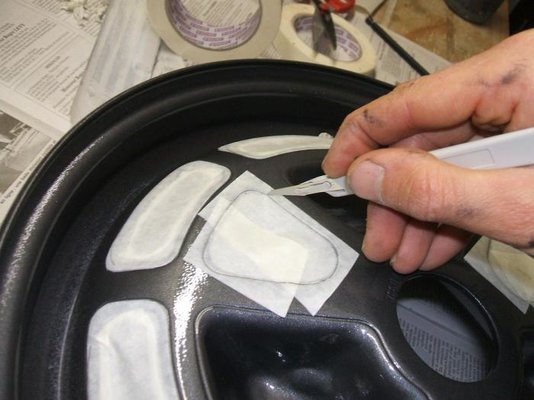
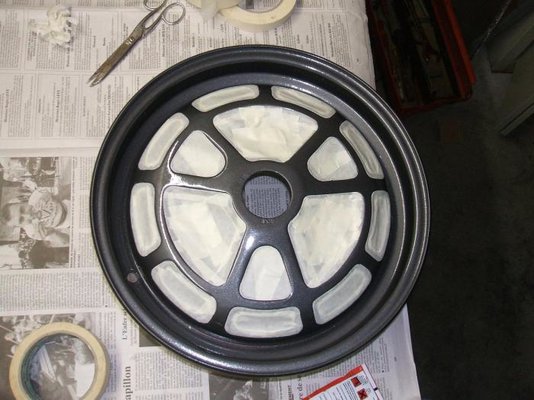
5. At this moment the most pleasant (!!!!) part the work started: protecting all the places which will keep this color, I used adhesive paper tape and scalpel to have precise cuttings;
175 Marouflage jantes.jpg
176 Jante marouflée.jpg

6. More of 3 hours were necessery to finish this job, but as the paint was direct-brightness (without varnish) I had to sand again the surface (1200 paper) before applying the clear grey;
177 Ponçage jantes.jpg

7. Then I applied the clear grey to finish the job;
178 Peinture grise.jpg

8. After few ten minutes, but before complete drying of the paint, I carefully remove all the adhesive paper tape and...
179 Enlèvement scotch papier.jpg
 
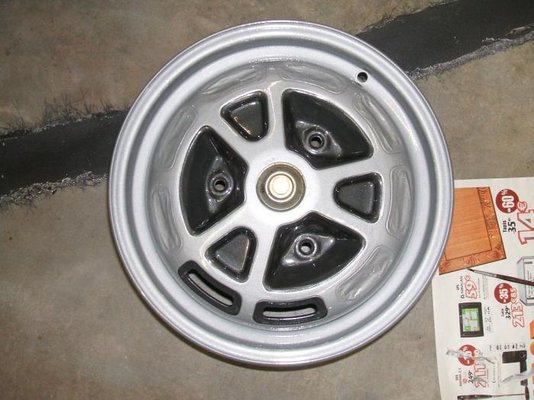
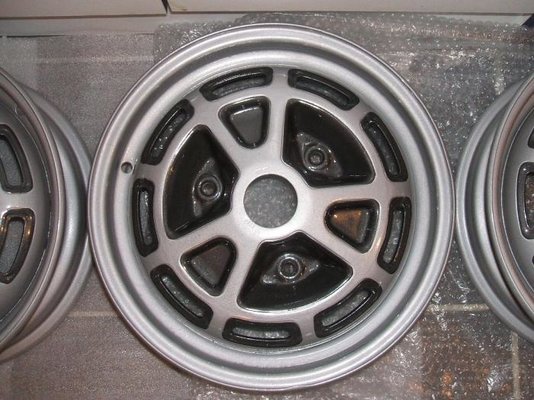
... the rims are absolutly beautiful :shock: :shock: :shock: :shock:

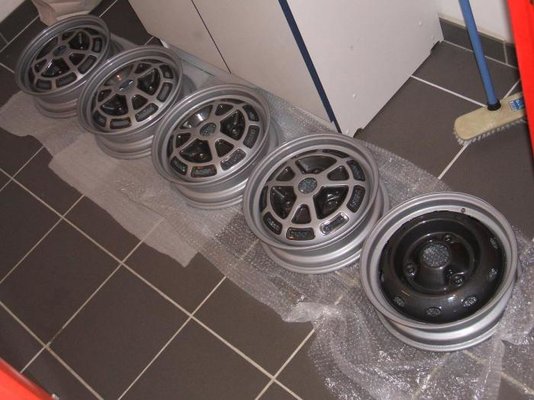
The job was awful and extremely long but the result is nearly perfect, here and there if you look at very closely you can see many little defaults but honestly I 'm proud of myself :D :D
181 Jante 1.jpg

As I told you above I customized the spare wheel, except the Renault 4 I'm absolutly fan of Porsche 911, so I found it cool to make the spare wheel look like a Fuchs wheel (Porsche 911 76/89): clear grey around the rim, and dark color at the centre ;) ;)
182 Roue de secours.jpg

Now my rims are in my laundry room and I have to find a guy who will be able to fit the tyres without damaging them :eek: :eek:
180 Jantes finies.jpg
 
Again, nice job!

I have 2 of these rims which I have no use for.
If you are interested, I could send them to you for just the postage...

David

R4-03.jpg


R4-02.jpg
 
:cool: Good evening ladies and gentlemen,
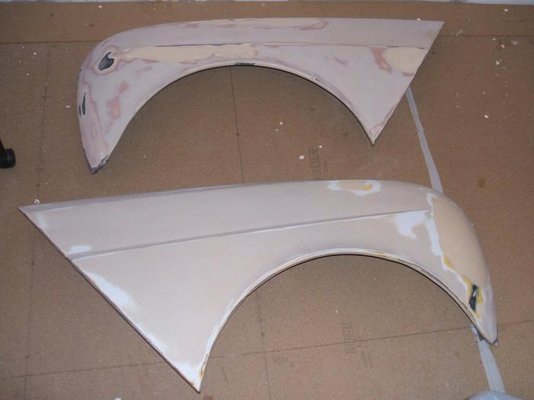
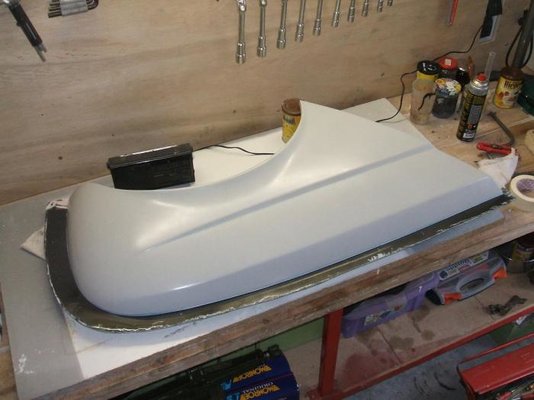
today I'm going to tell you about fiberglass, as I've already said I decided to make all my wings and the inner front wings in fiberglass to avoid rust définitely. During these weeks I worked on the fist one, the right front wing. To operate, first at all I gave 2 wings to my coachbuilder, he prepared them to have a surface as perfect as possible, then I applied a primer on them.
160 Ailes mastiquées.jpg

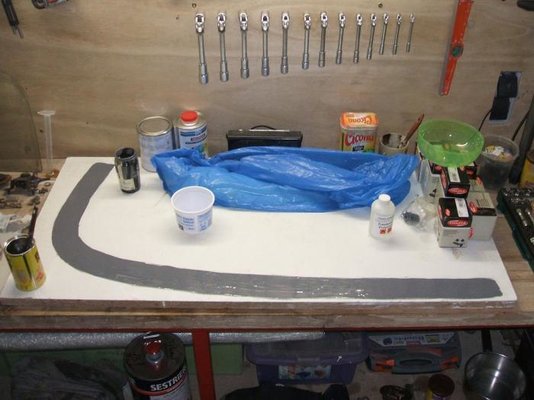
At the same time I made a first piece to create the edge on the mould, I applied gel coat on a flat surface, and when dry I put the fiberglass with resin:
184 Pièce pour moule aile.jpg

Then I sticked this piece at the top of the wing, it was sticked with neoprene glue but I also needed to fit it with several 4mm nuts and bolts. Note the glossy finish on the wing, due to the removal wax on the surface (6 coats plus 6 polishings):
185 Cirage aile avant.jpg

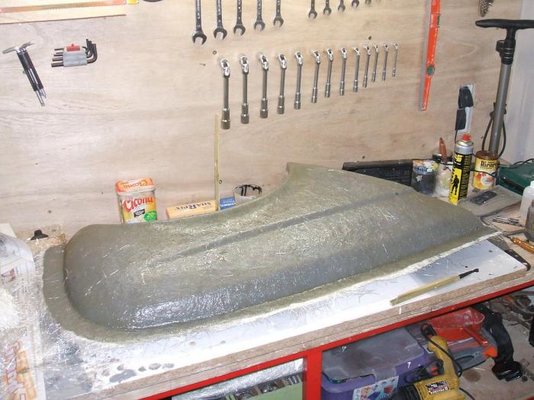
I applied fiberglass and resin to make the fist part of the mould, this kind of work maybe looks easy on a picture but let me tell you that it's a awful job: that stinks, that sticks all over, that takes very, very long time...
186 Moulage moitié 1.jpg

When the resin was dry I returned the unity, and I removed the fiberglass piece. After filling in the little 4mm holes, I put removal wax before making the second part of the mould:
187 Préparation moitié 2.jpg

As I did for the first part, I applied fiberglass and resin, the second part of the mould is now finished:
188 Moulage  moitié 2.jpg

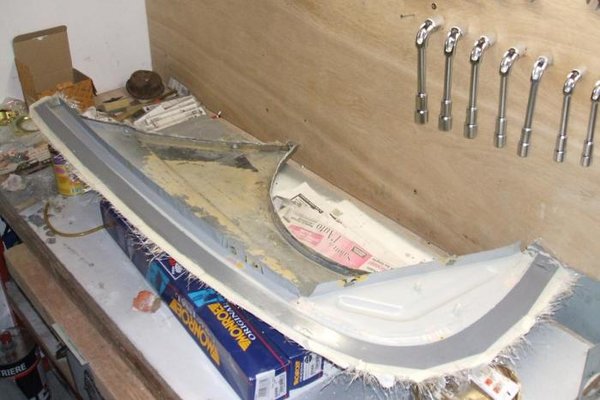
:hug: After few days of drying I removed the 2 parts of my mould, this operation is very simple, you twist the piece and all is removed without problem. After deburring here is the first part of the mould:
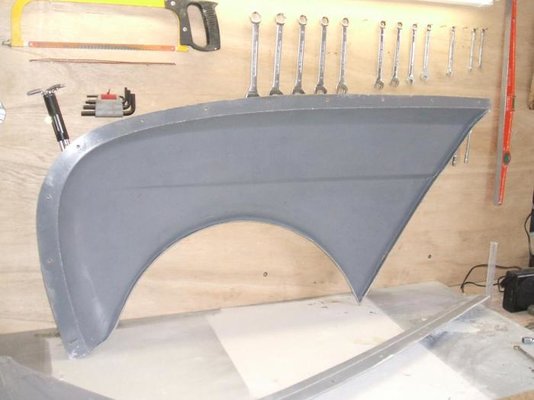
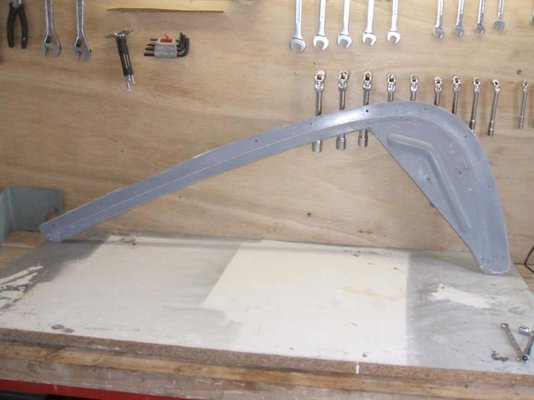
189 Moule 1 sur 2.jpg

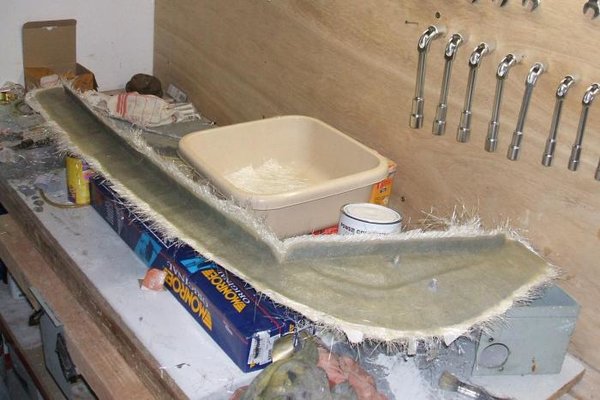
:hug: And the second one:
190 Moule 2 sur 2.jpg

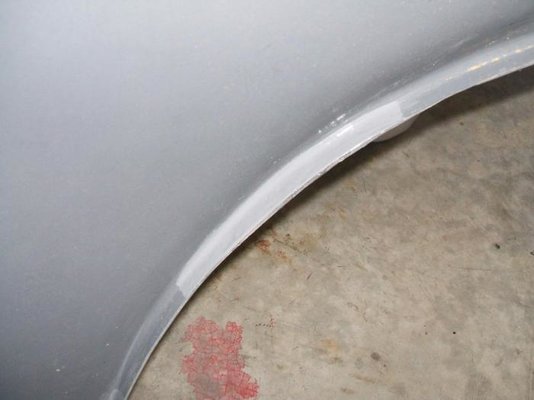
:mad: In spite of my efforts I discovered few little air bubbles under the gel coat, I fill them is with filler and I applied a thin gelcoat to finish the surface (the most clear part on this picture):
191 Reprise bulles d'air.jpg
 
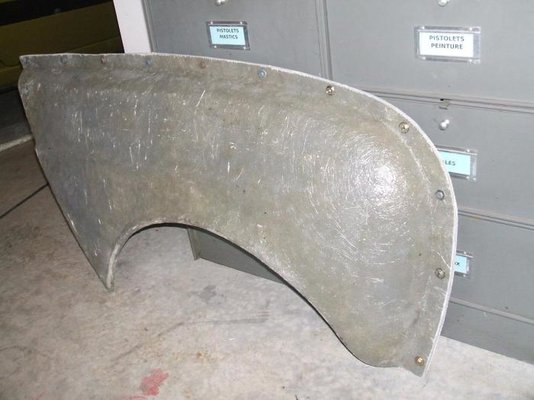
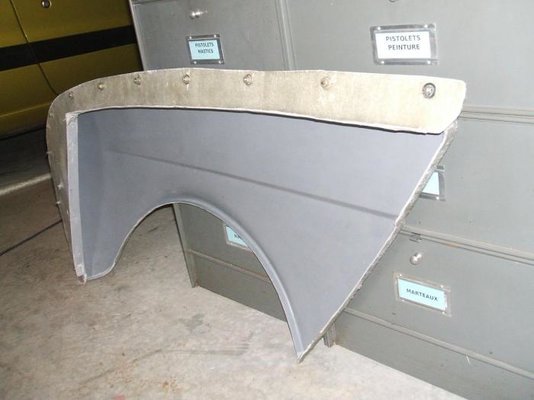
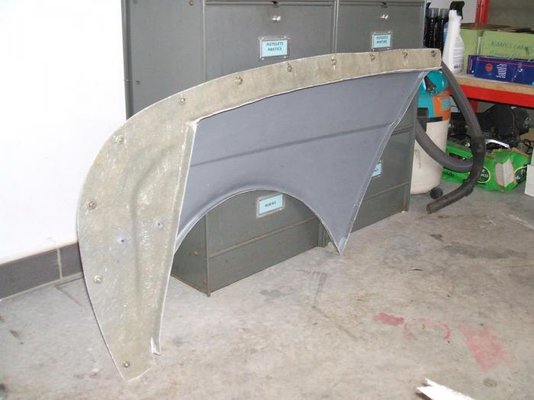
The 2 parts of the mould are attached with 11 6mm nuts and bolts. I'm going to polish the inside of the mould with removal wax, then I will be able to have my fiberglass front wing ;)
194 Vue extérieure.jpg
192 Vue intérieure.jpg
193 Vue intérieure.jpg

:shock: So, now I just need to do the same operation with the 3 others wings... Today I started the second front wing...
195 Préparation aile avant n°2.jpg

If anybody need fiberglass wings, you know where finding them :rolleyes: :rolleyes:
 
Back
Top