Clementine's Garage
Clementine the Cat
 
Image of flower
Yellow R4
 
Réparateur d'automobiles

Gordini Head Gasket and Investigation

Very useful Robert, thanks. Looks like mecaparts in France can also supply them, but I've drawn a blank in the UK. I'll pop a private message across if I get stuck.
 
Just a quick update - I picked up the head this morning. New exhaust valves and unleaded seats, and a 5 thou (0.1mm) skim. Looks lovely, so if that doesn't get rid of the bong bong noise I don't know what will.

Should have the car running again at the weekend. :D
 
  • head-reconditioned-large.jpg
    head-reconditioned-large.jpg
    67.3 KB · Views: 150
Lovely job - should last you a long time. A .005" skim is nothing so another .005 skim in 100,000 miles would be perfectly acceptable!!

Just make sure those bolt holes in the block are perfectly clean and free from all debris!! With regards to the 'bong bong' noise - do remember we have a beer riding on that one!:)
 
The head went on this evening. I spent the afternoon with a screwdriver and rags getting rid of the oil in those head bolt holes.

I reckon my beer will be safe. No way can it reasonably keep bonging after all the love that's gone into it - the engine will surely see some sense.:smile:
 
I do like Abbot but I'm sure that Charles Wells do a similarly strong brew in the Bedford area - I can taste the hops already:cool:.

Too late now but I use an air line to clean all the crap from the bolt holes. Then I run a tap down them and then use the airline again.
 
I do the same as Steve, I was going to mention it last night but thought using an air line to clear them out may sound a little wrong so didn't mention it.

I get the majority of the gunk out then blow the rest out with the air line, though I hadn't thought of using a tap to clear the threads before.
 
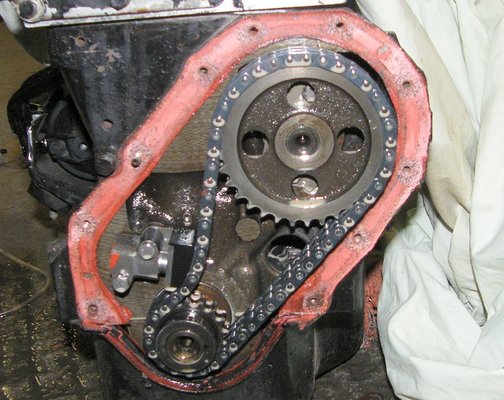
I've used my 'patented' method since the early 1980's. It was when I discovered the reasons why British Leyland 2200cc Princess models had tendencies to develop cracks in their cylinder heads.
Before fitting a second cylinder head on a customer's Princess in one year I prodded one of the bolt holes with an electrician's screwdriver and it was full of swarf from the manufacturing process. All other holes were equally as bad. A little light came on and I realised that the reason for the cracks was because the head could not be properly torqued down.

Since then, before I replace a head I do the following:

1) Stuff clean rag in all the orifices of the block except the bolt holes.
2) Thoroughly clean the surface of the block using a Stanley Knife blade, wet and dry paper lubed with WD40 or similar.
3) Stick a small screwdriver in each bolthole to check for swarf and crap.
4) Run the compressor up to 100psi, wrap the end of the airline nozzle with rag and blow out each hole. Keep a grip on the rag to prevent swarf and carbon going everywhere.
5) Repeat if necessary. Then run a tap down each hole to clean burnt carbon particles from the threads. Blow out all the holes again.
6) Remove the rag from the orifices and throughly clean the block surface and bores with thinners so everything is perfectly clean.
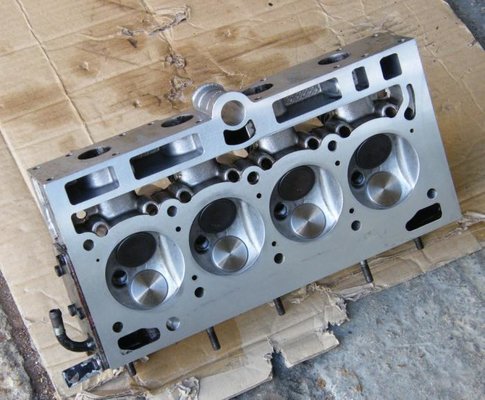
7) Fit the gasket without any sealant or grease (light greasing okay on copper asbestos gaskets). Carefully drop on an equally clean cylinder head that has been thoroughly overhauled and checked for straightness.
8) Apply a very light smear of copper grease to each cylinder head bolt and tighten them down by hand using an extension and socket.
9) Then nip them up using a bar, then tighten them in the correct sequence using half the recommended torque. Then 75% of the recommended torque, then 100%.
10) After 500 miles on a cold engine. Undo each bolt one turn and then torque to the recommended figure.

By using these simple rules I never had any failures at all and I urge any of you who are carrying out any top end work to use these rules. There is nothing worse than a head gasket failure when you're miles from home and you had forgotten to renew your AA subscription :(
 
Back up and running today. The car seems to be behaving a lot better at idle and drives OK. Some of the improvement might be down to lubricating the advance weights in the distributor. I've not put any load on the engine yet - understand I should be careful until the re-torque. Still some water on the underside of the filler cap - I'm assuming that's left over and will go away soon.

It's just possible I might owe someone a beer. It's still bong bonging like mad bongy thing. There's not a lot of duplicated work between swapping the head gasket and sorting a bong noise, so I'll put enough miles on to make sure the head gasket has worked, then pull the engine out to fiddle with the timing chain. I'll finish the project eventually.
 
Oh dear, bad news folks - the water is still happily finding it's way into the oil at a good rate. Must be either a crack or bottom liner seals. I don't think the engine has always been blessed with antifreeze in the past, so maybe a bit of corrosion at the bottom of the liners.

On the plus side I couldn't bear the thought of removing the engine just to tackle the timing chain.
 
Oh bugger!

This was why I ended up changing the engine in BB because it had exactly the same problem as yours. The liners were leaking so for me it was easier to get another engine and swap it over, but in your case it looks like a strip down pressure check and reliner is going to be in order.
 
Really sorry to hear this Malcolm. Just a thought - would it be worth trying some 'snake oil' in the cooling system just to see if it stems the flow? If it works then you could use the car throughout the summer and get some enjoyment out of it for all your hard work and then fix it in the autumn.
Did the engineers check the head for cracks?? Mind you, aluminum heads don't usually give any problems. If the water is getting in through the base of the liners then it won't be all four of them - at least you can now do a pressure test just to see how much is getting through.
 
Pressure test will be easy - the cooling system doesn't seem to be holding pressure any longer, but there is no water underneath the car and the radiator and expansion bottle seals are good. It's now worse than it was - I suspect I am past the point where gunk would help.

The Haynes book mentions bolting the liners down after removing the head. I've never bothered, but then I've always changed head gaskets in a weekend before now. This one was off for a couple of weeks. Eeerm - could that that be it? :oops:

I've never had the liners out before. They ought to reveal whether they were the original cause of the problem or whether I've helped them on their way.

Went out for a full out blast in the afternoon. There is still hesitation at full throttle and low to medium revs. Not sure if it's down to the water/ petrol/ air mix, but it's running a lot better than before.
 
Provided you don't turn the crankshaft with the head off, or the liners not held down, they will not move, or their seals disturbed, no matter how long the engine sits witout head.

Maybe you will be able to see traces of rust between the liner bases and their registers on the block, that would be a good proof they were leaking.
 
I pulled the engine out this afternoon. All of the liners can be moved from side to side quite easily. The head gasket took a lot of force to break the first time around, so maybe it pulled the liners, or maybe they were the original problem.

Now for this bong bong noise. There is the tiniest evidence of contact between the timing chain and the rubber guides fixed to the side of the timing chain cover, and indeed tapping the rubber parts makes a bong noise. The tensioner appears in good condition with a clean filter, but the adjustment limit looks close (looks like the tensioner is in the wrong place to me) so it might be worth fitting a new chain.

There's something funny about this. That side of the chain should surely always be in tension as the crank is pulling the cam. Would poor tension cause the camshaft to rock around more than it otherwise would?
 
  • timing-chain.jpg
    timing-chain.jpg
    136.9 KB · Views: 97
Timing Chains...

Malcolm,

A couple of points of engine building practice.
1) While you are in replace it or you will just duplicate the job doing it again (and waste gaskets and time etc - possibly engine damage).
2) Always replace the chain AND sprockets. The chain stretches and the sprockets wear. Also the sprockets wear WITH the chain links. They are a set. NEVER just replace the chain except possibly on a tractor.

3) While the tensioner will go again if its good - I wouldn't given the 'boing'!

The tensioner has no say in the driven side - as it is as you correctly say under tension. Poor fit of the chain on the sprockets makes for a roor chain take up and link bounce - thought I don't think you are experiencing that here. The tensioner takes up the slack on the return side of the chain - and allows for chain stretch.

When timing up your cam remember that the stretch of a new chain will typically give 2 degrees retard in the first few hundred miles. A race engine used to be built with this in mind (using a vernier). You could check your engine against book figures using a DTI and cam timing wheel. (Is a vernier timing sprocket available?). No idea how good Alpine were - but BMC can be several degrees out ( a tooth) as standard... Best to check.

Have fun!
Charliemouse
 
I do agree with all of the above but just because the timing chain is impossible to get to without removing the engine. I have never had any problems fitting a new timing chain to replace a worn one - never fitted new sprockets either. The only exception was when I rebuilt a Mini Cooper engine and used the Vernier sprocket in order to get the valve timing exact and fitted a new chain as well, but not the crank sprocket. No problems at all.
 
Steve,

Maybe 9 times out of 10 - or 99 out of 100 all will be fine. Then that one time the uneven wear means the chain skips, snaps and kinks... Cam timing lost... valves hit head... Ouch! Given the cost of a full set (for instance £60 on a BMC 'a' series), its just not worth the risk.

If the parts of an engine are vastly more expensive - its a tougher decision. But then - if it goes wrong you have more to lose...

Charliemouse
 
Well, normally if the sprockets show an uneven shape (they tend to form a concave shape on the driven side, and a convex on the pick-up side) they are worn, and therefore so is the chain. If you always replace them as a set as you should this is the method. If you are one of the chain replacing gang - the only way would be to compare the length to a new chain - though as I said in a previous post all chains stretch at first. If the links have any play the chain must be disgarded immediately. As a rule, if you have the engine out and in bits, for what a timing chain costs, you might as well just do it.

Charliemouse
 
Back
Top