Clementine's Garage
Clementine the Cat
 
Image of flower
Yellow R4
 
Réparateur d'automobiles

Restoration 1984 R4 GTL Rutger-peer

Well, I think after my last exam, I will go and check and see the total damage. After all, in the end I can always give up and buy the second hand one. But for now, I'll at least give it a try, rather than give up directly. Also my honour is at stake ;) haha...

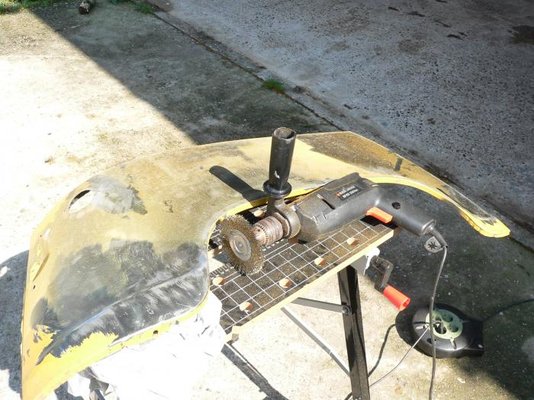
And besides that, I will really have to keep the cost of this whole restoration at a minimum, which does not mean I will make concessions and do things halfway. But ofcourse, I know those replacement parts for the chassis might also become quite expensive.
 
...and the question is - will the 2nd hand chassis be in a better condition?
Plus you will have all the hassle with the registration when changing the chassis (and the vehicle identification number).

It's quite a lot of welding necessary on your chassis (way more than it was on my F6) but if you feel you have to do it - do it.
 
buggerd chassis

it dosnt take much to cut out the id number and weld it into your second hand chassis - just make sure its a good one before you buy it - thats a load of work to do on yours - cant see that ever being right - i have a man that works for me doing such a thing - i showed him it - he said dont ever give me anything like that or i will leave - think he meant it too - cut open the sloping bit inside were your feet go - where the front chassis go into the floor pan i think you might find some more welding - no point doing all the back end before you look in there - ime not trying to put you off - like i said been there.
Reg
 
Doesn't look that bad to me :D

The damage looks like a result of the patches that have been applied in the past. It's always a pain to find patched cars, but all chassis will likely be going in the same places, just might not need welding yet, and when they do go the rust won't have gone quite so far. The only fiddly bit I can see is the rust looks close to the rear shock mounting. Otherwise not unusual.

For a jig, taking hole positions from a good chassis that hasn't previously been repaired is OK - that's how I got some of my dimensions. Make sure you weld up the jig fully before drilling the holes - they can distort on welding. Get the jig made before any repairs - you can check if everything is in place, and the rear suspension height depends on accurate hole positions (some cars dip on one side after even patch repairs).

Also for the front keep an eye on dimensions if you can - the chassis can twist a bit if you have to do a lot of welding on the triangle. There are dimensions from the factory manual at the bottom of the chassis jig page referenced to the bottom of the floor. Bit of straight steel bar and a tape measure will get you within a couple of mm at the front.

PS - if you need any welding help: http://www.mig-welding.co.uk/
 
Haha thanks for reassuring me David and Malcolm! And ofcourse Reggie thanks for the concerns and the advice, really appreciate that. I know the more rational choice is to buy the other chassis but it's the feel-thing that does it for me ;). So it's nice to have some people who actually encourage me to go on with this chassis haha...

I will go and make a jig first, I think I thought of a way to make it maybe even without another chassis but might use that one for checking whether the jig is made correctly. Anyway, you'll see the process probably next saturday, when I can resume work on the R4.

So far.
 
Hey, you're probably right. And more people suggested that option. But I decided to go along with this one and get it on the street again. I've been offered a decent second hand chassis for 300 euro's but my point is more like: if I replace the whole chassis, then I replace almost half my car and that's not really what I had in mind with restoring my car. It's probably gonna be a pain in the ass to get the chassis up and going again but I think that's what restoring a car is about (at least, I'm trying to comfort myself that way ;)).

It's more a feel-thing.

Hi Rutger peer, I understand exactly what you seem when you tell that replacing the chassis is not a "real" restoration; in my case mine was really too damaged and I decided to replace it even I think the same thing as you. My body needs also many work but I decided to restore it, I prefer to replace the chassis and to keep the body which represents -for me- the real "identity" of the car...
 
Hey!

Funny you say so because today I decided I will have to go with a new chassis after all. Today I found additional holes on top of the ones I had already located and that did it for me. My chassis is really, really wrecked too. Although I've been saying for quite some time that I'd fix it, I decided today that it realy is beyond any reasonable repair after finding out about those new spots that'd need attention.

So far the problems on my chassis:

- Right backbeam rotten for about 50% (also rotten beneath the shock absorber-mounting)
- Left backbeam rotten and old repairs
- Rocker carrier right side totally wrecked.
- Rocker carrier left side kinda rusty and would need welding
- Triangle front chassis, the lowest points on both sides are rotten
- Where the triangle joins the floor, both beams punctured
- Floor on the whole frontside ripped apart with old repairs
- Box-section on both sides front chassis rusted and old repairs.

I just can't go on with it. I got an additional problem since I can't weld myself and somebody else helps me out on that, I simply can't burden him with all that work, which will cost him his whole vacation ;). Next to that, I am offered a decent chassis for 300 euro's so...

So in the end I will follow the advice I've been given by many people here ;).

Tomorrow more pictures regarding the progress and I will make photographs of the problems on the chassis.

Your project is making nice progress by the way! Keep up the good work!
 
;) Finally we are both at the same point ! Today I'm also going to post pictures of the problems on my old chassis, I'm curious to see if it's better or worst than yours :confused::confused:

Good luck for your restoration and show us your new chassis :D
 
Haha, indeed! Anyway, I could buy the other chassis from an acquaintance of mine but he's currently on vacation so I'll have to wait a while.

I will start with the other parts that are neccessary to get the chassis finished (suspension parts such as the wishbones etc.).
 
I promised to make some pictures all the bad spots on my chassis and we would see whose chassis was worse, Snoopy1974's or mine... that'll have to wait since I see now that all the pictures I made are very bad, I'll post them tomorrow (believe me, they are really bad quality).

Yesterday I steelbrushed my backfender (fuel-filler-side). I grinded it until the black paint became visible (and sometimes till bare metal). The paint kind of splitered off. This panel had been a replacement and it's also the only panel on my car that is going to be fitted back on. They are all dented in a way that you can push out the dent from the other side but at some time it flaps back so you got the dent once more. Maybe I'll heat one up just to see if that works, if not, new panels will be fitted (which are not expensive anyway).

Today I started cleaning some more parts with the steelbrush.

I brushed the caps that are fitted underneath the chassis, where the torsion bars are mounted as well as two other parts that I don't know the English name of. As for the caps, after brushing I sanded them down, applied two coats of primer, then two coats of black paint and next three coats of bitumen (anti-stone-chip-stuff, I don't know if it's also called bitumen in English).

As for the other two parts, I applied two coats of primer and two coats of black paint.

I did this with spraycans. I will do some more parts with the spraycan since I can easily do that myself, it is cheap and works quite well (also looks nice). Regarding the durability: I also used it on my motorbike at the cartercaps (which also get quite hot) and it's still perfect after 5 years. In the photographs you can see the result.

I will go on brushing some more parts.

Advice regarding cleaning the parts and painting them is welcome. I find it quite difficult to remove all the rust and dirt from such oddly shaped pieces as those of the suspension mountings to the frontpart of the chassis or the lower wishbones. I can't get into all the small corners (and ofcourse not inside the parts themselves) with my steelbrush. The people I restore the car at have a small sandblasting cabin which I could use maybe.

Also I don't know how thouroughly clean those parts have to be (you only get them clean to a certain standard) in order to have them painted well. All that surface-rust is very hard to get rid of in some cases.

What do you guys use for this kind of painting? Do you use some sort of special primer for corroded surfaces?

You also see a picture of my brake distributor, it looked to me as if it isn't the way it's supposed to be, can anyone say anything about it?

Regards, Rutger.


PS: uploading pictures like this is great but a shame I can't write anything underneath them.
 
  • P1070714.jpg
    P1070714.jpg
    58.5 KB · Views: 1,289
  • P1070716.jpg
    P1070716.jpg
    32.1 KB · Views: 1,283
  • P1070723.jpg
    P1070723.jpg
    58.3 KB · Views: 1,277
  • P1070726.jpg
    P1070726.jpg
    51.8 KB · Views: 1,277
  • P1070730.jpg
    P1070730.jpg
    44.7 KB · Views: 1,267
  • P1070732.jpg
    P1070732.jpg
    75.5 KB · Views: 555
  • P1070736.jpg
    P1070736.jpg
    79.3 KB · Views: 562
  • P1070738.jpg
    P1070738.jpg
    104 KB · Views: 1,291
  • P1070746.jpg
    P1070746.jpg
    52 KB · Views: 1,277
  • P1070686.jpg
    P1070686.jpg
    70.6 KB · Views: 1,267
rutger thats a smart move - i agree save the body thats the car and its easy to put right too - plus it wiil drive in a straight line and if you have a bump you wont end up in two halves - good luck with the rest of it
Reg
 
Good evening Rutger ;)

"What do you guys use for this kind of painting? Do you use some sort of special primer for corroded surfaces?"

In France, especially all the guys who have Renault 4 or collection cars, we use a wonderful product which can be applied on corroded surface, before applying a classic primer before paint. This Product is made by RUSTOL and it's called CIP:
092 Anticorrosion.jpg
As you saw I didn't remove all the parts of my chassis, so it had certainly hidden or inaccessible parts, to be sure to have a good protection I painted all my chassis with this product and I'm sure it will be protected for a very, very long time :D
102 Châssis protégé.jpg

For those who read french language here is the technical notice of this product:
http://www.rustol.com/fr/fiche_rustol-cip.php

I don't know if it's sold in England or anywhere in Europe but I can say that in France it's considered as one of the best, or the best, product for this kind of use.

"You also see a picture of my brake distributor, it looked to me as if it isn't the way it's supposed to be, can anyone say anything about it? "

Concerning your brake distrubutor I don't see what you mean ? It seels absolutly normal to me :confused: :confused: This only thing to do is remove all the parts and carefully cleaning or restoring every one ;)
Here are 2 pictures of mine, before and after... Good luck :rolleyes:
031 Répartiteur 2.jpg
167 Répartiteur remonté.jpg
 
Hey!

Thank you very much for the detailed description!

I actually read your whole thread so I saw that rustol C.I.P. coming around (you also called it "rust preventing primer" so that already gave me a clue) but now I understand better what kind of stuff it is. I'm going to have a look for something like that here in the Netherlands! Thanks

Yeah, about the brake distributor, kind of hard to explain why I thought it was broken but I took it apart and now I kind of understand how it works but your pictures again are very useful since the mounting plate of my distributor and the cap on top of it are very bent and distorted and on your pictures I can see how it's supposed to be!

Thank you very much!

Oh by the way: I thought it was you or DavidN who said you loved those before-after pictures, well, I absolutely love them too haha. Hope I can make some myself in the near future.
 
Be careful to choose the good one, the exact name is "Rustol Owatrol" so maybe in the UK it is sold with the name "Owatrol CIP", but I have to precise that there are 2 types of product Rustol as I showed on my pictures:

"Rustol CIP" which can be painted with polyurethane 2 components paints used on cars by every coachbuilders.

"Rustol Owatrol" is another product which doesn't accept car paint (it makes very bad reaction with the 2 components paints and you have to start all the job again :mad:). Owatrol is used to protect the inside of the rails, crossbeams or other hollow bodies (not sure of the english word :confused:)
 
I like your chickens! What sort are they?

Great work with the painting - it looks good :)
 
I like your chickens! What sort are they?

Hmmmm, I looked it up for you and it says on their underneath that they were made in China, model "chicken" no. 122. Only cost 30 € each and don't shit around (as well as walk around, the downside) :lol: :lol:.

But thanks. I will have a look just now how the paint turned out to be, then package them in paper and go on with the next parts.

Thanks for helping me out on the whole "Rustol" thing. I will go by the local paint-man and ask around, I'm sure they know these kind of things there :rolleyes:.
 
Back
Top