Clementine's Garage
Clementine the Cat
 
Image of flower
Yellow R4
 
Réparateur d'automobiles

Vagabund

Do know from the original advertising blurb for the (very easy to use) insulation that have used in my van, brand Low-E it was originally apparently designed for NASA, one of the alternate uses it had been advertised as used for was heat shielding for NASCAR exhaust/turbos, cockpit heat protection, might be worth a look, might not. The thermal efficiently is up in the high 90’s % from memory, its also fire retardant.
 
In the last week I made some progress on the vagabond.
Installed the heater unit and connected all the piping for the cooling system.
filled up the system and bled it as far as possible with a closed thermostat.
Oiled up the engine and let the starter turn the engine round. So far so good.
withe a squirt of petrol straight into the carburetor Gasmonkey style she wanted to fire. But lacking petrol from the tank she wasn’t quite ready.
I also made a cradle for a toolbox under the bonnet next to the expansion tank.454FAEAC-0C14-48E2-AD5A-39EC2ED860D0.jpeg034890AB-F224-499A-84C6-8265E4E6A687.jpeg2DCE0B0A-FE98-48C1-9212-B32C6C20714A.jpeg
 
What kind of tools will be inside?

What will you do about rattling of tools inside toolbox?
 
What kind of tools will be inside?

What will you do about rattling of tools inside toolbox?
I have a canvas toolroll for all my spanners.
So no rattle.
And a small hydraulic jack. And some tidbits like some snares and ignition stuff.
 
Last edited:
And a little progress.
I managed to close the holes in the sides with polyester epoxy and glass math.
just some bondo work and painting the roof.
I picked up the bumpers from powder coating. Put the front bumper on again.5E65CBCC-C592-4078-BD47-D46A2C457B89.jpeg
 
Some more progress today.
back window is in. Side window done.
Both bumpers done and the bonnet latch is on.
 
  • 0EDAF545-C678-43B9-8864-3CF12B2E4C6B.jpeg
    0EDAF545-C678-43B9-8864-3CF12B2E4C6B.jpeg
    157 KB · Views: 14
  • D62F5592-A563-493B-A39D-938C3FF81E7E.jpeg
    D62F5592-A563-493B-A39D-938C3FF81E7E.jpeg
    157 KB · Views: 16
  • 5492EC0F-7F7B-4FD0-98FD-4841C6D36AD3.jpeg
    5492EC0F-7F7B-4FD0-98FD-4841C6D36AD3.jpeg
    82.9 KB · Views: 16
  • E70163C1-4EB3-4DD0-9541-D72C144C8F32.jpeg
    E70163C1-4EB3-4DD0-9541-D72C144C8F32.jpeg
    166.1 KB · Views: 16
This stagnant project is not making any progress. Due to duty’s in hospital I’m at a complete standstill at the moment.
But I found some time today to do something cosmetic.
I modified the grill to a mix of modern and retro. There were some slats missing. So I cut almost everything out except for some of the vertical ones. And put a modern honeycomb grill covering over the vertical slats that remained.
I had a wrecked phase 2 grill cover in a corner somewhere and used the losange to make this grill a bit more retro. 955DC492-DB0A-4793-8D8D-4253D0C4637E.jpeg
I do have to glue it al together. But the result is quite good.
 
Last edited:
I had a 950cc Renault 4 TL in that exact same color scheme.

It had originally been white when it was bought as part of a large fleet by Exxon in Paris. I would guess it was a 1985ish car.

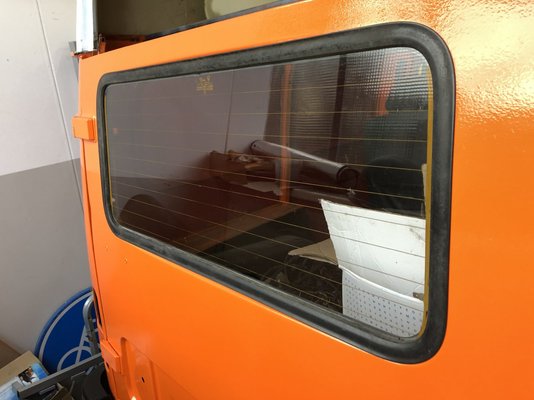
Exxon painted the outside orange, however the door shuts and engine bay/ boot floor were still white.

It was driven to the UK some time in the 90's when the rear wheel fell off! It had pressed steel rear suspension arms, one had rusted out and snapped.

It was abandoned in my town, where it became the property of a farmer who sold it a few years on.

I picked it up on fleabay for £200, 20 years ago and luckily had and cast axle so I could replace the failed one easily. It was still on French plates at that time.

I tool the body off the frame, removed the orange and painted it back white, then reassembled it. Reapplying for the V5 was a real saga, however I obtained UK plates.

After that it was a really nice low mileage car with no rust that I sold on. Wish I had kept it.
 
That grille is fabulous!
 
Hi all,
I have been absent for some time. But I’m picking up some momentum again in finishing this project.
Today I finally got the engine running and I have been busy with building a custom exhaust.

The original F6 exhaust has the muffler underneath the left front wing.
Resulting in a front wing that is eaten away by the dreaded rust worm.
So I bought the first two parts of a GTL exhaust and fitted them underneath the F6 adding a middle muffler and a funky looking Abarth end peace at the rear of the car.

The muffler is a custom build absorption muffler that I pieced together from parts of another piece of exhaust pipe some muffler wool and sheet metal.
After welding the muffler together and putting the first pieces together I wrapped them with heat wrap.
51A7CA23-813C-4BBA-AEC6-7B78402AC2F0.jpeg
836EDB2F-EE86-4A67-ABC9-A7ED1DB6EABD.jpeg
E45B54FE-6310-412E-97C5-286E78560DFE.jpeg
6B767F6E-9BAB-41B0-8CCA-4E79B975A694.jpeg
38C41E94-2940-4754-9C1E-91E74DB70F3F.jpeg
It started with these parts.
5D717D39-A035-4C45-80D8-85923821180B.jpeg


And she looks like this now.
5BED03F4-56F1-4667-BB41-4F1B284A094C.jpeg
 
Really nice sound coming from engine and the exhaust Robert, well done on combining Renault and a Fiat parts :clapping:
 
@JdeW Abarth &Co. was a full sister company to Abarth tuning. They specialized in making sporty exhaust systems for many European cars. Not only fiat. This end piece comes from an exhaust for a R5.
 
Back
Top