You are using an out of date browser. It may not display this or other websites correctly.
You should upgrade or use an alternative browser.
You should upgrade or use an alternative browser.
R4 GTL 1985 Restoration
- Thread starter JdeW
- Start date
A look around the gearbox ....


Disassembling which makes it easier to clean.

No words....

Upper lid and a peek in the gear case.

The front cover is also excused.

After a few hours we see again that the lids truly are made from aluminum and the cap of the vent valve is really original blue.


Next time more progress, for now I have a long weekend holiday.
A look around the gearbox ....


Disassembling which makes it easier to clean.

No words....

Upper lid and a peek in the gear case.

The front cover is also excused.

After a few hours we see again that the lids truly are made from aluminum and the cap of the vent valve is really original blue.


Next time more progress, for now I have a long weekend holiday.
JdeW
Enthusiast
- Messages
- 1,159
- Location
- Laarbeek The Netherlands
Hello Edwin, there are various suppliers to obtain decoke sets for engine and gearbox.Hi. I am rebuilding a 1985 845cc engine and looking for a good de coke set. Can you advise where to get one. Thanks Edwin
Melun retro Passion in France, Der Franzose in Germany or Rquatre in The Netherlands.
There may also be UK resources but that I'm not aware.
Keep up the good work.
Cheers, Joop
JdeW
Enthusiast
- Messages
- 1,159
- Location
- Laarbeek The Netherlands
And on we go with the restoration. Some nice rust pictures will show up further, I know we all love to see those massive rusty bits 
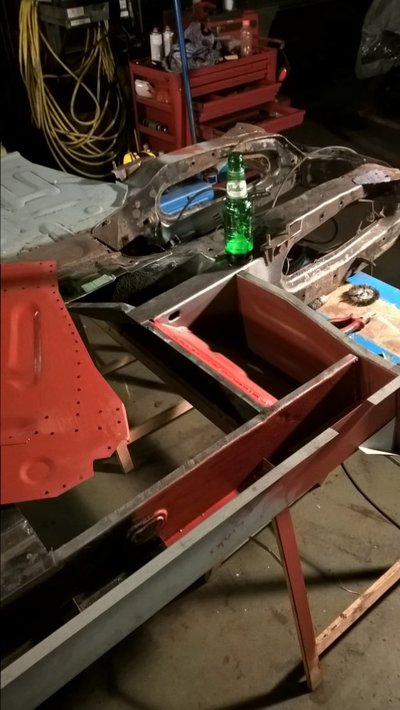
Cutting out the rear safety belt floor stiffener plate.
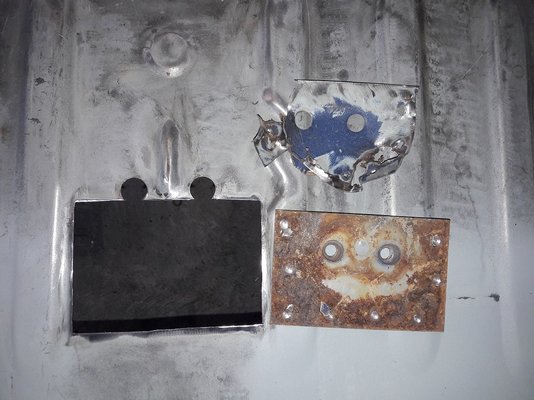
Preparing to plug weld the new bottom piece onto the stiffener plate. This kind of plug weld is different as the bottom part is 1 mm thick and the stiffener plate measures 3 mm thickness. For a good weld penetration power settings on the MIG welder were put to high.
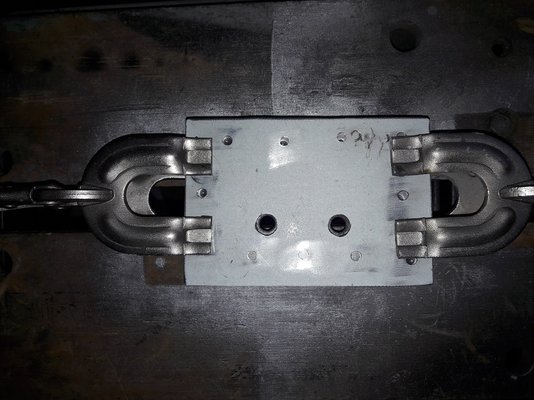
After this it's time to tack the restored piece in place and finishing it off with a nice butt weld round and around and don't forget the zincspray.
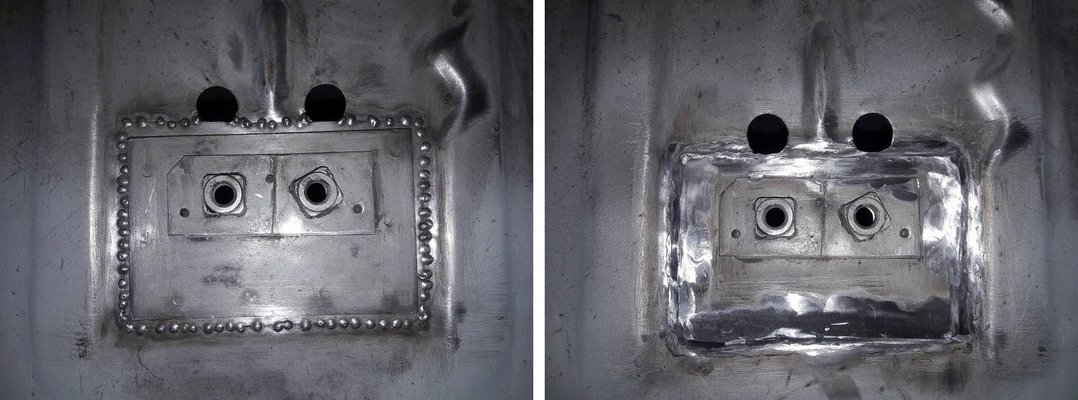
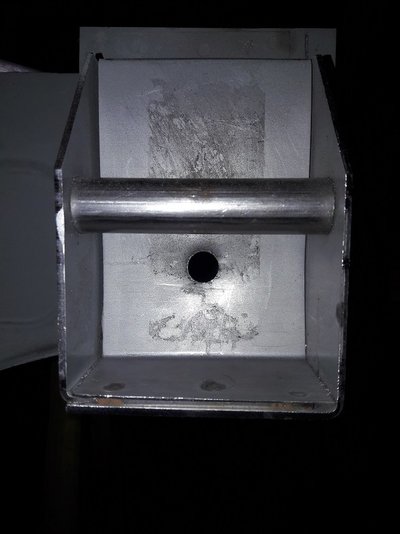
The outer supports rear end gets their modification,first I drill a hole so the ends cavity are accessible for the Mike Sander's grease.
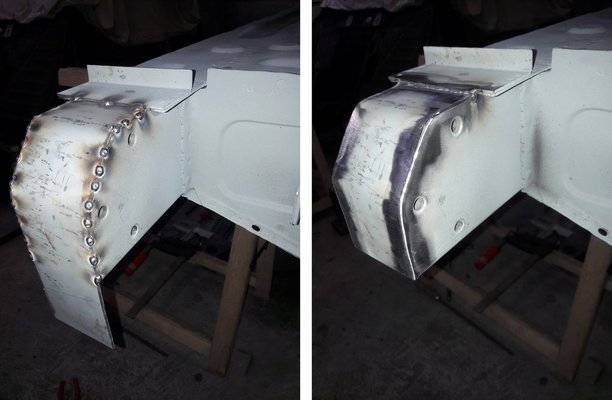
Tacking and finishing all the way round.
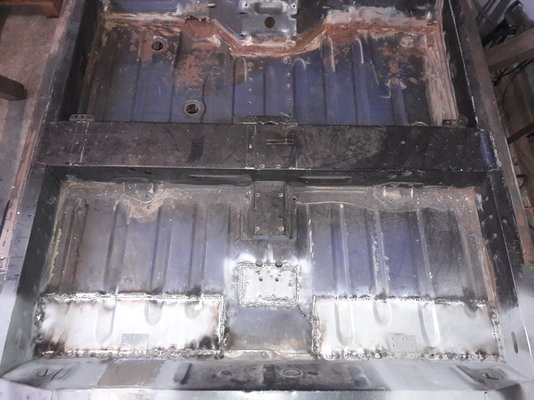
It's time to flip and turn the half restored chassis. Good to see the nice weld penetration on the visible rear parts and the difference between rear and front.
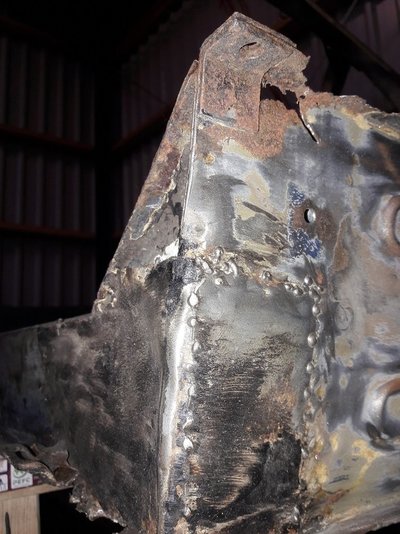
Ready to get started on the front chassis repairs but first as promised the nice detailed rusty bits.
Here we see a former "repair" job on the front left outer support beam... a real botch and bungling job to get a car pass it's MOT...
Revealing the real problem...some nice hole in the beam...the original material (beam and stiffener plate) has vanished into thin air...
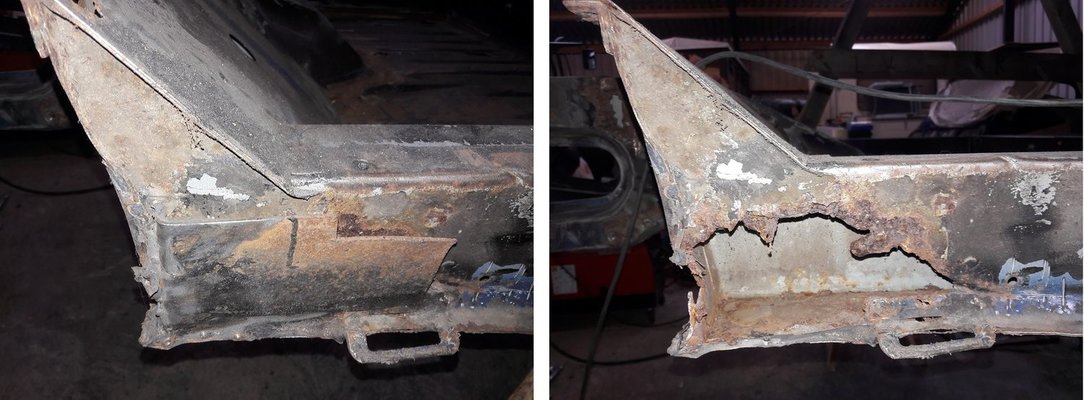
And how about the front right side?
Hmmm... even more layers of former bungling work... again revealing the real problem and damage...
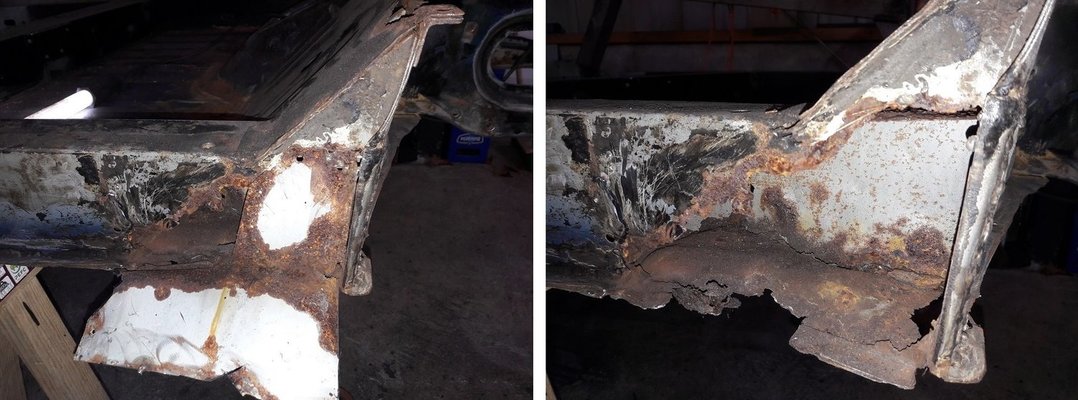
In my opinion those repairs in the past done by so called "skilled repair craftsman" those man should be hung, drawn, quartered and burned....

Cutting out the rear safety belt floor stiffener plate.

Preparing to plug weld the new bottom piece onto the stiffener plate. This kind of plug weld is different as the bottom part is 1 mm thick and the stiffener plate measures 3 mm thickness. For a good weld penetration power settings on the MIG welder were put to high.

After this it's time to tack the restored piece in place and finishing it off with a nice butt weld round and around and don't forget the zincspray.

The outer supports rear end gets their modification,first I drill a hole so the ends cavity are accessible for the Mike Sander's grease.

Tacking and finishing all the way round.

It's time to flip and turn the half restored chassis. Good to see the nice weld penetration on the visible rear parts and the difference between rear and front.

Ready to get started on the front chassis repairs but first as promised the nice detailed rusty bits.
Here we see a former "repair" job on the front left outer support beam... a real botch and bungling job to get a car pass it's MOT...
Revealing the real problem...some nice hole in the beam...the original material (beam and stiffener plate) has vanished into thin air...

And how about the front right side?

Hmmm... even more layers of former bungling work... again revealing the real problem and damage...

In my opinion those repairs in the past done by so called "skilled repair craftsman" those man should be hung, drawn, quartered and burned....

Last edited:
JdeW
Enthusiast
- Messages
- 1,159
- Location
- Laarbeek The Netherlands
Continuing this article from the post above.
No rest for the wicked, let's start the front chassis restoration.
Flipping the chassis to get started on attacking the problems so start drilling out the old spot welds and removing more patch work.
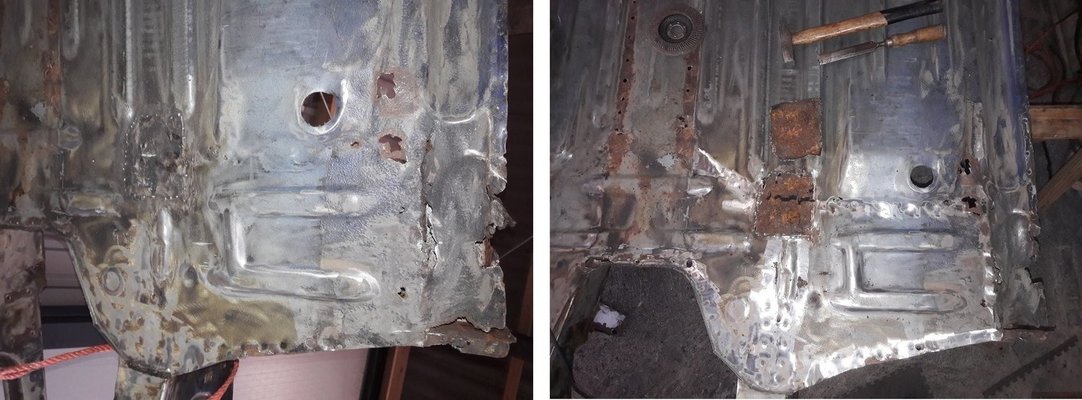
And it's always nice to see what we're up against.

A section of the front right floor has been removed.
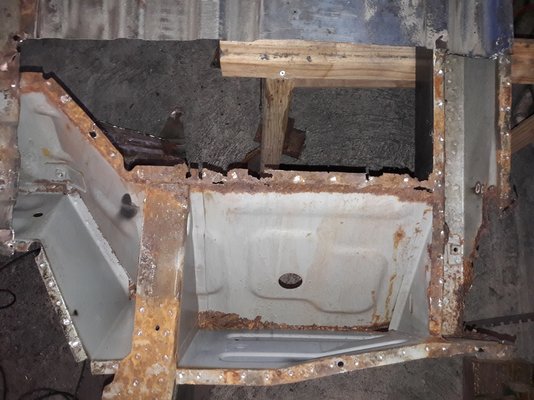
The front outer beam section will be made from scratch including the inner and outer triangular stiffener plates.
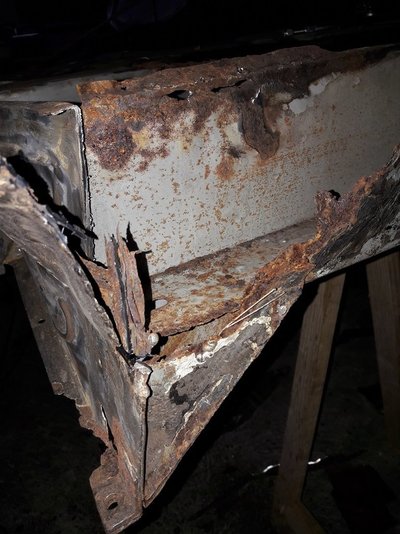
And after taking all kinds of measurements it's time to cut that piece away.
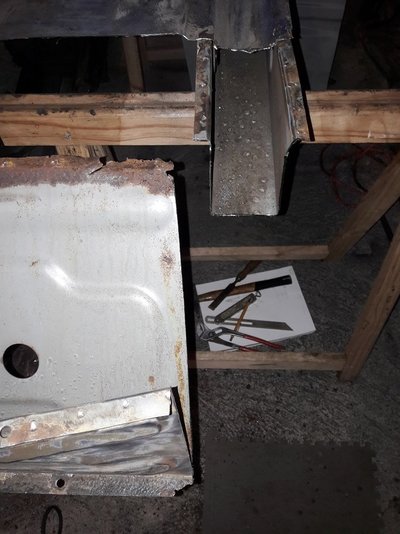
The pieces that will be built from scratch taken out in their sub pieces.
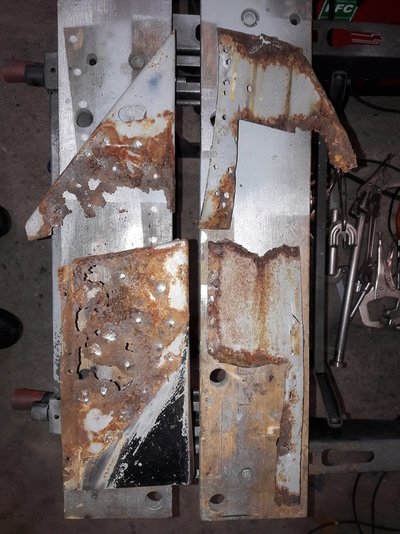
Let's start.
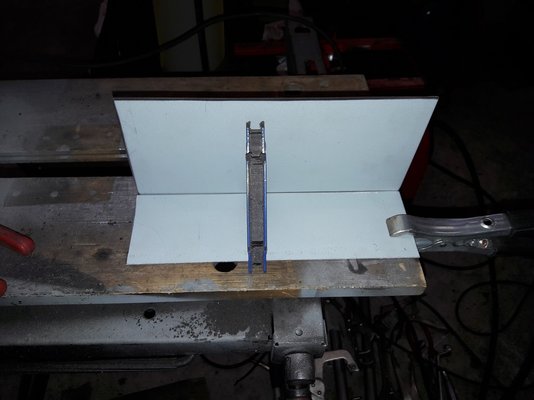
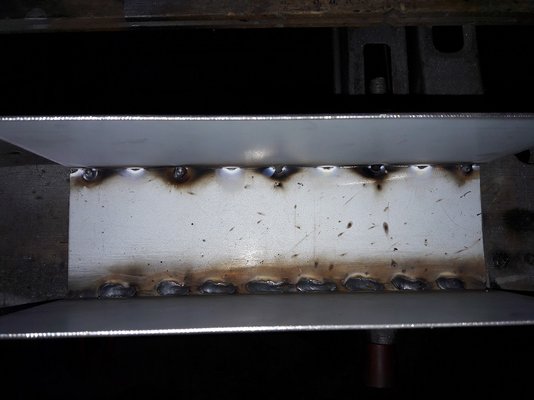
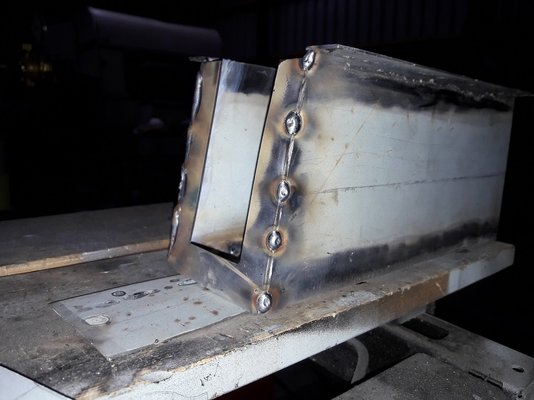

That's it for now more to come next time.
Cheers
No rest for the wicked, let's start the front chassis restoration.
Flipping the chassis to get started on attacking the problems so start drilling out the old spot welds and removing more patch work.

And it's always nice to see what we're up against.

A section of the front right floor has been removed.

The front outer beam section will be made from scratch including the inner and outer triangular stiffener plates.

And after taking all kinds of measurements it's time to cut that piece away.

The pieces that will be built from scratch taken out in their sub pieces.

Let's start.


That's it for now more to come next time.
Cheers

Last edited:
JdeW
Enthusiast
- Messages
- 1,159
- Location
- Laarbeek The Netherlands
Hi Jurjen,O wow, that's some serious work you're up to, but keep it up and keep your Cebora & cold beers close!
View attachment 20262
thanks I know but you had almost the same challenge and amount of work accordingto your photo's a while ago. I assume the cold beer is to cool the metal after welding?

Question: What's the progress on the spray booth on your location?
JdeW
Enthusiast
- Messages
- 1,159
- Location
- Laarbeek The Netherlands
In between all the front chassis welding there's more to do such as work on the front suspension.
Here the removal of a very stubborn inplace well-rusted upper ball joint. With the help of WD-40, some time and some gentle motivation from a hammer, the piece came free.
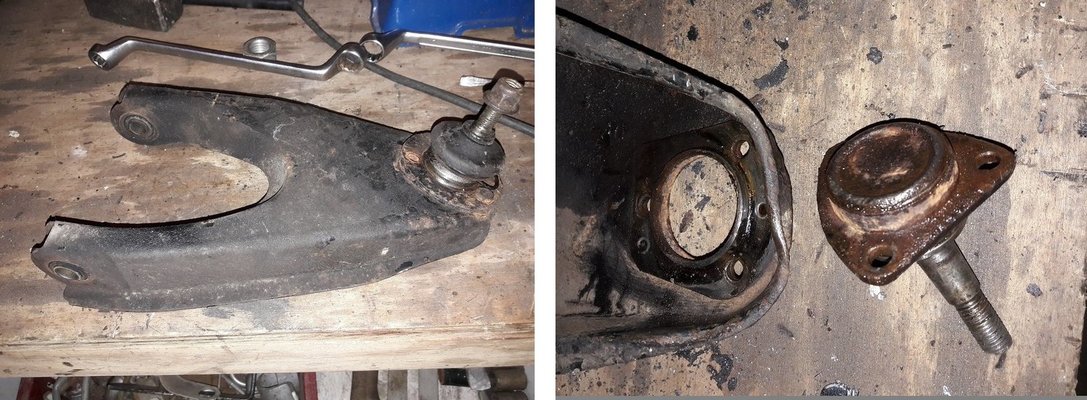
After 30+ years of service it's time to replace all the silent-blocs from the front upper and lower wishbones.
First I tried the easiest handson approach to remove the lower wishbone silent-bloc...
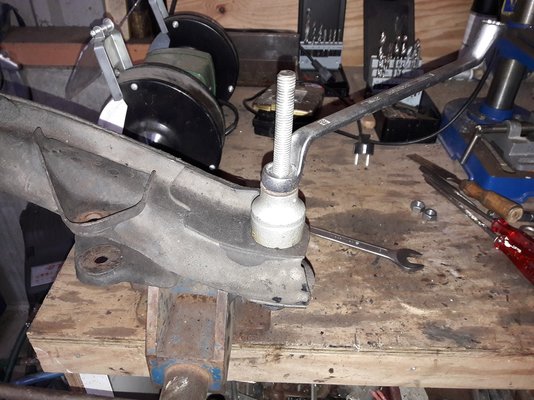
But it wouldn't budge so I switched to the hard way, drilling out the inner bush and weakening the outer bush...
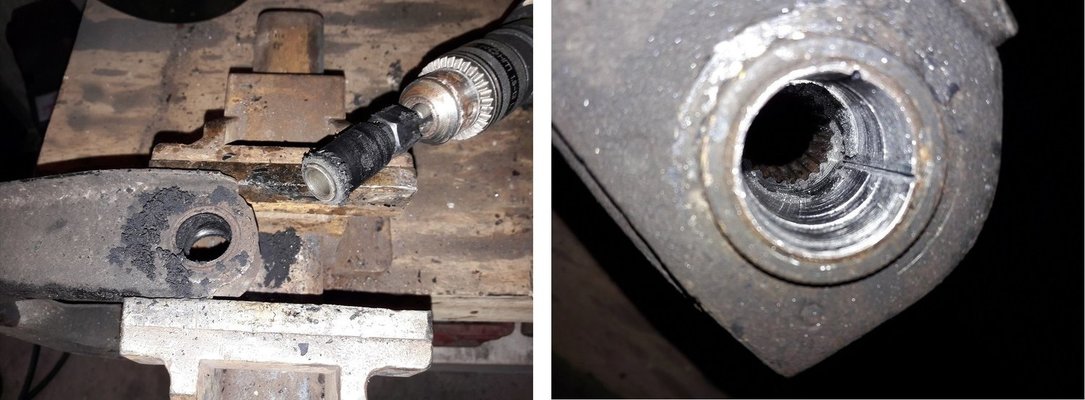
Then a while of tapping, hammering etc. and the bush can be removed, it was well rusted in it's place.
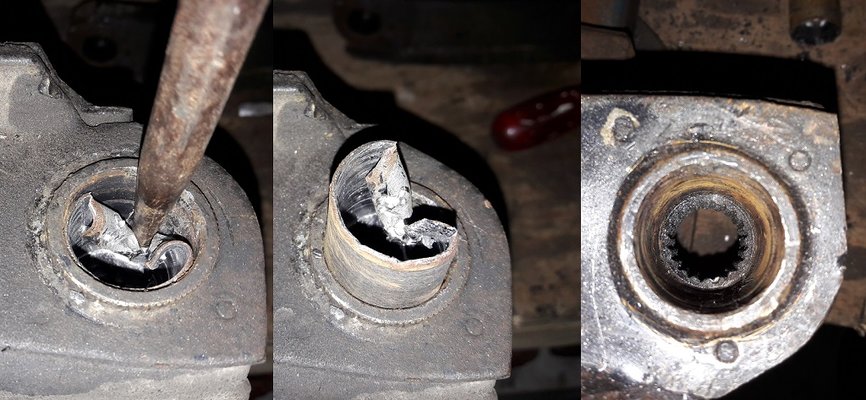
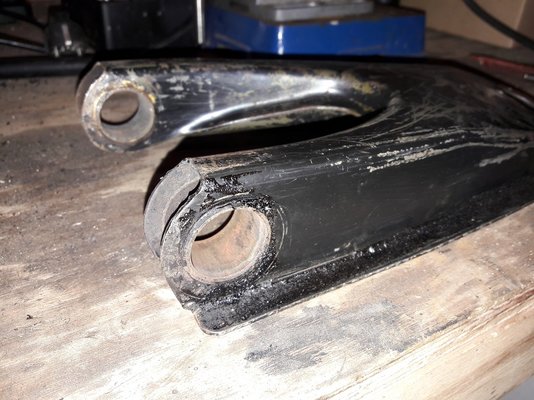
And after some time the silent-blocs from the upper wishbone are also removed.
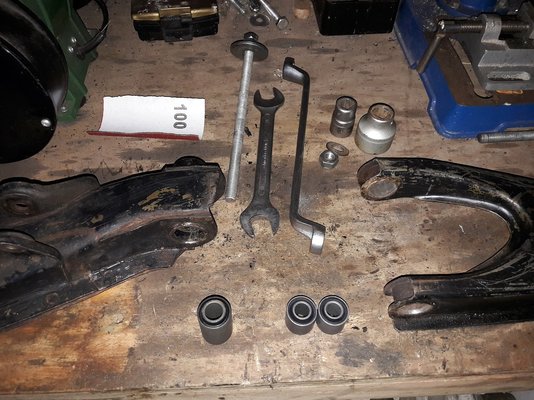
The new silent-blocs and some .tools.
Pressing the silent-blocs in their places...
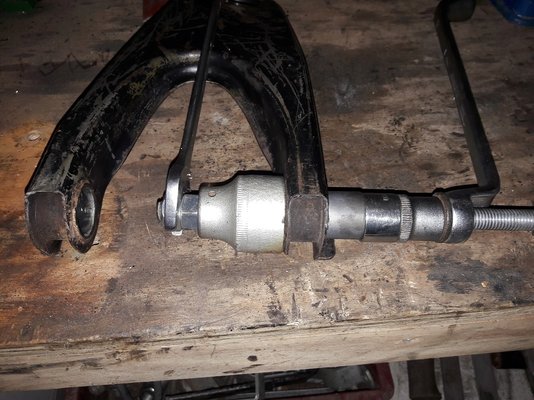
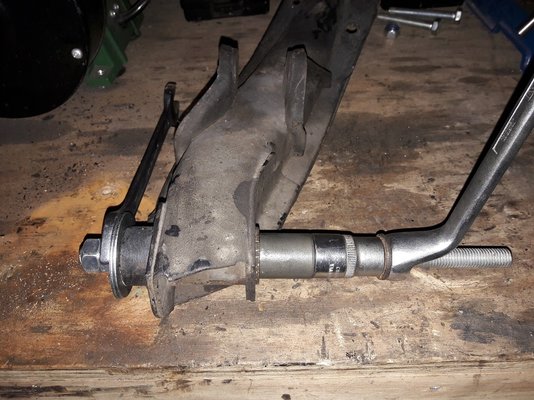
And again a job well done, I suppose
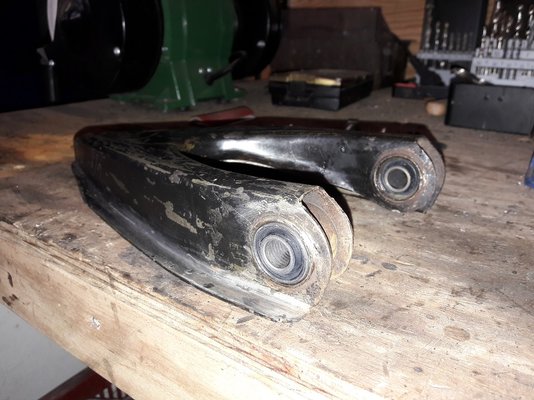
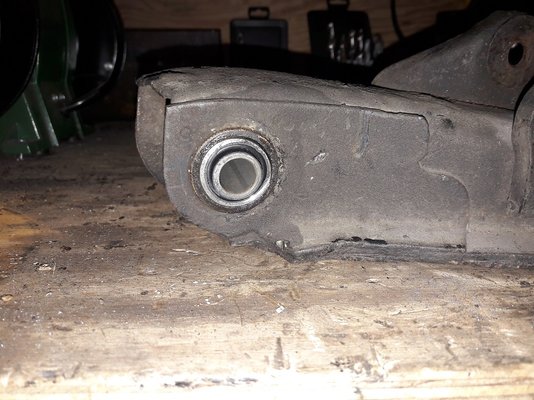
Next time the welding progress on the right front corner,
Cheers, Joop
Here the removal of a very stubborn inplace well-rusted upper ball joint. With the help of WD-40, some time and some gentle motivation from a hammer, the piece came free.

After 30+ years of service it's time to replace all the silent-blocs from the front upper and lower wishbones.
First I tried the easiest handson approach to remove the lower wishbone silent-bloc...

But it wouldn't budge so I switched to the hard way, drilling out the inner bush and weakening the outer bush...

Then a while of tapping, hammering etc. and the bush can be removed, it was well rusted in it's place.

And after some time the silent-blocs from the upper wishbone are also removed.

The new silent-blocs and some .tools.

Pressing the silent-blocs in their places...


And again a job well done, I suppose


Next time the welding progress on the right front corner,
Cheers, Joop
Last edited:
JdeW
Enthusiast
- Messages
- 1,159
- Location
- Laarbeek The Netherlands
As promised hereby the chassis progress on the right front corner.
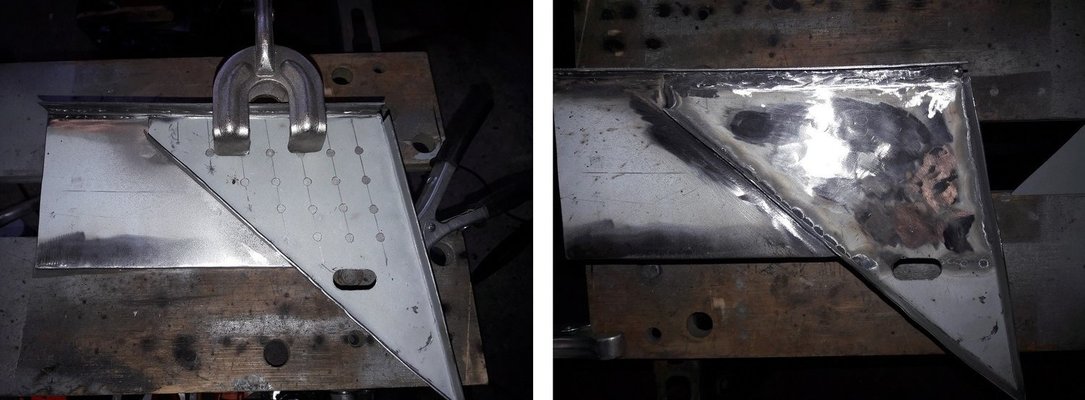
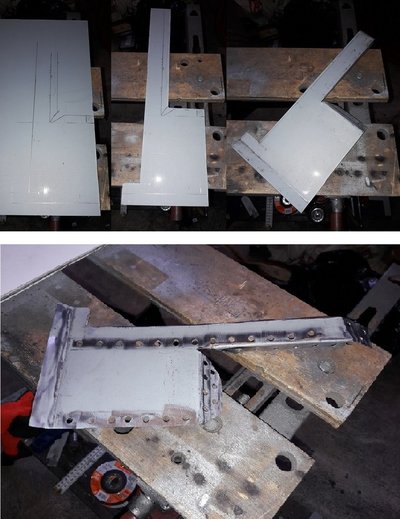
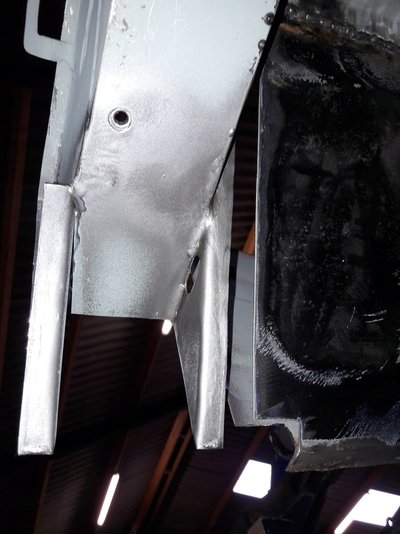
Creating the inner and outer stiffener triangles.
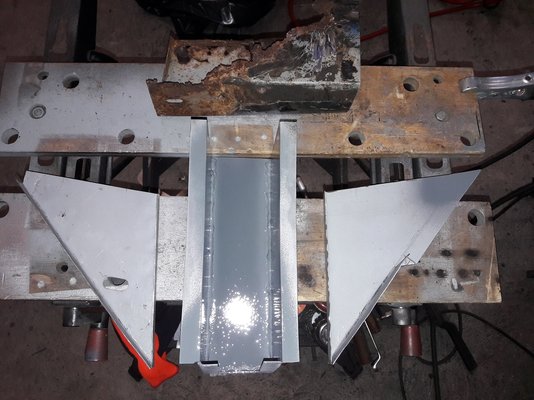
Ready to weld the inner stiffener triangle.... and miraculously the outer stiffener triangle also done.
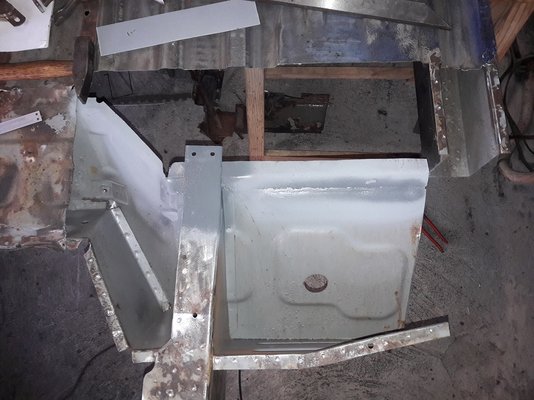
Here some rusty strips on the footwell are refreshed by new steel,
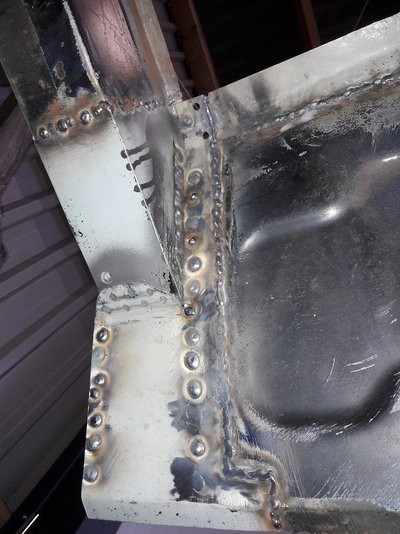
The new created piece for the right front beam, tag welded in its place.
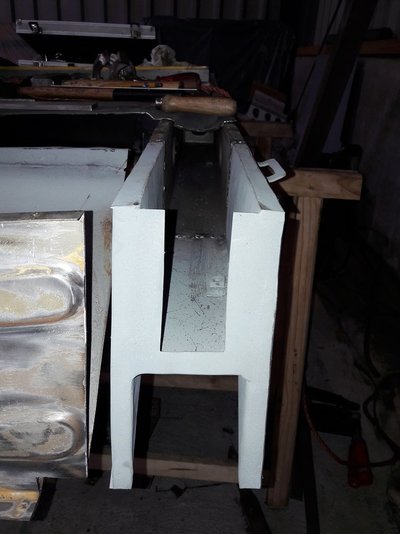
Creating a new piece to weld the beam to the inside front cross beam.
And here it has to fit-
And welded...pfffff the grinding will be done when I flip the chassis because working, welding and grinding in impossible places and positions is something for youngsters
Creating the outside right front repair piece.
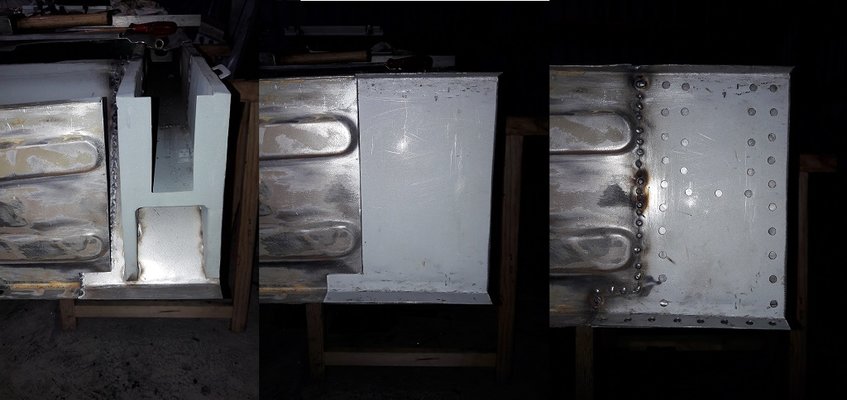
And more shinny new metal, cleaning up a bit and ready to start on the front left corner.
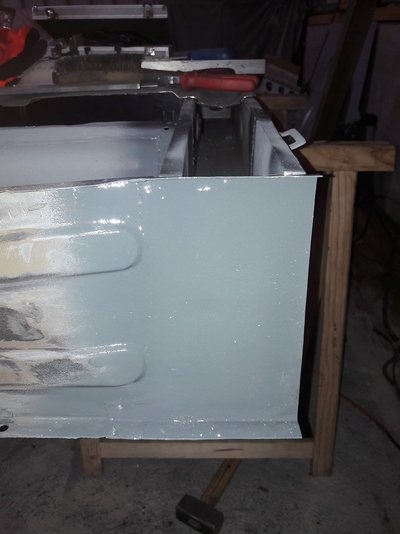
Time to start on the front left corner and it is more challenging because the front left chassis beam also affected by the famous R4 rust....
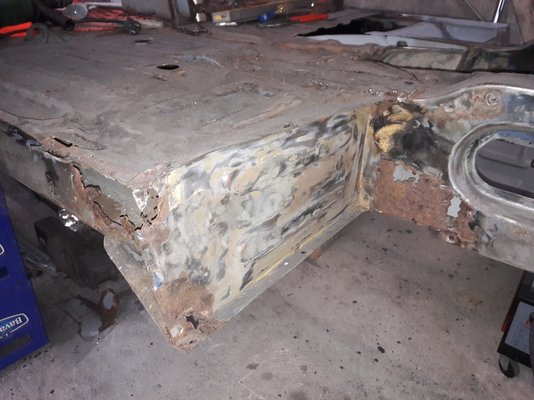
Here an idea what one can expect and what I'm up against for the next corner
Bye for now
Cheers, Joop
Creating the inner and outer stiffener triangles.

Ready to weld the inner stiffener triangle.... and miraculously the outer stiffener triangle also done.

Here some rusty strips on the footwell are refreshed by new steel,

The new created piece for the right front beam, tag welded in its place.

Creating a new piece to weld the beam to the inside front cross beam.

And here it has to fit-

And welded...pfffff the grinding will be done when I flip the chassis because working, welding and grinding in impossible places and positions is something for youngsters

Creating the outside right front repair piece.

And more shinny new metal, cleaning up a bit and ready to start on the front left corner.

Time to start on the front left corner and it is more challenging because the front left chassis beam also affected by the famous R4 rust....
Here an idea what one can expect and what I'm up against for the next corner


Bye for now

Cheers, Joop
Last edited:
Andy McGhee
Enthusiast
- Messages
- 1,943
- Location
- Cheltenham
Joop
This is a fascinating restoration - brilliant photos, too!
This is a fascinating restoration - brilliant photos, too!
JdeW
Enthusiast
- Messages
- 1,159
- Location
- Laarbeek The Netherlands
Thanks for the compliments Andy.Joop
This is a fascinating restoration - brilliant photos, too!
JdeW
Enthusiast
- Messages
- 1,159
- Location
- Laarbeek The Netherlands
Thanks jjad,Great work! Thanks for posting your progress
The trigger for this full restoration begins in 2015. During MOT they noticed some small rusty holes in the front beam.
When there is one rusty spot there should be more, they never come alone

What can one expect as the dismantling starts? More and even more rusty "bits"

It's good to post the progress on this great forum so more people can see how to deal with repairs.
Cheers, Joop
Last edited:
petak
Enthusiast
- Messages
- 1,916
- Location
- Vodice, Croatia
So far so good! 
I'm kidding
What you are doing is unbelievable.
I am really interested to see what you will do with front crossmembers. One that engine sits on.
Also interested what you will use to protect metal from rusting again.
Especially on those places where two plates are welded together and from inside chassis crossmembers
When i look your picture, progress and how "easy you are doing it" almost thinking of doing it again one another project car... I said almost

I'm kidding

What you are doing is unbelievable.
I am really interested to see what you will do with front crossmembers. One that engine sits on.
Also interested what you will use to protect metal from rusting again.
Especially on those places where two plates are welded together and from inside chassis crossmembers
When i look your picture, progress and how "easy you are doing it" almost thinking of doing it again one another project car... I said almost
JdeW
Enthusiast
- Messages
- 1,159
- Location
- Laarbeek The Netherlands
Hey Jurjen, you've done the same, posting and sharing your progress and sometimes I still take a peek at your monster job.Ha Joop, also you should be thanked for posting & sharing your progress. Fantastic restoration this far! Are you going the replace the front part?

The front beam will be replaced but the front chassis beam will be restored, and that will take some time....pffff.
I got some inspiration from Malcolm's front chassis repair he did the bottom side and it's a nice tutorial.
Mine front chassis beam has to be repaired at the top and hopefully it will be a tutorial for others as well as myself
JdeW
Enthusiast
- Messages
- 1,159
- Location
- Laarbeek The Netherlands
Hello petak,So far so good!
I'm kidding
What you are doing is unbelievable.
I am really interested to see what you will do with front crossmembers. One that engine sits on.
Also interested what you will use to protect metal from rusting again.
Especially on those places where two plates are welded together and from inside chassis crossmembers
When i look your picture, progress and how "easy you are doing it" almost thinking of doing it again one another project car... I said almost
First I'm still wondering if your forum name is your real name.
And yes, you are right "still so far so good"
 as I remember you did also an unbelievable job yourself
The front chassis beam (aka front crossmember) will be restored, as I wrote to Jurjen I got some inspiration from Malcolm's front chassis repair he did the bottom side and it's a nice tutorial. Mine front chassis beam has to be repaired at the top and hopefully it will be a tutorial for others as well as myself
Not only the engine sits there, it's also structural for the complete front suspension and steering
As I weld two pieces of sheet metal, I use a weld-thru primer either a zinc-based or an inox (stainless steel) based, depending on the application.
At the end I always first apply a zinc spray inside and outside and at the very end all the insides (cavities) will be treated with Mike Sander's grease.
And all the so called drain holes (which are actually nothing other than water magnets) actually atracks more and more water between the several layers of sheet metal or cavities, all those holes will be closed.
JdeW
Enthusiast
- Messages
- 1,159
- Location
- Laarbeek The Netherlands
Front Left Chassis Beam repair part 1
Disassembling to see what whe're up against.
At some point in this R4's past again patch over patch have been applied to pass MOT.
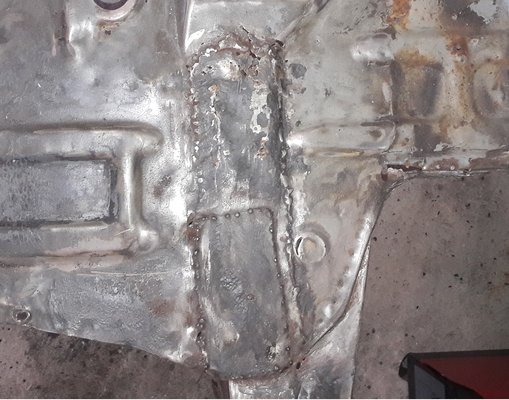
Underneath such a terrible fix the worst is to be expected.
So lets grab a 1mm cutting disc and remove a piece of the floor panel and flip it over. (Needless to say to drill out the spot welds first.)
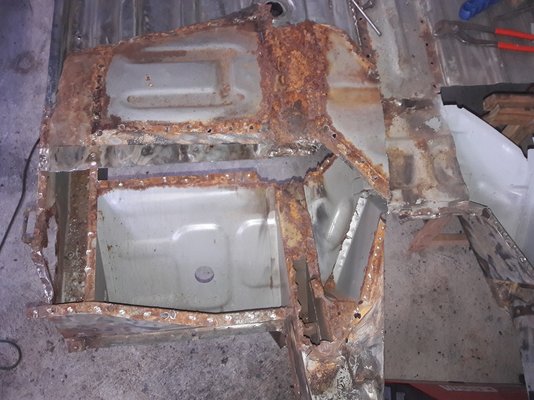
The left corner isn't that bad at all, so I must be really Lucky this time
The inside triangle is in good shape and state so I leave it.
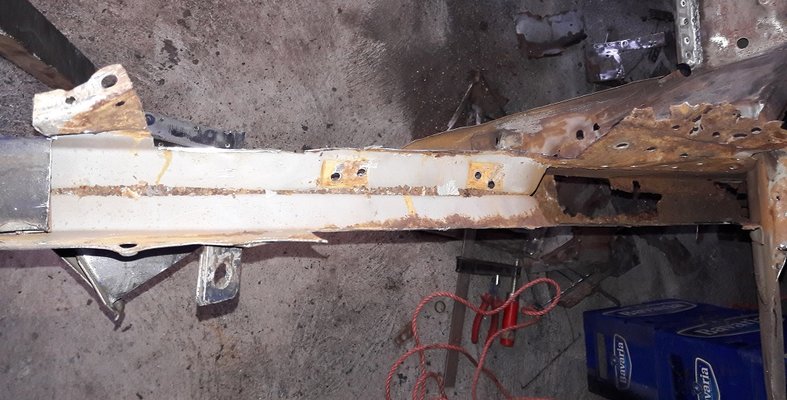
Only a piece of the left front corner has to be restored, the splash plate is removed for better access to the front chassis beam.
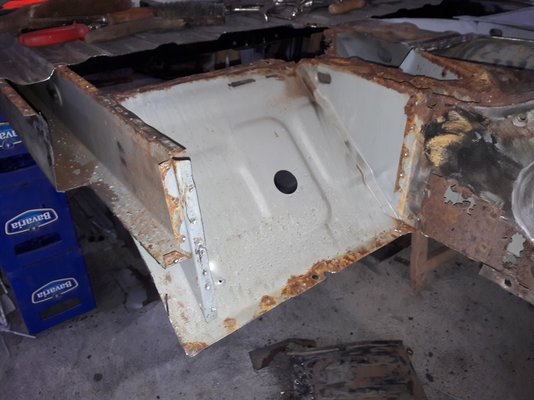
Continue with the precise removal of sheet metal to see how far it is affected.
The front chassis beam is a nice construction of multiple layers which is better described as French pastry dough and in combination with water we get a rust croissant....
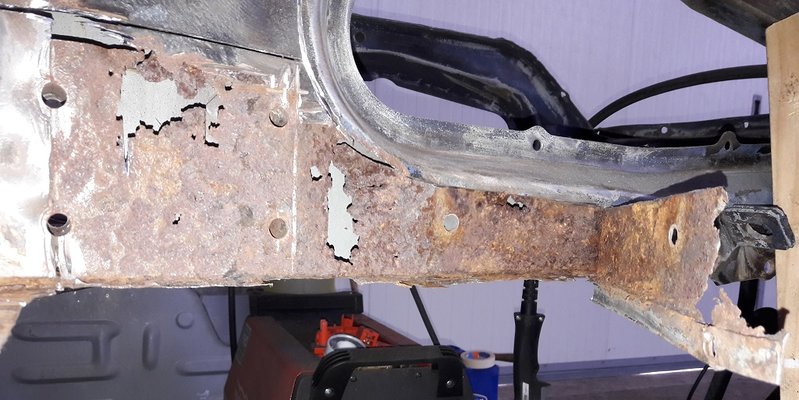
Drilling out the spot welds that keep the inside part in its place.
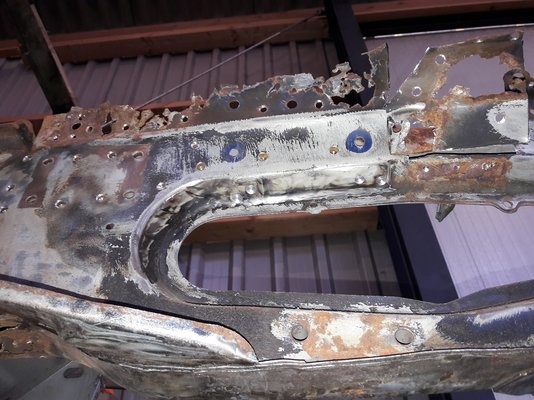
The inside piece is out and will be rebuild.
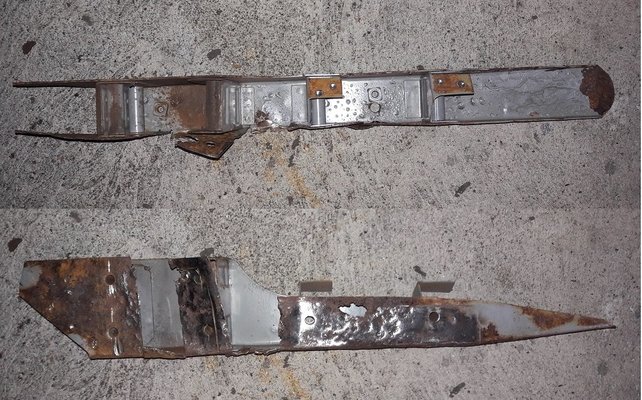
And a look (top to bottom) at the front chassis beam's inside...
The front beam is also removed revealing more rust. The so called Napoleons head looks worse than it is.
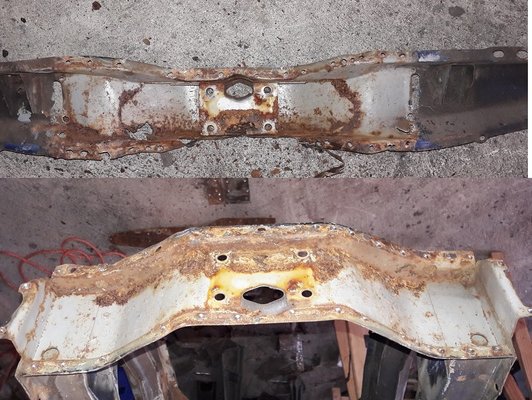
That's it for the disassembling part for now.
Meanwhile I'm allready busy with the rebuild of the various pieces but those will be revealed next time.
Cheers
Disassembling to see what whe're up against.

At some point in this R4's past again patch over patch have been applied to pass MOT.

Underneath such a terrible fix the worst is to be expected.
So lets grab a 1mm cutting disc and remove a piece of the floor panel and flip it over. (Needless to say to drill out the spot welds first.)

The left corner isn't that bad at all, so I must be really Lucky this time
The inside triangle is in good shape and state so I leave it.
Only a piece of the left front corner has to be restored, the splash plate is removed for better access to the front chassis beam.

Continue with the precise removal of sheet metal to see how far it is affected.
The front chassis beam is a nice construction of multiple layers which is better described as French pastry dough and in combination with water we get a rust croissant....

Drilling out the spot welds that keep the inside part in its place.

The inside piece is out and will be rebuild.

And a look (top to bottom) at the front chassis beam's inside...

The front beam is also removed revealing more rust. The so called Napoleons head looks worse than it is.

That's it for the disassembling part for now.
Meanwhile I'm allready busy with the rebuild of the various pieces but those will be revealed next time.
Cheers

Last edited:


