You are using an out of date browser. It may not display this or other websites correctly.
You should upgrade or use an alternative browser.
You should upgrade or use an alternative browser.
R4 GTL 1985 Restoration
- Thread starter JdeW
- Start date
petak
Enthusiast
- Messages
- 1,916
- Location
- Vodice, Croatia
Some day I will drive by Hrvoje.... and borrow your beer
And by the way I'm very familiar with the Baltic regions...
Must stock local beers so you can taste them (as thru beermaker)
You meant Balkan region I believe......Baltic is little far away from me.... aldo i would like to visit it with my faithful friend R4
P.S. nice job on that steering rack, and great part for joungsters to start learn "how to" as it is not complicated.
JdeW
Enthusiast
- Messages
- 1,159
- Location
- Laarbeek The Netherlands
I mean Balkan region indeed sorry for the typoMust stock local beers so you can taste them (as thru beermaker)
You meant Balkan region I believe......Baltic is little far away from me.... aldo i would like to visit it with my faithful friend R4
P.S. nice job on that steering rack, and great part for joungsters to start learn "how to" as it is not complicated.

And locally brewed craft beers I'm curious

JdeW
Enthusiast
- Messages
- 1,159
- Location
- Laarbeek The Netherlands
Update chassis repairs.
Before I flip the chassis and repair the bottom side of the left front chassis beam there was some work to be done on the left lateral beam.
Welding a home brewed corner piece in place.
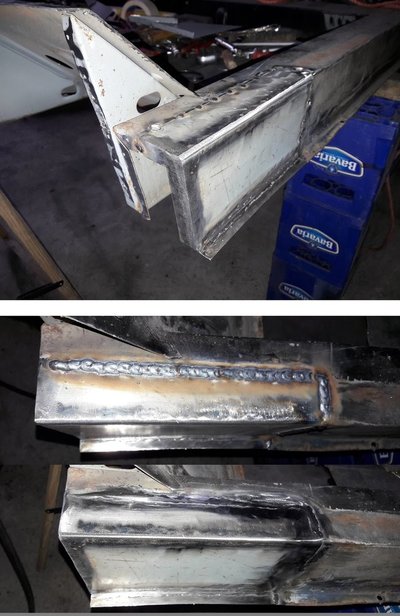
Again creating an outer triangle stiffener plate, and attached it to the lateral beam.
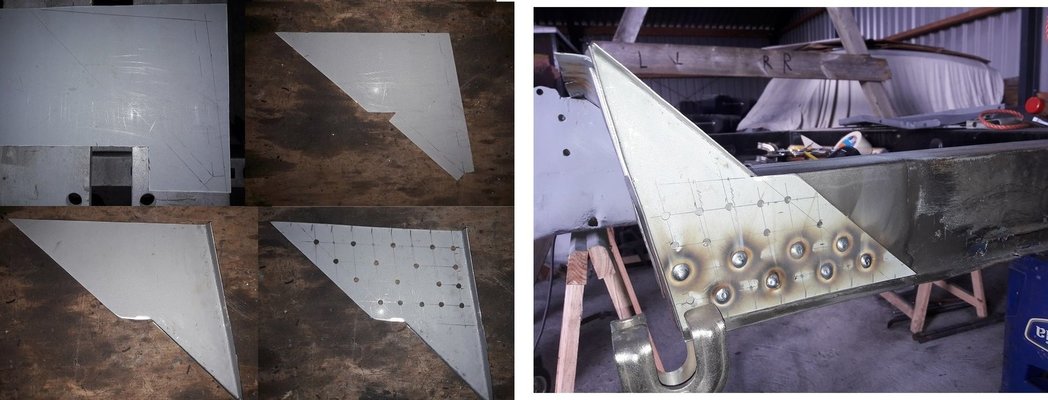
Created and welded the top piece.
Almost finished it is, I'm sure you guys have a keen eye for details, so here the hook for the jack has been rebuild as the old original one wasn't salvageable.
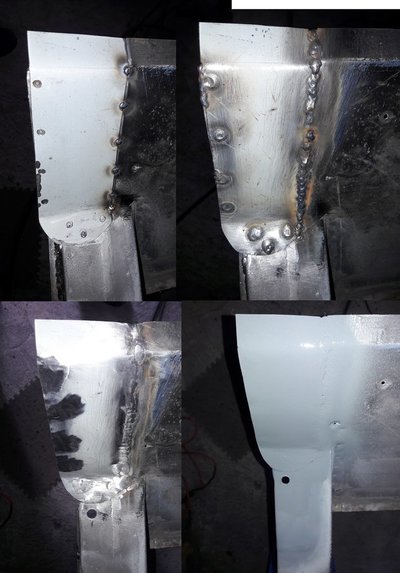
Here again an example of French pastry dough. A triangular shaped piece corroded by brake fluid (and water) and partly held together by somekind of sealant.
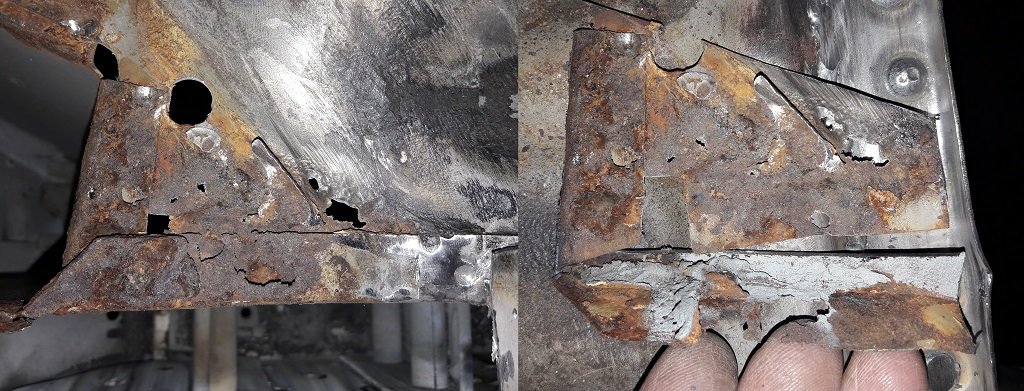
Cutting away the rusty bits.
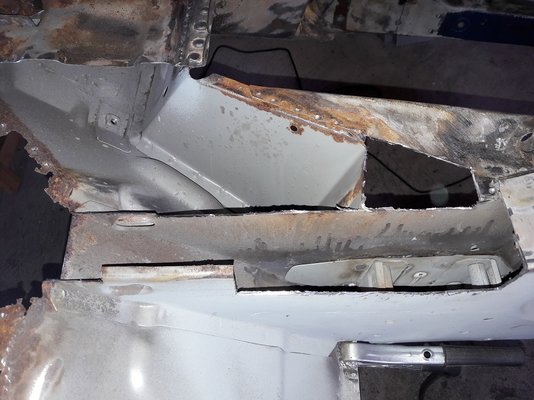
The traingular piece of several thin layers of origamy style folded sheet metal is replced by 1 thick piece.

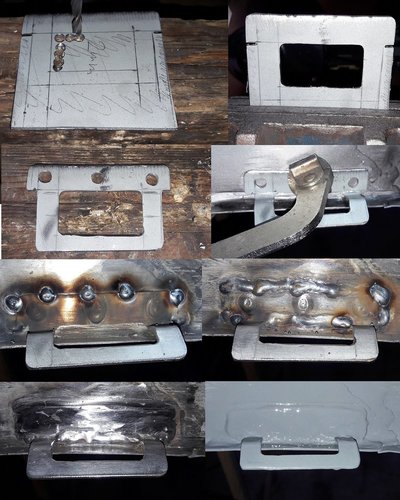
For repairing the bottom left chassis beam I first weld a strip in place.
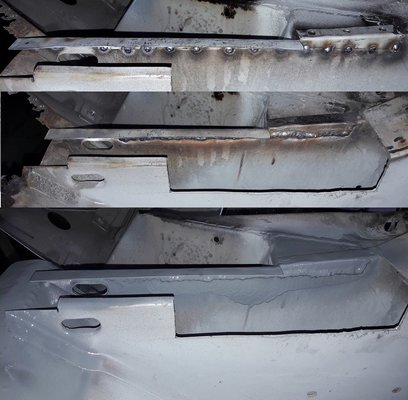
And the bottom piece is created and closed.
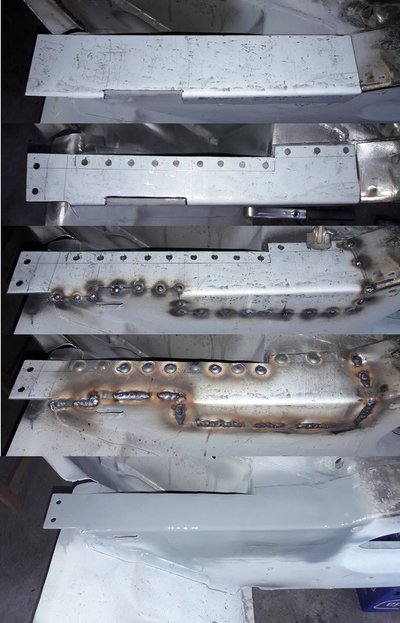
Again for those who have a keen eye, you see that some small strips of sheet metal are replaced here and there
Here a look at the last things to do.
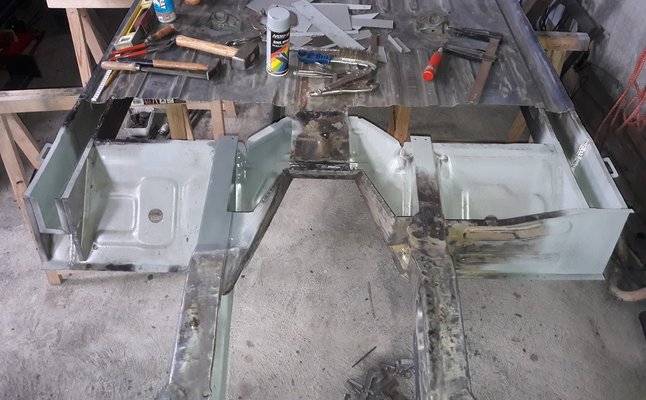
Thin sheet metal is to be welded next so lowering the amps on the MIG welder is a must.
But that's for next time.
Hope you enjoyed the pictures and hopefully I don't spoil you guys to much

Before I flip the chassis and repair the bottom side of the left front chassis beam there was some work to be done on the left lateral beam.
Welding a home brewed corner piece in place.

Again creating an outer triangle stiffener plate, and attached it to the lateral beam.

Created and welded the top piece.

Almost finished it is, I'm sure you guys have a keen eye for details, so here the hook for the jack has been rebuild as the old original one wasn't salvageable.

Here again an example of French pastry dough. A triangular shaped piece corroded by brake fluid (and water) and partly held together by somekind of sealant.

Cutting away the rusty bits.

The traingular piece of several thin layers of origamy style folded sheet metal is replced by 1 thick piece.

For repairing the bottom left chassis beam I first weld a strip in place.

And the bottom piece is created and closed.

Again for those who have a keen eye, you see that some small strips of sheet metal are replaced here and there
Here a look at the last things to do.

Thin sheet metal is to be welded next so lowering the amps on the MIG welder is a must.
But that's for next time.
Hope you enjoyed the pictures and hopefully I don't spoil you guys to much


Last edited:
JdeW
Enthusiast
- Messages
- 1,159
- Location
- Laarbeek The Netherlands
Thanks Mojo, safety is important for my youngest and yes you can use tools in that way.Your son did a great job, glad to see that he's wearing safety goggles. I've never used my drill like that, usually the other way around
Sometimes it's easier to work the part around the tool. I'm not doing it all the time it's easier to work the MIG welder around the chassis instead of moving the chassis around the MIG welder

JdeW
Enthusiast
- Messages
- 1,159
- Location
- Laarbeek The Netherlands
Chassis update the ongoing story.
Work is a bit slow these days alltough the weather is really fine. Reason is our house is sold and now my wife and I are looking for another house
But here are the pictures.
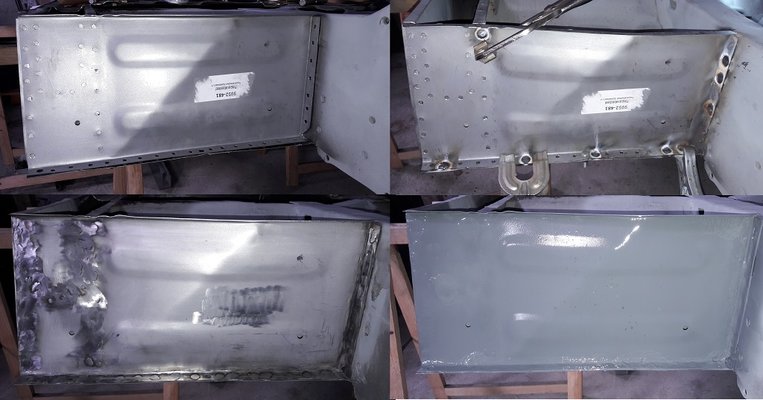
The left spatter plate welded in position.
Slowly the last floor repairs are taking place. First I start with the left side, the repair piece is a bit bigger.
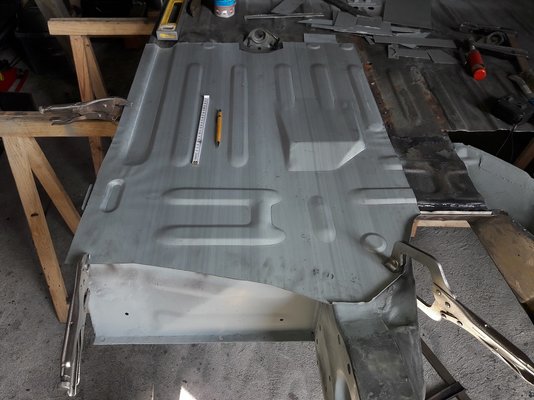
After some cutting and grinding the piece will fit.
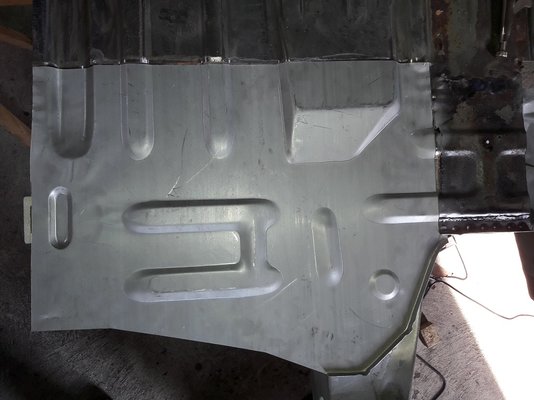
Numerous holes have been drilled.
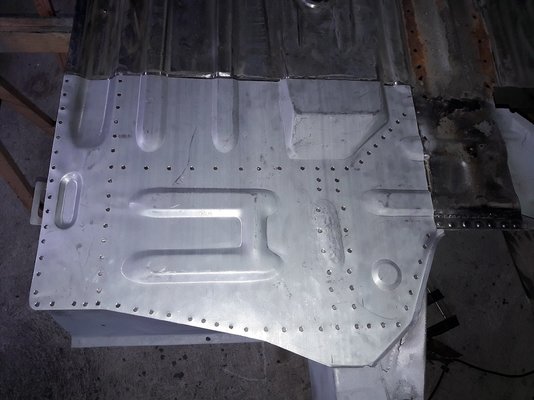
Tacking
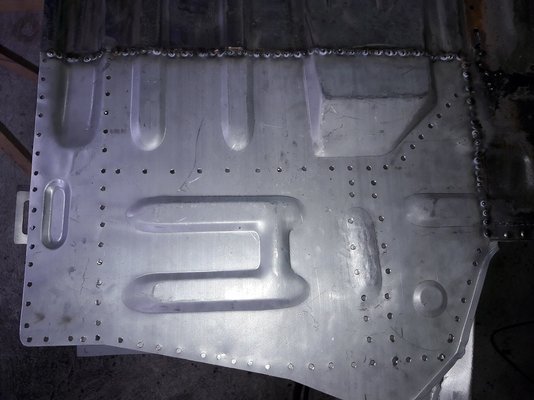
Plug welding and grinding.
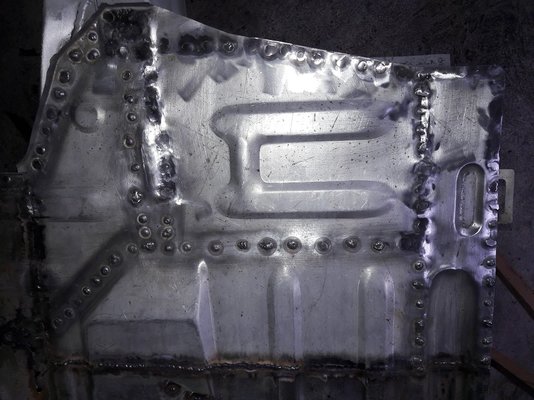
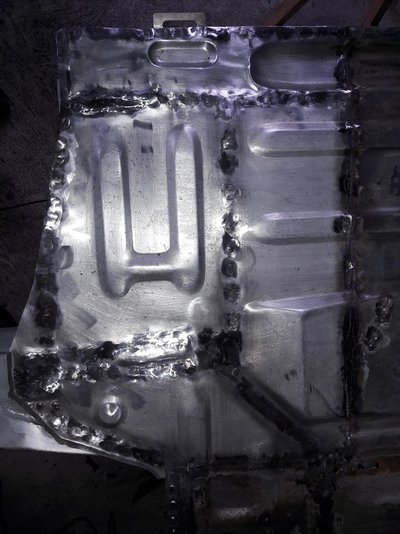
And finising it off with a layer of zinc and the left front floor is closed.
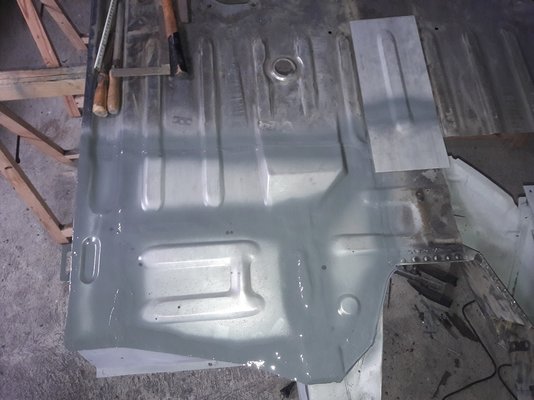
I've also created a small rectangular front center floor piece where the original one was a bit bad (which part isn't ).
).
The front center floor piece is where the floor protection part is positioned.
That's it and bye for now
Work is a bit slow these days alltough the weather is really fine. Reason is our house is sold and now my wife and I are looking for another house

But here are the pictures.
The left spatter plate welded in position.

Slowly the last floor repairs are taking place. First I start with the left side, the repair piece is a bit bigger.

After some cutting and grinding the piece will fit.

Numerous holes have been drilled.

Tacking

Plug welding and grinding.


And finising it off with a layer of zinc and the left front floor is closed.

I've also created a small rectangular front center floor piece where the original one was a bit bad (which part isn't
 ).
).The front center floor piece is where the floor protection part is positioned.
That's it and bye for now

Last edited:
JdeW
Enthusiast
- Messages
- 1,159
- Location
- Laarbeek The Netherlands
Well Mojo, working on all the beams of the chassis was easier (thicker metal) then working and welding on the floor panels...pfff the thinner metal is prone for bending while welding but slowly and surely the chassis is almost done.This seems a lot less complicated than the repairs that you had to do on the chassis. You're on the home run now!!
jcarruthers2
Enthusiast
- Messages
- 690
Hi Jdew
I'm impressed by your restoration project and have been following your updates with interest. I noticed you have recently been working on the front crossmember and I would be grateful if you could let me know whether the outer section ( section in the foreground in your picture) is bolted and welded into place or just bolted as the one on my R4 will need changing too. I can see some bolts on my R4 where the crossmember is bolted to the inner wings but I cannot see further along. I look forward to hearing from you. Thanks Chris
I'm impressed by your restoration project and have been following your updates with interest. I noticed you have recently been working on the front crossmember and I would be grateful if you could let me know whether the outer section ( section in the foreground in your picture) is bolted and welded into place or just bolted as the one on my R4 will need changing too. I can see some bolts on my R4 where the crossmember is bolted to the inner wings but I cannot see further along. I look forward to hearing from you. Thanks Chris
JdeW
Enthusiast
- Messages
- 1,159
- Location
- Laarbeek The Netherlands
Hello Chris, thank you for following my progress on my R4 restoration.Hi Jdew
I'm impressed by your restoration project and have been following your updates with interest. I noticed you have recently been working on the front crossmember and I would be grateful if you could let me know whether the outer section ( section in the foreground in your picture) is bolted and welded into place or just bolted as the one on my R4 will need changing too. I can see some bolts on my R4 where the crossmember is bolted to the inner wings but I cannot see further along. I look forward to hearing from you. Thanks Chris
Let me tell you first that the wings are bolted to the front crossmember and not the other way round

The front crossmember is spot welded. It consists of two parts e.g. the inner crossmember part (the so called napoleons hat) is welded to the left and right front chassis beams (the odd chapped ones) which support the front suspension, engine mounts and steering rack.
The front crossmember is then welded to the napoleons hat and the outer ends of the left and right front chassis beams.
Removal is a bit time consuming but pretty straight forward by carefully drilling/grinding out all the spotwelds and be sure to line up the new part very well and the plug weld it in place.
For me the front crossmember is the last part to be welded and I'm not there yet. It will be done after I've treated all the insides of beams and cavities with Mike Sanders grease.
Whenever there is a question don't hesitate and good luck with the replacement.
Regards Joop
jcarruthers2
Enthusiast
- Messages
- 690
Hi Joop
Thank you for your prompt reply and the advice which will be very useful in preparing for the fitting of the new crossmember. Your detailed picture library of your restoration is of great value to anyone restoring a Renault 4. Regards Chris
Thank you for your prompt reply and the advice which will be very useful in preparing for the fitting of the new crossmember. Your detailed picture library of your restoration is of great value to anyone restoring a Renault 4. Regards Chris
JdeW
Enthusiast
- Messages
- 1,159
- Location
- Laarbeek The Netherlands
It has been a while so time for an update.
Currently there's hardly any time for working at the R4 GTL.
In the past weeks we've sold our house and bought another house just 3 doors away, so now it's time for packing and making preparations for the move.
Our current house was build in 1910, the other house was build in 1947 and allthough it's a bit newer it needs a lot and lots of work so again another project
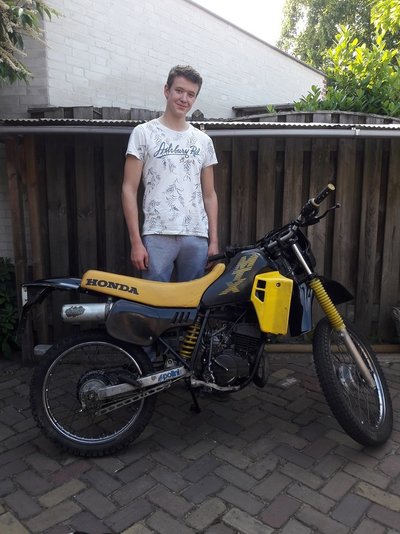
The younghest son succeeded in getting his driver's licence and instead obtaining his own R4 (or R5 Alpine ) he bought a moped a Honda MTX-SH from 1988.
The MTX also needed some TLC, a small restoration and rebuilds on various parts, so in the past weeks he went to work on stripping it, cleaning, restoring etc. you know what I mean.
Lucky me, he let me do the engine, so here some photos.
The engine was 70cc and due to some ridiculous Dutch law some 100 years ago, that's not allowed over here, 49,9cc is the max
After opening the engine it was clear that rebuilding was necessary, parts where missing, seals where leaking, a cracked crankshaft bearing, one crankcase was bad, one cylinder head bolt was poorly fixed etc. etc.
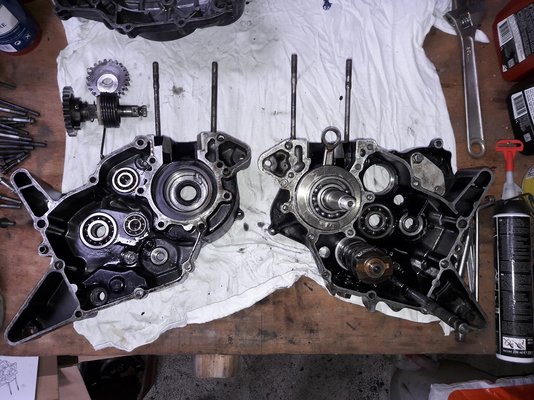
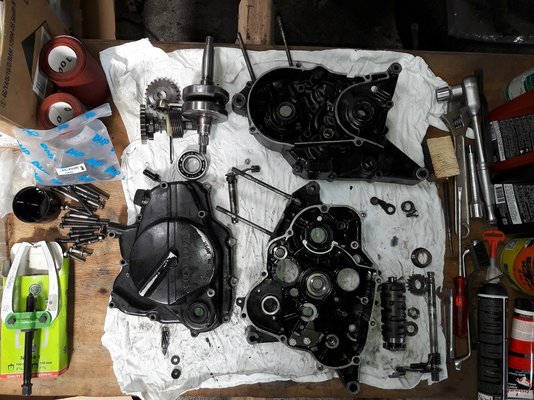
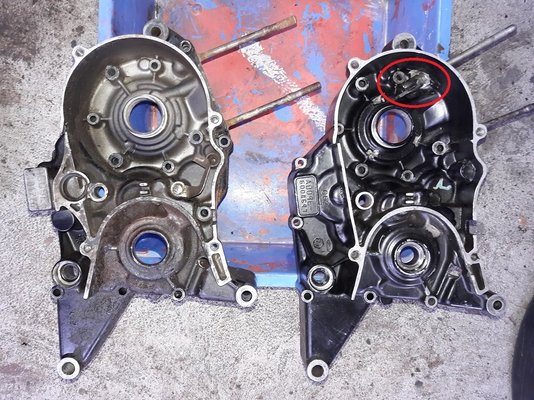
I decided to replace all the seals and all the bearing (SKF C3 type bearings) and I found a replacement crank case.
Time to rebuild the engine, this time with a 6 speed gearbox.
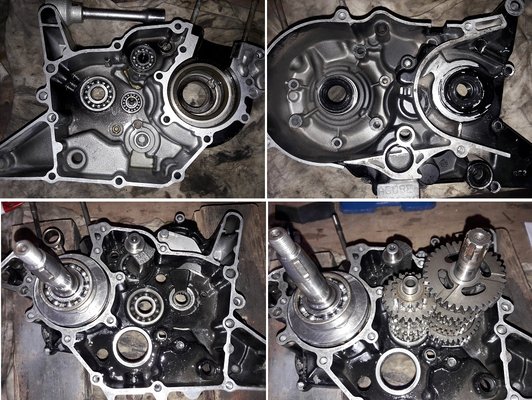
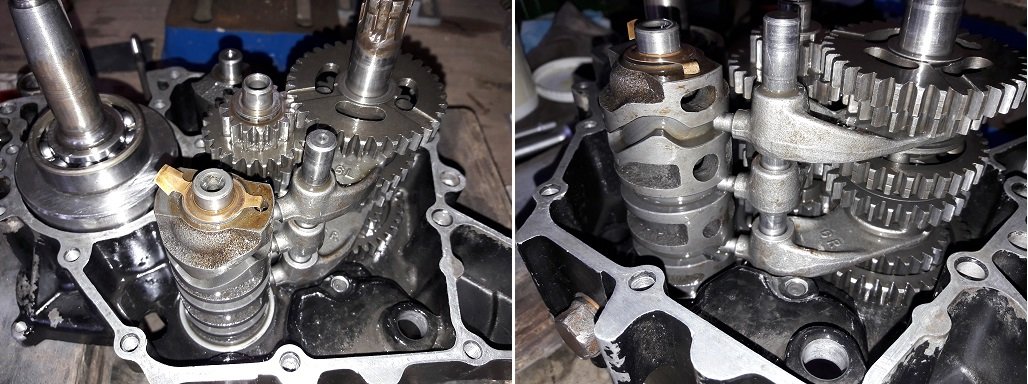
6 speed gears, primary and secondairy axle, gear selector and 3 shifter forks
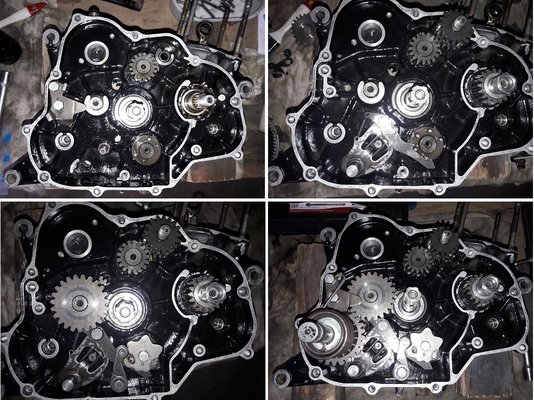
Rebuilding the crank case.
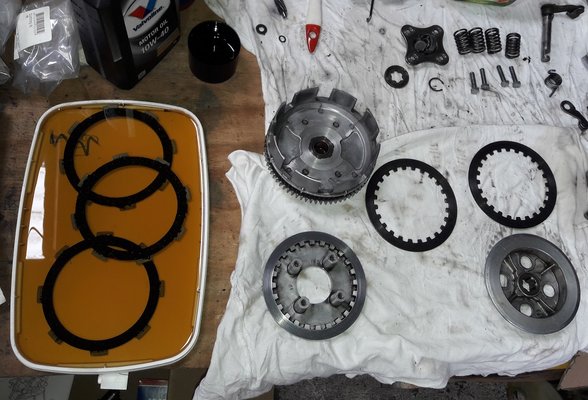
Last part is the clutch but first I soaked the friction plates in oil.
The last bits and closing the complete crank case
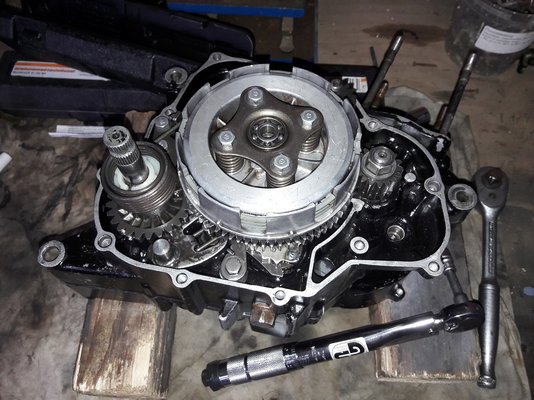
The youngest worked hard on reassembling everything (his mind stood on driving ) and here is the preliminary final result and everything worked.
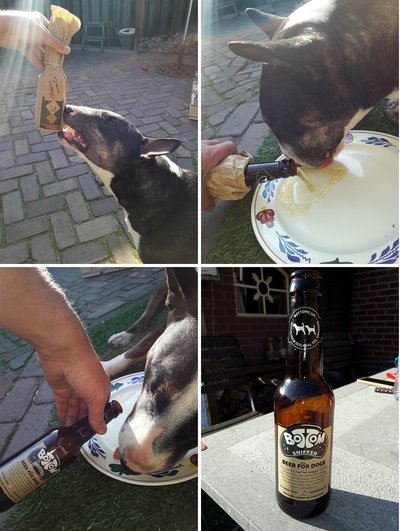
And after a job well done it's time for a beer and don't forget the dog
Currently there's hardly any time for working at the R4 GTL.
In the past weeks we've sold our house and bought another house just 3 doors away, so now it's time for packing and making preparations for the move.
Our current house was build in 1910, the other house was build in 1947 and allthough it's a bit newer it needs a lot and lots of work so again another project

The younghest son succeeded in getting his driver's licence and instead obtaining his own R4 (or R5 Alpine
The MTX also needed some TLC, a small restoration and rebuilds on various parts, so in the past weeks he went to work on stripping it, cleaning, restoring etc. you know what I mean.
Lucky me, he let me do the engine, so here some photos.
The engine was 70cc and due to some ridiculous Dutch law some 100 years ago, that's not allowed over here, 49,9cc is the max

After opening the engine it was clear that rebuilding was necessary, parts where missing, seals where leaking, a cracked crankshaft bearing, one crankcase was bad, one cylinder head bolt was poorly fixed etc. etc.


I decided to replace all the seals and all the bearing (SKF C3 type bearings) and I found a replacement crank case.
Time to rebuild the engine, this time with a 6 speed gearbox.

6 speed gears, primary and secondairy axle, gear selector and 3 shifter forks


Rebuilding the crank case.

Last part is the clutch but first I soaked the friction plates in oil.

The last bits and closing the complete crank case

The youngest worked hard on reassembling everything (his mind stood on driving
 ) and here is the preliminary final result and everything worked.
And after a job well done it's time for a beer and don't forget the dog


Last edited:
Richnd1974
Enthusiast
- Messages
- 579
- Location
- Bournemouth
I used to have a Honda MT50....bored it out to 75cc..
JdeW
Enthusiast
- Messages
- 1,159
- Location
- Laarbeek The Netherlands
Hello Mojo,Bottom Sniffer Beer? what an awesome name, have you tasted it as well?
Yes I've tasted it. It's an unfermented malt brew (very sweet) with several herbs added to it.
But I must say, as a professional craft beer brewer, I prefer my ales better.


