


You are using an out of date browser. It may not display this or other websites correctly.
You should upgrade or use an alternative browser.
You should upgrade or use an alternative browser.
1985 Renault R4 F6 restoration project
- Thread starter DavidN
- Start date
DavidN
Enthusiast
- Messages
- 488
I thought that it would go something like "double holds it better"
Yeah, you are probably right.
Sorry for my lack of English, I just googled the translation and trusted the finding...
Okay, let's go on with my "restoration diary". :smile:
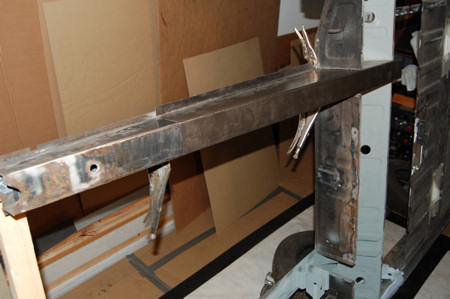
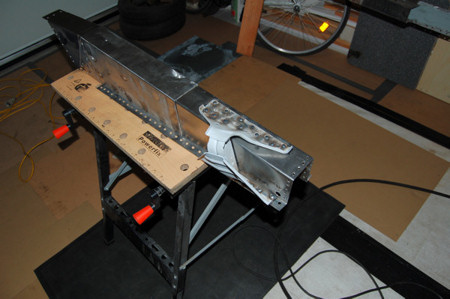
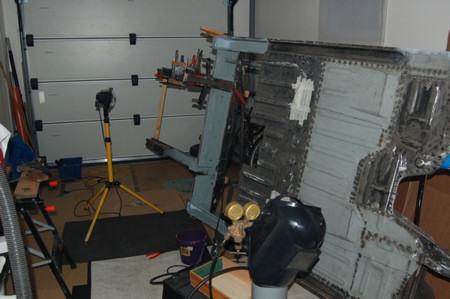
I spent a fair amount of the last days cutting out all the rust on the two rear frame parts next to the fuel tank...
The frames became more and more floppy as I cut away more and more of the substance. So I supported them with roof batten.
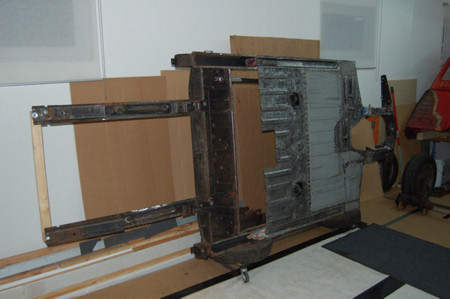
Nicely cut away all the crap...
Here are the new "frames", thanks to a friend of mine who works in a metal processing company and made me the parts for free.

David
Last edited by a moderator:
DavidN
Enthusiast
- Messages
- 488
Hi guys,
It's been a while since my last posting.
I had to take a few days off because of a little accident that happened last week.
I worked with the angle grinder and one tiny piece of glowing metal surprisingly found it's way through (or past the side of) my protective goggles.
At first I thought it was nothing dramatic and that it will go away by itself.
After 3 painful days I finally decided to see the doc.
He found the piece and extracted it from my lens where it has been melted on.
Man, that was a pain!
After 2 more days everything was fine again.
I had the open chassis parts covered with zinc paint - as Malcolm recommended.
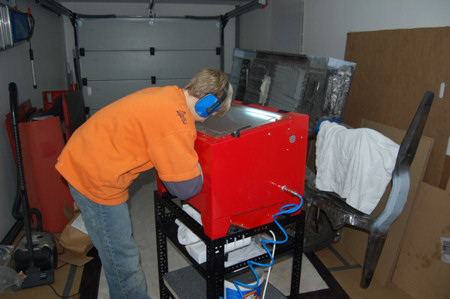
Meanwhile I bought a small sandblasting cabin and Tim, my 12 year old had a little fun with the box...
Actually I wanted to do the big parts e.g. chassis, axles and the body first, but this funky machine had to be tested.")
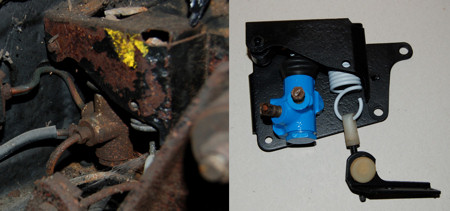
So we restored the rear brake limiter (?).
Before and after:
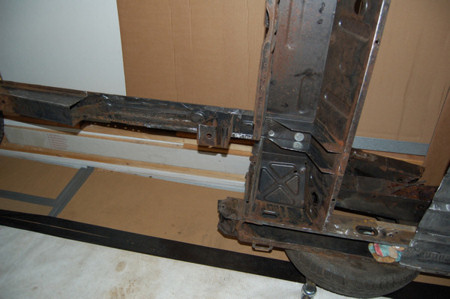
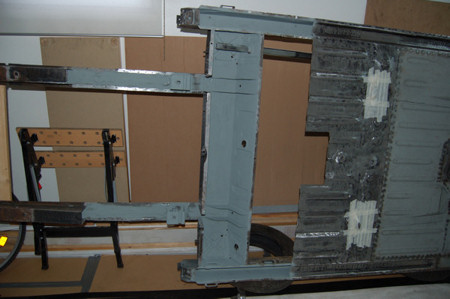
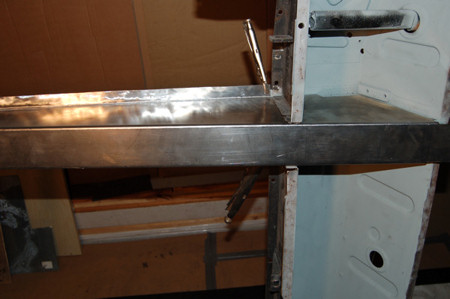
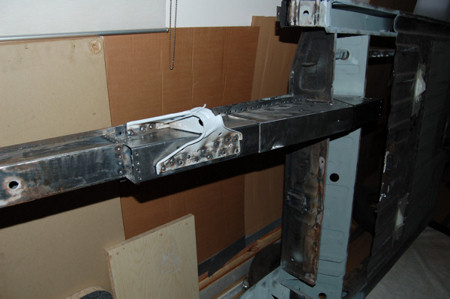
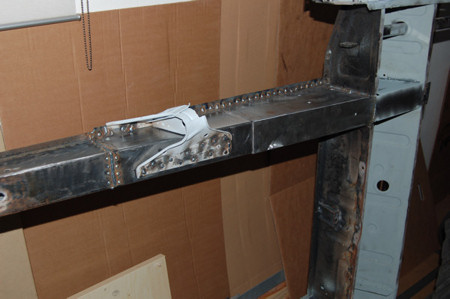
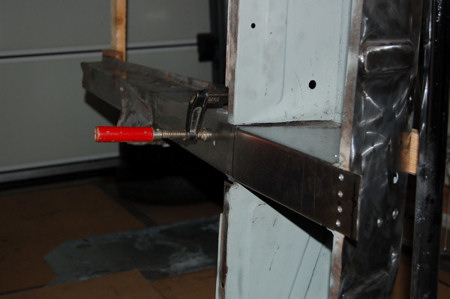
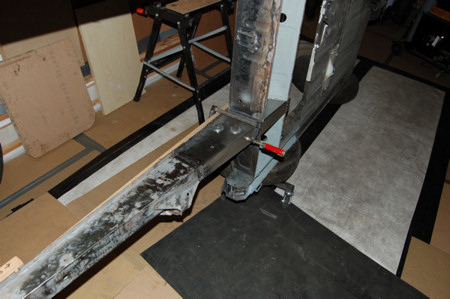
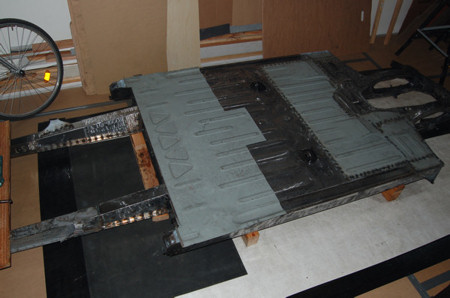
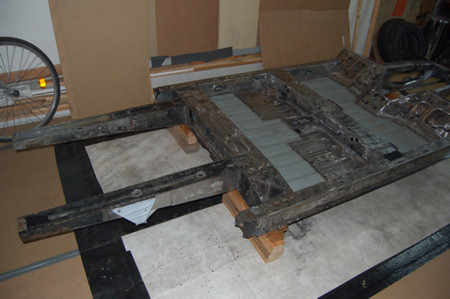
Today I worked on the chassis' rear frames (again).
I just let the pictures speak ...
...
It's been a while since my last posting.
I had to take a few days off because of a little accident that happened last week.
I worked with the angle grinder and one tiny piece of glowing metal surprisingly found it's way through (or past the side of) my protective goggles.
At first I thought it was nothing dramatic and that it will go away by itself.
After 3 painful days I finally decided to see the doc.
He found the piece and extracted it from my lens where it has been melted on.
Man, that was a pain!
After 2 more days everything was fine again.
I had the open chassis parts covered with zinc paint - as Malcolm recommended.
Meanwhile I bought a small sandblasting cabin and Tim, my 12 year old had a little fun with the box...
Actually I wanted to do the big parts e.g. chassis, axles and the body first, but this funky machine had to be tested.
So we restored the rear brake limiter (?).
Before and after:
Today I worked on the chassis' rear frames (again).
I just let the pictures speak ...
...
Last edited by a moderator:
DavidN
Enthusiast
- Messages
- 488
I do hope everything will be aligned. Malcolm used chassis jig for extensive chassis work.
Should be.
For lack of a jig I measured more often than I can count ...
mr-reno-139
AKA Paul Cunningham
- Messages
- 2,279
- Location
- lancing west sussex england
very thorough job you are doing wish i had your time and skill
guess you have done other cars before ?
keep at it, very inspiring
regards Paul
guess you have done other cars before ?
keep at it, very inspiring
regards Paul
DavidN
Enthusiast
- Messages
- 488
very thorough job you are doing wish i had your time and skill
guess you have done other cars before ?
keep at it, very inspiring
regards Paul
Thanks a lot!
The R4 is my first complete restoration.
My whole life I tried to do as much work on cars, scooters, and bikes by myself.
I think it all started 24 Years ago with my first car. A 1969 Alfa Romeo GT Bertone.
It came with a lot of work to do but I never did a complete restoration at least not on a car.
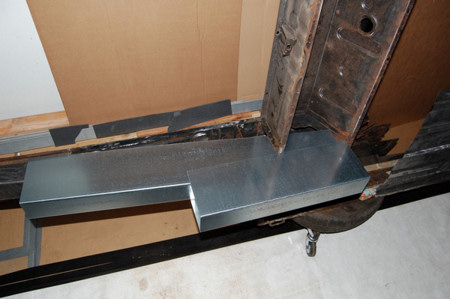
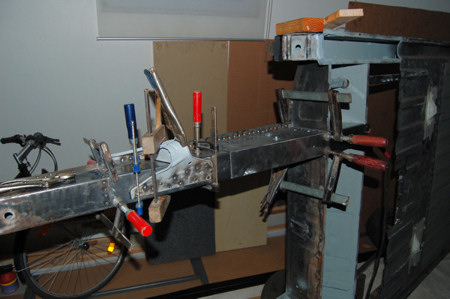
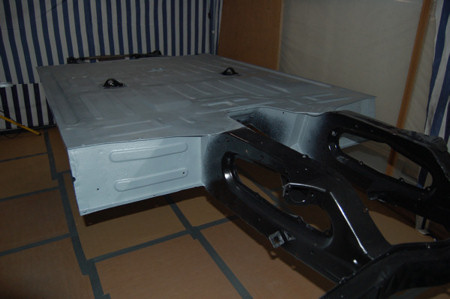
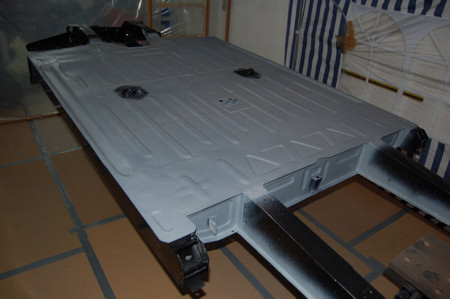
Today I finished the welding on the chassis !!!
First I prepared the rar floor...
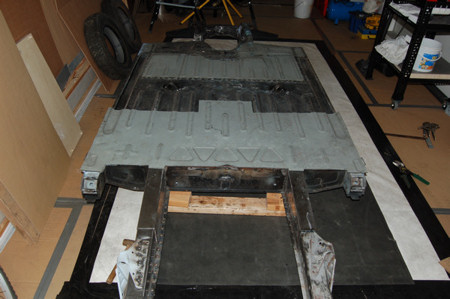
And here it is nicely welded in. :wink:
Next on the list is a lot of grinding and then comes the paint job...
David
Last edited by a moderator:
Snoopy1974
Enthusiast
- Messages
- 412
very nice job David, your chassis will be absolutly NEW Thanks you also for your proposition about your wheels, if I find here 2 others one to have a set of 4, I will certainly ask you to send them to me. Can you tell me the cost of postage ? (Germany to France, I'm a little afraid :eek
I'm looking forward to read you soon.
A
Snoopy1974
Enthusiast
- Messages
- 412
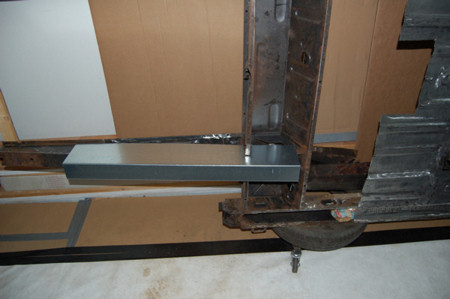
I forgot the most important, actually I start to repair the chassis of my brother new R4, a 1981 GTL, as you, the rear of the chassis is damaged, but luckily less than yours As Malcolm did on Rosalie, I started to cut with a grinder the damaged section:

My question is what the thickness of the steel sheets you use to repair this part of your chassis ?
Personnaly, I think I will make the repair with a single 2 mm steel sheet instead of 2 ones to prevent the rust between them...
Thanks you for the informations")
As Malcolm did on Rosalie, I started to cut with a grinder the damaged section:My question is what the thickness of the steel sheets you use to repair this part of your chassis ?
Personnaly, I think I will make the repair with a single 2 mm steel sheet instead of 2 ones to prevent the rust between them...
Thanks you for the informations
Snoopy1974
Enthusiast
- Messages
- 412
Yes I think 2mm would be good, but I still wonder why Renault chose this construction with double skins and didn't think there could be rust problems with years ???...
DavidN
Enthusiast
- Messages
- 488
Thanks you also for your proposition about your wheels, if I find here 2 others one to have a set of 4, I will certainly ask you to send them to me. Can you tell me the cost of postage ? (Germany to France, I'm a little afraid :eek
I'm looking forward to read you soon.
A
Postage isn't that high.
I could remove the old tyres and send you just the rims.
This way it would probably be something around 30 Euro.
But if it's getting serious I will give you an exact quote of the costs
I forgot the most important, actually I start to repair the chassis of my brother new R4, a 1981 GTL, as you, the rear of the chassis is damaged, but luckily less than yours
My question is what the thickness of the steel sheets you use to repair this part of your chassis ?
Personnaly, I think I will make the repair with a single 2 mm steel sheet instead of 2 ones to prevent the rust between them...
Thanks you for the informations
I used 2 sheets of 1.5 mm.
I do not bother much about the rust problem because I plan on using the car only in the summer months and I will have a nice cavity protection done on the chassis.
(Mike Sanders Cavity protection grease)
Therefore I put 12 mm bore holes on strategic places of the chassis to reach all the hollow parts of it when the paint job is done.
The Mike Sanders grease is said to "wander" for years and to get in between the narrowest places. What it does is to block the air oxygen from getting onto the metal surfaces and so there will be no more rusting.
David
Last edited:
DavidN
Enthusiast
- Messages
- 488
After I took 2 weeks off for my traditional waterski winter vacation in Florida I have a hard time to fight the jet-lag and the icy cold temperatures over here!
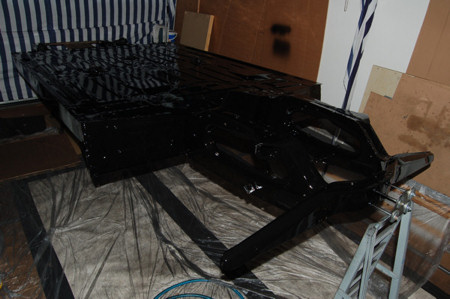
Yesterday I sealed all the joints and seams on the chassis with black paintable sealant and today I managed to apply the stone chip protection.
Yesterday I sealed all the joints and seams on the chassis with black paintable sealant and today I managed to apply the stone chip protection.
Last edited by a moderator:
DavidN
Enthusiast
- Messages
- 488
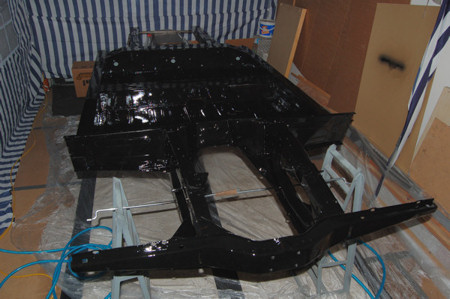
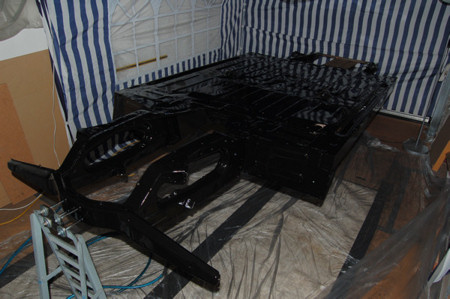
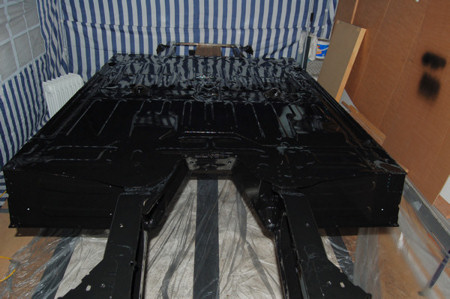
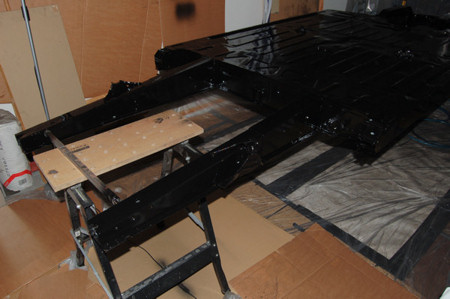
The outside temperatures over here slowed me down, as my garage has no heating.
To work in the cold is definitely not the best for my self-motivation, but the paint-job on my chassis is finally done.
I decided to use black mat as top coating.
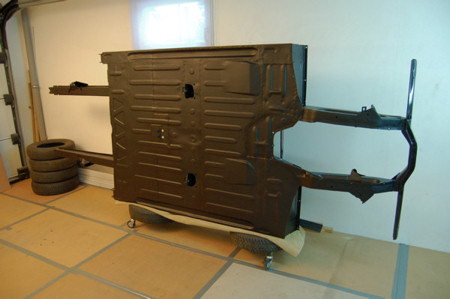

Next I have to work on the axles ...
David
To work in the cold is definitely not the best for my self-motivation, but the paint-job on my chassis is finally done.
I decided to use black mat as top coating.
Next I have to work on the axles ...
David
Last edited by a moderator:
billythefish
Enthusiast
- Messages
- 350
Brilliant job