


You are using an out of date browser. It may not display this or other websites correctly.
You should upgrade or use an alternative browser.
You should upgrade or use an alternative browser.
1985 Renault R4 F6 restoration project
- Thread starter DavidN
- Start date
DavidN
Enthusiast
- Messages
- 488
david - your doing a great job and i think you are enjoying it - please try again with your front torsion bar settings - i think you might regret it - rf6 are nose heavy to start with. just my 10 pence worth - i wish you all the best.
reg
Thanks Reggie, I will definitely consider to get the front suspension to it's original height.
On the other hand ... I always liked cars with a slightly lowered front.

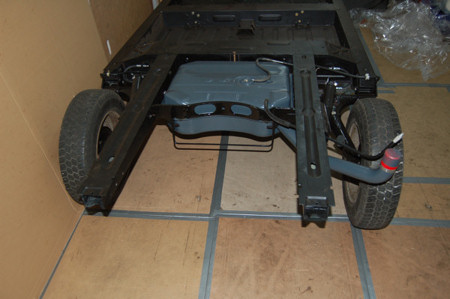
Today I went on with the brake lines.
I bought a "loop" of 5 Meter tube and just figured out, that I would need at least one additional Meter. Damn...

I should have gone for the 7.5 Meter loop.
After that disappointment I mounted the fuel tank and called it a day...

Last edited by a moderator:
kevinandkate
Sadly no longer an owner
- Messages
- 138
Also really enjoying such a well documented rebuild. John, regarding the De Carbon dampers they are available here in France on line for 49 euros a pair plus 12 euros delivery.If you look under Renault r4 in the pieces detachee part of Ebay.fr there are lots for sale there. Only put R4 not 4l or anything else.
DavidN
Enthusiast
- Messages
- 488
Bingo!
Got the dampers off ebay France.
Shipment was a bit exorbitant (30 Euros).
Maybe I should have asked the seller first. My fault.
The steering rack comes out again when I implant the engine/tranny unit.
Right now I'm sandblasting and grinding the rims to prepair them for the paint job.
Got the dampers off ebay France.
Shipment was a bit exorbitant (30 Euros).
Maybe I should have asked the seller first. My fault.
The steering rack comes out again when I implant the engine/tranny unit.
Right now I'm sandblasting and grinding the rims to prepair them for the paint job.
John Doe
Enthusiast
- Messages
- 802
I'll take a look, thanks.
Let me tell you my adventure with www.franzose.de The parts were like 27 euros + 32 for the postage + 30 for the customs so your 30 euros sounds nice
Let me tell you my adventure with www.franzose.de The parts were like 27 euros + 32 for the postage + 30 for the customs so your 30 euros sounds nice
DavidN
Enthusiast
- Messages
- 488
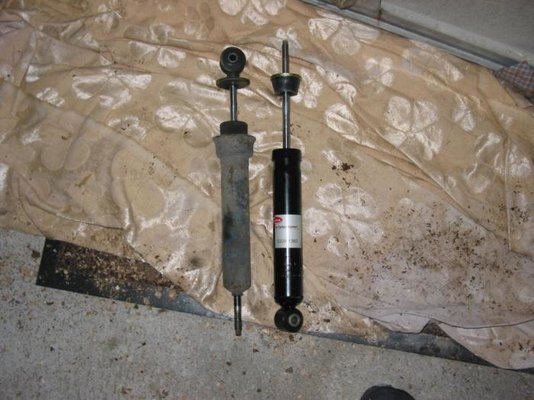
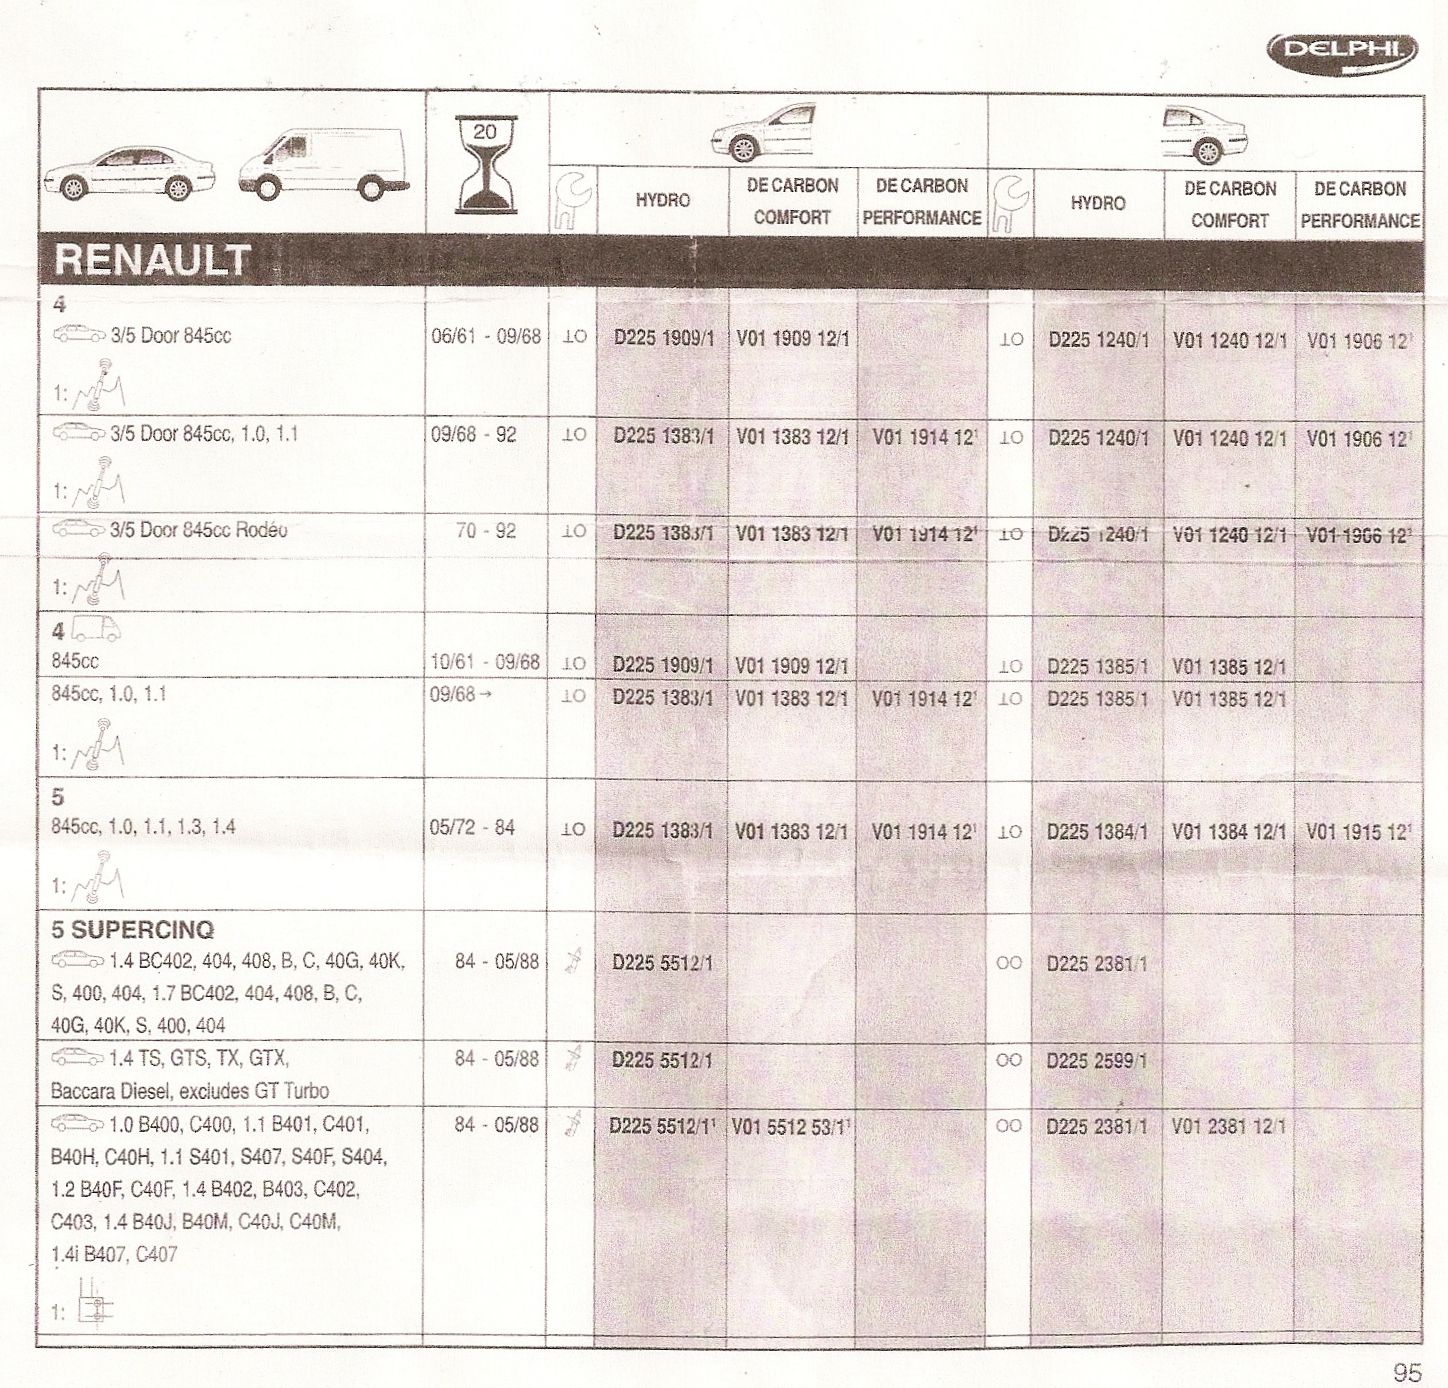
David, just wanted to confirm that the Delphi rear dampers are actually gas-pressurized, are they? Did they rest in the "extended" position?
I think they are gas pressurized, but I'm not 100 percent sure.
At least that's what the package says.
BUT they do not extend automaticly like the ones that Malcolm used.

I bought the dampers from a guy named "carshopphil" and according to the numbers (D225 1385) these are the matching dampers for the F6 van.
Here's the DeCarbon list:
http://www.renault4.co.uk/technical/decarbon-dampers.jpg
IF you consider buying from this guy please check the shipping costs before you buy!
In the auction they are not stated clearly! It says 13 Euro, not 30.
kevinandkate
Sadly no longer an owner
- Messages
- 138
Mine also came from carshopphil and are gas pressurised according to the box however they also do not extend automatically like the ones Malcolm used and like the ones I took off which were leaking. Mine are also apparently the worng ones as the bottom eyelet is on the body of the damper not on the strut although they are the same length etc. I have emailed the vendor with no reply as yet. Anyone know if "upside down is ok?
kevinandkate
Sadly no longer an owner
- Messages
- 138
Thanks Malcolm, they are the right number I was just confused when I saw they were so different. Just waiting for the new driveshafts now, the engine and box are in and ready to go.
DavidN
Enthusiast
- Messages
- 488
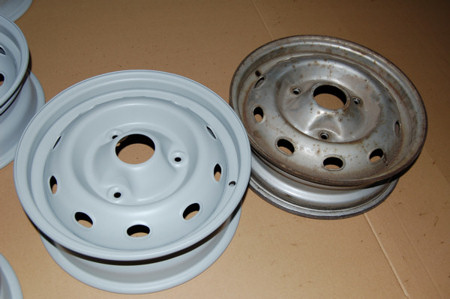
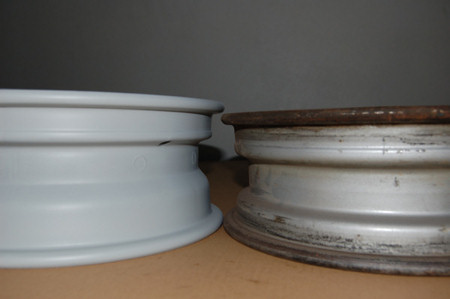
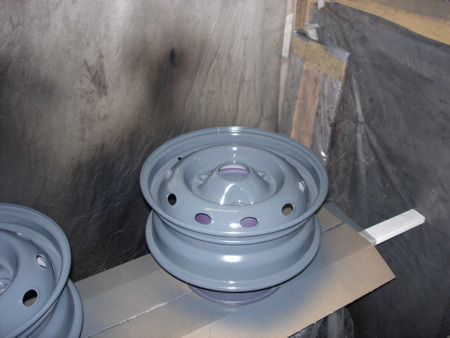
Within the last 2 weeks I was preparing the rims.
Sandblasting and grinding, grinding, grinding ...
Before ...
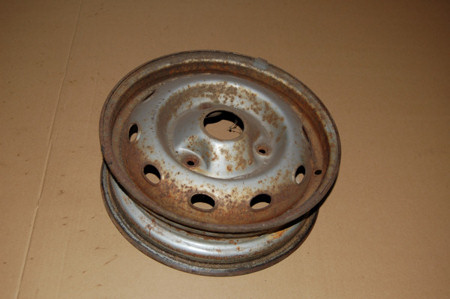
... and after - with a first coat of primer.
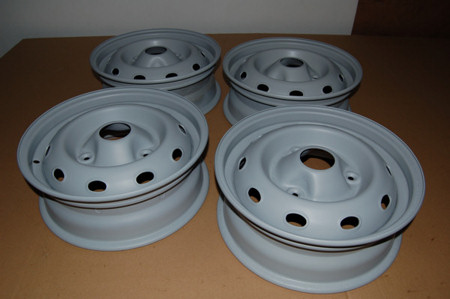
I had a lot of rims to choose from as my F6 came with a total of 13 (!) wheels.
I was able to assort 2 matching sets that looked pretty similar.
Both sets had that original look, but were of different width and offset.
One set is 4.00x13, 35mm offset and the other is 4.50x13, 30mm offset.
Of course the wider rims had been my #1 choice.")
Sandblasting and grinding, grinding, grinding ...
Before ...
... and after - with a first coat of primer.
I had a lot of rims to choose from as my F6 came with a total of 13 (!) wheels.
I was able to assort 2 matching sets that looked pretty similar.
Both sets had that original look, but were of different width and offset.
One set is 4.00x13, 35mm offset and the other is 4.50x13, 30mm offset.
Of course the wider rims had been my #1 choice.
Last edited by a moderator:
DavidN
Enthusiast
- Messages
- 488
david - your doing a great job and i think you are enjoying it - please try again with your front torsion bar settings - i think you might regret it - rf6 are nose heavy to start with. just my 10 pence worth - i wish you all the best.
reg
Reg,
just want to let you know, that I followed your advice and was able to turn the torsion bars of the front suspension to their original setting.
Was a painful job though, but finally I won over the stiff bars. :smile:
David
f6 restoration
hi david
well done you will be happy you did when your plowing through the snow- it has a big effect on the ride too which is why we all love driving r4s in the first place-now get 2 snow tyres on your spare rims for next year you will have a blast in a 4.
all the very best Reg
hi david
well done you will be happy you did when your plowing through the snow- it has a big effect on the ride too which is why we all love driving r4s in the first place-now get 2 snow tyres on your spare rims for next year you will have a blast in a 4.
all the very best Reg
DavidN
Enthusiast
- Messages
- 488
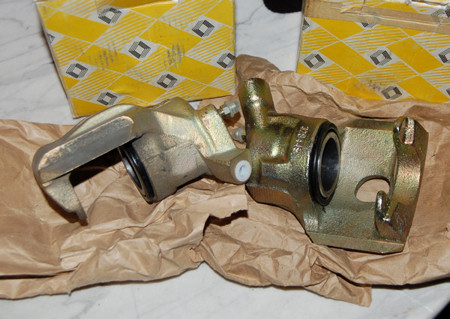
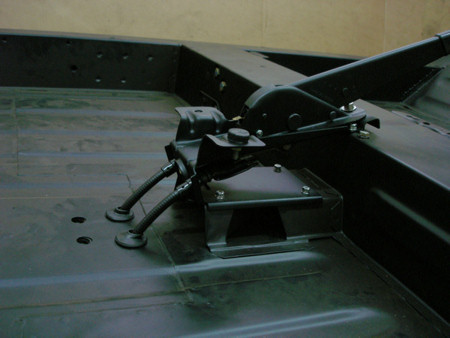
Today I mounted the missing front brake lines...
... and the overhauled parking brake assembly.

The rims got their first coat of varnish.
I used the same paint as on the fuel tank, a silk-mat darkish gray (RAL 7016).
I'm aware of that it is the wrong colour for the rims, but I like it because it looks nicely old-fashioned. :smile:
I plan on using it for the bumpers as well.
... and the overhauled parking brake assembly.
The rims got their first coat of varnish.
I used the same paint as on the fuel tank, a silk-mat darkish gray (RAL 7016).
I'm aware of that it is the wrong colour for the rims, but I like it because it looks nicely old-fashioned. :smile:
I plan on using it for the bumpers as well.
Last edited by a moderator:
DavidN
Enthusiast
- Messages
- 488
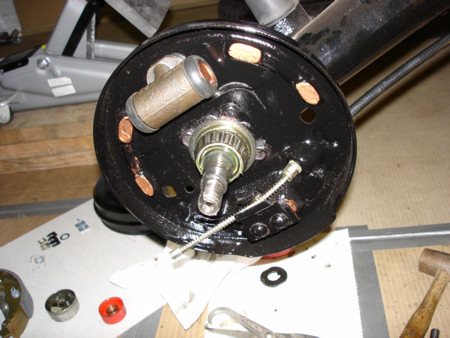
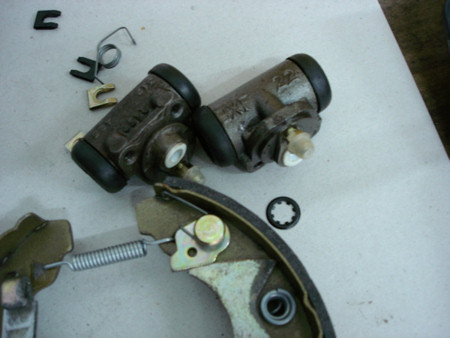
Did the rear brakes today.
First I fed the parking brake cables ...
... then I mounted new brake pads, cylinders, washers, springs ...
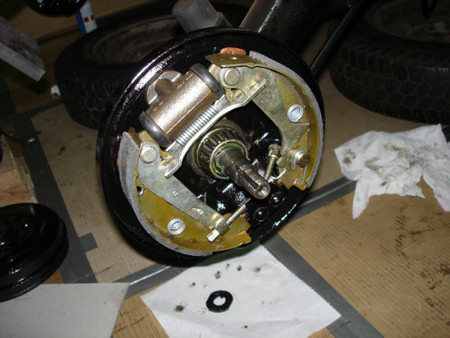
I got 2 New Old Stock brake cylinders off eBay for 10 Euros each - what a steal.
Both had a little surface rust but I don't care as the inside looks brand new.
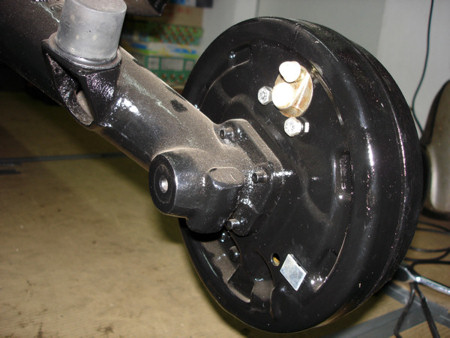
Rear brake drums mounted.
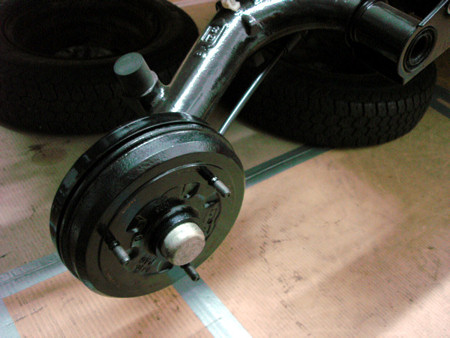
Just the brake lines missing...
First I fed the parking brake cables ...
... then I mounted new brake pads, cylinders, washers, springs ...
I got 2 New Old Stock brake cylinders off eBay for 10 Euros each - what a steal.
Both had a little surface rust but I don't care as the inside looks brand new.
Rear brake drums mounted.
Just the brake lines missing...
Last edited by a moderator:
DavidN
Enthusiast
- Messages
- 488
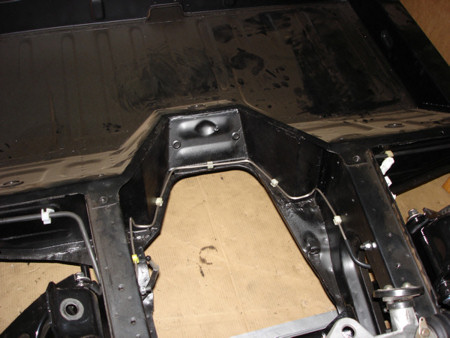
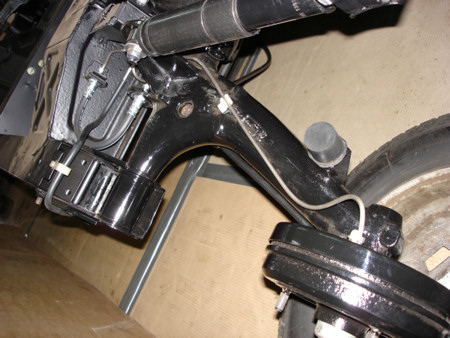
Today I finished the rear brakes ...
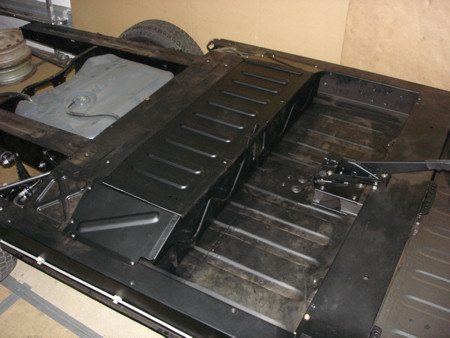
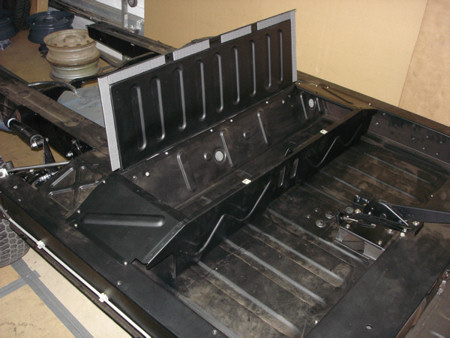
... and started with the tool box that is riveted on the chassis of the F6 van right behind the front seats.
Unfortunately that damn "box" and it's lid is pretty beaten up.
The metal sheets are dented and bent like hell.
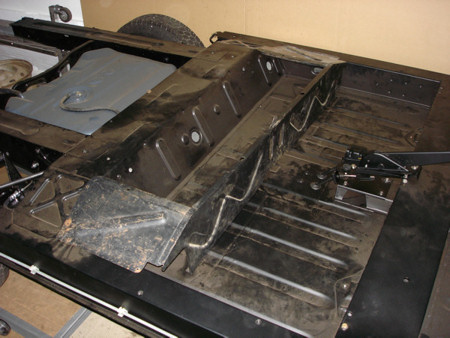
... and started with the tool box that is riveted on the chassis of the F6 van right behind the front seats.
Unfortunately that damn "box" and it's lid is pretty beaten up.
The metal sheets are dented and bent like hell.
Last edited by a moderator: