


You are using an out of date browser. It may not display this or other websites correctly.
You should upgrade or use an alternative browser.
You should upgrade or use an alternative browser.
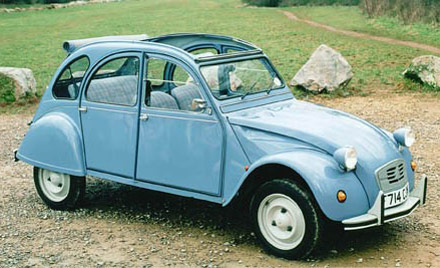
1985 Renault R4 F6 restoration project
- Thread starter DavidN
- Start date

DavidN
Enthusiast
- Messages
- 488
I spent the last days cleaning, searching for and mounting parts.
The whole restoration project has turned into a big puzzle.
Most of the parts are easy to allocate, others are a bit more tricky.
I highly recommend to take as much pictures as possible before dismanteling a car or starting a restoration project.
Good pictures are a valuable help to identify all the bits and pieces, their appropriate nuts and bolts, and the correct location in the whole mess.
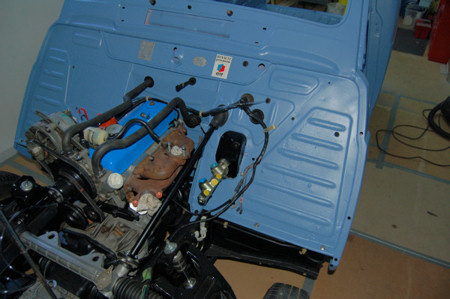
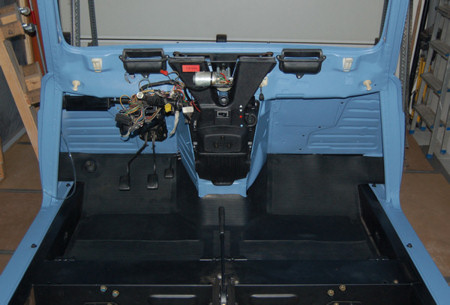
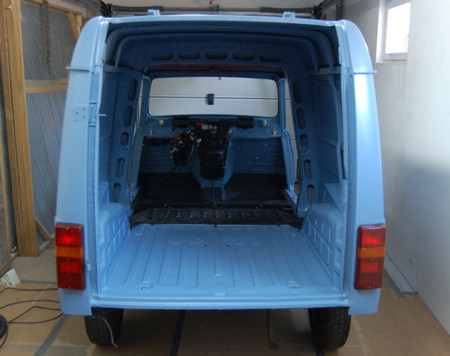
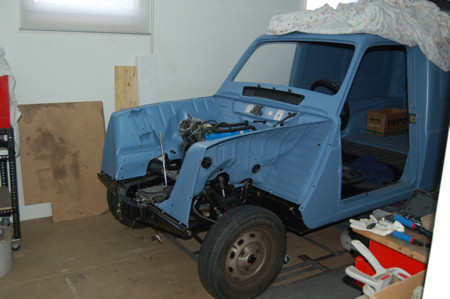
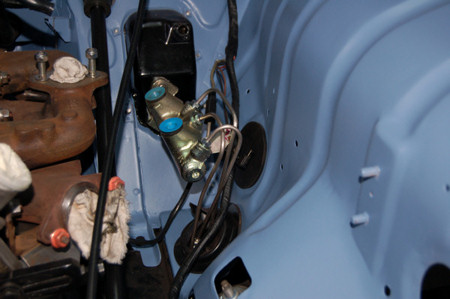
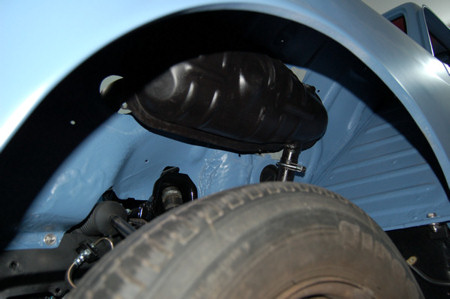
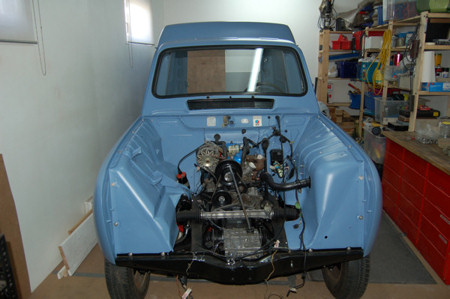
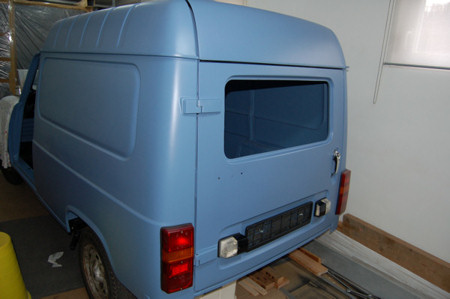
I was able to complete the fuel tank with it's filler and breather hose and cap, mount the taillights (with grommets in a very very sad condtion ), lay the wiring, and attach some of the inner parts as the steering column, the radiator, wiper-motor, and the brake-, clutch-, and throttle-pedal.
The whole restoration project has turned into a big puzzle.
Most of the parts are easy to allocate, others are a bit more tricky.
I highly recommend to take as much pictures as possible before dismanteling a car or starting a restoration project.
Good pictures are a valuable help to identify all the bits and pieces, their appropriate nuts and bolts, and the correct location in the whole mess.
I was able to complete the fuel tank with it's filler and breather hose and cap, mount the taillights (with grommets in a very very sad condtion
), lay the wiring, and attach some of the inner parts as the steering column, the radiator, wiper-motor, and the brake-, clutch-, and throttle-pedal.
Last edited by a moderator:
Steve Hennessey
Moderator
- Messages
- 1,406
You may find something of interest on this web site. They do lots of goodies for restorers.
http://www.frost.co.uk/
http://www.frost.co.uk/
DavidN
Enthusiast
- Messages
- 488
You may find something of interest on this web site. They do lots of goodies for restorers.
http://www.frost.co.uk/
That's right Steve, they do have some very nice things!
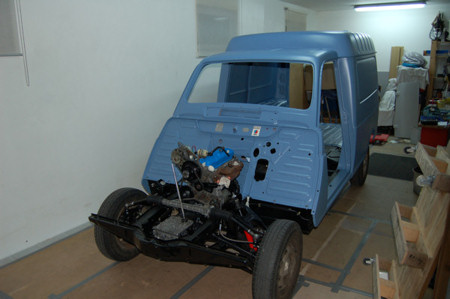
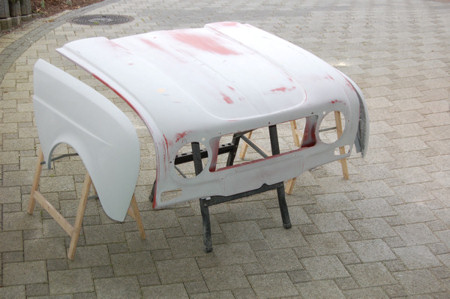
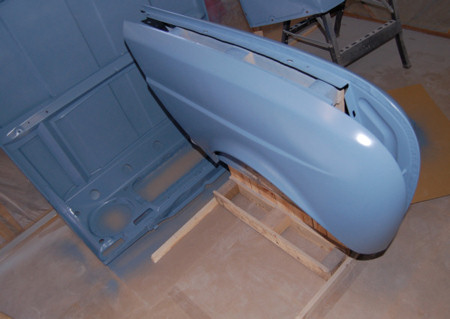
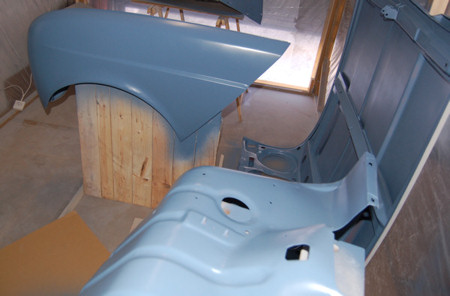
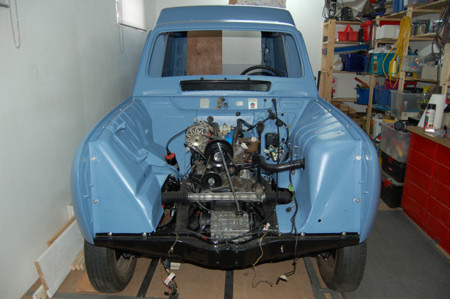
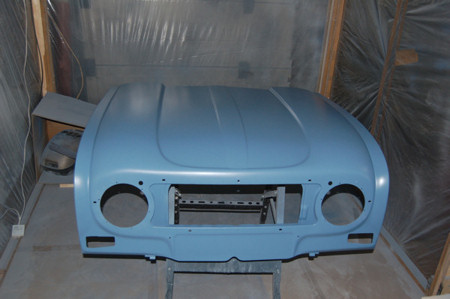
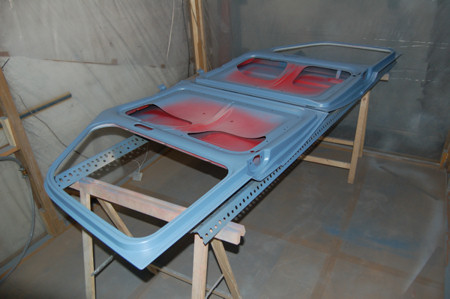
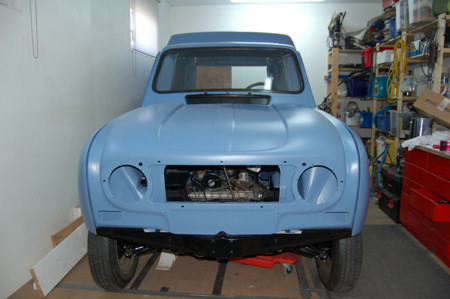
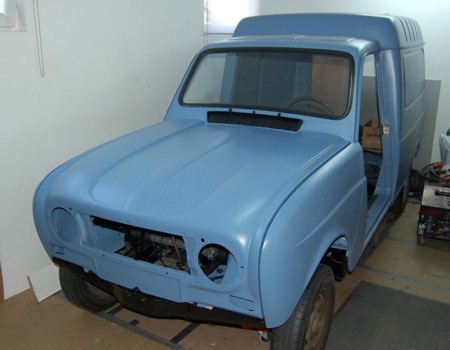
I'm preparing the front body parts for the paint-job now.
The inner & outer wings & the bonnet.
Surprinsingly we got a few nice warm days so I could do some of the work outside - in the sunshine!

Here are the parts after countless hours of applying body filler & grinding it down afterwards, applying another coat and grinding it down and again and again...
The parts got their first coating of high built primer which was sanded down afterwards.
(I surely could do this for weeks, but the parts will get a silk-mat finish so I think I'm good to go.)
Last edited by a moderator:
malcolm
& Clementine the Cat
- Messages
- 4,529
- Location
- Bedford UK
I can't believe how quickly you are progressing with the restoration. I'm still ahead but I started 3 1/2 years before you and am am now in real danger of being overtaken. The work looks good and must have taken a lot of time. Make sure you seal those wings properly - I didn't seal the wings on my yellow car properly and they are starting to rust.
Your paint is unusual. My own cars achieve the matt finish through neglect so I've never made any special effort during restoration. Might washing or polishing your car turn the paint finish to gloss?
The work looks good and must have taken a lot of time. Make sure you seal those wings properly - I didn't seal the wings on my yellow car properly and they are starting to rust.Your paint is unusual. My own cars achieve the matt finish through neglect so I've never made any special effort during restoration. Might washing or polishing your car turn the paint finish to gloss?
DavidN
Enthusiast
- Messages
- 488
Hi Malcolm,
it's right, I'm pretty fast with my restoration. Probably much quicker than most of the other hobby mechanics.
Fortunately time is one of my biggest resources at the moment and that project is incredible time consuming.
On the other hand my restoration is definitely less thorough and professional than most of the long-term projects.
(E.g. your fantastic job on the Gordini!)
I bought that van pretty cheap and I have to keep my expenses for the restoration as moderate as possible as I am on a very tight budget.
I'm no professional in all these things either.
I never learned how to weld, I never learned how to use body filler properly, I never learned how to paint...
All these "skills" I aquired by "just doing it".
The finish of the bodywork and the paint I used are the best examples of my amateurish workmanship.
If I had the financial background I would have given the body and all the parts to a professional paint-shop to give my project a perfect finish (I think, most of the do-it-yourselfers do it that way).
With a low budget (and all the circumstances of having to work in a narrow, unheated garage) I decided for the less professional, but do-able finish in mat.
I know that the paint is unusual and that it needs some time to get used to it.
I admit as well that I (like the most of you) prefer a glossy, shiny finish, but for me that was simply out of reach. :neutral:
angel
Enthusiast
- Messages
- 2,449
- Location
- Athens, Greece
On the other hand my restoration is definitely less thorough and professional than most of the long-term projects.
No way!!! This has to be one of the "most professional" jobs I have ever seen from an amateur.
Your choice of satin paint was very wise, as you say you don't have much experience in spraying. I think that if you decide the F6 looks nice with the "Smurf blue" colour, it is only a matter of removing lights, handles, bumpers etc (easy stuff) and spraying a coat of clear varnish on the outer surfaces, either by yourself, or giving the car to a professional body painter.
DavidN
Enthusiast
- Messages
- 488
Angel, thanks for the nice words! : ops:
ops:
The windshield of my van was beyond repair.
Even if I was able to remove it in one piece, it had some severe stone chipping holes that the glass-shop couldn't fix.
For quite a long time now I was looking for a new or good used one.
Yesterday Martin, a fellow R4 enthusiast sold me a brand new F6 windscreen!
He ordered it over a decade ago but never installed it.
His F6 is long gone and that big flat piece of clear glass almost got forgotten.
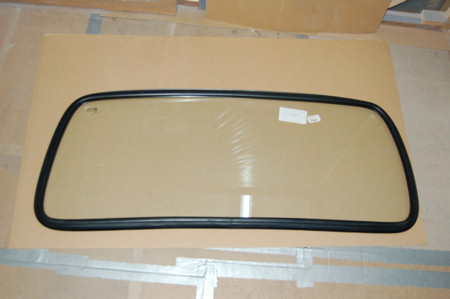
I was more than happy to get a new windshield for a fair price.
Thank you again Martin, if you should read this one day!
Today I fitted it with the help of ... my wife (!)")
ops:The windshield of my van was beyond repair.
Even if I was able to remove it in one piece, it had some severe stone chipping holes that the glass-shop couldn't fix.
For quite a long time now I was looking for a new or good used one.
Yesterday Martin, a fellow R4 enthusiast sold me a brand new F6 windscreen!
He ordered it over a decade ago but never installed it.
His F6 is long gone and that big flat piece of clear glass almost got forgotten.
I was more than happy to get a new windshield for a fair price.
Thank you again Martin, if you should read this one day!
Today I fitted it with the help of ... my wife (!)
Last edited by a moderator:
helpfull wives
david how much or what did you have to do to get your wife to help you ?- my wife can name most parts because they have been on the kitchen table over the past 38 years-but if i said hold this or press that i would get a blank stare- you are a lucky man
Reg
david how much or what did you have to do to get your wife to help you ?- my wife can name most parts because they have been on the kitchen table over the past 38 years-but if i said hold this or press that i would get a blank stare- you are a lucky man
Reg
DavidN
Enthusiast
- Messages
- 488
Actually it wasn't that complicated to get the help of my wife.
You just have to know how to ask.
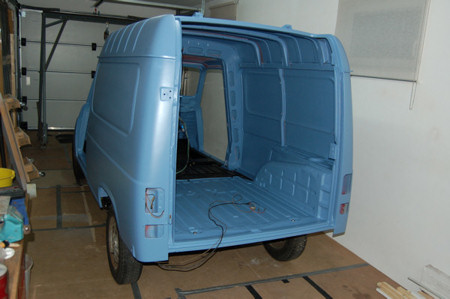
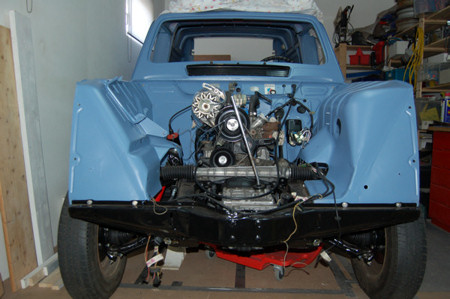
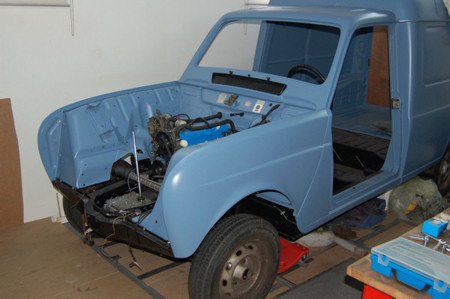
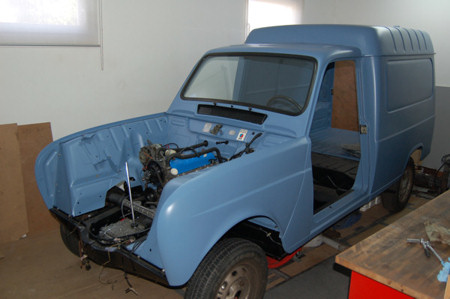
The last days I spent preparing the doors for the paint job.
The inside of the doors already got their blue coating.

The "giraffon" is already mounted, Alexandre (Snoopy1974) was so kind to organize a complete set of new rubber sealants for the rear doors.
Encore une fois - Merci beaucoup Alexandre !!!
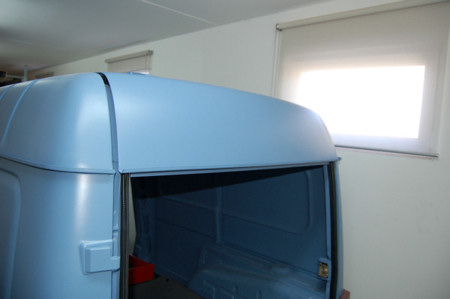
The bonnet is mounted (the gaps between the wings and the hood are a nightmare).
But what bothers me a lot more is that the profile of the (probably aftermarket) front wings is totally different than the one of the hood.
The fitting/clearance (?) is simply disappointing.
I did my best to align everything as good as possible, but it's still FAR from perfect.
You just have to know how to ask.
The last days I spent preparing the doors for the paint job.
The inside of the doors already got their blue coating.
The "giraffon" is already mounted, Alexandre (Snoopy1974) was so kind to organize a complete set of new rubber sealants for the rear doors.
Encore une fois - Merci beaucoup Alexandre !!!
The bonnet is mounted (the gaps between the wings and the hood are a nightmare).
But what bothers me a lot more is that the profile of the (probably aftermarket) front wings is totally different than the one of the hood.
The fitting/clearance (?) is simply disappointing.
I did my best to align everything as good as possible, but it's still FAR from perfect.
Last edited by a moderator:
Snoopy1974
Enthusiast
- Messages
- 412
The "perfection" doesn't exist anywhere in the world... but even if you tell us there are some little problems on your job, I'm sure your car will be probably cool when it will be finished ")
A bientôt David !
A bientôt David !
DavidN
Enthusiast
- Messages
- 488
The "perfection" doesn't exist anywhere in the world... but even if you tell us there are some little problems on your job, I'm sure your car will be probably cool when it will be finished
A bientôt David !
Thanks for your encouraging words Alexandre!
The aftermarket front wings tend to he high at the front.
Exactly! The front of the wings is higher than the profile of the hood, plus the top of the wings is "straighter" than the hood which has a little "curve" towards the windshield.
Might be worth trying a spacer under the hood mounts.
I did! 4 Washers on the right side, 7 (!!) on the left side, still no good fit.
What about a little bending of the hood to match the profile of the wings?
Is it possible or would that do more damage than good?
I'm never happy with fit, but nobody else notices, and after you start driving the car you won't notice either.
And that's so true. When I face these kind of problems and I show them to my wife she almost never sees what I'm talking about.
Last edited:
angel
Enthusiast
- Messages
- 2,449
- Location
- Athens, Greece
But what bothers me a lot more is that the profile of the (probably aftermarket) front wings is totally different than the one of the hood.
The fitting/clearance (?) is simply disappointing.
I did my best to align everything as good as possible, but it's still FAR from perfect.
Well these words were really encouraging for me David! I am re-assembling my white 1975 R4 after a (very...) long restoration. I am using the original left-hand inner wing, a secondhand right-hand inner wing, both outer wings are reproduction ones, from different suppliers, though, and the bonnet is new of unknown origin but probably old repro... The people who did the bodywork/painting told me it was a nightmare to align them correctly, and no matter what they would do, the bonnet to wings gaps would end up too wide.
I had to put all of them together for a second time, since it was me who bolted definitely the body to the chassis. The gaps are still too wide (but any gap on the R4 is wide...) but what upsets me most is that the front of the bonnet is about 1 cm inwards from the wings' front edges...and this could not be adjusted by moving the bonnet forwards. It seems that either the bonnet is shorter and/or narrower, or the bonnet and wing contours are different.
So the best is to leave as it is and try to remember its only us who spent hours adjusting and measuring that can notice this, as Malcolm said... Nobody else will look at this.