Clementine's Garage
Clementine the Cat
 
Image of flower
Yellow R4
 
Réparateur d'automobiles

1985 Renault R4 F6 restoration project

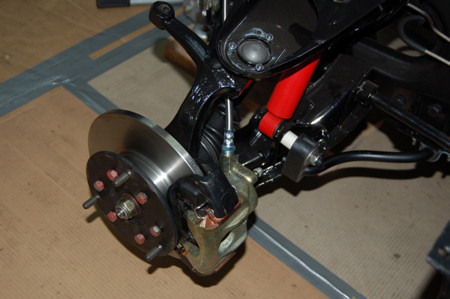
The work on the chassis is done and I started prepping the engine/tranny this weeekend.

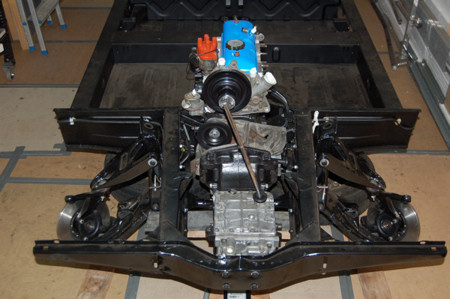
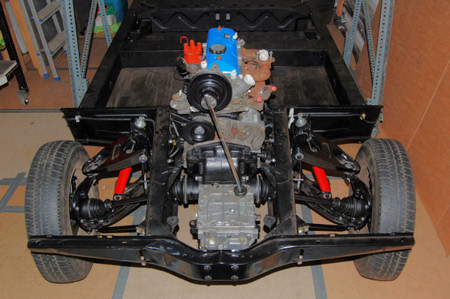
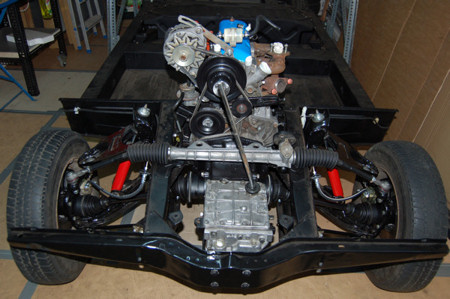
My plan is to mount the engine/tranny unit to the chassis before I start to work on the body.
That way I can move it easily and store half of the car out of my way.


The engine was running quite well and is pretty much clean and dry. (At least for it's age.) :rolleyes:
The clutch, the starter and the gearbox were working as well so I decided to keep this part of the restoration very basic.
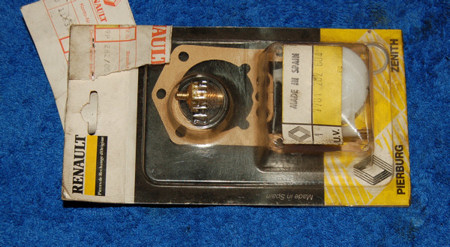
Just some clean up, some new seals and a bit of paint.
If the engine should fail one day, to swap it isn't that bad of a job. ;)


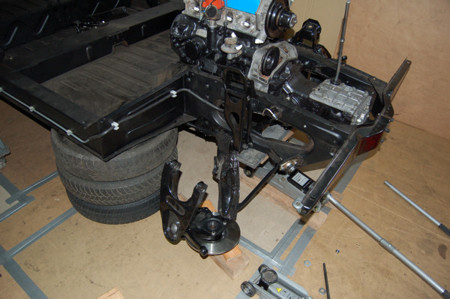
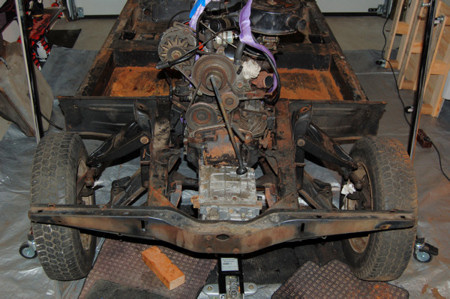
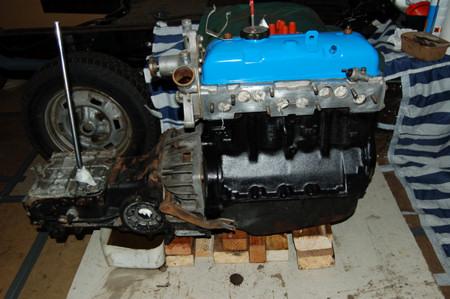
Here come's the powertrain :mrgreen: right out of the storage.

Restauration-105.jpg


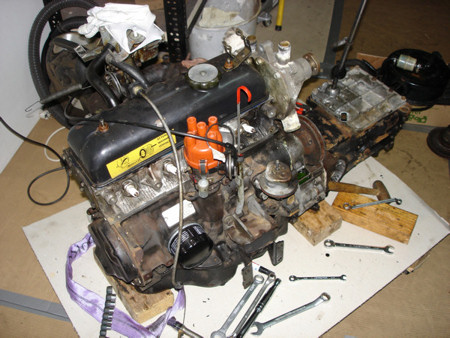
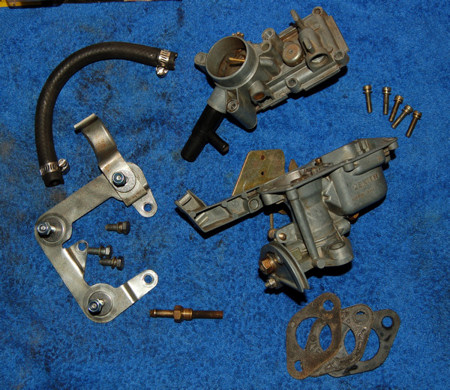
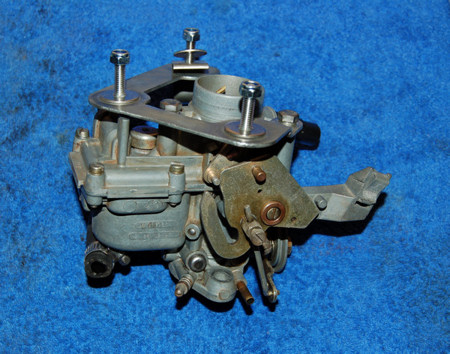
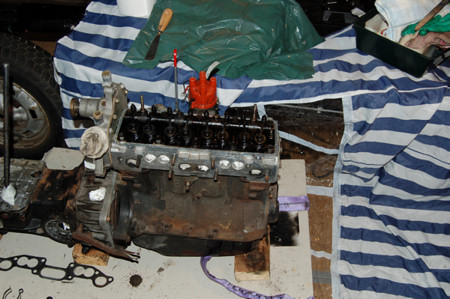
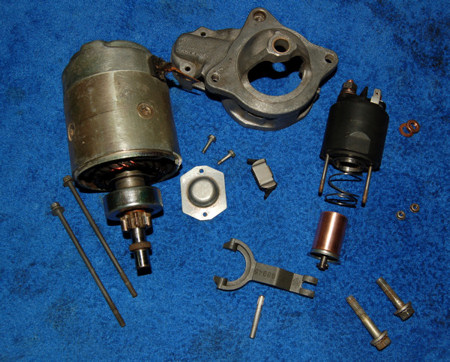
I removed as many parts as possible to get better access to clean up everything.

Restauration-106.jpg


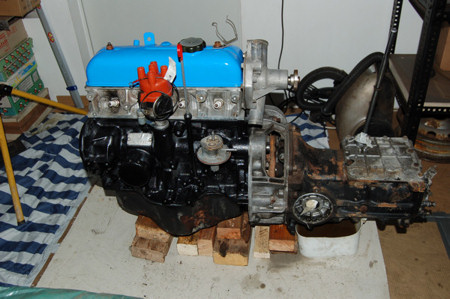
I got a funny powder coated valve cover months ago - here it is...

Restauration-107.jpg


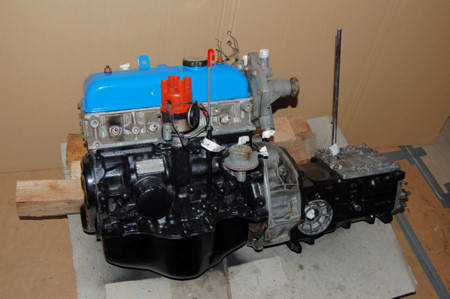
The engine block is painted, next comes the oil pan and the gearbox ...

Restauration-108.jpg
 
Last edited by a moderator:
Nice work David. This is my 5 speed box
and my valve cover ;)

Nice, nice...

The engine is ready for it's implantation to the chassis.
For that I will leave all the parts that I removed off the engine - that way it will be a lot easier to get it into the chassis without damaging anything.

Restauration-109.jpg
 
Last edited by a moderator:
heart transplant

hi david
just a thought - put a new timing chain and tensioner in before you put it back-they are quite cheap-everything else can be done with the engine in place
-unless its major-which rarely happens-just a thought - ;)
Reg
 
DavidN... I am full of admiration for You and Your work :D

waiting for me the same thing...also the R4F6 from 1985 (with side windows on back)...the same places of frame are rusty, but I've also front side and some on sides of frame to repair...:smile:

In future - I think about tommorow, I'll make a new topic about "Restoration of my F6" - from Poland ;)
 
hi david
just a thought - put a new timing chain and tensioner in before you put it back-they are quite cheap-everything else can be done with the engine in place
-unless its major-which rarely happens-just a thought - ;)
Reg

Reg,

although the engine was out of use since 2001 it ran very solid, powerful, and without any strange sound after it's reanimation in November.

Don't get me wrong, I really do appreciate everyones thoughts, opinions, and advices and I always try to follow them.
But at some point I just have to make a cut. :rolleyes:
If I change the chain & it's tensioner - for sure something else will brake.
I know there are lot of sealants, bearings and joints that are much easier to change with the engine removed, but I guess I just have to take the risk that I have to remove the engine again sometime in the future.

And from a financial standpoint my budget is already blown up. :rolleyes:

I also have to keep my goal in mind, that the R4 has to be on the street again this Summer.


DavidN... I am full of admiration for You and Your work :D

waiting for me the same thing...also the R4F6 from 1985 (with side windows on back)...the same places of frame are rusty, but I've also front side and some on sides of frame to repair...:smile:

In future - I think about tommorow, I'll make a new topic about "Restoration of my F6" - from Poland ;)

Thanks for the compliments!
I don't know if I would do the work again. It took so many hours by now and there is still no end in sight...
For the money I invested so far I surely could have bought a good (and running) R4 van.

BTW - Nice avatar!


David
 
f6 money pit

hi david
if you add up what you spent afterwards-not to mention your time-you now know why i would rather spend a lot of (toy money) to buy the best there is-i have done with restoring cars-always buy the one you cant afford its cheaper in the end-unless you enjoy doing it that is-i think you have-but i do it for a living-so the last thing i want to do when i get home is head for the garage- i
dont mind a bit of polishing etc but thats it for me - your doing a good job tho
Reg
 
Today I replaced the oil seals on both sides of the gear box (where the driveshafts enter the differential).
Now engine & tranny are entirely ready for the implantation.

Restauration-110.jpg


And the rims got their final color coating.
(In the end I decided against RAL 7016 which was really dark and tended to have too much "military style".)

Restauration-111.jpg
 
Last edited by a moderator:
Today I cleaned and painted the drive-shafts.
No further work required here. All the seals are in perfect condition. :D

Restauration-112.jpg


And here's my "Frankenstein-style" motor-lift. :mrgreen:

Restauration-113.jpg


I'm now just waiting for the hoist to arrive then I can finally start to mount the engine!

10198_1.jpg


As I needed a lot of space for the heart implant there's quite a mess on the other side of the garage... :oops:

Restauration-114.jpg


David
 
Last edited by a moderator:
There's one thing you experts could help me with...

Is it possible to mount the driveshafts while lowering the engine/tranny-unit into the chassis WITHOUT loosening/disconnecting the front axle balljoints?

I would prefer to do it that way rather than mounting the engine/tranny first and doing the driveshafts afterwards.

Does anybody know?
Is there enough room?
Are the driveshaft bearings "flexible" enough to do it that way?


Thanks for your input!


David
 
As I'm kind of stuck with the engine implantation (still waiting for the - online ordered - winch to be delivered :mad:
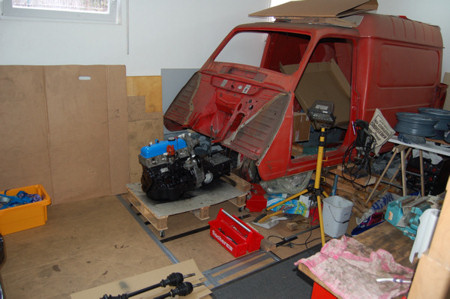
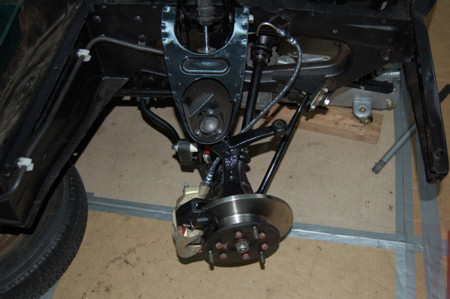
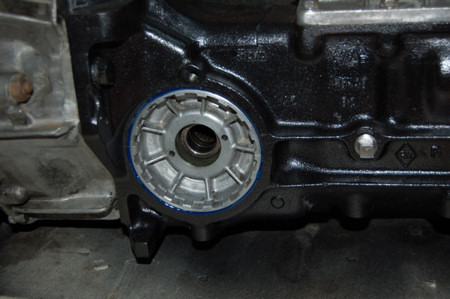
), I decided to save myself from future problems and surprises with the starter. I heard what a hell of a job it is to remove the starter so I thought a little inspection could do no harm.
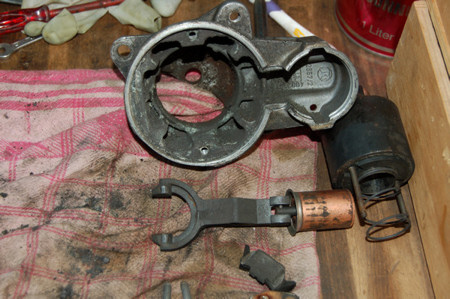
Even if it was working perfect when I dismantled the car I was probably right taking it apart...

Here's what it looked like inside...

Restauration-115.jpg


... all the parts after a little clean up ...

Restauration-116.jpg


... and that boy is going to do it's job for the next 10 Years - minimum. ;)

Restauration-117.jpg


David
 
Last edited by a moderator:
David, unfortunately it is not possible to fit the driveshafts the way you described... :-( The angle of the CV joints is already great when fitted and the suspension is fully extended.
 
David, unfortunately it is not possible to fit the driveshafts the way you described... :-( The angle of the CV joints is already great when fitted and the suspension is fully extended.

Thanks Angel, I actually would have preferred to do it that way.
I really don't like the thought of disconnecting the new balljoints again. :(

Anyway...

Today was the carburettor's turn...

Restauration-118.jpg


Everything cleand up...

Restauration-120.jpg


Add a few new parts...

Restauration-119.jpg


Et voilà ...

Restauration-121.jpg


David
 
Last edited by a moderator:
There's one thing you experts could help me with...

Is it possible to mount the driveshafts while lowering the engine/tranny-unit into the chassis WITHOUT loosening/disconnecting the front axle balljoints?

I would prefer to do it that way rather than mounting the engine/tranny first and doing the driveshafts afterwards.

Does anybody know?
Is there enough room?
Are the driveshaft bearings "flexible" enough to do it that way?


Thanks for your input!


David

I fear sometimes there just is no other way than to do the job properly in the right order. In other words the hard way.
This is one of those times.
And yes I am a firm believer in doing a proper job. ( To be pronounced with heavy Devonshire accent. )
 
Today I reached a milestone.
Finally the engine is mounted to the chassis again. :D

Restauration-122.jpg


As expected - and predicted by the experts - it was not possible to mount the driveshafts while lowering the engine-tranny-unit into the chassis.

BUT I found a way around loosening and separating the front axle balljoints for mounting the driveshafts.
That way you just have to take out one bolt and that's it (okay in my case the steering rack was just temporarily fixed).
;)

Restauration-123.jpg


- engine/tranny
- driveshafts
- fresh gear oil
- shocks
- front stabilizer bar
- starter
- intake-/exhaust manifold

I'm pretty contend with my work today! :cool:

Restauration-124.jpg


David
 
Last edited by a moderator:
Keep up the good work, David!
Have in mind that both upper and lower arm pin bolts have to be tightened when the suspension is compressed up to a point, and not fully extended. Otherwise the Flexibloc bushes would be constantly strained. Renault has a special tool (...again!) and setting for this, but it is more than OK to tighten these bolts when the car has been fully assembled and resting on its wheels.
 
Thanks Angel!
I left these bolts just hand tight and plan to tighten them fully when the body meets the chassis again.

P.S.

I LOVE before-and-after-shots. :mrgreen:

November 2009 vs March 2010:

Restauration-124a.jpg
Restauration-124.jpg
 
Last edited by a moderator:
Today I mounted the front brakes...

Restauration-125.jpg


Restauration-126.jpg


... the alternator, belts, fuel lines, and the steering rack.
Now as the chassis is finished I have to start the work on the body. :rolleyes:

Restauration-127.jpg
 
Last edited by a moderator:
Back
Top