Sound Proofing a Renault 4
I've never bothered soundproofing a Renault 4 before. For this one I'm planning to add soundproofing where it won't be noticeable. That means I might not add any treatment to the front bulkhead (the area where most manufacturers add something fairly serious and where the R4 has nothing). The Renault 4 lends itself to lightweight treatment everywhere else so I'll give that a go and see how much difference it makes.
Noise Absorption
Noise reflects backwards and forwards against hard surfaces. A bit of foam will help absorb higher frequency noise as it bounces around. It won't reduce booming or engine noise but will make the car feel less open and make talk radio easier to make out.
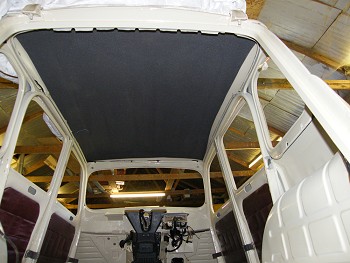
The Renault 4 originally had three strips of hessian on the inside of the roof behind the headlining. There seemed to be room for soft material across the whole roof. I've used a sheet of 12mm open cell foam. In hindsight I would have used 8mm hessian material as the headlining rails were difficult to slide against the foam and it was difficult to equalise the tension in the headlining sections.
This will only be effective in cars with the fabric headlining. The later molded headlining might benefit from some thin headlining foam on the cabin side. Beware - I have found it impossible to remove the pre-'82 headlinings (with the cardboard section around the edges) without ripping them. The later headlinings in French models are easier to remove as they are edged with a thinner plastic section.
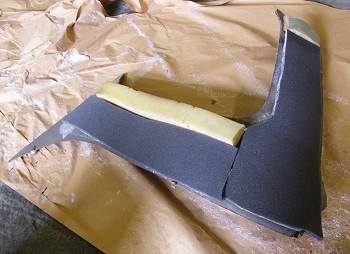
A bit of 12mm foam has gone behind the rear quarter trim. There is space so I may as well, and also it helps the panel achieve the correct shape especially after it has been sitting in a damp car for 40 years.
It'll not make a huge difference. The noise from the rear is mostly from lower down (it gets much worse with the rear seat folded). But every little helps.
Noise barrier
Noise from the suspension or radiated from tyres will make the metal panels vibrate, and there radiate the noise into the cabin. The Renault 4 has thick rubber matting on most surfaces directly attached to the panels. These will vibrate with the panel and transmit noise. Spacing off the rubber from the panel will isolate the rubber. It'll vibrate less and transmit less noise.
This will be effective for all noise frequencies including booms and engine tones.
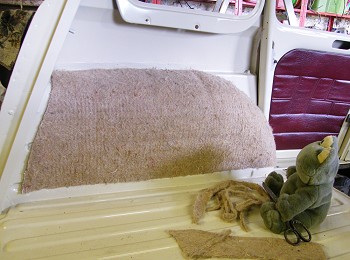
The back of the R4 tends to sound quite hollow and the rear wheelarches get noisy when it rains.
I've fitted an 8mm layer of hessian behind the rubber wheelarch cover. It will make the wheelarch cover stand off the panel a little so it won't reach all the way around, but working in combination with the cover it should be quite effective.
Open cell foam would be more effective than hessian as it's less stiff so would better isolate the rubber from the panel.
Sealing
I've not covered sealing yet. This probably the most important part of sound proofing. Imagine someone being really noisy outside and you decide to close the door. It's only when the door is nearly completely shut that noise starts to reduce. That's sealing for you. Tiny gaps in grommets or door seals can let through a lot of noise.
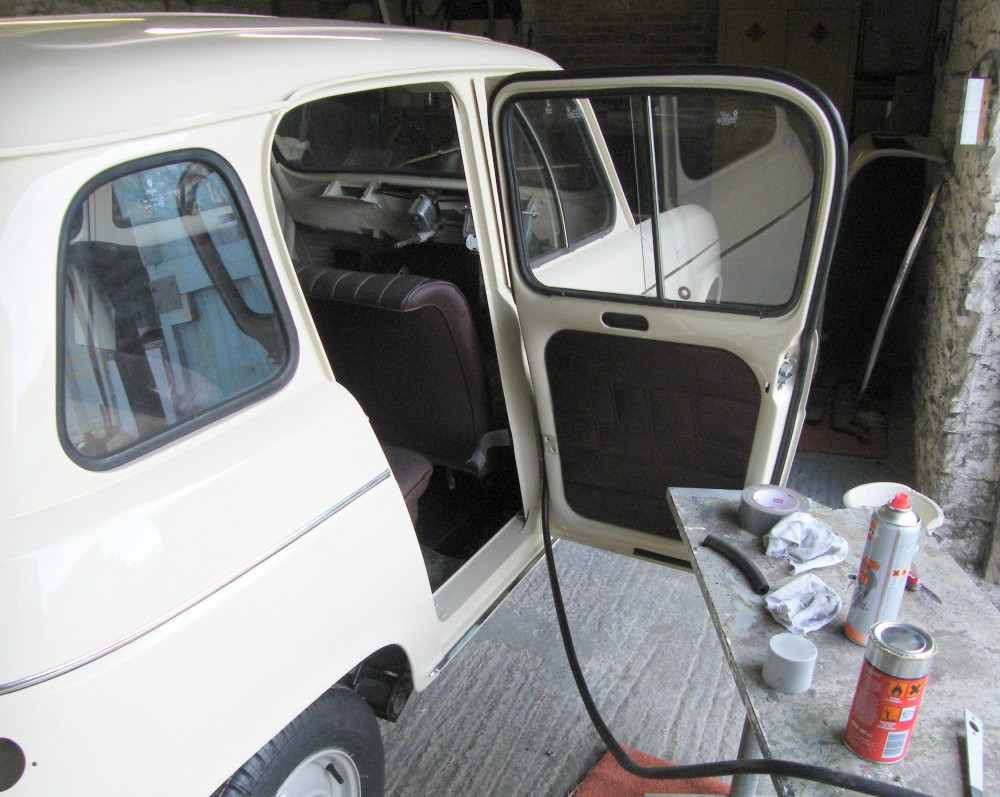
I'm using GTL plastic side window frames on this car as the earlier steel ones have a habit of rusting and leaving rusty streaks down the bodywork. I've seen some cars with a thin foam behind the side window to help seal it to the door frame, but other cars have not been sealed. I suspect any sealing I have found has been aftermarket.
I've used 1mm thick double sided foam tape on the flange to help seal the joint between the side window and the door. Thin draft excluding foam would also work. The side window is very close to the driver's ear, and a little soft foam can reduce windnoise at lower speeds.
Door Seals
What a hassle the door seals have been. I bought an "original style" replacement set from a supplier in France, and while the style was near original the shape the material was not.
The original seal was of a solid expanded foam type which adjusts itself to the shape of the door over time. That's not ideal in itself as the seals aren't very flexible, and the slightest movement in the door frame will lead to gaps and wind noise.
The replacement seals appeared to be made from the wrong material and didn't adjust to shape. I gave them a month to settle with the door forced shut, but I think it would have been several years before I would have been able to shut the door.
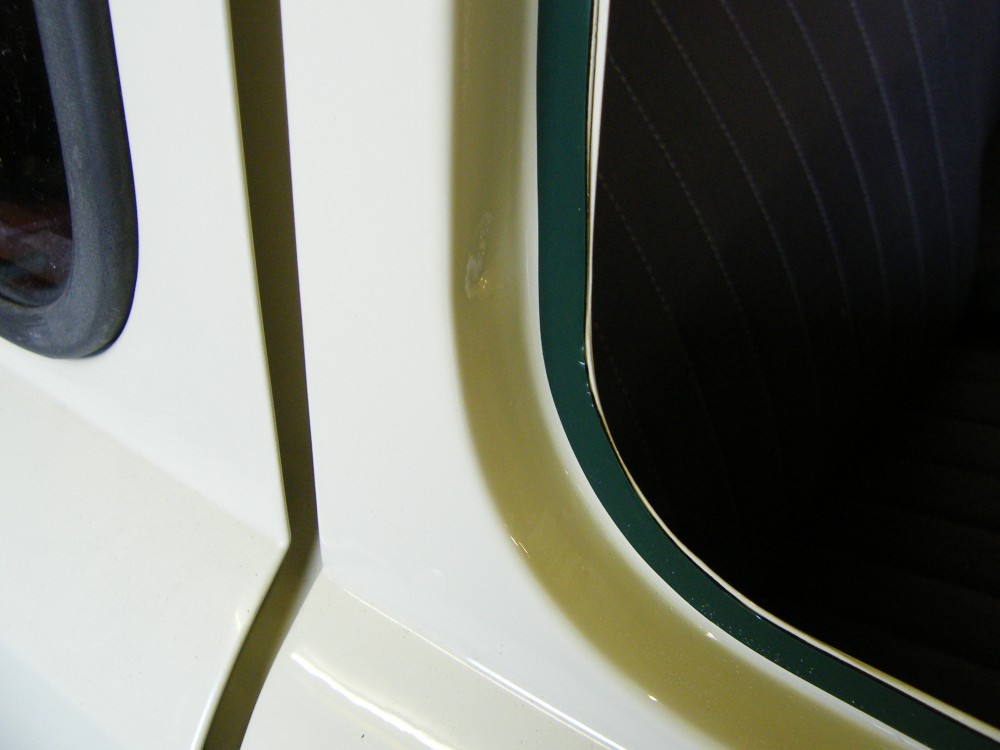
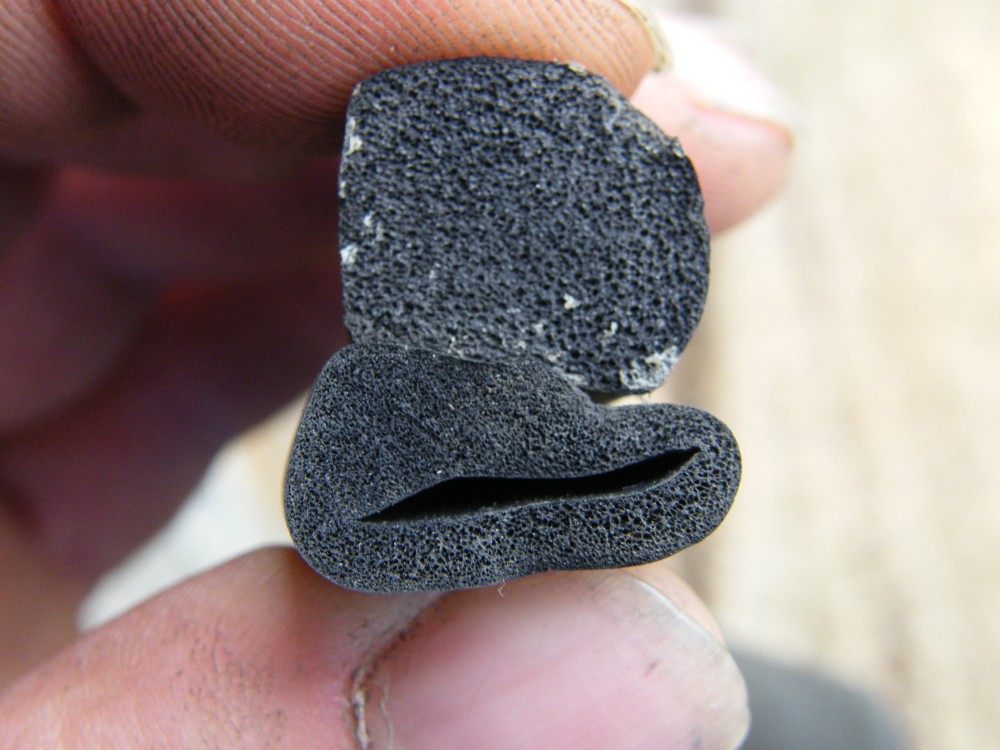
Angel on the forum helped me. He has a supply of seals of the correct size and shape that are hollow. The hollow seals should spring as the door frames move outwards at speed, and hopefully reduce wind noise.
The hollow seals fit very easily and neatly. I used good quality contact adhesive (Evostick) which worked very well. I had started with a DIY store brand adhesive on the other seals at first and that didn't work at all.

You can see the difference between the hollow seals and the solid seals as they are compressed against eachother. The hollow seal compresses almost flat before the solid seal even starts to compress. Don't buy the reproduction solid seals. Or if you do contact me first - I have a set going cheap.
What a simple pleasure to be able to close the doors!
Wind Noise
On the first run wind noise was the dominant noise above 60mph. The sources of noise were identified by a passenger listening through a rubber hose, and then confirmed using gaffer tape.
The major source of noise turned out to be the front side window seal. I've used plastic framed windows and there is no rubber seal around the front section of glass. Removing the glass and applying windscreen sealant vastly reduced the noise.
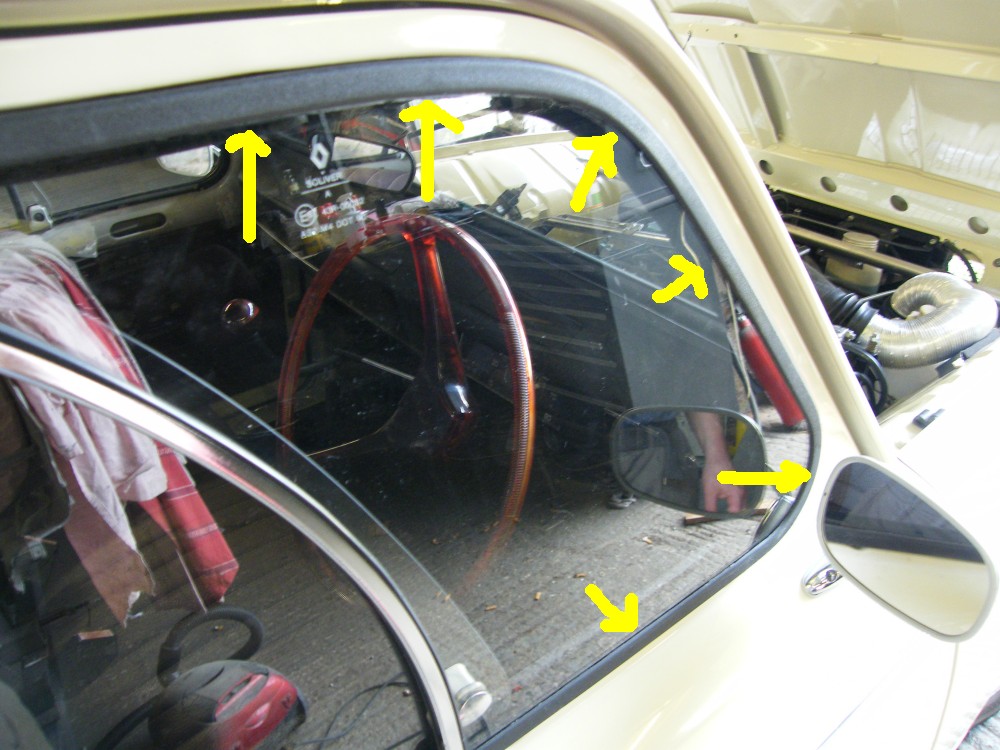
The next major wind noise source turned out to be the air vent at the front. The noise seems to be coming from the top of the windscreen pillars, but close the air vents in the dash and front panel and you notice a big difference. Taping the front air vent up increased the speed where wind noise became dominant to above 70mph.
I'm struggling to think of a long term solution for this. Perhaps add a seal around the flap so it seals when shut, then supply the air for ventilation from hoses to the front of the car and open the flap only when extra ventilation is needed.
The exhaust manifold on the Gordini heats the bulkhead up so much that it's too hot to touch from inside. Some heat proofing will go on to compensate for any reduced efficiency in ventilation.
Floor Covering
Foam with a heavy rubber facing is conventionally used in soundproofing. The Renault 4 already has the rubber so adding 1/2 inch open cell foam underneath the mats is an easy upgrade.
The result is worth having. Harshness, booming and floor vibration are reduced, and the cabin feels more comfortable and isolated.
Overall noise levels weren't significantly reduced in my car as the dominant sources are engine noise through the bulkhead and wind noise.
More Wind Noise
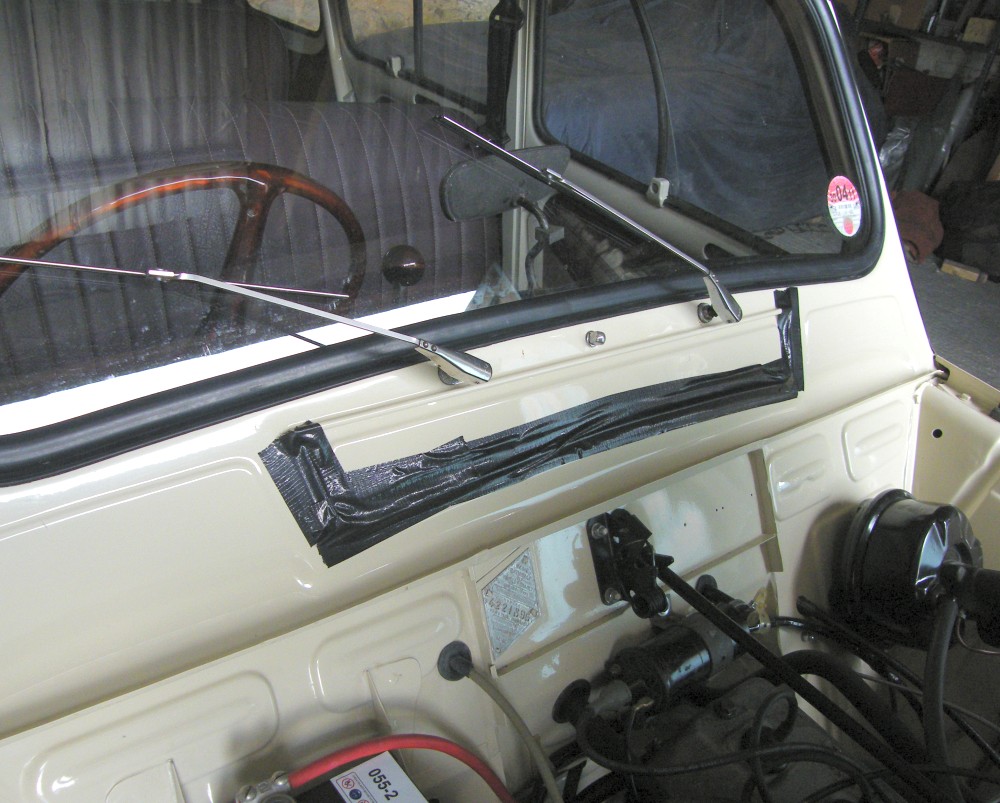
In an attempt to reduce the wind noise through the vent in the front I decided to glue a lot of foam in the cavity behind the vent. It probably won't work as there is a direct line of sight path between the vent and the driver, but it might take the edge off.
Rain can also come through the vent, so gluing foam directly to the panels would likely promote dampness and rust. Instead I've glued the foam to ABS panels which are fixed inside the cavity. Photos are difficult to take in there, but I've added a fair bit of foam.
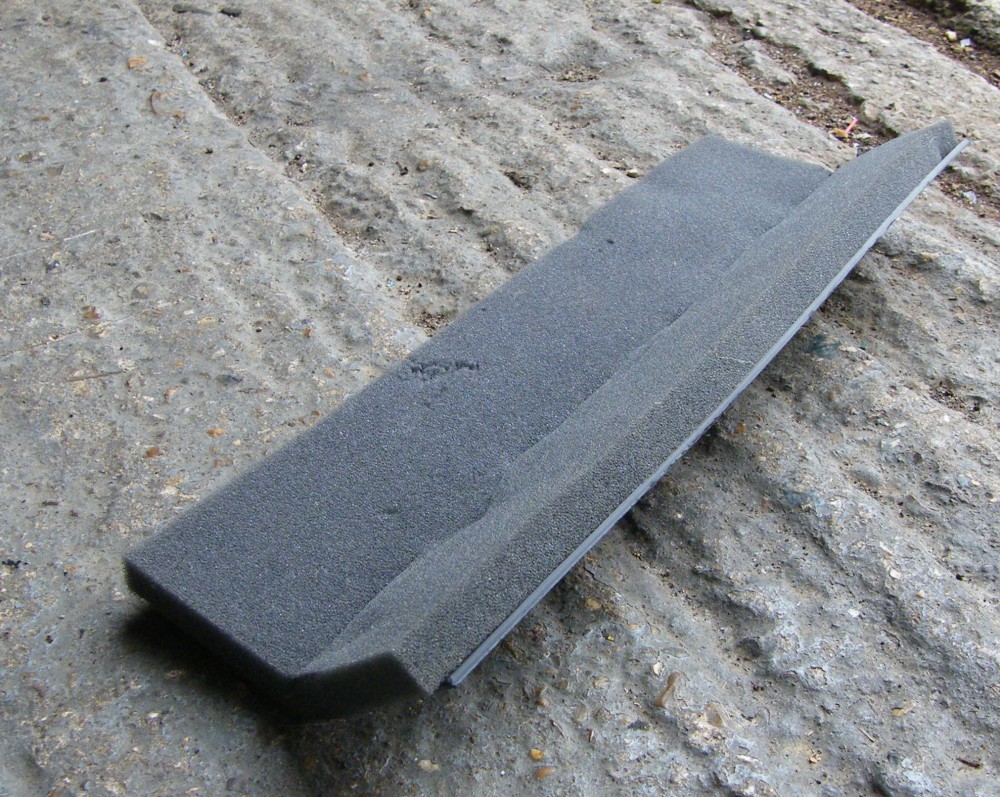
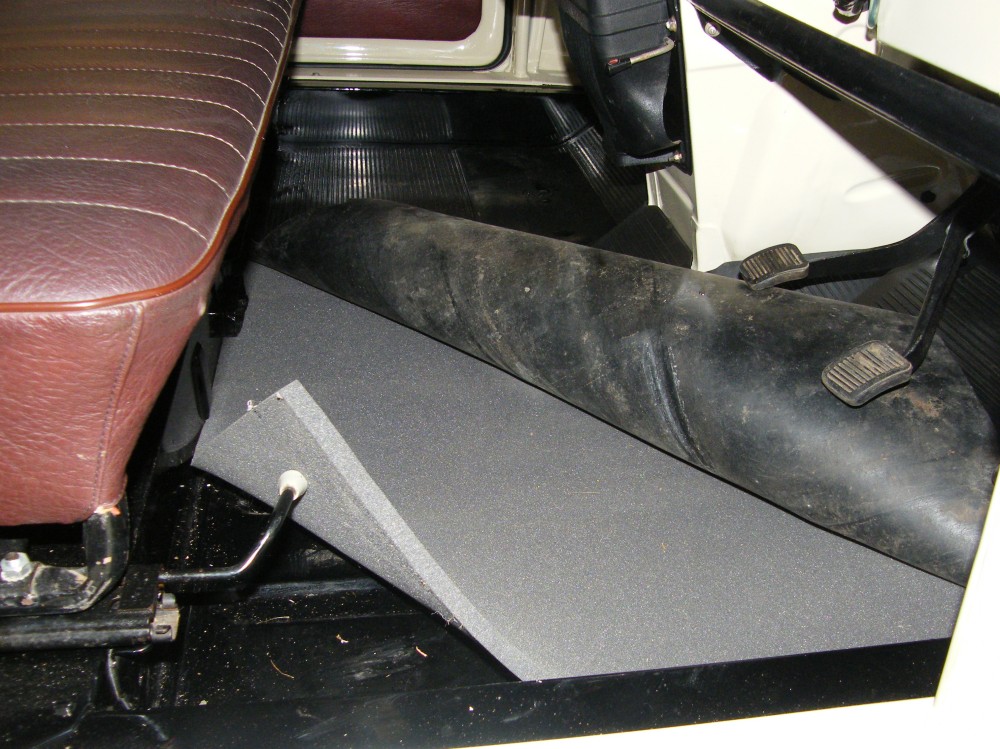
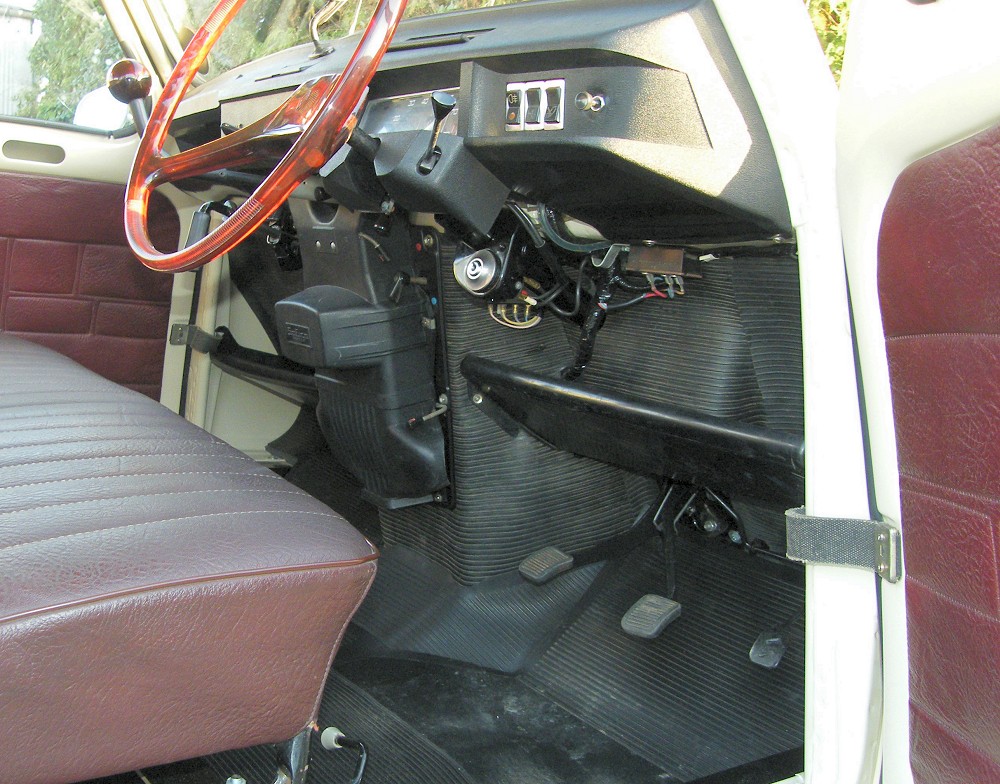
Bulkhead
There was a lot of engine noise apparantly coming straight through the bulkhead. This is a major area for soundproofing on most modern cars, but one where the Renault 4 had no insulation at all.
Most cars will have a layer of rubber spaced from the bulkhead by a layer of foam. In the photo the foam is mostly in place. I've also added a little panel damping behind the foam. That went in because it will be difficult to remove the foam if I decided I wanted to add some later. It's not good for booms (and can make them worse), but otherwise is either helpful or doesn't do any harm.
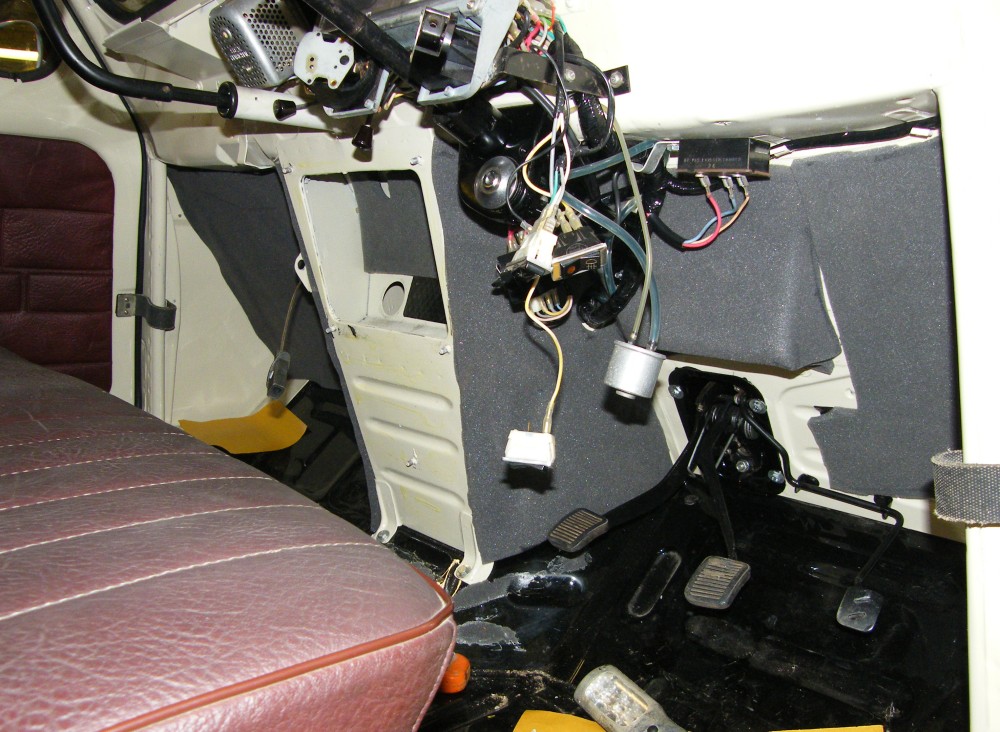
The rubber mat came from parts rear floor mat that I'd been hanging on to in case they came in handy, but which were too torn to be used in a car.
I cut it into 4 sections: the heater panel; the LHS bulkhead; the battery tray; and the RHS bulkhead. The mat continues under the pedals and heater in order to seal the edges.
The effect is amazingly good. The engine noise is vastly reduced, and engine booming is also much reduced. The character of the engine noise that remains is pleasant, sporty and nicely balanced.
More soon. The wind noise is still terrible, but oddly it gets a lot better with the air vent flap at the front taped up. I think opening the air flap at the front pressurises the cabin and pushes out the seals on the door windows and side glass which causes the wind noise. Every modern car (even the Renault 5) has venting at the back to allow the extra air to escape. Probably the answer is to add some of those.
Next > Photos of the Finished Car or back to the Gordini Project


