Renault 4 Chassis Welding
I decided to remove the body to carry out a proper repair to the chassis. It would be possible to achieve an MOT pass by just welding patches over the affected areas (and this is the usual approach as my repair is not cost effective for a £50 car). This would not cure the problem but would keep the car running for another couple of years.
Quick link: | Rear Suspension Outer Mounting | - | Rear Suspension Inner Mounting | - | Front Corner |

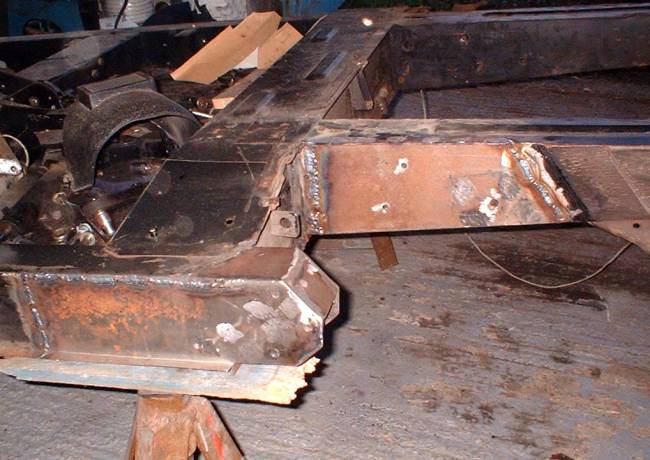
This photograph shows the completed chassis. The shiny parts are the new metal that I have welded in which might help visitors work out which areas of the chassis are represented in the photographs below.
The Rear Suspension Outer Mounting
The rear suspension mountings on Ermintrude were much more corroded than any other Renault 4 I have seen. We welded a temporary repair onto the chassis when we collected the car as the LHS mounting had become almost completely detached.
The Renault 4 rear suspension mountings are prone to rust. Dirt is thrown up by the rear wheels and is trapped on top of the rear suspension mounting. Renault made the problem worse by leaving a hole in the rear of the chassis and filling the rear of the chassis with foam. The foam soaks up the moisture and gently rots the suspension mounting.
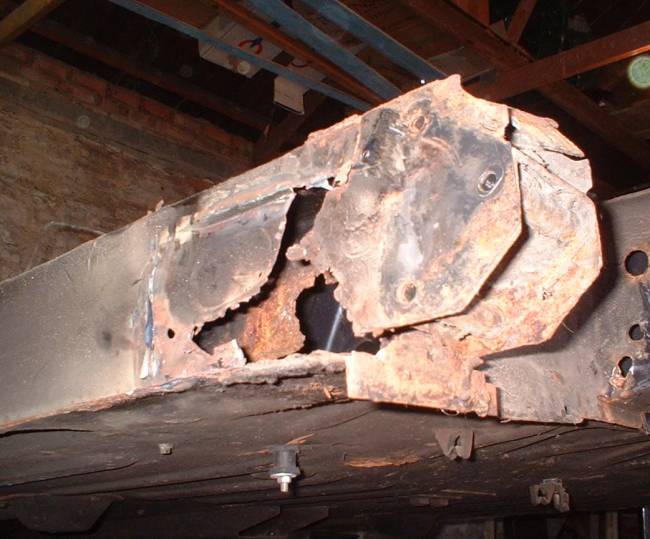
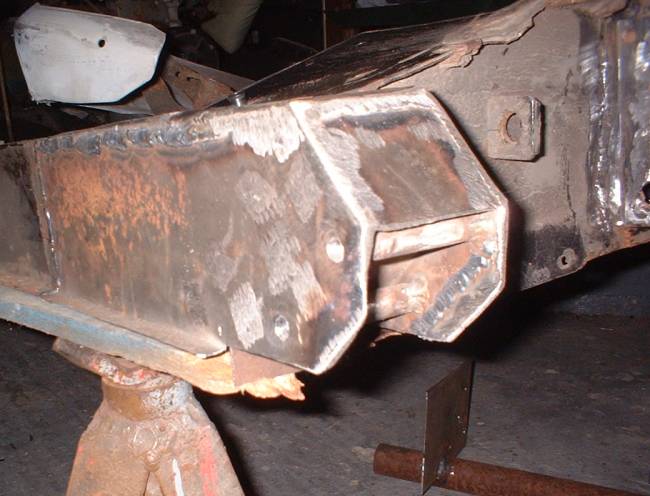
The rust was relatively localised. This photograph shows the LHS rear corner of the chassis with all rusty metal removed. Each side of the chassis member was cut back to a different point and angled. This is to reduce the chance of stress build up causing fatigue along the welding line.
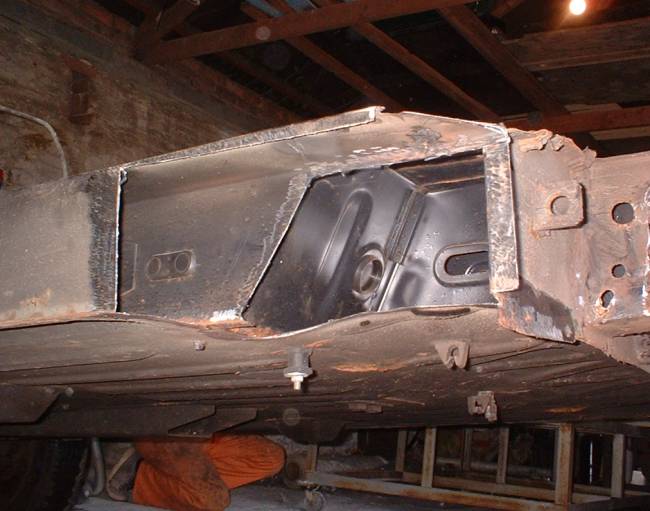
The rear suspension mounting was completely removed as access was needed from the outside to weld in a new inner skin. The suspension mounting must be millimeter accurate to prevent misalignment and wear of the rear suspension components.
The answer was to use a jig. This jig was made using a combination of measurements made from Ermintrude, Rosalie the Renault 4, and dimensions from the Renault 4 factory workshop manual.
The jig mounts onto all of the suspension mounting points which allows each mounting to be removed for repair (one at a time).
Make your own jig - see the page on suspension jig dimensions.
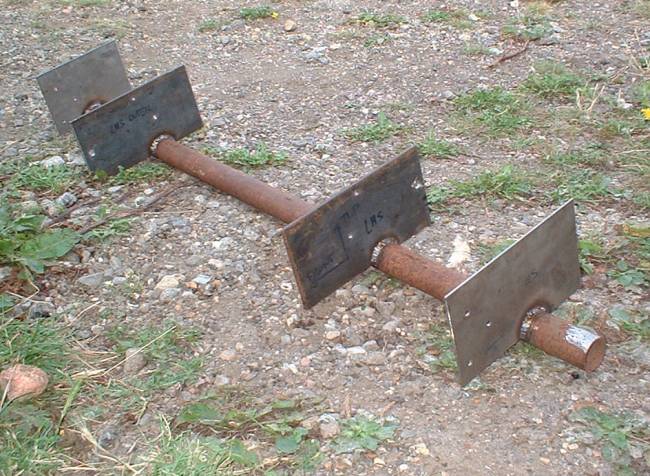
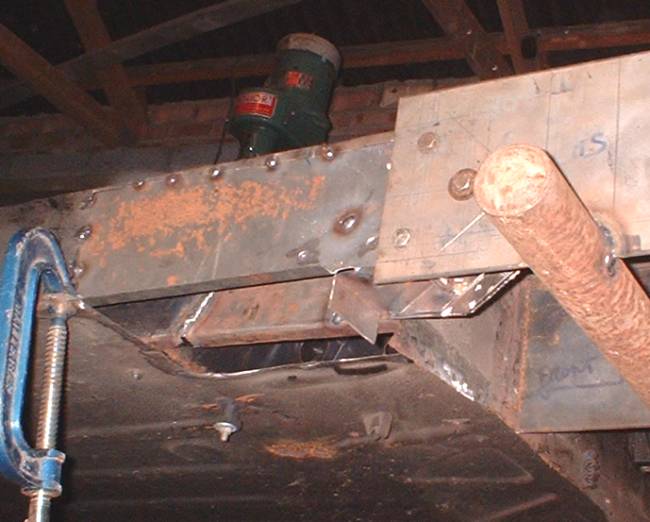
Here the jig is lined up with the inner mounting face of the LHS rear suspension mounting. The three holes in the plate are where the suspension mounting bolts will go.
The new inner face of the chassis member was made from a single sheet of steel which was bolted to the jig and welded in to the chassis. I neglected to take any photographs of the inner face.
The inner face and strengthener were welded in. The inner face was made from 1.2mm steel (the same thickness as the chassis rails), and the stiffener is 2mm steel. It was difficult to judge the original thickness of the stiffener as this had almost completely rusted away. I think Renault used about 1.6mm thick steel.
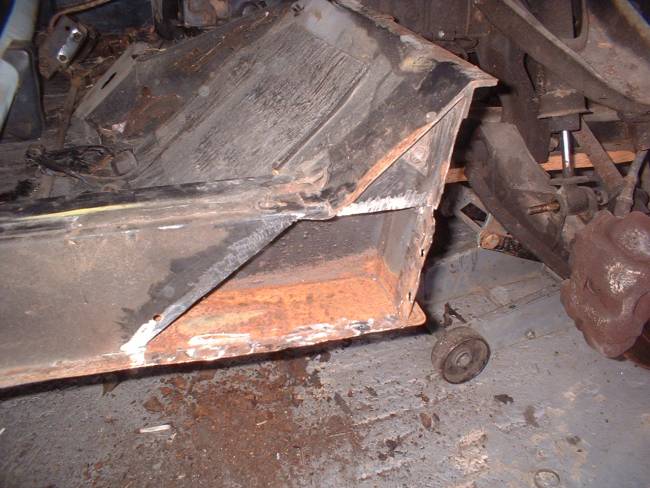
This photograph is from the right hand suspension mount (I forgot to take a photograph while I was repairing the left side.
![]() "I'm an Ayrshire!" - Ermintrude, Magic Roundabout
"I'm an Ayrshire!" - Ermintrude, Magic Roundabout ![]()
The original reinforcement was rotten and had to be remade. The reinforcement consisted of two U shaped pieces of metal. The outer piece is triangular in shape and spreads the suspension loads into the chassis. The inner reinforcement is much smaller and braces the two forward bolt holes.
I reused the original sleeves for the bolts which I cut from the remains of the original suspension mounting.
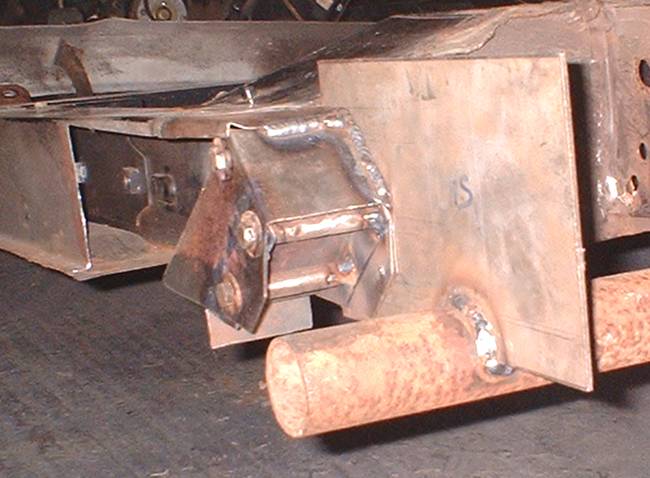
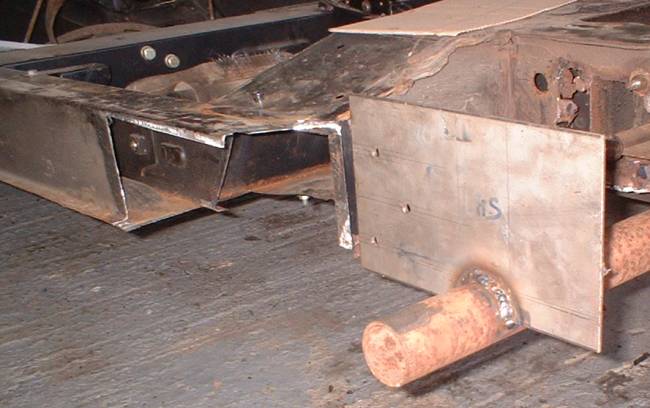
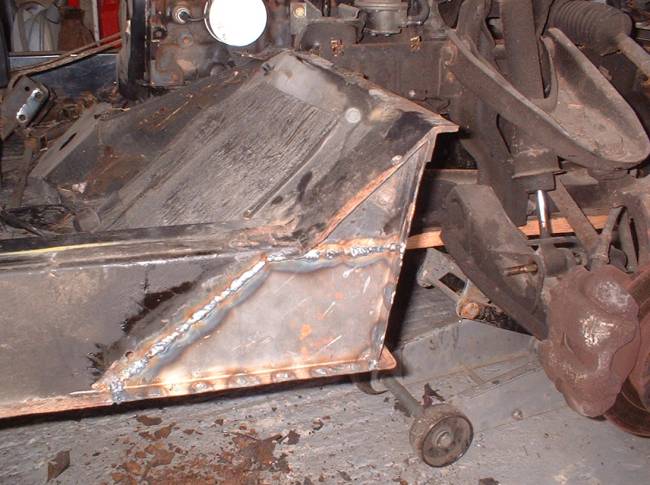
The jig was moved to the outer face of the suspension to weld in the outer section of the chassis. This section was plug welded to the reinforcements and seam welded to the chassis.
A small amount of welding will be carried out inside the reinforcement before the floor is replaced to complete the repair.
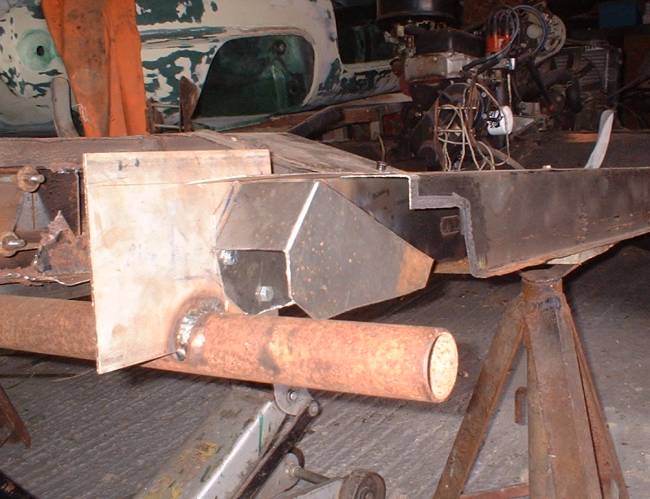
The new suspension mounting with the jig removed. I have welded up all of the exterior seams to prevent water ingress and rust. I've also left out the holes that were present in the old mount for the same reason. The old mounting had a flap at the top to locate brake and fuel pipes. I've removed this to prevent it from acting as a resting place for mud.
A trial fit of the rear suspension revealed that the suspension mountings were accurately positioned, and that I hadn't trimmed enough material from the bottom of this mounting. I'll rectify this when I carry out the floorpan welding.
The Rear Suspension Inner Mounting
The inner suspension mounting was also in a poor condition and the outer and bottom faces were replaced with 2mm steel. I used a thick single sheet of steel instead of the original double skin as it's the double skin that caused the rust problem in the first place.
See Clementine's Renault 4 Rear Suspension Repair for more details of that repair (on another car... and carried out by a cat).
Front Corner Repair
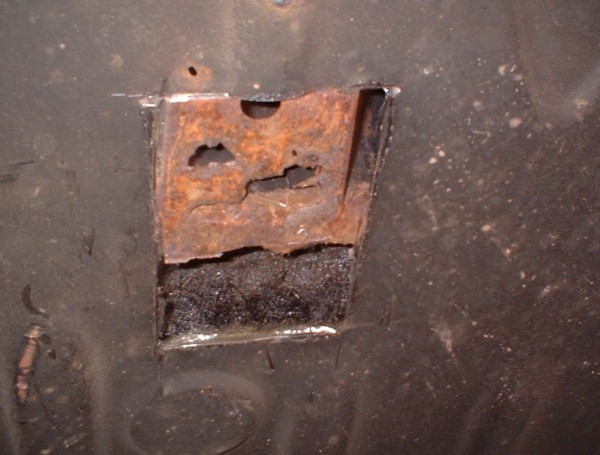
The double skinned section at the front of the chassis can be seen bubbling away on most Renault 4s but is rarely a cause for MOT failure.
The double skinned section doesn't appear to be a reinforcement - it was just a handy way for Renault to fill in the little triangular section at the top of the chassis. The rust didn't extend above the level of the chassis member.
I welded in a single section of 1.2mm steel. Fortunately the floor pan and wheel housing were in good condition on this car. Often the rust spreads into these areas making the job a little more effort.
Floor Repairs
In common with most Renault 4s Ermintrude had rusted in the floor area inboard of where each chassis rail joins on. I had to repair 3 of the 4 corners. I cut the rusty metal away from the floor and the chassis, then welded a new piece of metal in and plug welded it to the chassis for strength.
With the floor repairs completed the chassis was painted, and the rear suspension refitted. Time for the body to go back on for more welding.
Renault 4 chassis will tend to rust where water is trapped between double skinned sections. Most of the parts I have had to weld have been affected by this problem, and where possible I have replaced the double skinned section with a single section. The double skinned sections were used by Renault for extra strength in critical areas (such as the suspension mountings). This allowed them to reduce the thickness of the rest of the chassis which resulted in the light weight of the Renault 4.
Another cause for rust is less easy to forgive. Water will always find it's way into chassis members, whether through a leaking seam, or from condensation etc. Most car manufacturers put drain holes in the lowest points of the chassis to allow water to escape, and for the chassis members to vent. Renault didn't do this in the Renault 4. I will drill holes in the lowest points of the chassis and wayoyl the chassis members. Hopefully this will be sufficient to keep the car running many years to come.
Next: Body Welding


