Making a Torsion Bar Unloading Tool
Renault 4 front torsion bars need to be unloaded before they can be removed. The factory workshop manual recommends a 1.3m long spanner with a fitting at the end for an 8 sided nut, which would work, but requires the car to be 2m in the air and an assistant to be positioned inside the car. Here's a cheap and cheerful alternative.
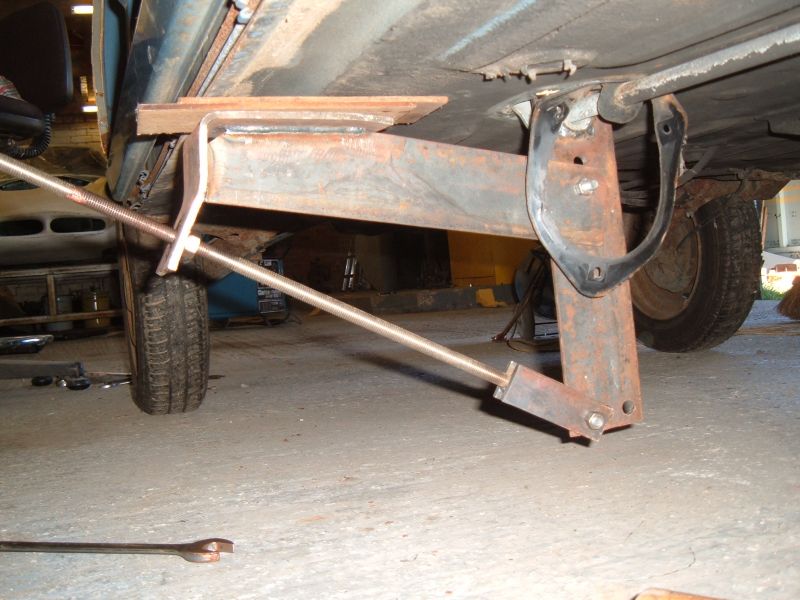
The tool clamps onto the 8 sided nut on the torsion bar mounting. After disconnecting the lower front suspension balljoint to remove most of the tension from the torsion bar, the nut on the threaded bar (to the left of the photograph) is tightened to take the remaining load off the torsion bar. The load is reacted through the brace positioned under the floor.
Once the torsion bar has been unloaded the bolts in the rear of the central chassis cross member can be removed, then the load released from the torsion bar by unscrewing the nut.
In this photo the torsion bar load is being taken up by the tool.
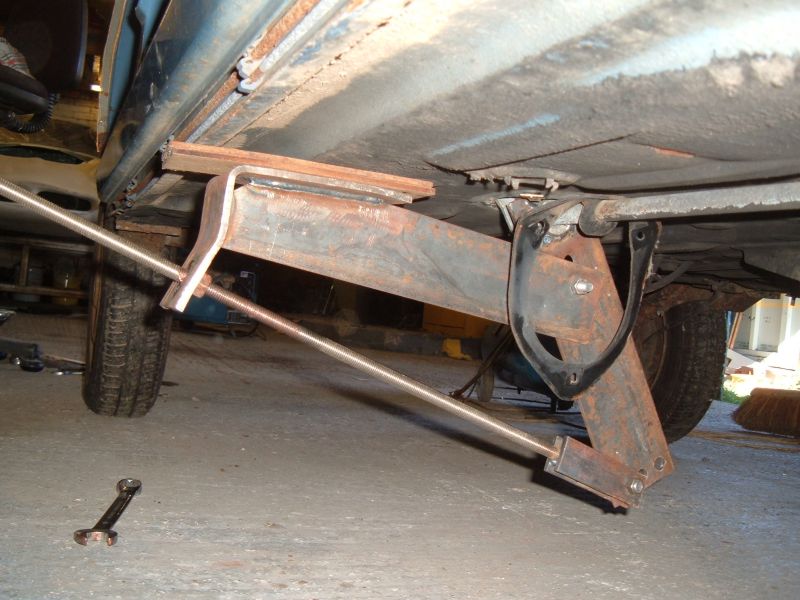
The torsion bar only needs to twist around 1/8 of a turn to release it's load. Here the torsion bar has been fully unloaded, so the tool can be removed.
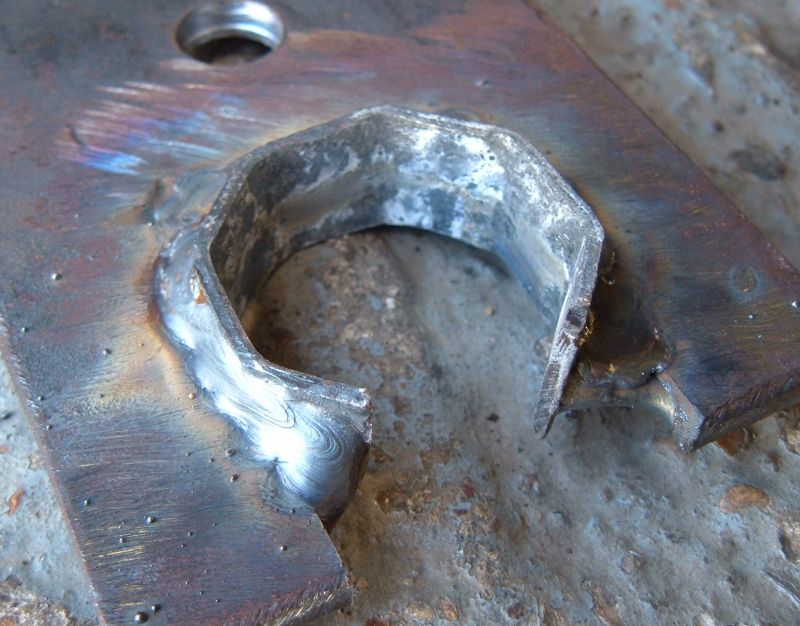
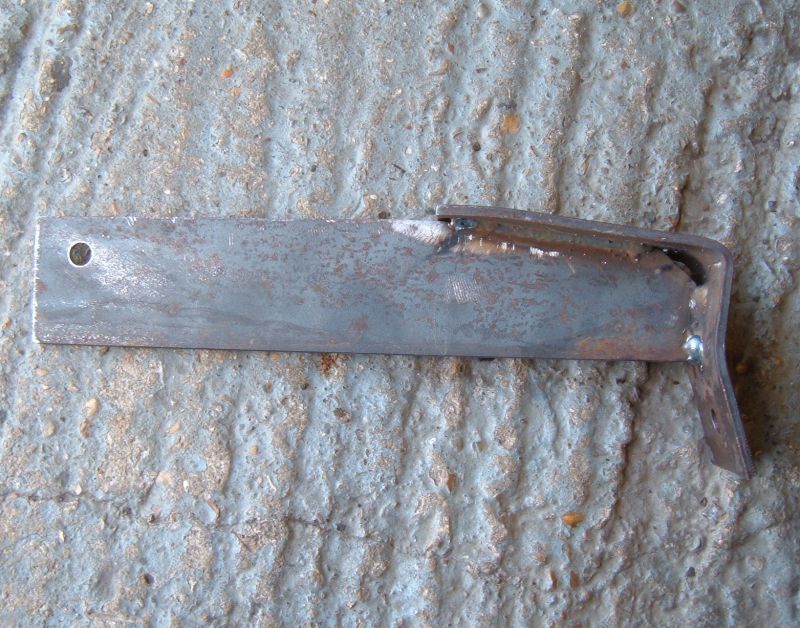
The torsion bar fitting is an 8 sided nut. It's slightly tapered, so I found it easiest to knock a bit of 2mm sheet around an old mounting and then weld it to a U shaped cut out in my sheet steel.
The nut tapers from around 23mm to 33mm across it's length, so 32.5mm across the flats would be a good starting point for a thinner spanner made by some other means.
I got the orientation wrong. It would have been better to align a corner of the nut with the sides of the spanner, rather than the flats as I have done (I didn't realise how little the torsion bar would need to twist to decompress).
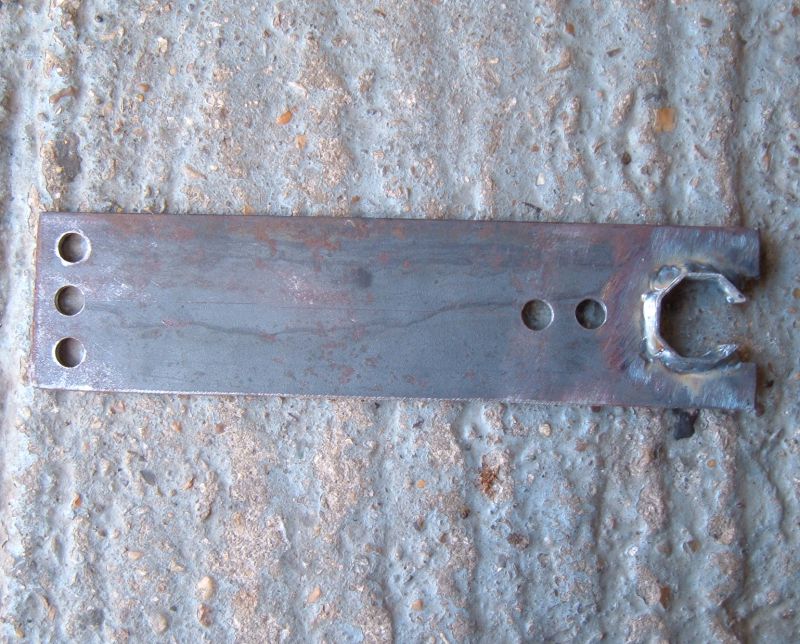
All of the parts used in this jig are 5mm thick and 75mm wide.
The spanner section is 300mm long, so can be used without the need for jacking the car a long way off the ground.
The extra bolt holes are a sign of development. You can see which ones get used in the two photographs at the top of the page.
The brace section is 350mm long. It's a bit short - had I been doing it again I'd have made it 400mm long.
The end at the right is designed to rest evenly against a piece of wood positioned under the outer sill. Mine only rests against the inner sill section rather than the inner and outer sections of sill.
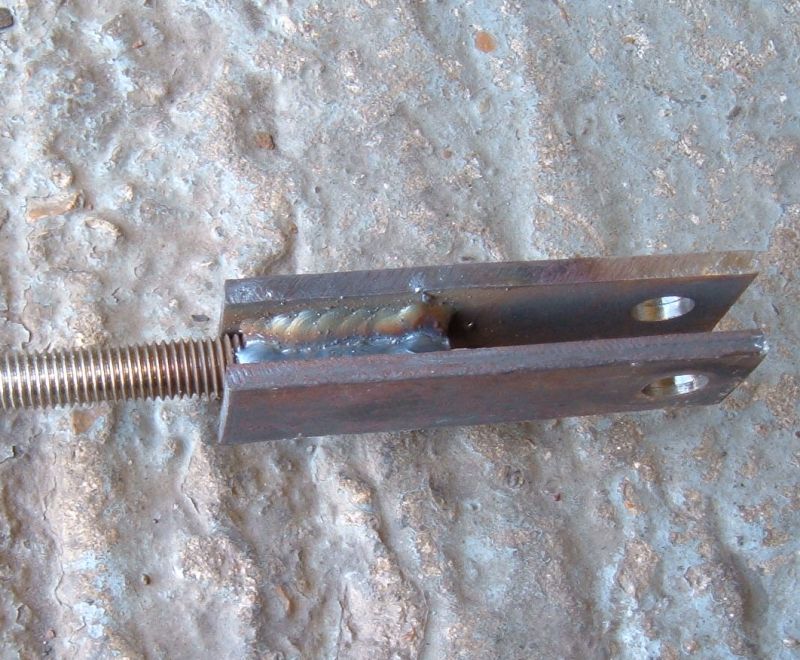
The U shaped clamp was made by welding a pair of 35mm wide and 5mm thick pieces of steel to a 1m long threaded bar. The bar doesn't need to be 1m. 0.5m would be enough.
The threaded bar is M10, which is fine for strength so long as the mounting to the brace is aligned at 90 degrees to the bar while the bar is taking the load of the torsion bar.
Torsion bars and springs can be dangerous - they store a lot of energy (the weight of the car) and a sudden release of that energy can do a lot of damage to anything in the way.
Back to Tech Tips


Engine
Electrical
Suspension
Front suspension lower balljoint
Brakes and hubs
Other
Frederick's angle grinder (RIP)