Clementine's Garage
Clementine the Cat
 
Image of flower
Yellow R4
 
Réparateur d'automobiles

1985 F6, now in Galicia

laxeian

Enthusiast
Messages
526
Location
Earth
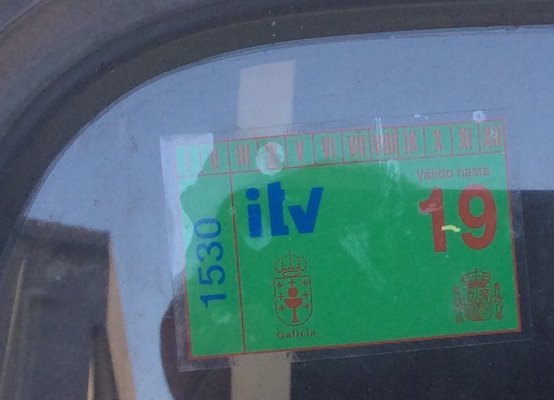
Think its time to start a progress thread, got my 1st Renault 4, a fasa built F6 a few weeks ago, it was a one owner car, its been sat in the original owners home garage since he retired from the garage trade in 2013, he recommisioned it for the Spanish ITV four months ago, the speedo turned 84kkm on the homeward journey, it runs really well..
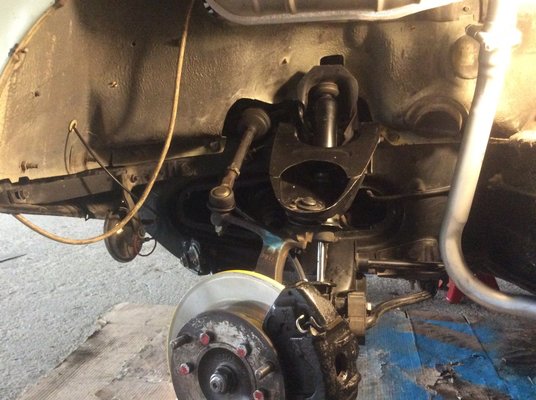
Since getting it home and putting it back into daily use from a period of little use ive had a few( not unexpected )small issues pop up, one, a noisy wheel bearing, Ive also started to overhaul the brakes ( it has had new cylinders on back,shoes,pads before it became mine),changed discs for new, then started having problems with calipers sticking, they have now been rebuilt, the cause was sediment actually in the calipers themslelves, probably a known problem on forum, think the brake fluid eats into the non machined part of the cast caliper casing behind. the piston whilst sitting not in use (mines got Bendix discs), so dissasembled ,cleaned and new seals.also fitted new flexes, originals may have passed last ITV but to my eyes wouldnt go through another.
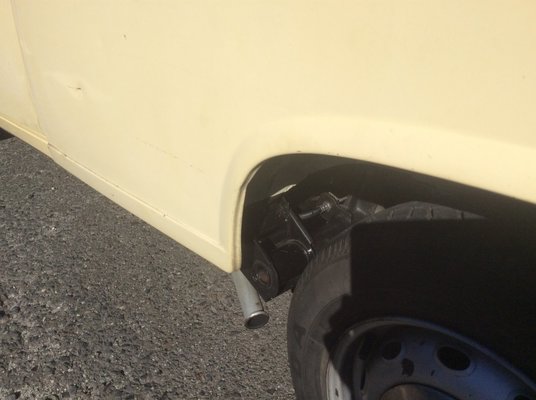
Also the silencer developed a blow just where you cant really efficently weld a repair, by the exit downpipe so its had a new silencer, took whole system off and cleaned and painted it same time.
Whilst under the front wings gave it all a quick wipe over and couldnt belive how well it all came up, put some yellow hammerite on the edges of the new discs just to give me a visual check to see if the brakes bind, saves burning fingertips looking to see if paints discoloured, dont expect them to but hey-ho.
Only took one photo,sorry to repeat as I already posted it in introduction section.
This weekend its the turn of the rear flexes.
B6652603-C1BA-49D6-8AC7-EBF944322BB1.jpeg
 
Last edited:
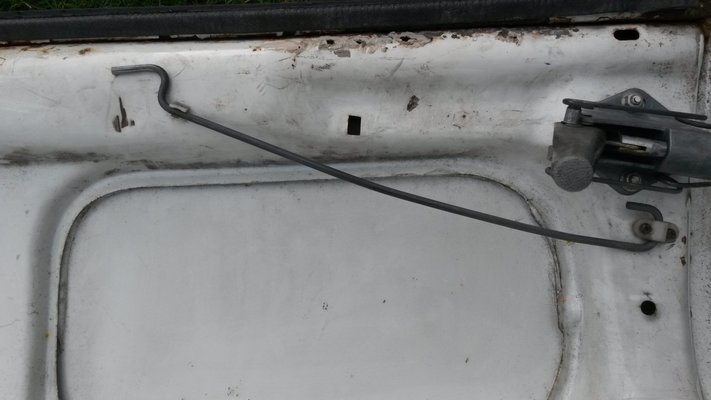
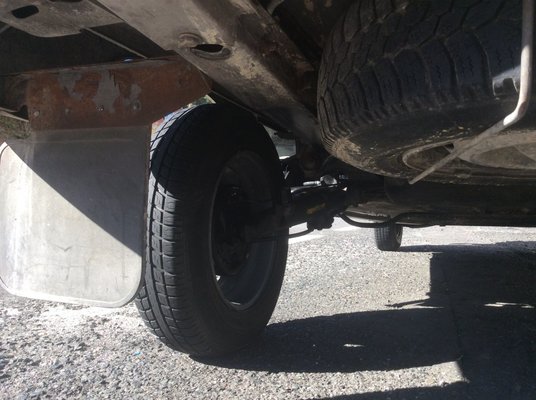
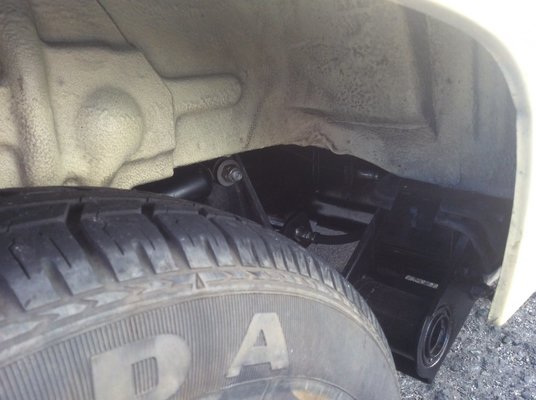
Rear brakes flexes done, would say ‘ fiddley’ is an apt description. Same time again cleaned arch areas to see what I’m dealing with, which is luckily no visable rust whatsoever and what appears to be factory paint.
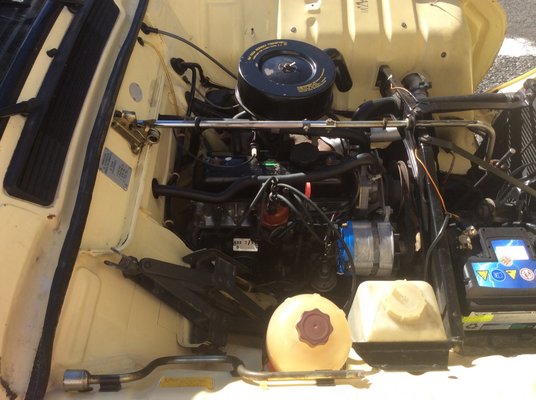
Gave engine bay quick once over,checking all the vacum hoses, fuel lines etc., got an ITV test coming up at 2.00pm today, so I see if I have any problems I’ve overlooked ( running as lean as I can get it atm;)).
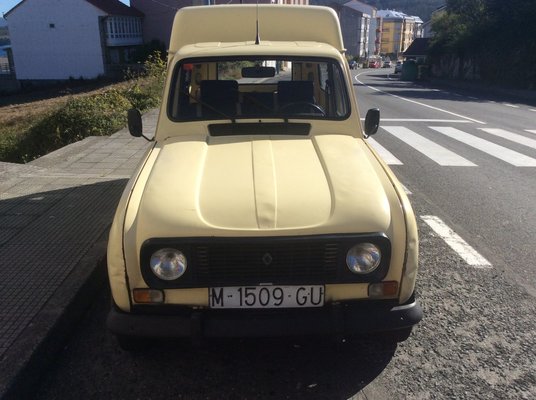
Also need to change thread title from ‘ Now in Galicia ‘ to Mr Magoo, the registration gave it its own name, fits with the dull overcoat paint colour ( next thing to be addressed when through ITV) and the enjoyfull way it bumbles round the countryside here.
Heres some pics..969105DD-CCEB-442E-B3E3-6F7C46422749.jpeg83D0B2D7-FF30-4238-92A9-5624C05368BE.jpeg980C607C-6CE3-48A1-AABF-96F344F30726.jpeg1195DC10-A769-499F-A0AB-CD348A9D795A.jpegFAB0647E-E71B-42CC-9DFB-839650210E66.jpeg
 
Rear brakes flexes done, would say ‘ fiddley’ is an apt description. Same time again cleaned arch areas to see what I’m dealing with, which is luckily no visable rust whatsoever and what appears to be factory paint.
Gave engine bay quick once over,checking all the vacum hoses, fuel lines etc., got an ITV test coming up at 2.00pm today, so I see if I have any problems I’ve overlooked ( running as lean as I can get it atm;)).
Also need to change thread title from ‘ Now in Galicia ‘ to Mr Magoo, the registration gave it its own name, fits with the dull overcoat paint colour ( next thing to be addressed when through ITV) and the enjoyfull way it bumbles round the countryside here.
Heres some pics..View attachment 21854View attachment 21855View attachment 21856View attachment 21857View attachment 21858
Hope it goes well for you
 
3F120DF0-49C7-4385-9A59-6CD03742CD1F.jpeg

Well pleased,pass with no advisories, with carb mixture tweaked emmision levels came in a tad under half limit (1.702, fail above 3.5), its registered as ‘ mixed adaptable ‘ so its for 6 months, just speaking to someone here and its possible to change paperwork so its for a year, will have to investigate that further, but if its anything like the hassle and cost of registering ‘ historico ‘ I’ll leave that out ( last vehicle here I went through that process, took a full year of paperwork just to have ‘emmision exempt ‘ on logbook for test and imposed limited mileage, test was only every 4 years but kms was limited to 3000 a year, which I covered in four months, not too practical if you like driving your classic as opposed to just showing them)
 
Last edited:
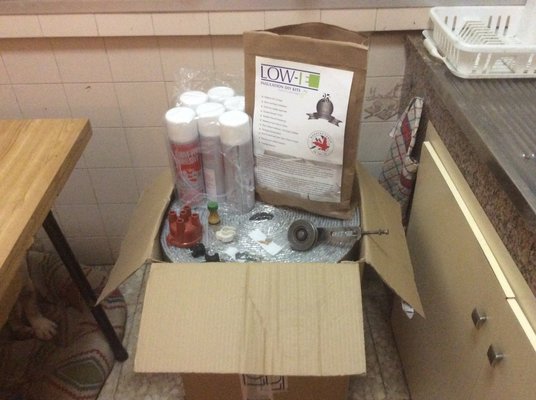
Fun few weeks, after much searching for correct speedo drive gear found one at DKS in Italy, 18 teeth( green cog), to replace one removed, sure there's a special tool somewhere that was designed to pull these out from top without need to remove front cover, puller that would clamp onto gear shaft or slot into hole in plasic speedo cable guide/ holder and just pop it out from top.. Tensioner pulley bearing started sqealing,new bearing fitted, heater valve needed freeing, Wd40, 24 hours,gentle reminder to the valves memory of what it should do, week later seems to of took hint with no tears. Ordered points,cap and rotor same time,mixture screw ( think ive got a poltergeist turning the mixture screw out ) and some silent blocks for exaust ( currently held by two long 10 mm bolts with 3 bolts,4 large metal/rubber washers each end, ITV guy didnt see,or say) same time, arrived today, busy tomorrow.
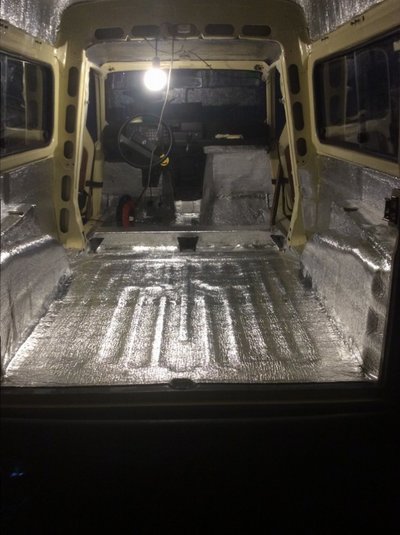
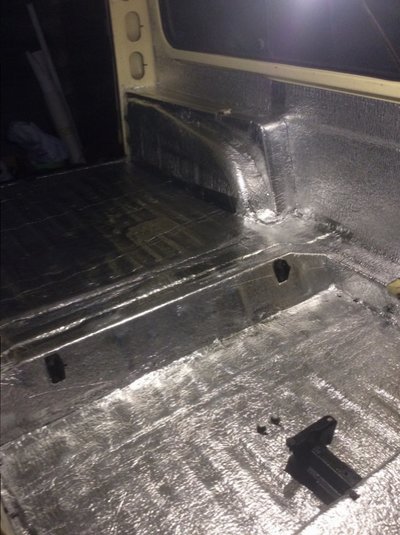
Also arrived, some LOW-E insulation, plan on lining the whole of the interior metal work ( floors,bulkhead, sides and roof and door interiors ) in this, after previously lining another vechicle with this hope it has the same effect with road/engine and rain(!) noise, also insulates, waterproof and mildew repellant. Will apply this with trim fix spray glue, going to be putting van lining carpet on top of this,same way sides/roof.
Tomorrow looks like a good day for some project progress:laughing:
image.jpg
 
Last edited:
Back rolling with a speedo working!, also pretty took back how sprightley a cap/rotor and points has made it, lot smoother too.
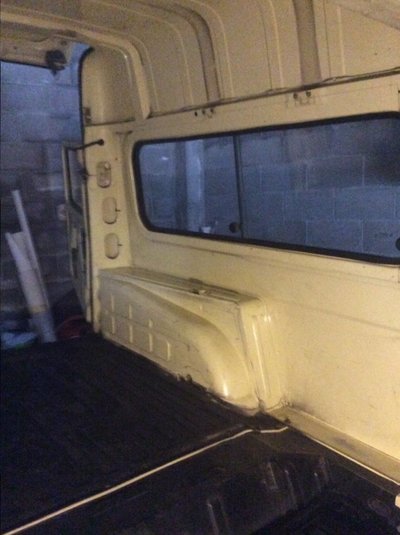
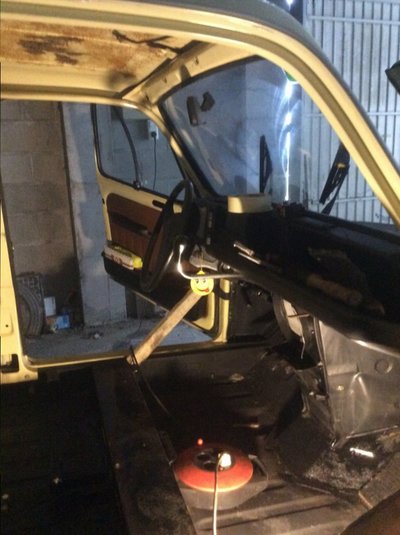
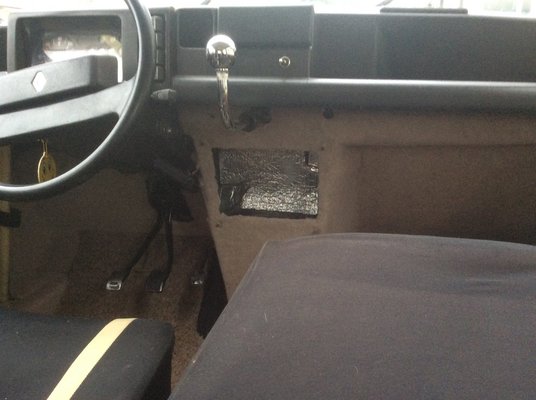
Stripped interior :-
AC099507-01D4-4D94-8155-984209E1B261.jpegE4A4A8BD-AF43-457B-9E5C-462E9A03745F.jpeg
And have got this far CA5DF3EE-244A-4375-BCC5-AEEBD99F0EC0.jpegD4B5BCB8-8358-4873-AA9E-C6958A756C0E.jpeg
Just been for a run with it as is plus drivers seat/seat belt and mats in, noise levels are noticabley lower, definitely stops the ‘ boonyness ‘ of the f6 on deacceleration in gears etc, pleased, as I havent reinstalled the rear roof strengthening bars etc. yet and the carpet trim should add to result, more progress due shortley, the carpet trim just arrived..
 
Thanks Tomcat,
Further to above post, drove it to a vets appointment and back yesterday, about 80km in a torrential windy downpour, got to say I’m amazed at difference, prior to insulation I’d only driven it once in similar rain and couldnt believe how loud it was, almost to the stage your minds telling you to duck your head to keep dry, in yesterdays weather,van at same stage, the loudest noise was the rain on the windsceen/windows, at 80/90 kph I could talk to my dog without raising my voice ;), really has transformed van.
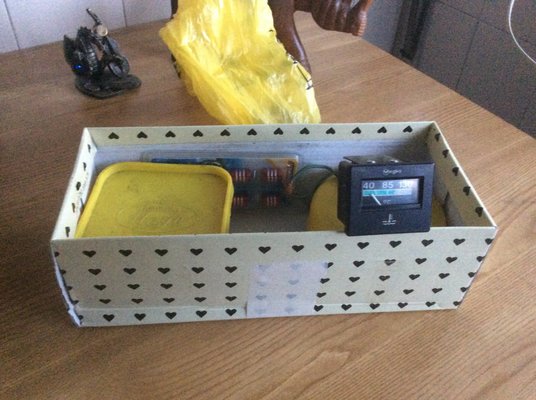
Nice suprise today, before leaving from picking up van the previous owner gave me a bag of bits and bobs for van, light lenses, good spare locks/handles for windows, door mirror, plugs, oil etc, been keeping in touch since purchase via occasional mail, nice people, today this arrived through the post1F6302AD-A9B2-4B41-A68D-FD3016D1497D.jpeg

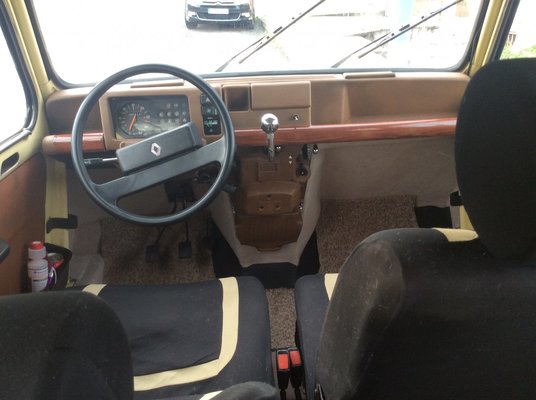
Few bulb sets, some valve caps and a temperature gauge, got to find a sender now, dont think if I searched a 1000 dashboards in dismantelers yards or trolled ebay etc for a while I could find a more suitable reason to stop the coin holder throwing coins at me, now to find a sender...
 
Quite simply the smallest piece insulation/soundproofing I’ve fitted and the result from this is nothing short of incredible, even without matrix back in and just tape over the hose holes the engine noise reduction inside the car amazing, to the extent if your interested in reducing engine noise in the car try this if you haven’t, truly gobsmacked at the difference9DF58344-040D-4AAF-9026-80FDE6798164.jpeg52F76624-BEEB-4561-80E5-6559BDC80C51.jpeg

Also fitted the lining carpet over the insulation on roof/ bulkhead and sides,
 
Van got a tidied dash for Xmas, found a space for temp. gauge where spare switches used to reside, paints a textured dark brown terracotta, real life looks more like colour of fan housing in photoC8F4B599-9A14-400C-92CD-1CCA02E63D06.jpeg
Possibly a bit ‘ Marmite’, but I like the results.
 
What model of temp guage is that, would like to install the same in mine, looks nice and neat
 
Not too sure on model, it was passed onto me by former owner, on casing there’s really only the polarity stamps by connectons on back with Veilga, made in Spain, will mail guy after holidays and ask where/what its from, to fit just had to file horizontal bar and enlarge to slot dial in,gauge sits just slightly to the left of centre of switch rectangle,but full display visable,had to file two slots in binacle cowl rectangle for dial face so cowl clicks flush.
Closer pic of dial few posts up. (Possibly same era-ish Seat/Fiat?)
 
Afraid I’ve not been able to determine the source of gauge @Richnd74, previous owner took it out of a Citroen AX owned by his son when sold with the intent on installing it in the F6, but looking through ‘google’ at AX dash pics just can’t see it in the pics, have searched 80s dashes and just cant see it in any, so its earlier or aftermarket..:dontknow:
 
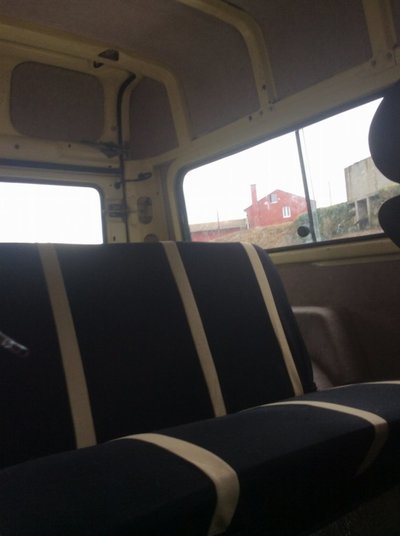
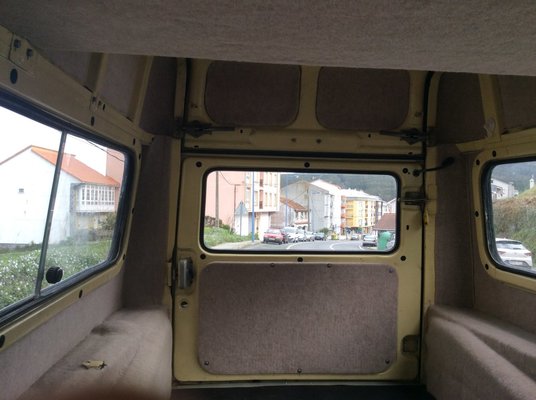
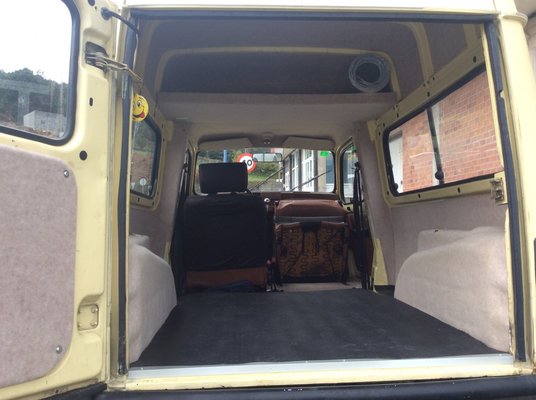
Little bit more finished in the rear interior, made a shelf for the front section of roof space, trimed the 4 corner verticals with carpet, fitted a one piece 3 mm rubber mat from rear door to seat crossmember ( lot easier to keep clean with the dogs in and out just sweeping from front to back, also made window blinds out of same insulation material used throughout,the roll on shelf affixes with velcro tabs ( black dots round windows) same time made a panel for rear door4850669B-0D9D-47CC-836B-CB33C9B02C3C.jpeg85613A4E-DD84-49D3-B758-AD9CC97FA7B2.jpeg for rear door
Next on the list is tinting of rear glass ( already have the tint film, a light green with UV protection), have to plan round this as van will be unusable for a few days..) and making/ designing a bed for rear, intention is to make a stretcher type bed from front to rear passenger side, initial thought was to have a clip in brace between front pilars and a right angle brace at rear, alloy poles (two pieces each length, sleeve join in middle) forming bed at window level, still the plan but instead of cross brace method Im going to make a foldable frame for front that uses the passenger seat rear mounts,with a small brace to front mount in middle for rigidity, the rear possibly original thoughts or just two fixngs for poles one on rear door,one pillar, made the rear door card out of 12mm ply in case I go this route, (want it window level so my Bulldogs cant climb up!).The idea is that it will all fold and store inside van without too much hassle, also the ITV here restricts what you can do, so I’m trying to design/build it so come ITV time its all out of sight, out of mind...
On a side note, I’m missing the giraffe roof braces, has anyone got a photo of one so I can make up some?
 
Hi Ian
The van looks great - I really like the slightly higher Spanish version with the side windows.
Is this any good?20190125_135010.jpg
 
Thanks Andy,
Ah, so thats what they look like and how they fix/work!,
Planning that when its all finished internally it will be similar to a pop up tent but without the tent;), also trying to keep it all as lightweight as I can feasibly go whilst keeping it practical, I’m no giant but the room in the back of it, if planned well is enough, also plan on making a simple awning to fix to the rear, so when the door and roof is up the space at rear of van becomes usable as a cooking/ living space, got an oldish microfibre frame tent that will be donating material and getting adapted for purpose, at the moment just thoughts/ideas, but slowly becoming a reality..
 
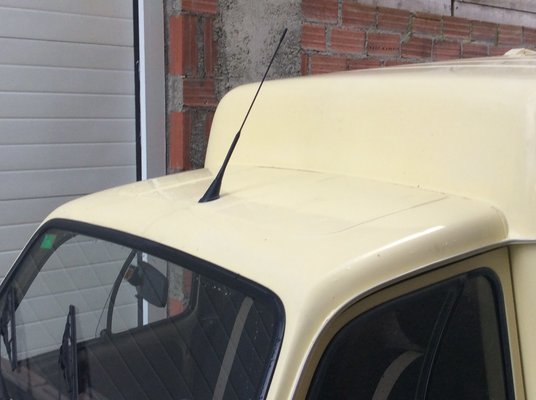
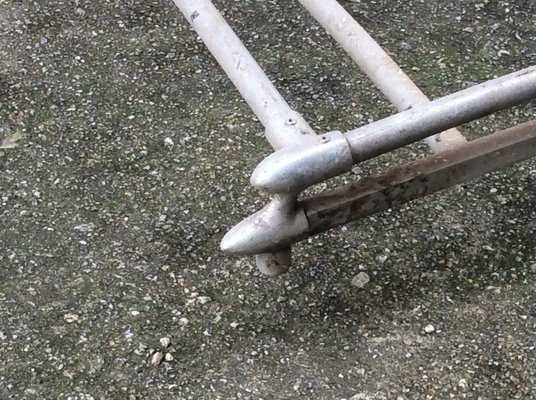
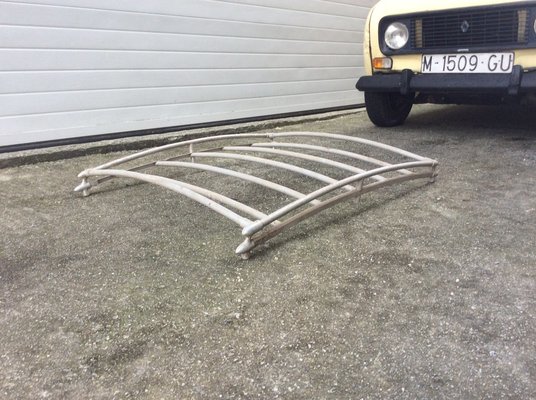
Been thrown a curveball on the to do list today , couldn’t refuse it as I really like the shape of the mouldings, saw this hanging in a neighbours garage said I liked mouldings and was given it, now feel liable to make it fit, but its not a straight forward thing, heres a pic of the new project within the project..
32594E09-ACCB-4C61-B1C5-53DAE2126B74.jpeg4D8D8576-EFFC-444B-8BED-F599E9CD4041.jpeg

All is possible with adjustment !, it just needs shortening, narrowing to fit here....:whistle:C70907CA-208A-49E0-8840-BE2E7E2A2C0D.jpeg
Then an old luggage case fitted to hide a stubbier aerial in, after I can find/make a suitable form of clamping it to gutter , after I find some suitable rubber feet..., and then it will look a bit silly without a matching ally grill instead of the plastic one, and chrome side strips instead of black rubber, peep mirrors instead of black plastic..for a roofrack:doh:....
 
Very nice laxeian, it wouldn't look out of place on a 50s Chevy Nomad. You can't beat a bit of retro, so good luck hunting out the goodies you need to make your lovely F6 "old school".
 
Back
Top