You are using an out of date browser. It may not display this or other websites correctly.
You should upgrade or use an alternative browser.
You should upgrade or use an alternative browser.
R4 GTL 1985 Restoration
- Thread starter JdeW
- Start date
JdeW
Enthusiast
- Messages
- 1,174
- Location
- Laarbeek The Netherlands
Front Left Chassis Beam repair part 2
Small update on the progress.
My restoration spot isn't heated so momentarily I'm freezing my *** of working on stone cold sheet metal in the farmer's shed
After brushing off the rust of the so called "Napoleon's hat" (aka the inner front cross member) I discovered a small hole (red circle), welded it and gave it a zinc treatment.
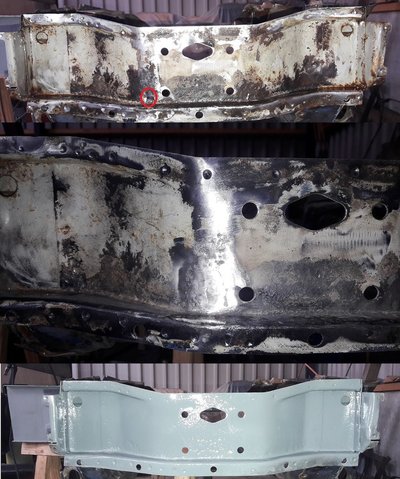
The front left chassis beam is roughly cleaned and prepared as seen here from the inside (engine bay)

And as seen from the outside in.
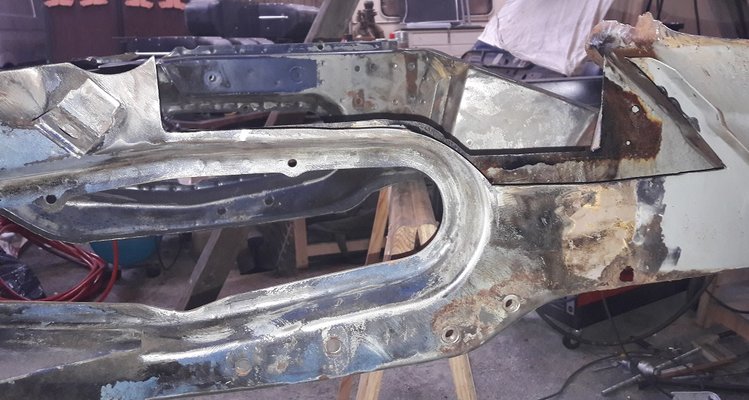
Starting on recreating the inner reinforcement piece, making lots of measurements and laying out the odd shape on a piece of 1mm sheet metal.
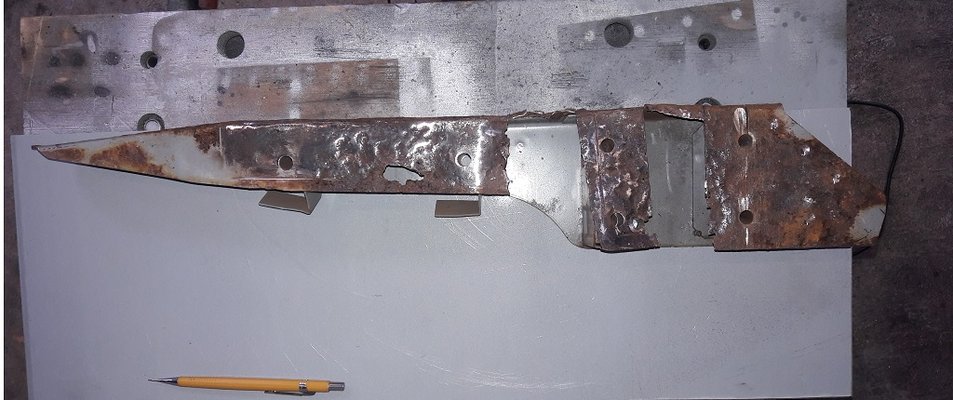
Cut some pieces.
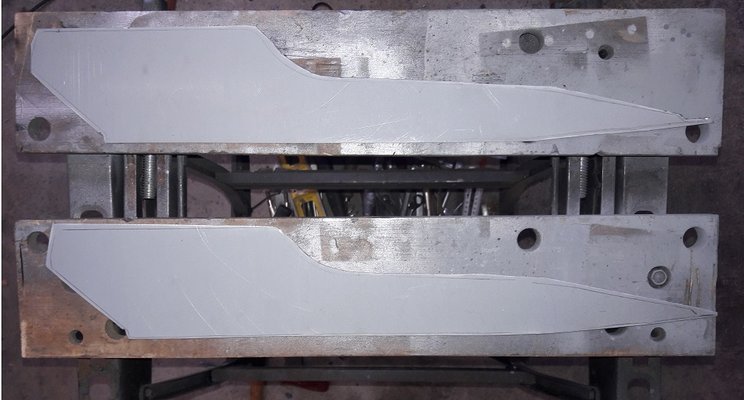
Grinding and drilling some holes. It's still an odd shape, never knew Renault did something with rocket science....
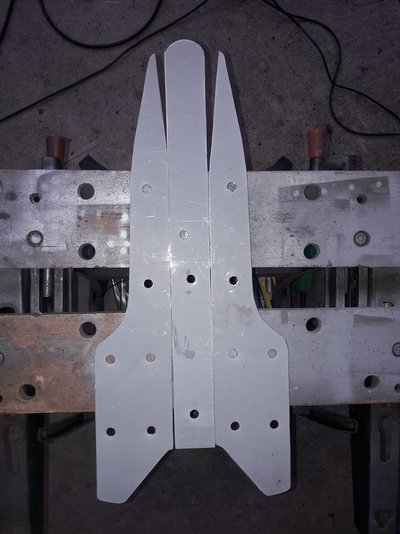
Laying out the various salvaged pieces like the nuts and anti compression parts.
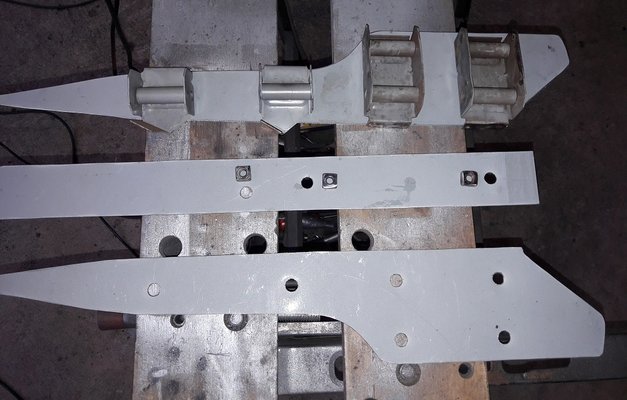
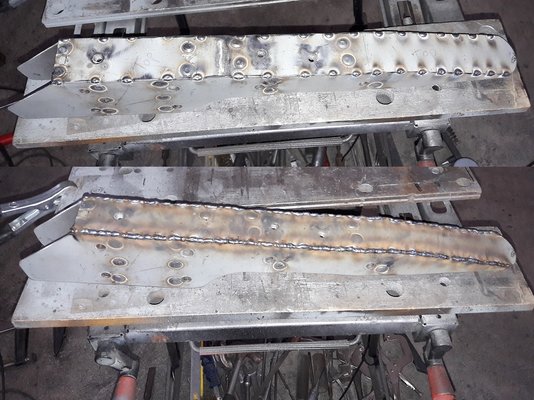
Drilled many holes for the plug welds and started welding.
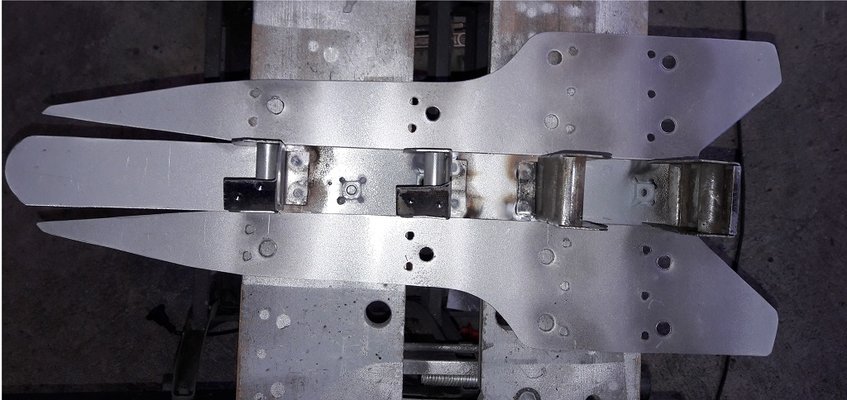
And here the inner reinforcement is almost done, the plug welds are done.
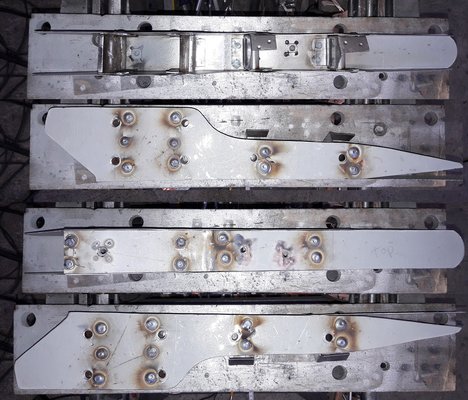
What's left are the seam welds on the top, grinding and plug welding the inner reinforcement piece on the front left chassis beam.
But that will be shown next time so bye for now
Small update on the progress.
My restoration spot isn't heated so momentarily I'm freezing my *** of working on stone cold sheet metal in the farmer's shed

After brushing off the rust of the so called "Napoleon's hat" (aka the inner front cross member) I discovered a small hole (red circle), welded it and gave it a zinc treatment.

The front left chassis beam is roughly cleaned and prepared as seen here from the inside (engine bay)

And as seen from the outside in.

Starting on recreating the inner reinforcement piece, making lots of measurements and laying out the odd shape on a piece of 1mm sheet metal.

Cut some pieces.

Grinding and drilling some holes. It's still an odd shape, never knew Renault did something with rocket science....

Laying out the various salvaged pieces like the nuts and anti compression parts.

Drilled many holes for the plug welds and started welding.

And here the inner reinforcement is almost done, the plug welds are done.

What's left are the seam welds on the top, grinding and plug welding the inner reinforcement piece on the front left chassis beam.
But that will be shown next time so bye for now

Last edited:
Simon Knight
Enthusiast
- Messages
- 200
- Location
- Sawbridgeworth
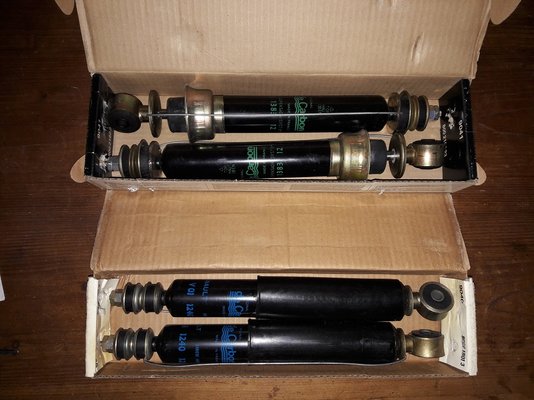
Hi JdeW, can I ask you where you got the nos
De Carbon shocks from please?
Cheers Simon.
De Carbon shocks from please?
Cheers Simon.
JdeW
Enthusiast
- Messages
- 1,174
- Location
- Laarbeek The Netherlands
Hello Simon,Hi JdeW, can I ask you where you got the nos
De Carbon shocks from please?
Cheers Simon.
Of course you may ask. I found them at last on Ebay the front pair from France and the rear pair from Greece.
They are quite rare to find and it took me almost one and a half year to get my hands on the types of De Carbon Performance shocks I was looking for, not just on Ebay but several sites such as www.leboncoin.fr More frequent the used or second hand shocks are advertised.
My advice, be patient, do frequent searches and with a bit of luck you hit the jackpot.
Cheers Joop
JdeW
Enthusiast
- Messages
- 1,174
- Location
- Laarbeek The Netherlands
Finally the outside temperatures are rising so I can continue working on my Renault 4 GTL.
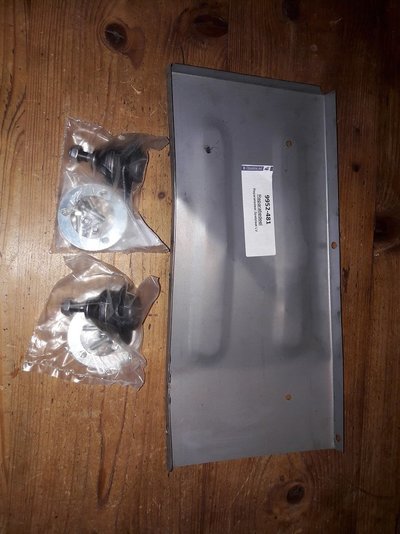
Again some parts are ordered and other ordered parts have arrived.
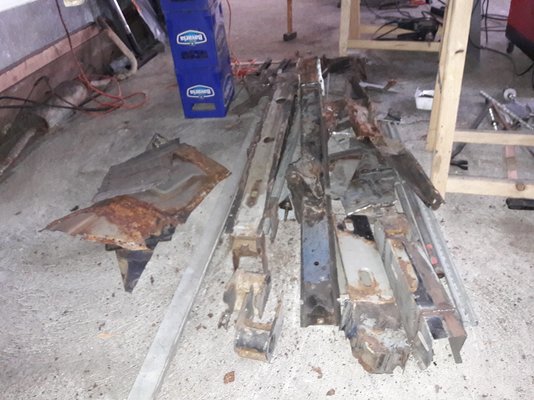
A pile of old rusty removed Renault scrap metal is pilling up underneath the chassis
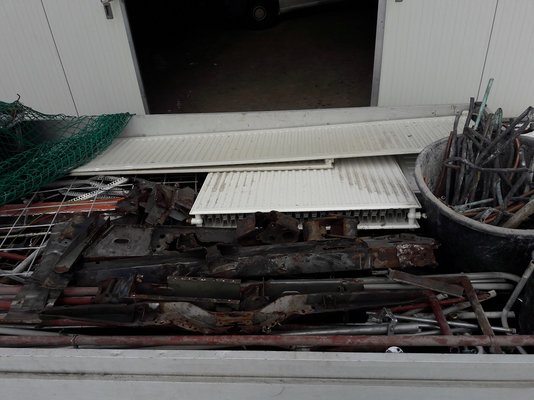
Time to say goodbye to the old rustybits so the scrap heap is dumped on the farmers trailer .
Continuing with spot and seam welding on the odd shaped inner piece of the front chassis beam.
Grinding
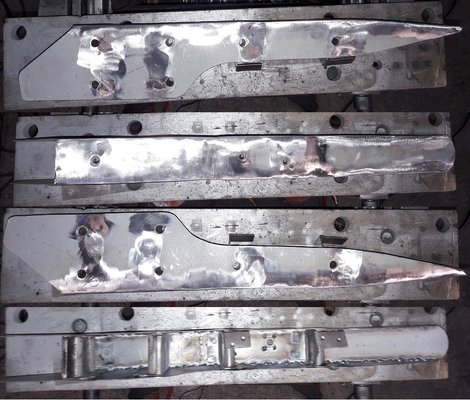
And finishing it of a layer of zinc.
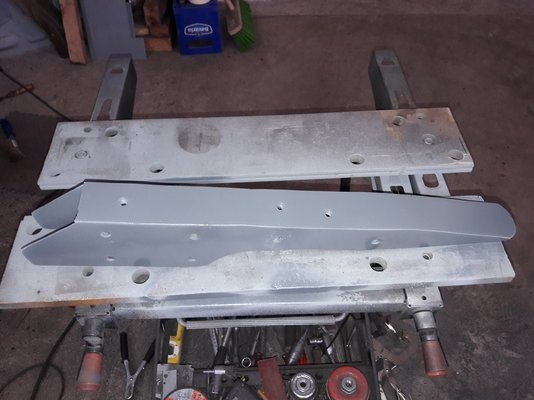
Again some parts are ordered and other ordered parts have arrived.

A pile of old rusty removed Renault scrap metal is pilling up underneath the chassis

Time to say goodbye to the old rustybits so the scrap heap is dumped on the farmers trailer .

Continuing with spot and seam welding on the odd shaped inner piece of the front chassis beam.

Grinding

And finishing it of a layer of zinc.

Last edited:
petak
Enthusiast
- Messages
- 1,926
- Location
- Vodice, Croatia
I admire your craftsman abilities.
P.S. Petak is just forum name. Came from early days in forum world while i way driving R5 GTE. In Croatia R5 is called "petica" (5-five - croatian pet), and mighty ones (R5 GTT and GTE) are called "petaaak". Totally different from Klingon word P'tak (Star trek TV series)
My real name is hard to pronounce. Hrvoje!
JdeW
Enthusiast
- Messages
- 1,174
- Location
- Laarbeek The Netherlands
Thank you Hrvoje, for the compliment, and petak is indeed easier to pronounce then your real nameI admire your craftsman abilities.
P.S. Petak is just forum name. Came from early days in forum world while i way driving R5 GTE. In Croatia R5 is called "petica" (5-five - croatian pet), and mighty ones (R5 GTT and GTE) are called "petaaak". Totally different from Klingon word P'tak (Star trek TV series)
My real name is hard to pronounce. Hrvoje!

I must admit when I first saw your forum name I thought it was and sounded as Klingon as I'm a Start Trek fan.

You made a good choice with petak named after the allmighty R5 GTT

Any plans on a second project e.g. a R4 with R5 1400cc Alpine GR2 engine or even Alpine Turbo to give honour to your forum name?
Greets, Joop
petak
Enthusiast
- Messages
- 1,926
- Location
- Vodice, Croatia
I was asked many times if star wars is reason (also big fan of series)
Those were days when i was young and foolish, and GTE was easy and cheap to maintain and jet very reliable (comparing to GTT) what was crucial. I was at University in Zagreb and needed car that can drive me 300km without fear it will let me down somewhere on the road. Plus side was it was low and fast, and it was very nice car to drive.
Now i am driving much slower and R4 is right measure for it. Now i enjoy in driving slowly and enjoying being on trip. Also i adore to be "different"
Second project (if it will ever happen) will be only R4F4 with rear bench and big rear slide glass on both sides and girafon roof.
Those were days when i was young and foolish, and GTE was easy and cheap to maintain and jet very reliable (comparing to GTT) what was crucial. I was at University in Zagreb and needed car that can drive me 300km without fear it will let me down somewhere on the road. Plus side was it was low and fast, and it was very nice car to drive.

Now i am driving much slower and R4 is right measure for it. Now i enjoy in driving slowly and enjoying being on trip. Also i adore to be "different"
Second project (if it will ever happen) will be only R4F4 with rear bench and big rear slide glass on both sides and girafon roof.

JdeW
Enthusiast
- Messages
- 1,174
- Location
- Laarbeek The Netherlands
Wow university study, so I must call you professor PetakI was asked many times if star wars is reason (also big fan of series)
Those were days when i was young and foolish, and GTE was easy and cheap to maintain and jet very reliable (comparing to GTT) what was crucial. I was at University in Zagreb and needed car that can drive me 300km without fear it will let me down somewhere on the road. Plus side was it was low and fast, and it was very nice car to drive.
Now i am driving much slower and R4 is right measure for it. Now i enjoy in driving slowly and enjoying being on trip. Also i adore to be "different"
Second project (if it will ever happen) will be only R4F4 with rear bench and big rear slide glass on both sides and girafon roof.
 I've only made it to an oldschool bachelor (in dutch engineer title abbreviation ing.) in process technology and nowadays I'm a professional craft beer brewer
I started driving slow as my first car was a 1983 R4 GTL and nowadays I drive sportier with a 9th generation Honda Civic, here we have an expression " the older, the crazier"

And I agree with your choice of the R4F4 van, in my opinion the R4F4 is the first and original R4 van, has nicer round feminine curves everywhere
Last edited:
JdeW
Enthusiast
- Messages
- 1,174
- Location
- Laarbeek The Netherlands
Front Left Chassis Beam repair part 3
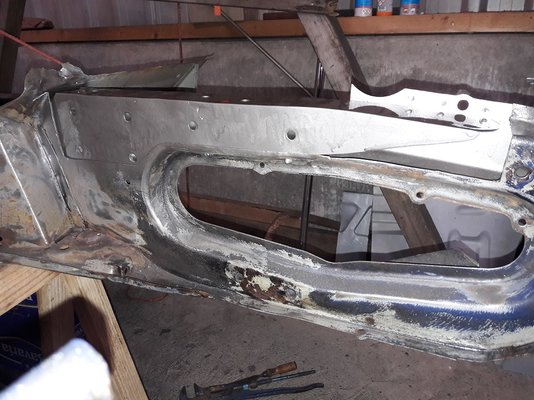
Continuing on where we left, the inner piece is ready and now we fit it in its cradle.
On the photo it looks "easy" but most of the time it was painstakingly measuring, fitting and alignment.
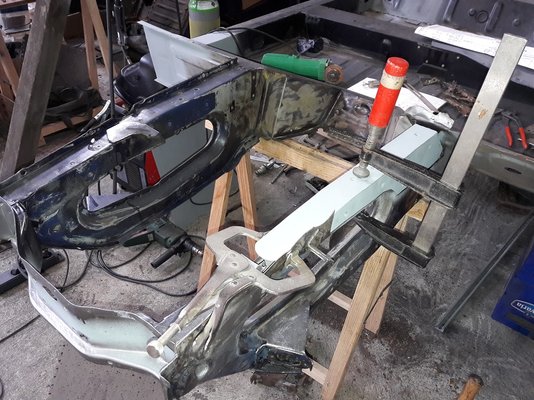
Tacked it in position and applying a weld thru primer.
The inner piece was build using 1mm sheet metal, for the outside parts I'm using 1,5mm sheet metal.
My farmers shed is not as well equipped as Petak used press brake and folding machine, so I'm limited on creating each outer piece seperately and welding it piece after piece.
Let's start creating the outside part on the outside.
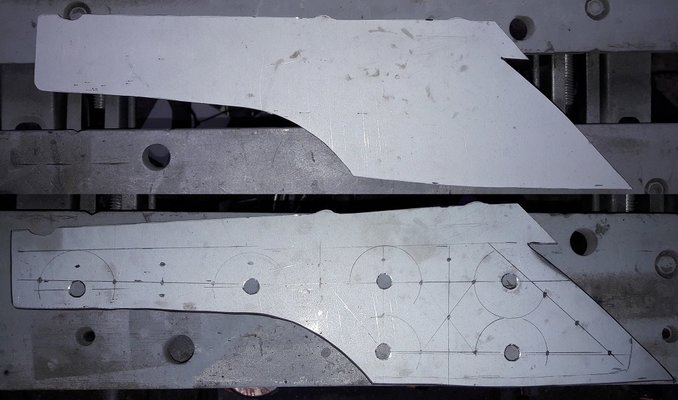
Tacked it and plug welding takes over.
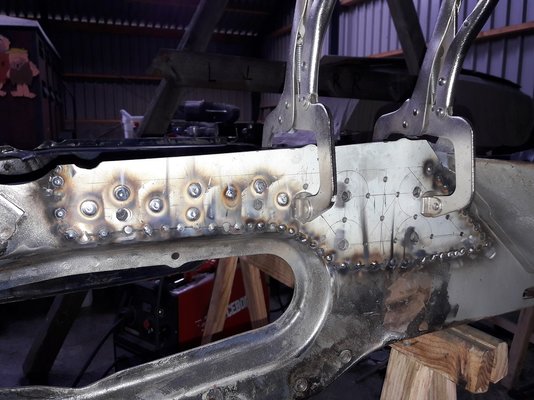
The bottom section is still open due to the famous R4 rust so the last plug welding can still easily be performed.
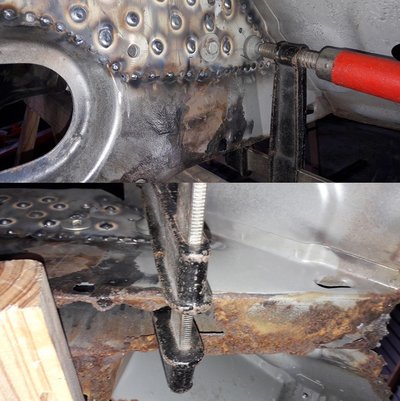
Final and grinding, the seam will be welded on a later moment,
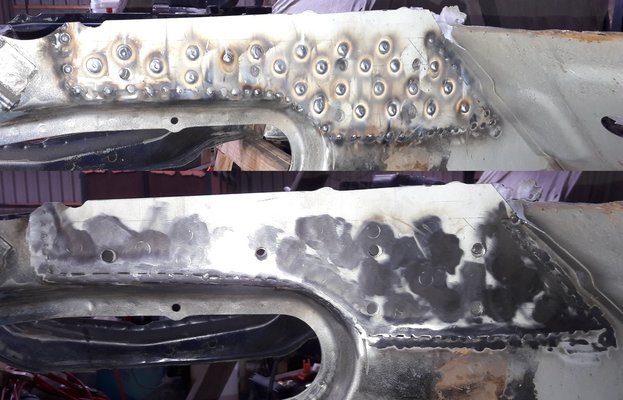
Time for the outside piece on the inner side.
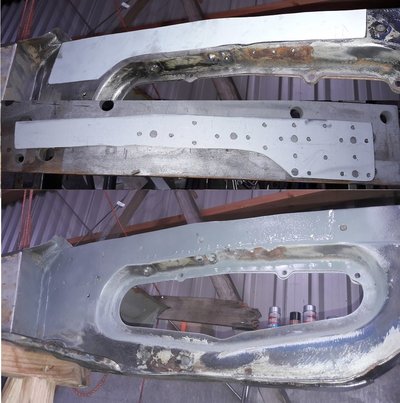
The outside piece on the top is next.
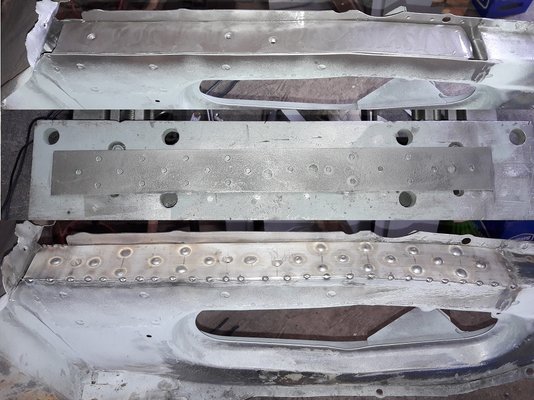
And finally a small strip to finish it off.
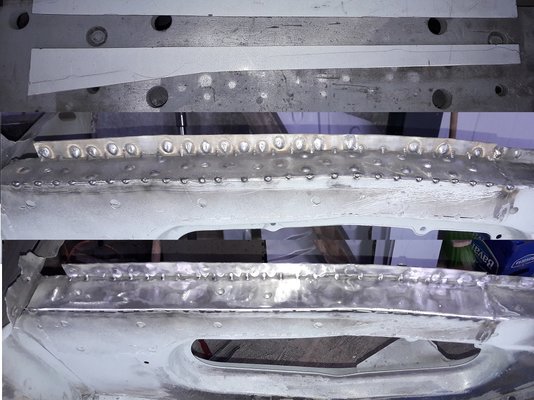
The seam on the outside is welded, grinded and zinced.
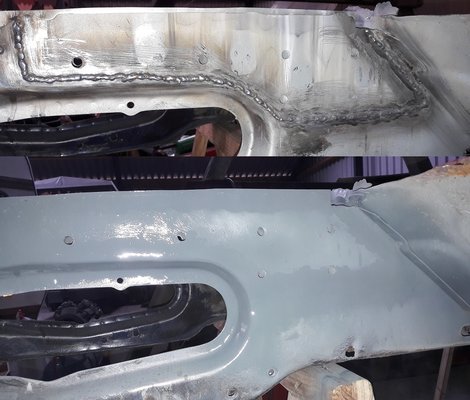
Unfortunately, as we speak winter has returned and the temperature is awful to work.
But fortunately, I keep you also busy in this way, on what's next.
Cheers, Joop
Continuing on where we left, the inner piece is ready and now we fit it in its cradle.
On the photo it looks "easy" but most of the time it was painstakingly measuring, fitting and alignment.

Tacked it in position and applying a weld thru primer.

The inner piece was build using 1mm sheet metal, for the outside parts I'm using 1,5mm sheet metal.
My farmers shed is not as well equipped as Petak used press brake and folding machine, so I'm limited on creating each outer piece seperately and welding it piece after piece.
Let's start creating the outside part on the outside.

Tacked it and plug welding takes over.

The bottom section is still open due to the famous R4 rust so the last plug welding can still easily be performed.

Final and grinding, the seam will be welded on a later moment,

Time for the outside piece on the inner side.

The outside piece on the top is next.

And finally a small strip to finish it off.

The seam on the outside is welded, grinded and zinced.

Unfortunately, as we speak winter has returned and the temperature is awful to work.
But fortunately, I keep you also busy in this way, on what's next.
Cheers, Joop
Last edited:
petak
Enthusiast
- Messages
- 1,926
- Location
- Vodice, Croatia
Jdew.....this is even better than modern press for bending i have used (and payed  )
)
I really appreciate how people are making their way to do the job without big and modern tools..
I can hide behind some project here mostly because lack of courage to take welding machine to my hands and start welding.....
Keep up and bring us those pictures.....
 )
)I really appreciate how people are making their way to do the job without big and modern tools..
I can hide behind some project here mostly because lack of courage to take welding machine to my hands and start welding.....
Keep up and bring us those pictures.....
JdeW
Enthusiast
- Messages
- 1,174
- Location
- Laarbeek The Netherlands
Thank you Petak,Jdew.....this is even better than modern press for bending i have used (and payed)
I really appreciate how people are making their way to do the job without big and modern tools..
I can hide behind some project here mostly because lack of courage to take welding machine to my hands and start welding.....
Keep up and bring us those pictures.....
I like machinery and you made your own rear chassis beams and that is also impressive
 for as I had to buy new aftermarket both rear chassis beams £££
The left front chassis beam (that odd looking curved shaped one) I choose to rebuild the rusted pieces.
It is for sale as well, aftermarket it is, but that is a bit too expensive as my monthly budget is limited.
And maybe you find your courage on MIG (TIG) welding on project number 2

Cheers, Joop
Last edited:
JdeW
Enthusiast
- Messages
- 1,174
- Location
- Laarbeek The Netherlands
Front Left Chassis Beam repair part 4
Further with rebuilding the top of the left front chassis beam.
Welding all the seams on the inside
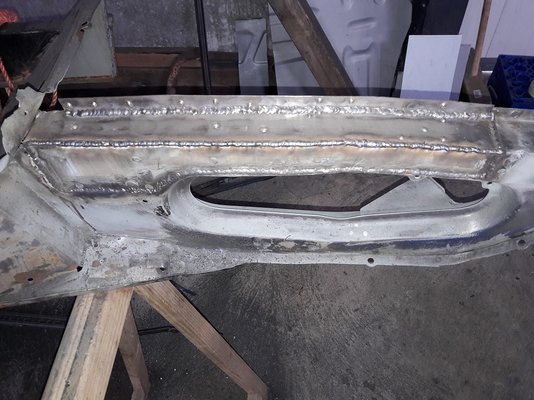
Grinding and profiling the strip
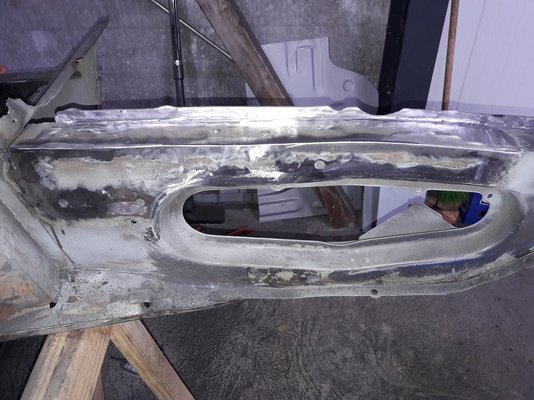
And you all know what comes after welding
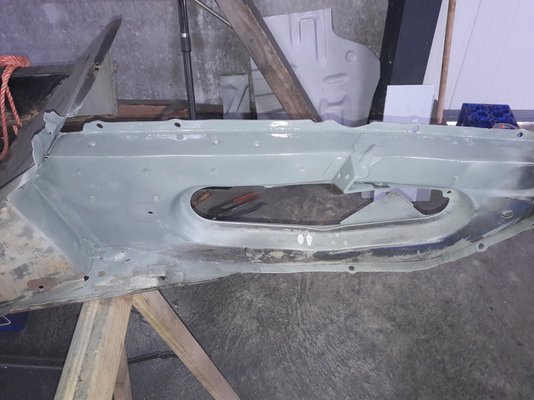
The old overlap piece was rusted away so I crafted a new piece, followed by tack and seam welding
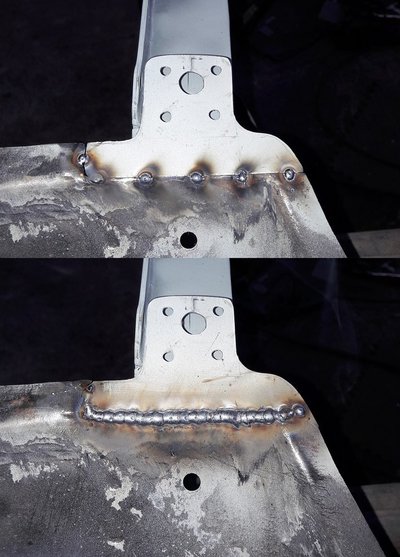
After a bit of hammering to get the piece in the right shape I plug welded to the top of the beam

And after finishing up this repair and cleaning the workspace I called it a day.
I got home and in the mail an ordered item arrived which I bought from Leboncoin.
Now I can build myself "The Tool".
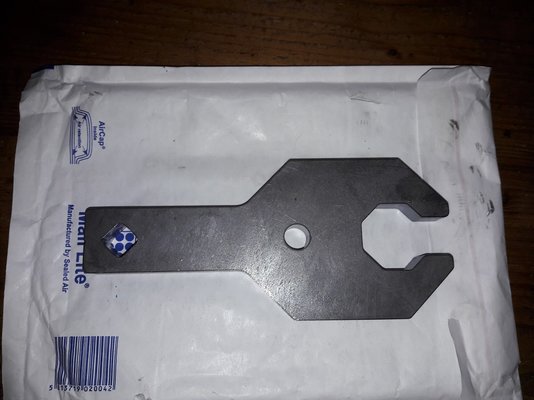
Of course I could have asked Petak for borrowing "The Tool" he used, but Croatia is quite a distance
Next job is rebuilding the front left corner of the lateral beam, welding the new splash plate in place, flipping the chassis, start replacing the rusted steel on the bottom section of the left front chassis beam, replacing more rusted parts and then closing the floor with the repair panels
It's beer time Bye for now
Cheers, Joop
Further with rebuilding the top of the left front chassis beam.
Welding all the seams on the inside

Grinding and profiling the strip

And you all know what comes after welding

The old overlap piece was rusted away so I crafted a new piece, followed by tack and seam welding

After a bit of hammering to get the piece in the right shape I plug welded to the top of the beam

And after finishing up this repair and cleaning the workspace I called it a day.
I got home and in the mail an ordered item arrived which I bought from Leboncoin.
Now I can build myself "The Tool".

Of course I could have asked Petak for borrowing "The Tool" he used, but Croatia is quite a distance

Next job is rebuilding the front left corner of the lateral beam, welding the new splash plate in place, flipping the chassis, start replacing the rusted steel on the bottom section of the left front chassis beam, replacing more rusted parts and then closing the floor with the repair panels

It's beer time
 Bye for now
Cheers, Joop
Last edited:
reidalpine
Enthusiast
- Messages
- 1,732
Quite some nice sheet-metal fabricating there Joop! -Reid.
JdeW
Enthusiast
- Messages
- 1,174
- Location
- Laarbeek The Netherlands
Thanks Reid, some home brew parts are straight forward but the top front chassis beam was time consuming.Quite some nice sheet-metal fabricating there Joop! -Reid.
But the end of the chassis repairs are in sight

Regards, Joop
JdeW
Enthusiast
- Messages
- 1,174
- Location
- Laarbeek The Netherlands
Some day I will drive by Hrvoje.... and borrow your beerYou could come by and borrow tool.....beer is in fridge

And by the way I'm very familiar with the Baltic regions...
Last edited:
JdeW
Enthusiast
- Messages
- 1,174
- Location
- Laarbeek The Netherlands
Happy Easter everybody and still a small update.
The youngest son did a great job on restoring the steering rack so hereby the photo's
The old original model 2 steering rack.
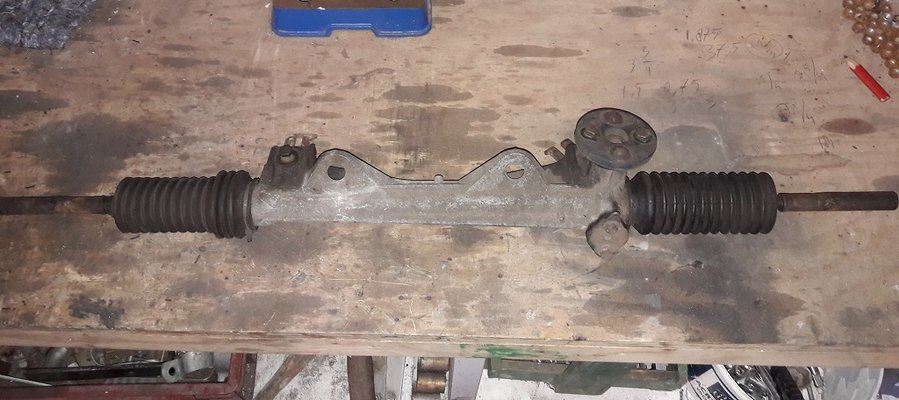
Dismantling is always fun.
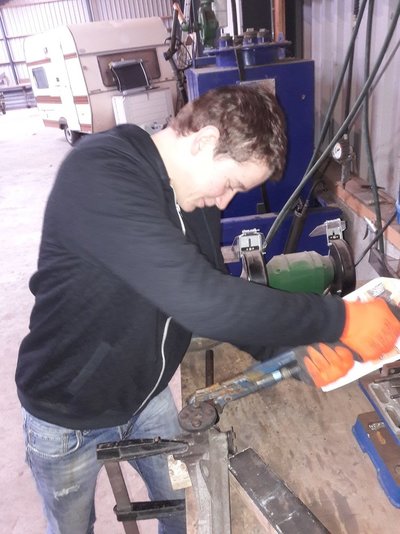
One of the inner ball joints disassembled, the silent support bushes taken apart, the whole set will be replaced and the house with plunger assembly taken apart.
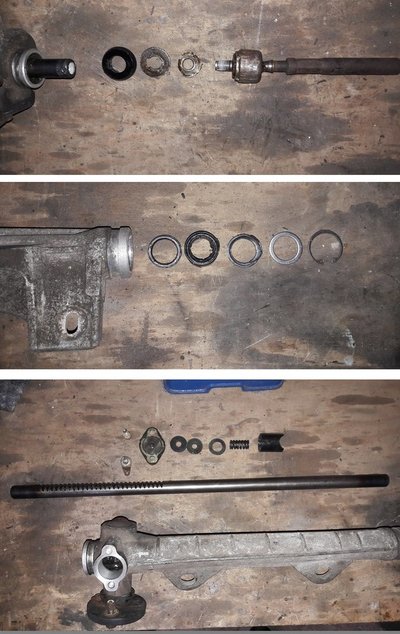
And disassembled the last parts.
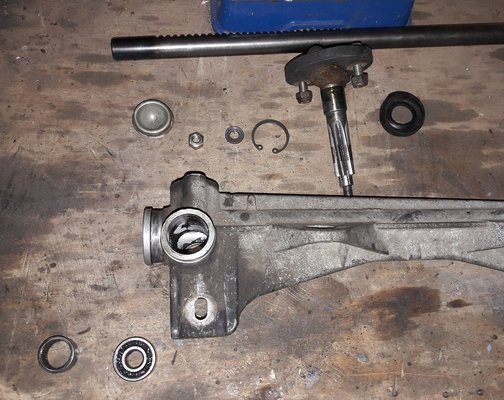
Some of the new parts, the open ball bearing (12x32x10) is replaced by a closed one type SS-6201-ZZ, the needle bearing (20x26x14) is type HK2014.
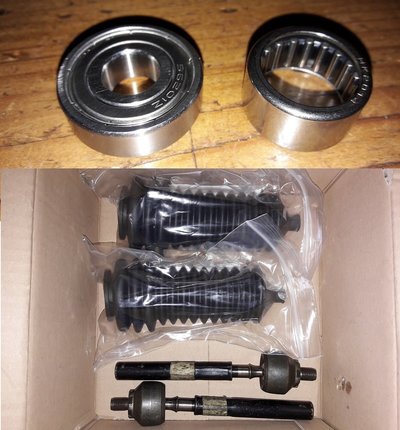
Cleaning and brushing the aluminum housing.
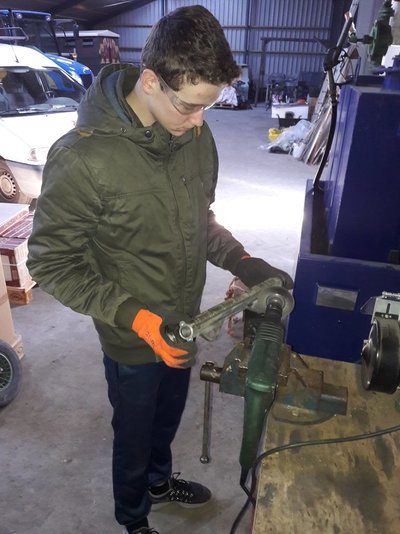
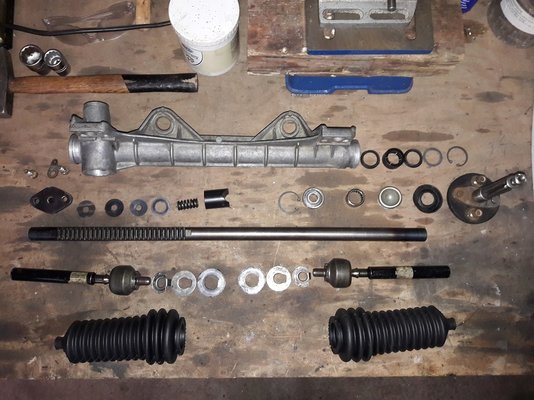
An overview of all the parts, time to reassemble.
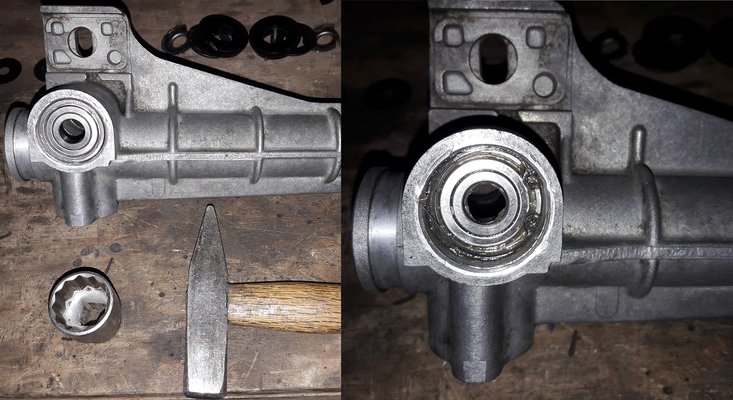
Tapping the bearings in place and securing the large one with a circlip.
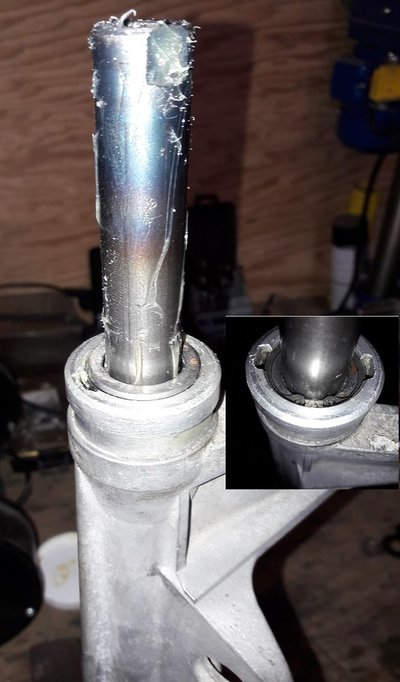
The silent support bushes replaced and circlip secured.
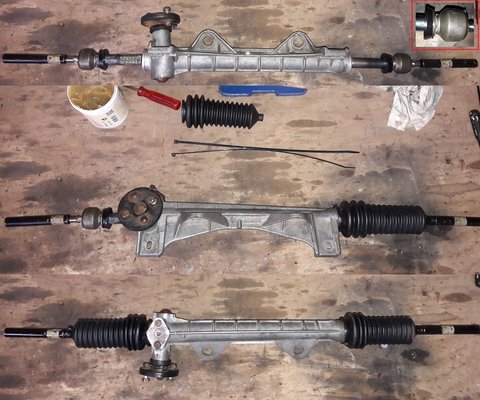
And finalising the steering rack, rebuild completed.
Cheers
The youngest son did a great job on restoring the steering rack so hereby the photo's
The old original model 2 steering rack.

Dismantling is always fun.

One of the inner ball joints disassembled, the silent support bushes taken apart, the whole set will be replaced and the house with plunger assembly taken apart.

And disassembled the last parts.

Some of the new parts, the open ball bearing (12x32x10) is replaced by a closed one type SS-6201-ZZ, the needle bearing (20x26x14) is type HK2014.

Cleaning and brushing the aluminum housing.

An overview of all the parts, time to reassemble.

Tapping the bearings in place and securing the large one with a circlip.

The silent support bushes replaced and circlip secured.

And finalising the steering rack, rebuild completed.

Cheers

Last edited:


