Clementine's Garage
Clementine the Cat
 
Image of flower
Yellow R4
 
Réparateur d'automobiles

Renault 4 armee de l' air project (Robinette)

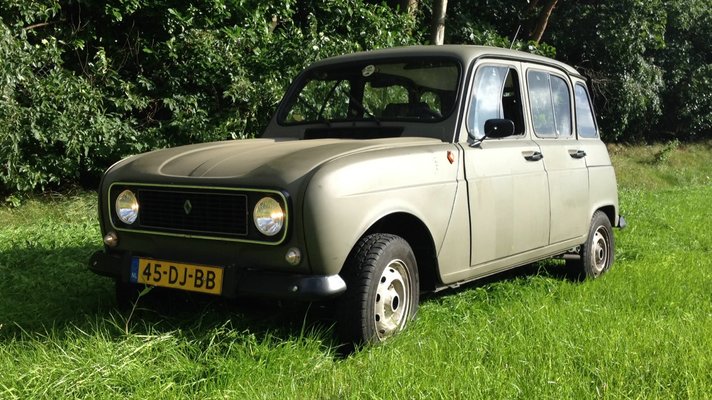
Today is a day for celebration. My project past its MOT. Two years of care free driving ahead. And lots more small things to fix but they can wait till wintertime.
 
The last few weeks I have been busy trying to locate the leakage of transmission oil from the Sinpar gearbox.
three weeks ago I took the gearbox out of my humble R4 without raising the engine. Fortunately there is some space to play with with the first generation gearboxes. With the later square gearboxes space is quite limited.

I found the source of the leakage. It was leaking from the front oil seal on the primary axle en from the gasket between the front cover and the fit plate.
After some fruitless attempts to get the front cover of, I let it rest for some weeks in an attempt to work out how to get the attachment of the primary axle that takes the lever for starting the engine manually. That piece was holding the cover in place.

Today I managed to get it of by blocking the primary axle with an old clutch plate, and with some force I was able to unscrew it.
After that it was a breeze to take the front cover off the gearbox.

IMG_1933.JPG IMG_1934.JPG

On the pictures you can still see the remains of a bad attempt to seal the front cover with liquid sealer.
Tomorrow I will be making a new paper gasket.
 
Ah ha! That's conclusive evidence for the leak. A proper gasket repair will sort it :cool:
 
This part caused the delay.
IMG_1937.JPG
And it fits in here
IMG_1938.JPG IMG_1939.JPG
Fortunately al went smooth today. I made a new paper gasket en placed 2 new seals on the primary axle.
The Gearbox is back together again ready to be fitted in the car. Hopefully Wednesday evening this job is sorted.
IMG_1942.JPG
 
Back at Robinette.
Taken the gearbox out again. It is still weeping oil so I decided to take it out and get some help with replacing all the seals.
I found an old mechanic that has experience with the old gearboxes. And he is willing to help me.

Today I have taken the gearbox out without removing the hood and leaving the engine where it belongs.

IMG_3106.JPG
For taking out the gearbox I had to disassemble quite a lot of Sinpar stuff. After that I had to take of the traverse underneath the engine and undo the for nuts that attach the engine to the gearbox at the top and 7 bolts that keep the gearbox attached to the sump
I also needed to knock out the roll pins that hold the drive shafts in place and both the steering baljoints and the top ball joints. IMG_3107.JPGLooking up from underneath the engine
IMG_3108.JPGGearbox on the floor.
IMG_3109.JPG looking at the engine driveshafts still there. lower travers gone.
IMG_3110.JPG IMG_3111.JPG both the wheel assembly's still attached with the driveshaft on.IMG_3112.JPGGearbox jack has supported the gearbox when I took of the front silent block to be able to slide the gearbox forward and the price axle out of the clutch plate. IMG_3113.JPG View from the top with the wheels back on and the car on the floor again. Without the bridge and the gearbox Jack it would have been almost impossible to do this job by myself.
 
Back at the gearbox today.
two nuts won't budge The Sinpar factory dented the nuts onto the treads as safety precaution I thinks. They are completely stuck.
Any ideas on how to undo them are welcome.

@mr-reno-139 @Andrew4Renaults or others

IMG_3189.JPGIMG_3190.JPG

The one on the second photo i have tried to undo by tapping the indentation outwards but I can't really get to it where I am supposed to get.
 
I normally, lock the sprocket. Then undo with windy gun. Come off every time.
 
Progress at last.
I placed the gearbox in a second motorstand that we have and used a 27mm socket and a killer for some extra leverage.
Finally the nuts came off.

43b27079-70e0-49ec-8b9c-f85f229e130a.jpg c0f7b9a0-57df-4600-9976-820647e5ede0.jpg 03e53d58-ba54-4e54-b8e0-a6665ee815db.jpg a078304c-95b4-4f1d-8403-de91e487faa5.jpg 883af854-2fce-4502-a814-6b9dc0a0fd9e.jpg 44936ad7-9845-4f8f-ab0a-0d45060766f9.jpg 3e746d3d-7092-455e-8dee-975c86a7b0d7.jpg 9557bdf0-63a8-41e6-817c-a6aa0a806b12.jpg f994efe5-1633-4cf6-af59-6c4585cd88d3.jpg

With all these sprockets off, I could take of the Sinpar adapter plate.

And split the gearbox halves to replace the seals
 
Back on the workbench I split the gearbox in half after undoing all the nuts and bolts that hold it together.

All the sprockets and gears are in remarkable condition after almost 50 years

You can't say the same for the seals. The paper ones have perished. and the factory liquid seal between the two halves have gone completely.IMG_3263.JPGIn the righthand half shell you can see the oil leak track

IMG_3264.JPGThe lefthand half shell holds some of the seal.
IMG_3265.JPG IMG_3266.JPGAfter cleaning IMG_3267.JPGNew liquid sealer.
 
After a daylong drying of the liquid sealer I tightened al the bolts and nuts that hold the shells of the gearbox together.

And trimmed the acces sealer.

Today I put the Sinpar conversion back in place with new liquid sealer.

Tomorrow tightening again.

7C53B4BF-09CA-49D2-8703-CF767F8A8EFF.jpeg 5CC0AA36-6B70-41C6-9A0F-ABECDDFDEFD8.jpeg 1CC7AC62-2E1D-459E-A0F3-AE2C6BA7A9AB.jpeg F6C2AA42-6B1C-41C1-AC8F-329189B7E4BE.jpeg 76C23918-B430-459D-A819-F04E2CE01899.jpeg E72323FE-385C-43FB-A3E0-CEF58ED10B6C.jpeg
 
The gearbox is finished.
Just to be safe I poured in some oil earlier this week.
Hip hip hurrah it’s not leaking anymore
All the liquid seals are okay. 9221B563-CC04-4CF1-83A6-2DEE75521DE3.jpeg F96261D2-1444-49ED-9F9F-7A090D621E01.jpeg 35FA6C5F-BA64-4A2A-87CE-61A140F3C101.jpeg
Today I put the car back on the lift. 9302F2B2-7E3B-4F9C-B77D-01E7C367425E.jpeg
Removed the wheels and undid the upper ball joints. Both the drive shafts are still in place.
3C23F22D-7FD7-47D7-BC28-0FE79564F02D.jpeg 8B9D85CE-7175-42F1-B0A0-320431E2E331.jpeg ADB031B3-C5E2-445B-BF71-9FD02DCE8133.jpeg
The gearbox is put on the gearbox jack just to put it a little higher up because it has to be manhandled in place. Notice that the front silent block is not on it

1D3ADC0A-F868-48A9-AFEA-FFCA16BAD5EE.jpeg
With two men we had to lift the gearbox with the price axle tilted up a bit.
Once it is in the hole in the flywheel it is a matter of lifting the front of the gearbox towards the front cross member and sliding the gearbox towards the engine.
After that I bolted the engine and gearbox together.F7612844-87B8-4F96-AF2E-F22BB3C5B8C7.jpeg
Then I put the front silent block on.

And then the driveshafts and lower traverse were put back on.B34B447A-990B-4793-B546-DEC20B123E2A.jpeg

This took about an hour.
After that I had to attach the various parts again an tighten all the bolts and nuts that keep the engine and gearbox together.

Coming week two bearings in the axle that runs underneath the car and I’m ready for the road again.
 
Replaced the old and worn bearings of the driveshaft that runs under the car to the backside differential.B270F1C6-2B50-4F21-A68C-E1ACFAD27352.jpeg These open groove bearings had a lot wear.
B64C36A3-1511-48F0-ABBE-B1C4780E3815.jpeg
Replacement with sealed groove bearings 50C011C3-EA1A-4169-920D-4CB8DE514515.jpeg
All back together ready for mounting 5DCB4FA3-3320-4BC9-A026-58BF70B8E004.jpeg

Unfortunately the Chinese silent blocks had cracks in them.
I bought some new ones. They’ll be put on Sunday.
6A31E583-DDAA-4B9B-99A0-2D537D3BBD9E.jpeg
I painted the towing brackets red with hammerite paint. So nobody trying to tow me will mistakenly put the tow hook somewhere that will rip apart my chassis
 
The driveshaft to the rear differential has been installed again.BB7A735E-B7E9-49F2-9AD8-9FAF167B1F6F.jpeg
81F85E10-6F66-4551-9D5D-475A1370BDD8.jpeg
In the process I changed the cracked Chinese silent blocs with some beefie full round silent blocs.
DD357583-6BFF-4743-BDD9-9810A989A4F4.jpeg For some strange reason both the diabolo type silent blocs at the rear were fine and unaffected.

Over the last two years I discovered that the gearstick that engages the 4x4 system at the gearbox was situated to low in the bulkhead. So today I drilled a hole through the bulkhead at the maximum height I could go. The remaining hole lower down was used to put in a circuit breaker as an anti theft precaution.43617248-4557-442F-8F82-A5EEEB79ACFE.jpeg2B8B7F23-7337-4182-B7FF-39966859E9B9.jpeg 8E94474E-71D4-43A6-A698-6BE2BE118855.jpeg And the last thing was putting on the painted towing brackets.
At the rear end.280137EC-FD53-4502-A0EA-C35588976CA1.jpeg9558234D-03D8-4A5B-A567-FD2B1B31F995.jpeg And in the Front.07D6E980-A96C-4C87-8E0E-92F81C2B9D46.jpegIn all not a bad way to spend a Sunday afternoon in winter.
 
Back
Top