


You are using an out of date browser. It may not display this or other websites correctly.
You should upgrade or use an alternative browser.
You should upgrade or use an alternative browser.
What have I done! (R4 GTL)
- Thread starter petak
- Start date


petak
Enthusiast
- Messages
- 1,931
- Location
- Vodice, Croatia
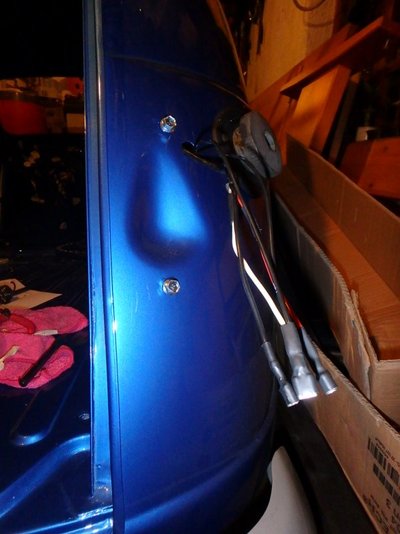
Was away few days but small update is here
Wiper motor in place
1. washers, nuts, grommets

2. cut out place. Maybe could go without cutting it but was afraid that would not block levers later

3. In place

4. Properly tightened


Internal door handles

Wiper motor in place
1. washers, nuts, grommets
2. cut out place. Maybe could go without cutting it but was afraid that would not block levers later
3. In place
4. Properly tightened
Internal door handles
petak
Enthusiast
- Messages
- 1,931
- Location
- Vodice, Croatia
Since last time i have made big step forward.
Glasses are in
Plastic frames and ruggers

Glass frame and window knob

parts for installation of the knob to glass

All in place


Ready to be put on car doors

hole for window

All together

Rear window

In place

Glasses are in
Plastic frames and ruggers
Glass frame and window knob
parts for installation of the knob to glass
All in place
Ready to be put on car doors
hole for window
All together
Rear window
In place
petak
Enthusiast
- Messages
- 1,931
- Location
- Vodice, Croatia
Between plastic frame and door i have put butyl rubber seal to tray make R4 little bit less noise and more weather tight place to be
It looks like this

But i ave found out that if you need to remove window for any reason it is pain it the ass to remove that butyl rubber seal from metal frame.
Have finished insulating fire wall


Clips that holds dashboard have arrived from All4renault from Portugal


And front window is put in

It went really nicely aldo i have noticed crease on left side of the rubber

Not sure will that will be good thing to left like that. Afraid that water could get inside.
Thinking of removing glass again and repeat installation.
Some fresh air for R4 (before windows were put in)


It looks like this
But i ave found out that if you need to remove window for any reason it is pain it the ass to remove that butyl rubber seal from metal frame.
Have finished insulating fire wall
Clips that holds dashboard have arrived from All4renault from Portugal
And front window is put in
It went really nicely aldo i have noticed crease on left side of the rubber
Not sure will that will be good thing to left like that. Afraid that water could get inside.
Thinking of removing glass again and repeat installation.
Some fresh air for R4 (before windows were put in)
petak
Enthusiast
- Messages
- 1,931
- Location
- Vodice, Croatia
gas pedal

in place

steering column ready


Hole in insulation for mounting points

Everything in place ( again, have used that butyl rubber seal to prevent water leaking inside)


This autumn i got early Santa Claus visit from far north of Europe (literally) who bring me revers light switch....Thank you borgeb

And put in place

in place
steering column ready
Hole in insulation for mounting points
Everything in place ( again, have used that butyl rubber seal to prevent water leaking inside)
This autumn i got early Santa Claus visit from far north of Europe (literally) who bring me revers light switch....Thank you borgeb
And put in place


petak
Enthusiast
- Messages
- 1,931
- Location
- Vodice, Croatia
Ventilation opening flap (that opens or closes canal letting fresh air from outside into cabin ) got her own rubber foam to try to maximize airtightness inside cabin.
Time will tell will all this effort bring something good or bad for accommodation inside R4. Will i get warm in winter time or not.
Insulation foam glued to the flap. Sorry for bad picture. I got new camera and i am still learning to get perfect pictures

Before bolting in

Finished

Also have put water temperature sensor in place on water pump

Some electrical problems

Got everything through firewall

Right side

Left side

All engine bay wires are connected now...still left to do inside and rear part of cables.
With some of mine additional details.
Till next time...
Time will tell will all this effort bring something good or bad for accommodation inside R4. Will i get warm in winter time or not.
Insulation foam glued to the flap. Sorry for bad picture. I got new camera and i am still learning to get perfect pictures
Before bolting in
Finished
Also have put water temperature sensor in place on water pump
Some electrical problems
Got everything through firewall
Right side
Left side
All engine bay wires are connected now...still left to do inside and rear part of cables.
With some of mine additional details.
Till next time...
Cornish4
Le Dazzleur
- Messages
- 1,881
- Location
- Falmouth
Petak, I've been following your cars restoration so far, and I have to say you are doing a beautiful job, such attention to detail and getting stuff right, it's a credit to you. Speaking as one who's been through this before, although not a 4L, I can say its a labour of love, and not everybody appreciates the blood sweat and tears that restoring a car entails. It's worth it though when it's on the road at last. It looks like you are almost there. Well done.
Regards, Brian.
Regards, Brian.
petak
Enthusiast
- Messages
- 1,931
- Location
- Vodice, Croatia
Cornish4: Thank you for kind words....i do really appreciate if anyone thinks that this is good job.
It is my hobby project...i wanted to do this since i got driving license....first idea was R5 GTE (because it is even more rare than R4) but it was not meant to be.
Do it in my spear time when everything else is in order (family, job...)
Do not care about bad words...(aldo i did not receive many of them)
Just enjoying myself doing my car.....And will enjoy it even more when he start to run on roads.
And i have find "friends" that are "crazy" in same way that i am!
Thank you!
Cornish4
Le Dazzleur
- Messages
- 1,881
- Location
- Falmouth
Petak, yes we must always remember it is just a hobby, although it can take over your life if you let it. Glad to see you've kept this old vehicle "illness" under control :-) and you are right, you do make great friends because of this pastime, friendships that will stand the test of time. Keep up the good work, almost there, that's the reward.
Regards, Brian.
Regards, Brian.
petak
Enthusiast
- Messages
- 1,931
- Location
- Vodice, Croatia
Thank you vlk for kind words.
I have used K-flex St duct 12mm thick with oner side adhesive and net on it
This one http://www.kflex.com/products/elastomers/k-flex-st-duct#documentation
I have paid some 40kn/m2 (or 5€/m2 or 4GBP/m2)
Big plus for this material is that it is 1,5m wide and R4 is nowhere wider than 1,2m.
I have spend some 4m2 so far for insulation of firewall and roof.
Thinking that will need some 2-3m2 more. For all doors and back left/right panel around window
")
petak
Enthusiast
- Messages
- 1,931
- Location
- Vodice, Croatia
not much to be honest.....
This time of the year is my top at the work so have to finish that first....long night work hours...(that is problem when you are self-employed)
Some small electrical job is done.
Whole wiring harness is in place now. fuse box installed.
Still need to pull through some additional wiring that i want. (door switch for interior light).
But struggling with myself where to put door switches.
I would like to avoid drilling thou body columns, door pillars...


I am afraid that it would weaken structure of the body....
So now i am thinking on putting door switch on doors...but then i need to get wiring somehow inside doors less visible as possible. (my silly head)
Rear glass defroster if fixed
Broken places

liquid conductive silver adhesive for fixing broken lines

Can be used to fix broken pins


fixed broken lines

Waiting to put transparent protective foil on glass to protect lines from scratching again.
Companies (in radius of 50km from me) that are putting sun protective foils on glass do not have transparent foil but will get it in next 10 days.
Then i can put rear glass on car...
This time of the year is my top at the work so have to finish that first....long night work hours...(that is problem when you are self-employed)
Some small electrical job is done.
Whole wiring harness is in place now. fuse box installed.
Still need to pull through some additional wiring that i want. (door switch for interior light).
But struggling with myself where to put door switches.
I would like to avoid drilling thou body columns, door pillars...
I am afraid that it would weaken structure of the body....
So now i am thinking on putting door switch on doors...but then i need to get wiring somehow inside doors less visible as possible. (my silly head)
Rear glass defroster if fixed
Broken places
liquid conductive silver adhesive for fixing broken lines
Can be used to fix broken pins
fixed broken lines
Waiting to put transparent protective foil on glass to protect lines from scratching again.
Companies (in radius of 50km from me) that are putting sun protective foils on glass do not have transparent foil but will get it in next 10 days.
Then i can put rear glass on car...


mr-reno-139
AKA Paul Cunningham
- Messages
- 2,279
- Location
- lancing west sussex england
WOW all i can say is what a fantastic job you are making
most of my time on this forum is answering questions you have obviously been really dedicated in your approach to this restoration and this is the first time i've read your section on here
your car will literally be better then when it left the factory but i would be scared to use it in such a pristine condition
it is a good motivation for all of us who have got cars in pieces to follow your work
Tomcat
Enthusiast
- Messages
- 968
- Location
- Milton Keynes
Thank you mr-reno-139....
I am trying to do it as best as possible...and to stay close to original.
That is why i lose to much time and effort to find and get small bits and peaces
I think the attention to detail has been absolutely excellent. The thread has been illustrated with many pictures which have been very informative indeed. Well done and I truly hope you will be more than satisfied with the end result.