Clementine's Garage
Clementine the Cat
 
Image of flower
Yellow R4
 
Réparateur d'automobiles

Restoration 1984 R4 GTL Rutger-peer

Yes I had more than a look even on that side...
But the only effective way to learn is practicing: so I do not weld becouse I am not able, and I am not able becouse I do not weld...
We are used to call it a dog biting his own tail...
But I am confident that one day the needing will make me learn welding too...

Andrea scripsit.

Andrea scripsit.
 
Guys, thanks for the nice words!

The welding on the body is almost finished. I still have to do the wheelarches (started with one today), one windowsill that needs a new liner and one fenderattachment (minor holes). Additionally I have to fill up some small holes. Probably still 2 or 3 days work. Then comes the finishing, grinding off the excess welds. Some pictures:

For the corner in the right rear doorsill I had to put in a new piece of doorstep. If you look good, you can notice it's a different color of yellow. I was lucky to have a spare piece from another car. The rest I grinded out and made new, pretty big amount of work. For the corner for the frontdoor driverside (here, that's the left side of the car), I also was lucky to have a replacementpiece.

The welding isn't great everywhere. I'm an unskilled welder and welding those 0.8mm sheetmetal isn't easy at all. Luckily, I'm getting better and welding the 1.5 mm sheetmetal goes very well by now. The rest will be a lot of grinding, but I'll manage!

Rutger.
 
  • P1080320.jpg
    P1080320.jpg
    46 KB · Views: 1,401
  • P1080326.jpg
    P1080326.jpg
    47.5 KB · Views: 1,420
  • P1080328.jpg
    P1080328.jpg
    43.1 KB · Views: 1,394
  • P1080331.jpg
    P1080331.jpg
    97.6 KB · Views: 1,384
  • P1080338.jpg
    P1080338.jpg
    76.2 KB · Views: 1,383
  • P1080340.jpg
    P1080340.jpg
    82.4 KB · Views: 1,383
  • P1080347.jpg
    P1080347.jpg
    58 KB · Views: 1,383
  • P1080348.jpg
    P1080348.jpg
    81.7 KB · Views: 1,390
  • P1080351.jpg
    P1080351.jpg
    54.9 KB · Views: 1,777
  • P1080355.jpg
    P1080355.jpg
    56.9 KB · Views: 1,374
Lately I haven't done much updating but here I am again. I finished all the welding on the body and started with applying the polyester putty (filler). I also bought me some 2k epoxyprimer and some 2k surfacer. I plan to only spray the spots where the bare metal is exposed with epoxy and then the surfacer. The rest of the body will simply be sanded with 400 grain and later probably 800 grain. Some parts I will sandblast to get rid of every single bit of rust. I also got me some new parts (backlid, bonnet and radiator).

The major filling-parts of my car are the underneaths of the rearwindows. The passengerside was fully wrinkled. I had to put on a full patch of filler to smoothen it out (and ofcourse I still feel small waves in the filler, can't get it more smooth than it is now). On the front there are also parts on either side that need to be filled, you'll see in the pictures.

I also started with the doors. One was dented all over so that needed a big patch of filler as well. Also there, I couldn't get it totally flat, if you move your hand over the surface, you feel a few waves in the surface. But I guess it'll have to do like this, otherwise I'll never get finished. I learned that when a panel has a lot of dents or has lost it's shape altogether, you just need to put filler on all over the surface and use that as the surface you're going to put the "line" back in. Just filling the holes doesn't nearly do the job and will leave you with a poor result and a few very frustrating hours of work.

I also uploaded a few pictures of the newly welded-in parts in the wheelarches.

As for the passengerside frontdoor, I welded in a reinforcementpiece for the side-mirror. It was just bolted on the door with two little bolts and that made the platework distort. That will not happen anymore with my reinforcement.

Anyway, tomorrow I'll continue the filling and sanding. Hopefully apply the epoxy one of these days.

Regards,

Rutger.
 
  • P7120084.jpg
    P7120084.jpg
    44.1 KB · Views: 1,116
  • P7050082.jpg
    P7050082.jpg
    45.8 KB · Views: 1,106
  • P7120085.jpg
    P7120085.jpg
    37.4 KB · Views: 1,101
  • P1080379.jpg
    P1080379.jpg
    47.3 KB · Views: 1,093
  • P1080380.jpg
    P1080380.jpg
    55.7 KB · Views: 1,105
  • P1080388.jpg
    P1080388.jpg
    56.2 KB · Views: 1,105
  • P1080381.jpg
    P1080381.jpg
    56.4 KB · Views: 1,095
  • P1080383.jpg
    P1080383.jpg
    38.8 KB · Views: 1,100
  • P1080386.jpg
    P1080386.jpg
    44.2 KB · Views: 1,101
  • P1080393.jpg
    P1080393.jpg
    57.1 KB · Views: 1,095
Hi all, a friend op mine has been helping me out the last 6 days so we made quite a lot of progress. In the meantime everything has been plastered (is that correct english for applying polyester putty?) and I sprayed all the bare parts with 2k Epoxyprimer. We cleaned the wheelarches, as well as every part of the underneath, then we sprayed 1k black paint underneath, 2 coats. After that we put the body back on the chassis with mastic in between.

The main problem was (still is) the alignment. The body and the chassis are both originating from different cars and I guess that's the reason why not all the holes for the bolts are coming together precisely as they should. Is this a well known problem with bodyswaps or am I the only one with this shitty problem?. As for now, we put in as many bolts as we could and I plan to widen the original holes on the body, so that I can still fit the bolts in and use some big rings to cover up the fact that they don't allign properly.

The second problem is that the chassis-backbeam we've been welding on, is slightly bent downward in the rear, I guess just where the new part is welded in, so the rear of the bootfloor on the passengerside isn't totally leaning on the chassis (though it's sealed and all). I'll show a picture.

Please let me know if more of you guys are familiar with problems of this kind, I feel kinda bad about it.

Next thing is fitting on the inner wings, as well as fitting the breaklines. Fitting the breaklines may turn out tricky but I picked this order of doing it on purpose, since I now know where the master breakcilinder is supposed to be at, so I can put the breaklines in the right place at once.

We've been sandblasting some parts as well, that might explain the tent-like creation in the picture ;).
So far.
 
  • P1080434.jpg
    P1080434.jpg
    58.4 KB · Views: 1,184
  • P1080443.jpg
    P1080443.jpg
    63.3 KB · Views: 1,182
  • P1080442.jpg
    P1080442.jpg
    61 KB · Views: 1,181
  • P1080425.jpg
    P1080425.jpg
    56.2 KB · Views: 1,348
  • P1080446.jpg
    P1080446.jpg
    69.8 KB · Views: 1,185
  • P1080447.jpg
    P1080447.jpg
    69.8 KB · Views: 1,244
Fitting a body on a different chassis can cause problems with some of the mounting holes in the middle of the boot floor. The other holes should match. The body sides on mine needed to be pulled inwards (they are quite flexible). I lowered the body down using screwdrivers through the holes in the body into the holes in the chassis. The original mounting bolts with a thinned down end are a great help in locating the body.

For the rear chassis member there wasn't much metal left on yours so likely welding has pulled it out of shape. A jack under the end ought to pull it into place if it's not far wrong.
 
Thanks Azazello for the compliments.

Malcolm thanks for the advice.

We did use some pins etcetera (a tip of yours) to make sure it went in the right place but some of the holes I had to re-drill because I put new patches of metal in, so one of those isn't in the right place. The two mounts underneath the heating we had to persuade into place a little by pushing with a rod from above, maybe that part bent a little from having pressure on it for a year (as it has been sitting on it for that long). In the front, I couldn't get a bolt in the first mountinghole passengerside, it's slightly misalligned but I should be able to get one there. Indeed none of the bootfloor ones did match the holes on the chassis.

Yesterday I had another look and it wasn't as bad as I remembered. Maybe that backbeam is bent a little but I had put on some clamps on and after removing those, the backbeam fits quite well. No problem I guess.

Now the only thing is that, since we put so much sealant underneath, the body doesn't totally hook up with the chassis in the places we weren't able to pull it downward with the bolts since the holes didn't line up.

Anyway, I'll have to make do with that. I guess every project has some kind of major issue which makes you feel bad for a while and in my case this is the one ;).
 
A few pictures for those of you who have been wondering what the hell I've been doing and the ones who might have worried I gave up ;).

We've built a sprayingcabin made of see-through plastic draped over wooden planks suspended from the ceiling. I had a few fans blowing the air out through a split between those two enormous doors.

The paint I've been spraying today is the filler. I only applied it to the places where I have been filling dents with polyester putty, after I applied 2k epoxyprimer onto the putty and the surrounding bare metal, as well as other places I just removed rust from.

Anyway, from now on it will be a matter of sanding it all down to prepare the car for the final coat.

And yes, I have been wearing a special paintingmask ;).
 
  • P1080450.jpg
    P1080450.jpg
    36.1 KB · Views: 1,006
  • P1080460.jpg
    P1080460.jpg
    55.7 KB · Views: 1,007
  • P1080461.jpg
    P1080461.jpg
    47.4 KB · Views: 1,002
  • P1080463.jpg
    P1080463.jpg
    52.4 KB · Views: 1,001
  • P1080464.jpg
    P1080464.jpg
    54.3 KB · Views: 1,002
  • P1080468.jpg
    P1080468.jpg
    43.9 KB · Views: 1,003
  • P1080469.jpg
    P1080469.jpg
    30.4 KB · Views: 1,016
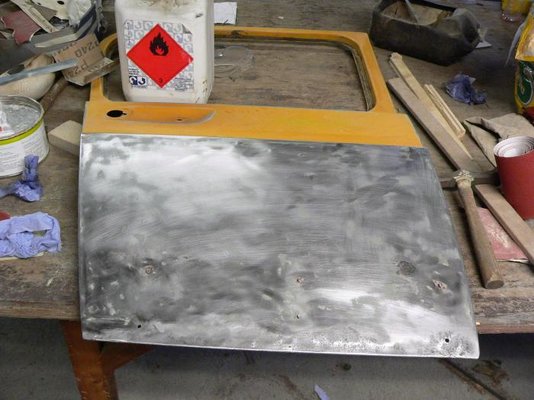
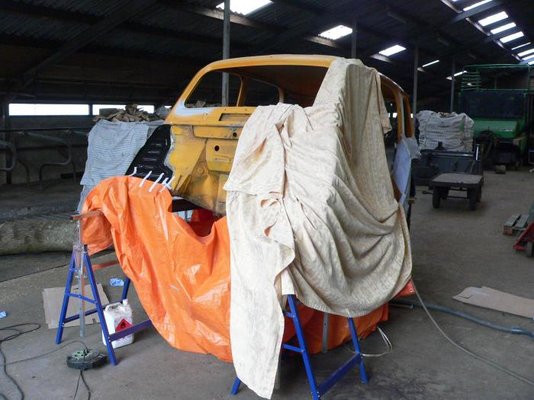
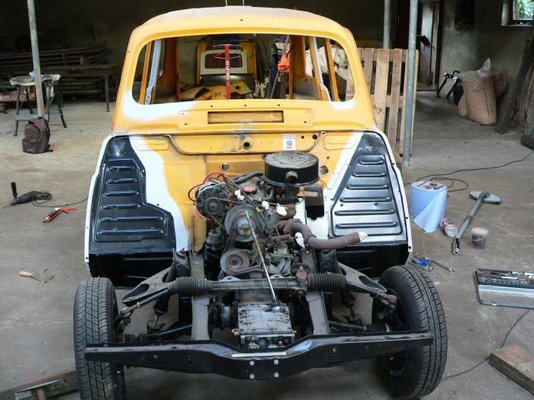
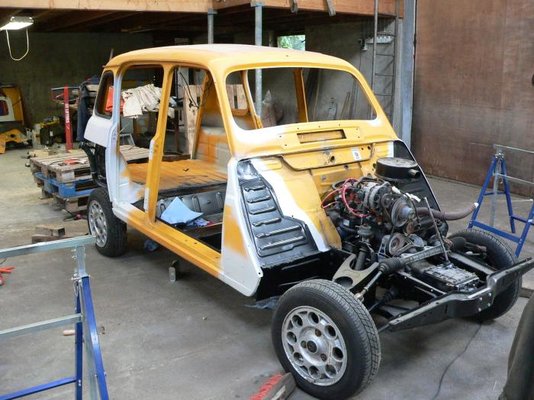
Okay, since the last post a lot of things have changed.

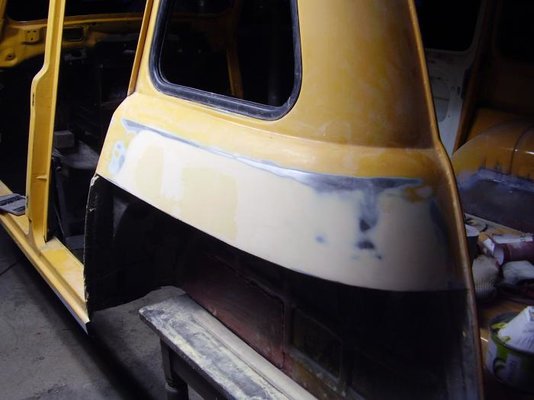
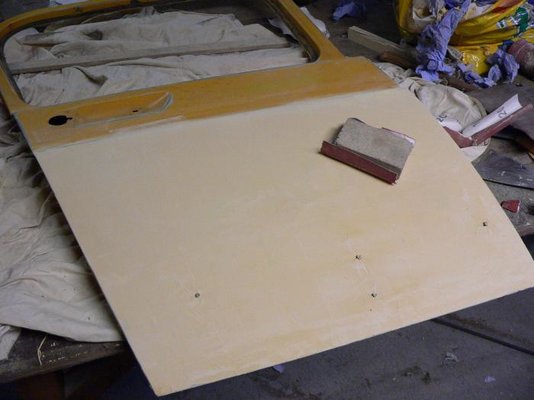
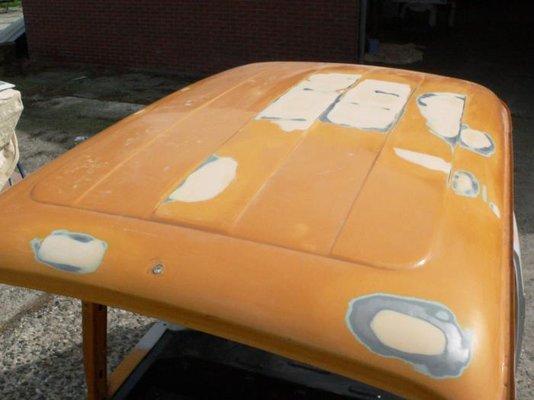
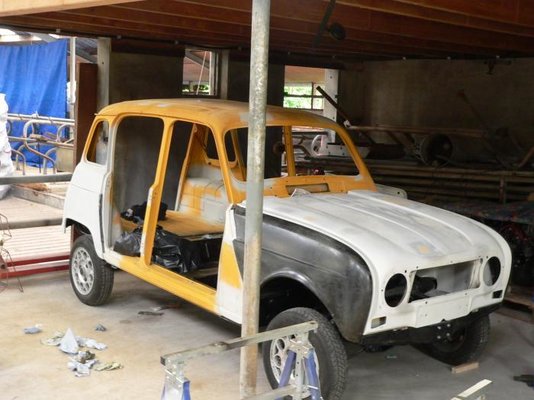
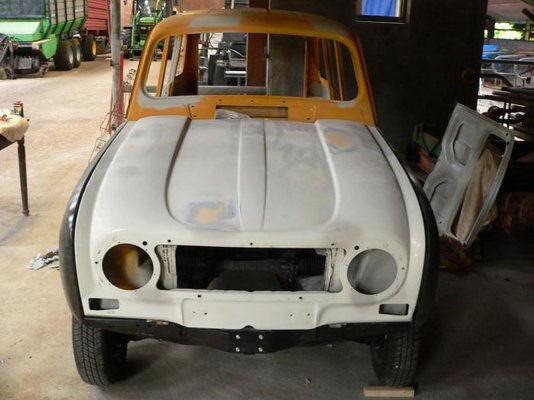
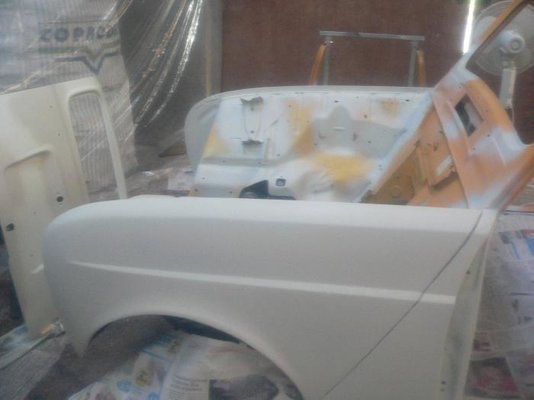
The last picture I posted shows the car with the taken care of-parts already in the epoxyprimer and a coat of filler. In the end I decided I wanted the whole car to be sprayed with filler to avoid colour-differences between the parts that were covered with the white primer and the parts that were still in the original colour. So therefore I bought another can of filler. That I sanded down with grid 600.

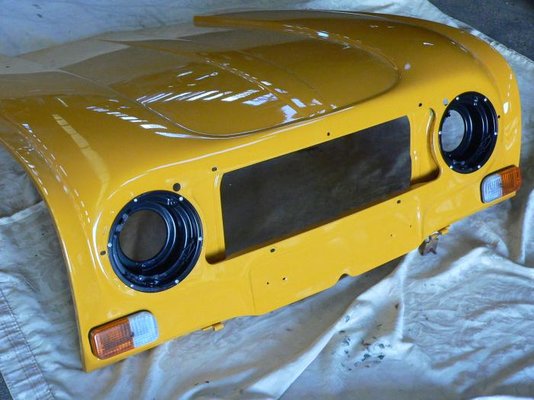
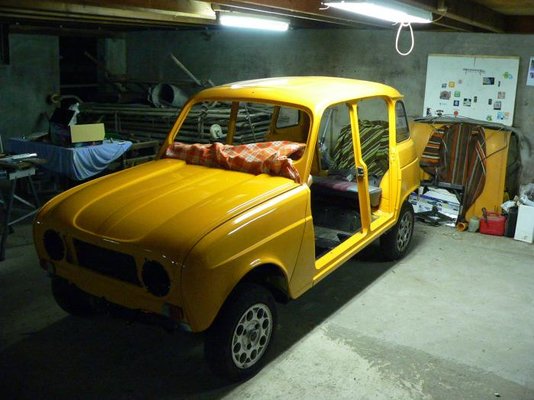
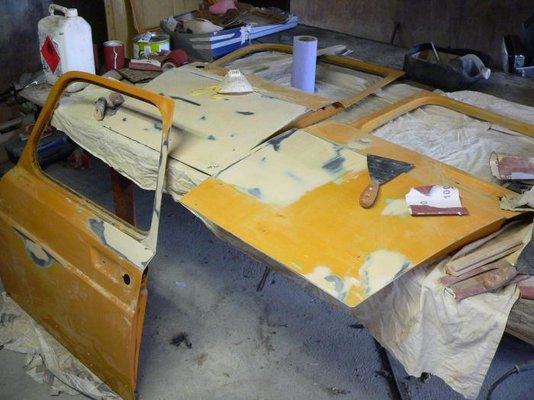
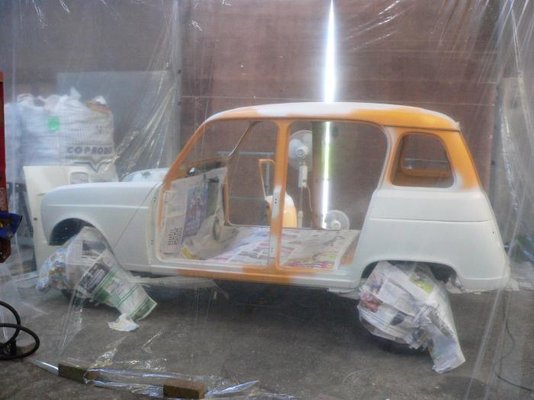
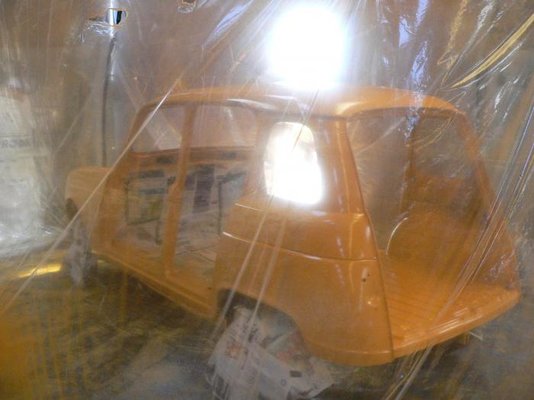
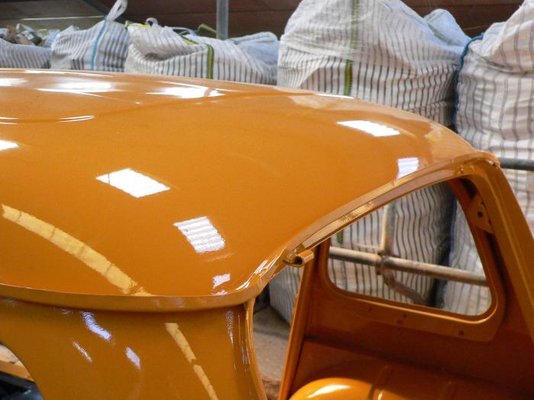
First I sprayed the bonnet, doors and the backlid in the orange paint. It turned out to be a disaster. I got orange peel all over. I kinda thought about it, figured out I would have to apply one thick coat of paint at once, not several thinner coats since that 2pack paint doesn't stay fluid for very long, actually, as soon as you spray it on, it's pretty much not flowing anymore, so when you apply more, the drops of paint don't merge with eachother anymore and what you end up with is an orangepeel finish. So I sanded all that down again with grid 600, then did it all over again together with a friend to make sure we did it right. That turned out pretty well actually!

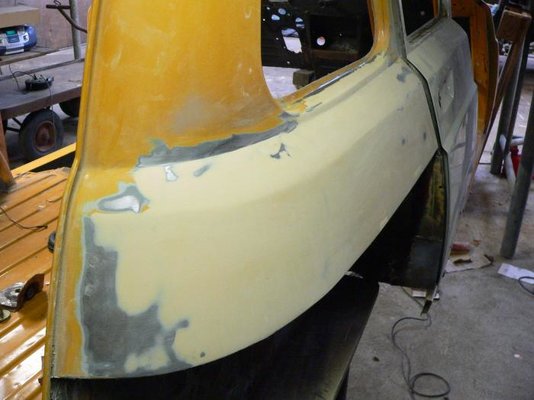
Then we also did the body and we did a good job on that one as well but after a good look I found out some parts were still only covered in a very thin coat of paint, so I decided to get me some more paint and be bold once more. I sanded the whole body down again with 600 grid and repainted it.

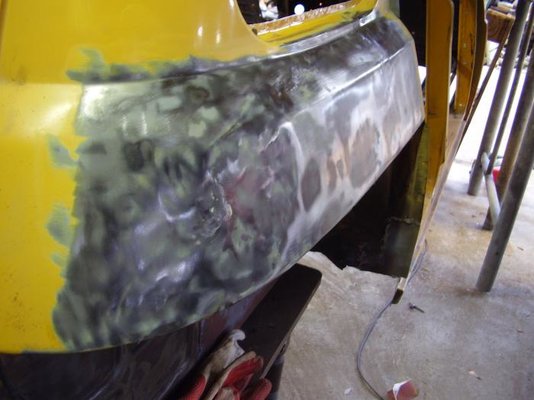
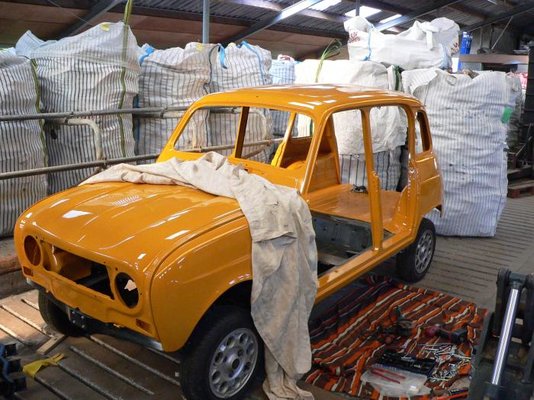
The first coat was pretty good, had a few drippers but not too bad. The second time I got a little overcourageous and had a few more drippers and a few very bad ones along the total length of the panels too. I will have to sand them down and polish those parts again. One other kind of little issue is that you can see the sanding marks through the final coat (so the sanding i did between the two colourcoats). That kinda sucks but isn't too bad either.

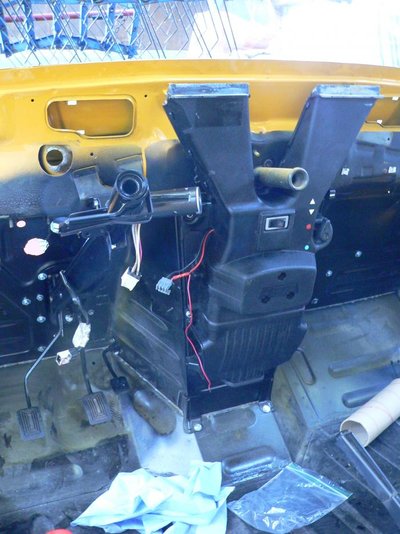
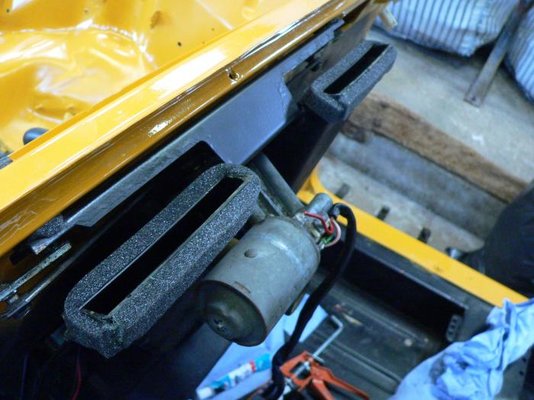
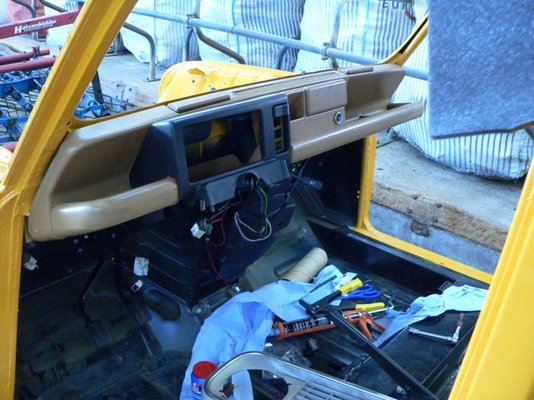
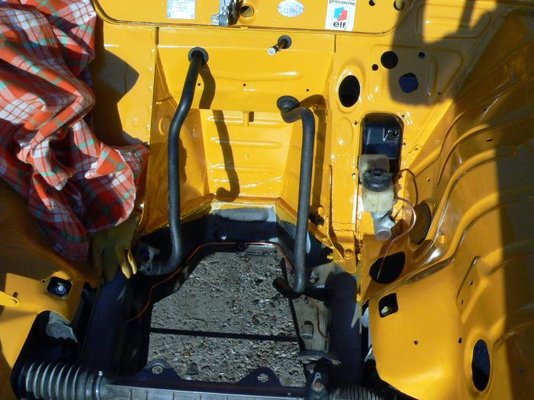
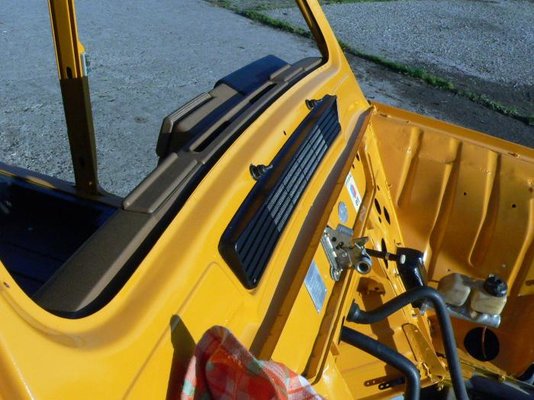
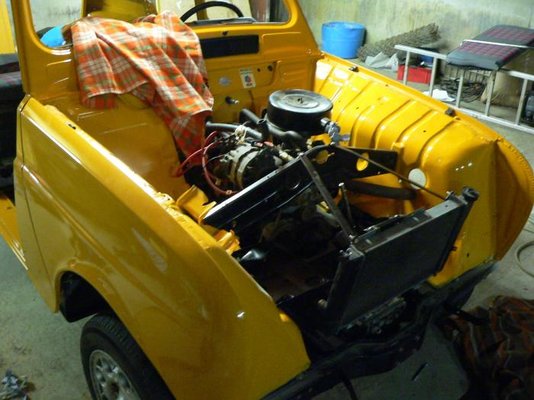
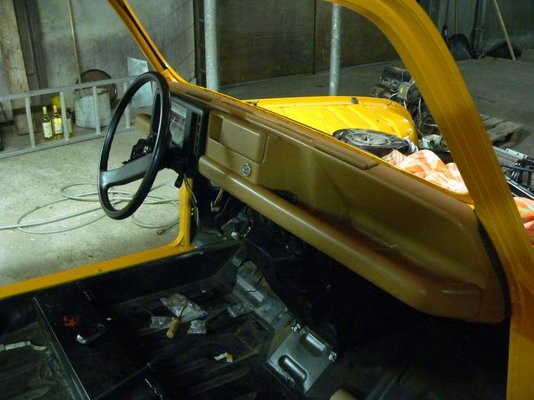
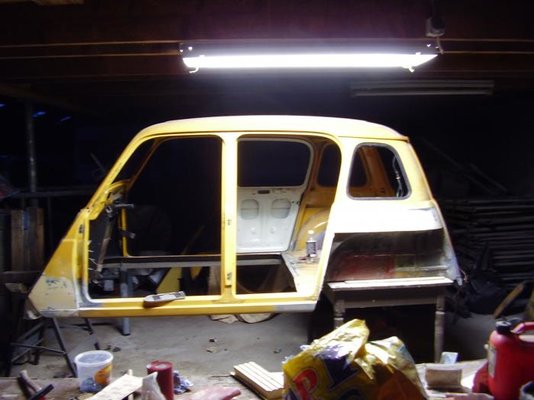
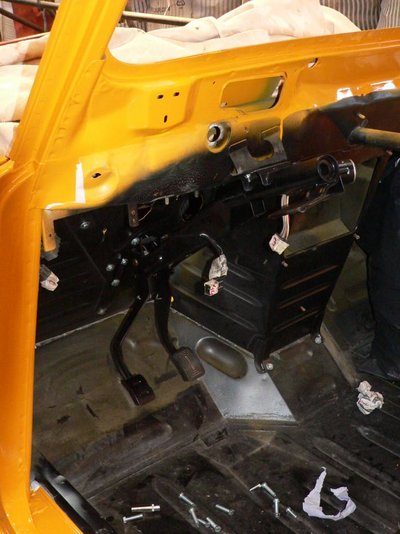
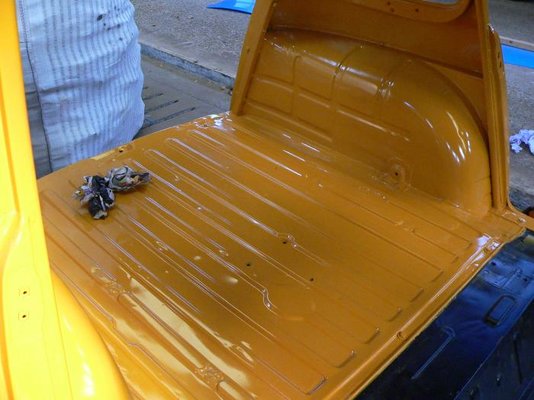
I installed the pedals and the backwindows. I also applied the seals between the body and the fenders.

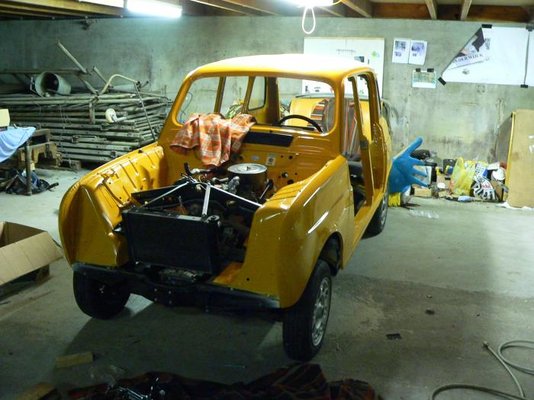
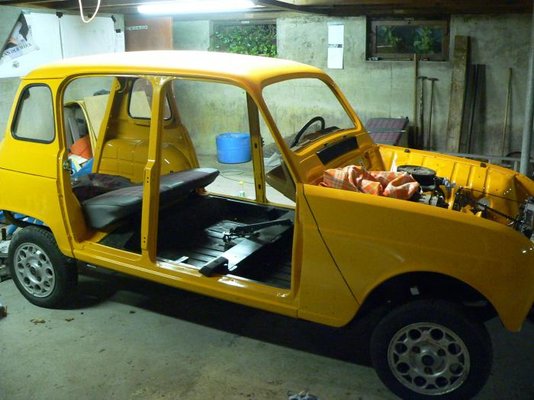
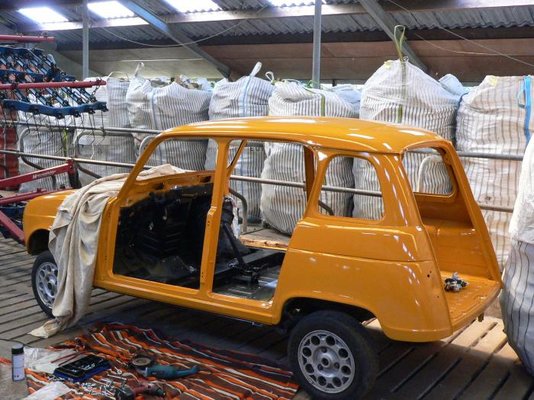
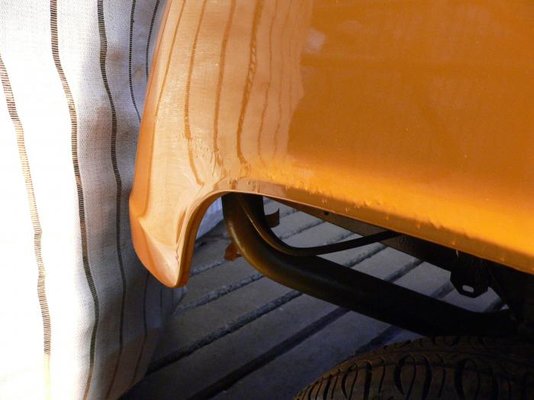
Here's some pictures of the whole thing, as well as some closeups of the finish and the drippers.

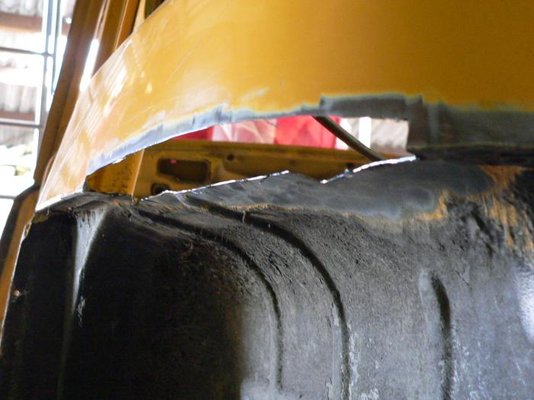
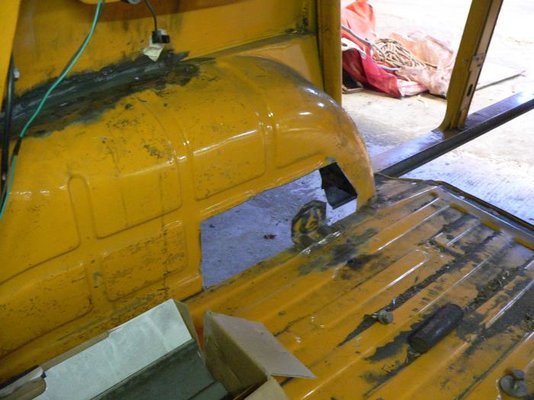
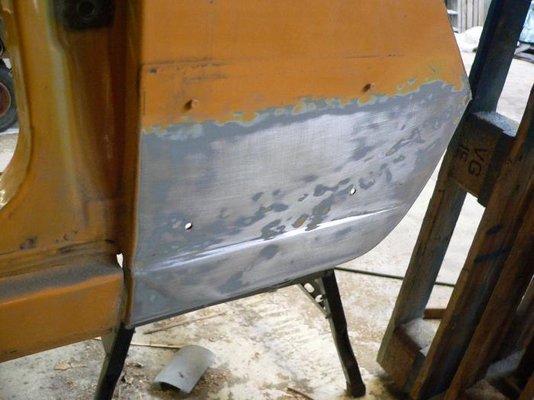
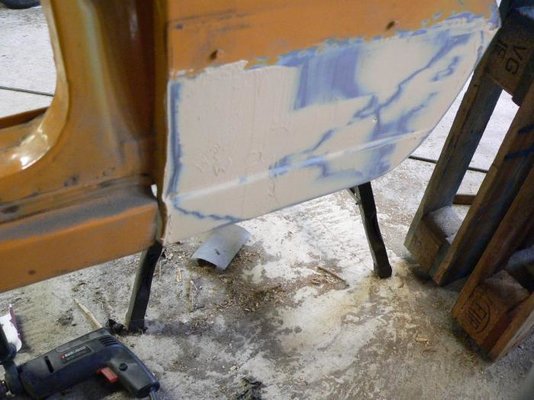
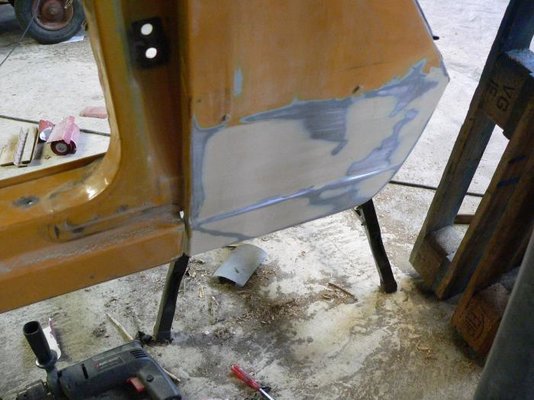
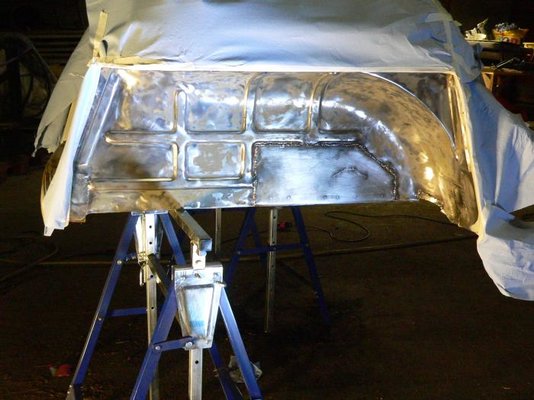
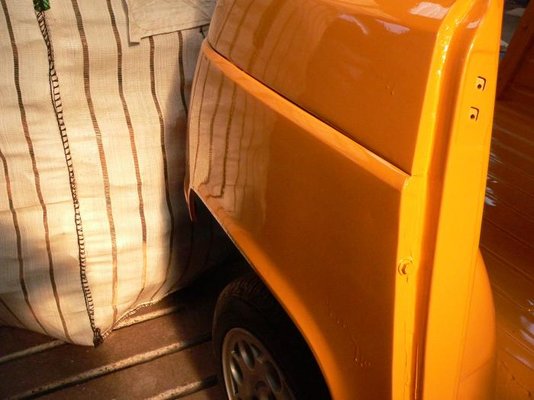
Also, I think it's pretty cool that I have a modified wheelarch!
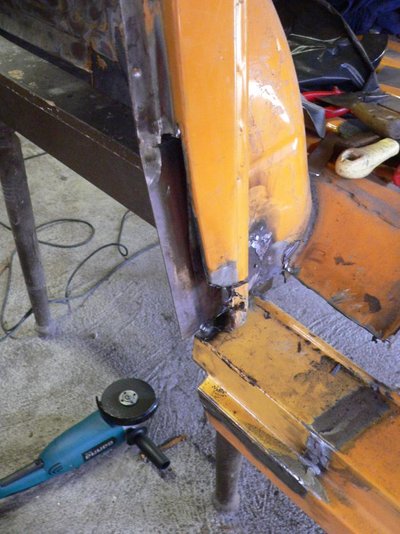
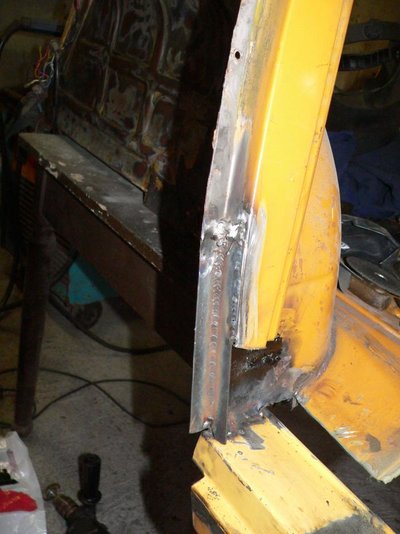
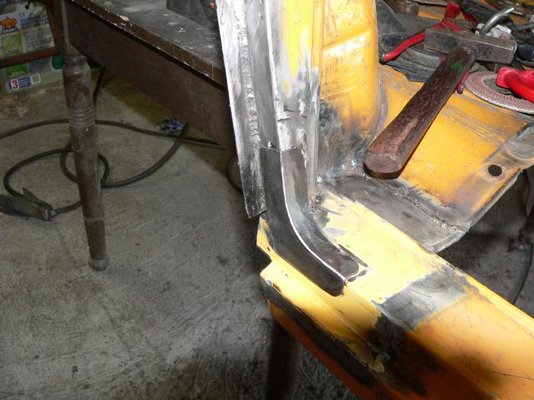
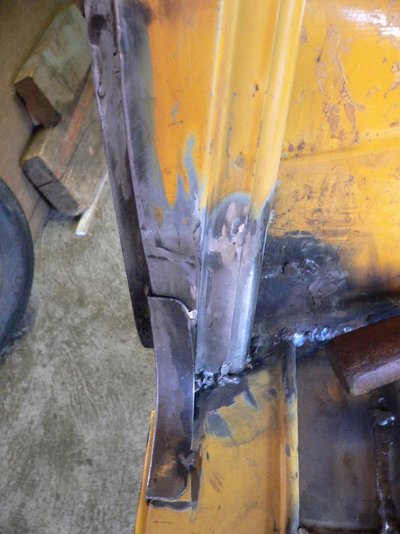
 ;) 
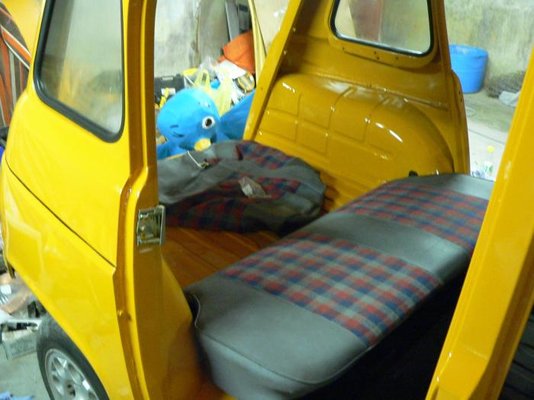
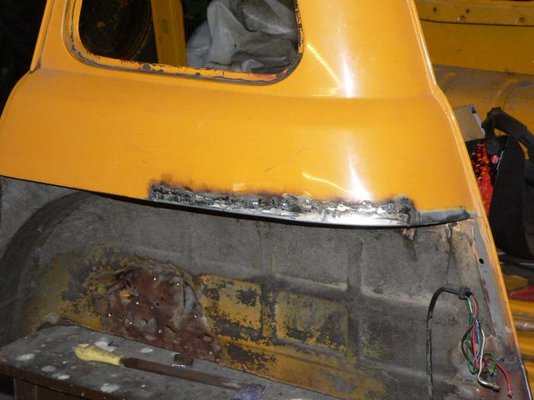
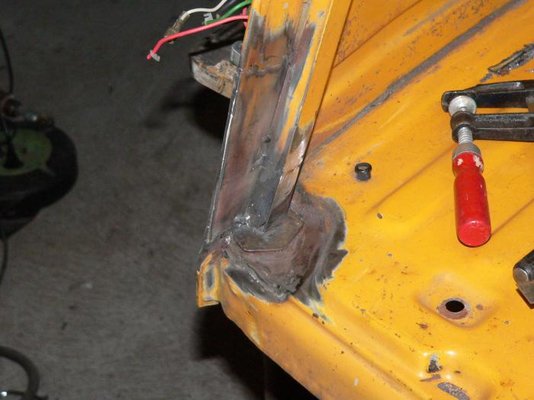
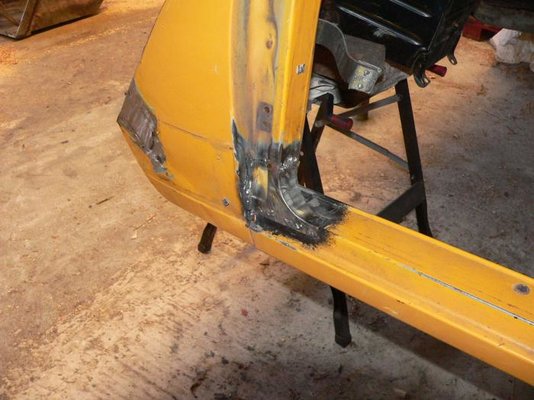
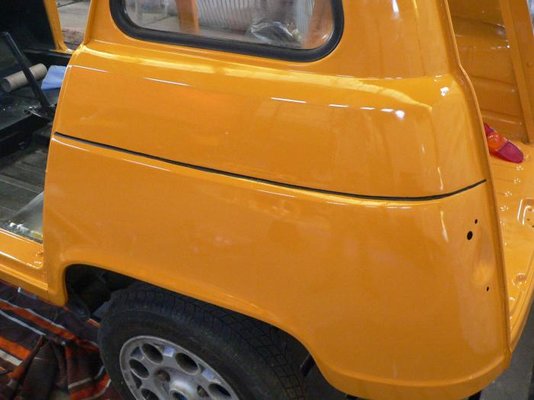
In other words: check out the repair I did in the seatbeltattachment-area in the back of the car, it nearly looks like it's straight from the factory but reveals a slight change in design ;).

I'll keep you guys updated!

Greetings,

Rutger.
 
  • P1080471.jpg
    P1080471.jpg
    39.4 KB · Views: 1,062
  • P1080484.jpg
    P1080484.jpg
    78.4 KB · Views: 956
  • P1080485.jpg
    P1080485.jpg
    80.5 KB · Views: 986
  • P1080486.jpg
    P1080486.jpg
    46.2 KB · Views: 932
  • P1080487.jpg
    P1080487.jpg
    81.1 KB · Views: 943
  • P1080488.jpg
    P1080488.jpg
    35.8 KB · Views: 929
  • P1080491.jpg
    P1080491.jpg
    50.8 KB · Views: 1,329
  • P1080493.jpg
    P1080493.jpg
    46.6 KB · Views: 935
  • P1080495.jpg
    P1080495.jpg
    39.6 KB · Views: 940
  • P1080496.jpg
    P1080496.jpg
    40.5 KB · Views: 942
Amazing job, for an amateur without spray booth. Congratulations!

You can try flatting the drips and polishing them this may save you from respraying, but even then, you won't need to do the whole car again.
 
That's looking so good Rutger, and what a brilliant colour. As Angel suggests, if you give the paint a chance to harden off and flat the runs with 1500 grade wet n dry or even 2000 grade, and finish off with cutting compound, they should disappear leaving a near perfect finish. I too have sprayed cars in garages and sheds, and it's quite amazing what finish can be achieved by us enthusiastic amateurs. Well done. Like those wheels too.:cool:
 
Hey Angel and Conish4, thanks for the compliments! I plan to take care of those runs after I put the car together totally. A friend of mine's got a polishingmachine which I'm allowed to borrow, as well as some polishing fluid, so that should do the trick.

I like the colour too. I was also stunned by what those black windowsills can do and those seals between the body and the fenders. Those black accents give the colour an even nicer teint.

So, I promise I keep you guys updated a little better from now on, during the NICE work ;).
 
Yes putting all the shiney bits back on the car is definatley the best part of a restoration, but take your time, don't scratch that lovely paint. I'm sure the end result will look stunning.:smile:
 
Just a short update. I installed the heater, the dashboard, aswell as some other interiorparts. A few pictures.
 
  • P1080645.jpg
    P1080645.jpg
    54.2 KB · Views: 1,312
  • P1080646.jpg
    P1080646.jpg
    94 KB · Views: 1,363
  • P1080647.jpg
    P1080647.jpg
    57.4 KB · Views: 1,313
  • P1080648.jpg
    P1080648.jpg
    47.1 KB · Views: 495
  • P1080650.jpg
    P1080650.jpg
    66.9 KB · Views: 1,365
Yesterday I put the enging back in, fitted the steeringstuff, as well as the radiator, batterystand and some more enginebay-parts. Also fit the airinlet beneath the frontwindow, and some more things. Also fitted the brakeline that runs behind the engine first, that would have been a pain in the ass to fit if the engine had already been in place.

Rutger.
 
  • P1080662.jpg
    P1080662.jpg
    64.4 KB · Views: 1,172
  • P1080663.jpg
    P1080663.jpg
    64.3 KB · Views: 1,156
  • P1080664.jpg
    P1080664.jpg
    65.1 KB · Views: 1,155
  • P1080665.jpg
    P1080665.jpg
    55.3 KB · Views: 1,148
  • P1080666.jpg
    P1080666.jpg
    59.6 KB · Views: 1,149
  • P1080667.jpg
    P1080667.jpg
    56.7 KB · Views: 1,147
  • P1080668.jpg
    P1080668.jpg
    52.8 KB · Views: 1,148
  • P1080669.jpg
    P1080669.jpg
    46.5 KB · Views: 1,185
  • P1080670.jpg
    P1080670.jpg
    58.1 KB · Views: 1,147
  • P1080671.jpg
    P1080671.jpg
    56.3 KB · Views: 1,163
Back
Top