JonathanT
Not normal for Norfolk
- Messages
- 1,335
- Location
- Wymondham Norfolk
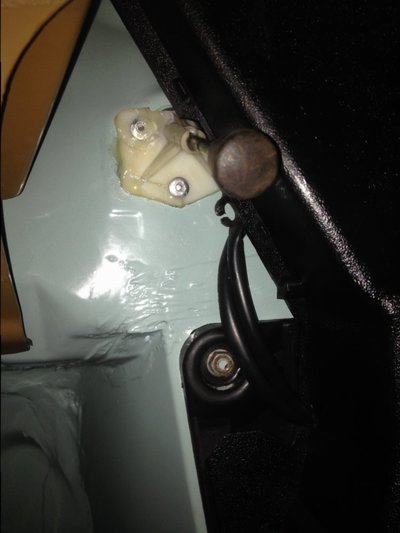
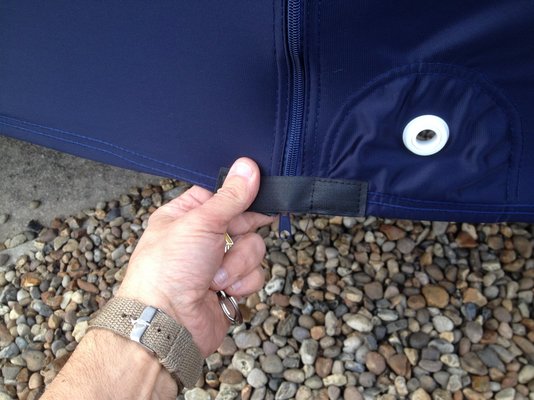
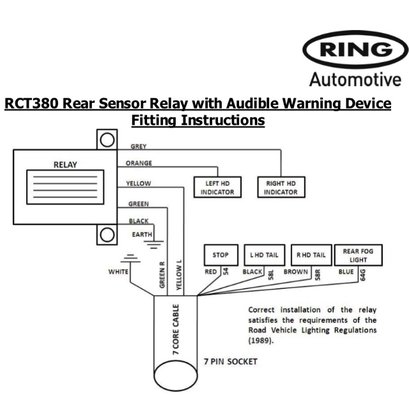
Yes you can do that but it's probable you will have a nest of wires visible through the lens and will be compromising the fit of the lens. I made connections on the inside in the corner above the inner rear wing and below the boot lid Spring. The relay repeater which peeps to confirm your indicators are working is then audible within the car. From beneath the wing on that side I have one sheathed set of wires to the rear light and another set of sheathed wires to the towing lights socket which is hidden on the underside in my case

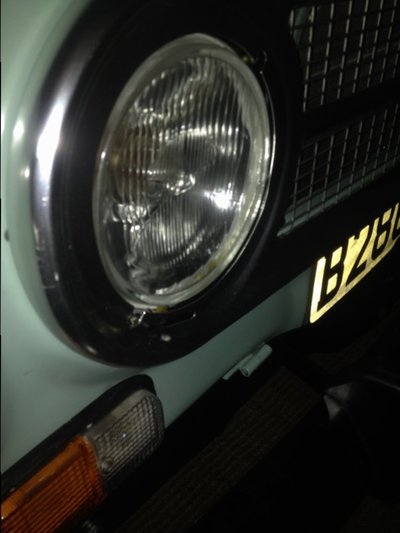
 The other job was the headlights which were too high and I've had several people flash me. Loathingly I had to take the front grill off then a bit of fiddling and for some reason both headlights seem to click down at the bottom edge. I still don't know why this should be because I studied it really carefully. Nonetheless I'm happy with the gift of a click and now the headlamps seem to be much better