Tedious dull stuff before paint (and all the bits I forgot to do earlier)
It's the worst part of a restoration. In most other parts you can see progress at the end of a days work. The bit before paint just goes on and on with no apparent reward. Yet it's one of the most important parts as it will determine how nice the paint ends up. But first the bits I've forgotten.
From there it's onto the body filler for weeks on end. Renault 4 panels are thin and flat and easily dented, especially when they've been knocking around on un-loved cars for the last 40 years.
There's a modification I'd been planning to make to the front door frames but hadn't got around to. But it'll need doing before paint.
Wind noise from the front door pillars has always been an annoyance. It cuts in at about 100km/h when the low pressure air outside the car pulls the door frame outwards and breaks the door sealing.
A quick look inside the door frame reveals a handy box section that doesn't extend as far as the upper frame. In the photo I've cut open an old door frame for use in making a pattern for a reinforcement to join the upper frame to the hinge box section.
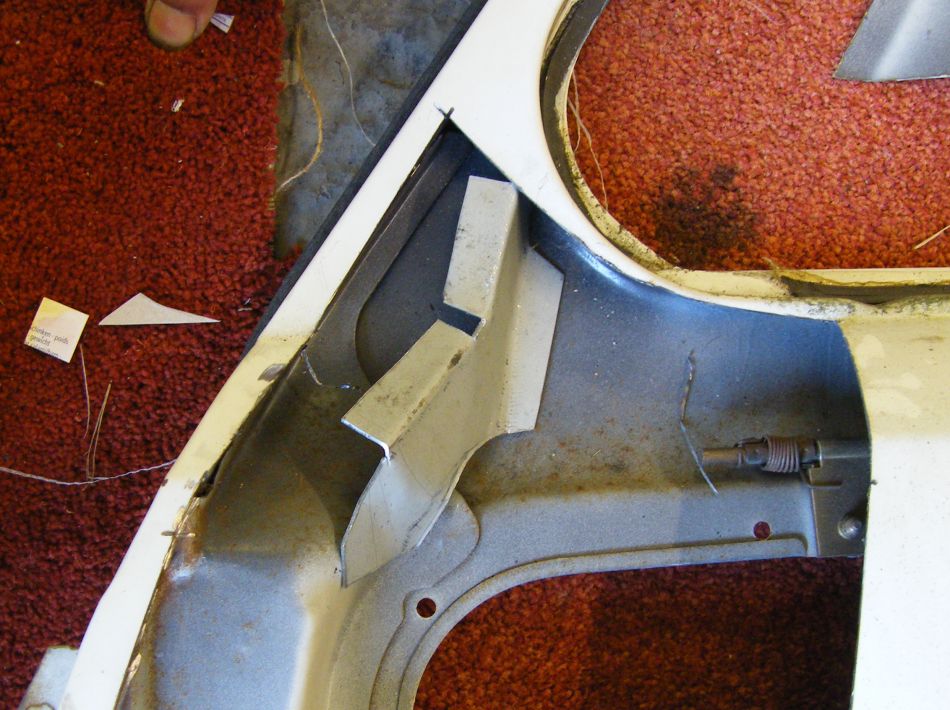
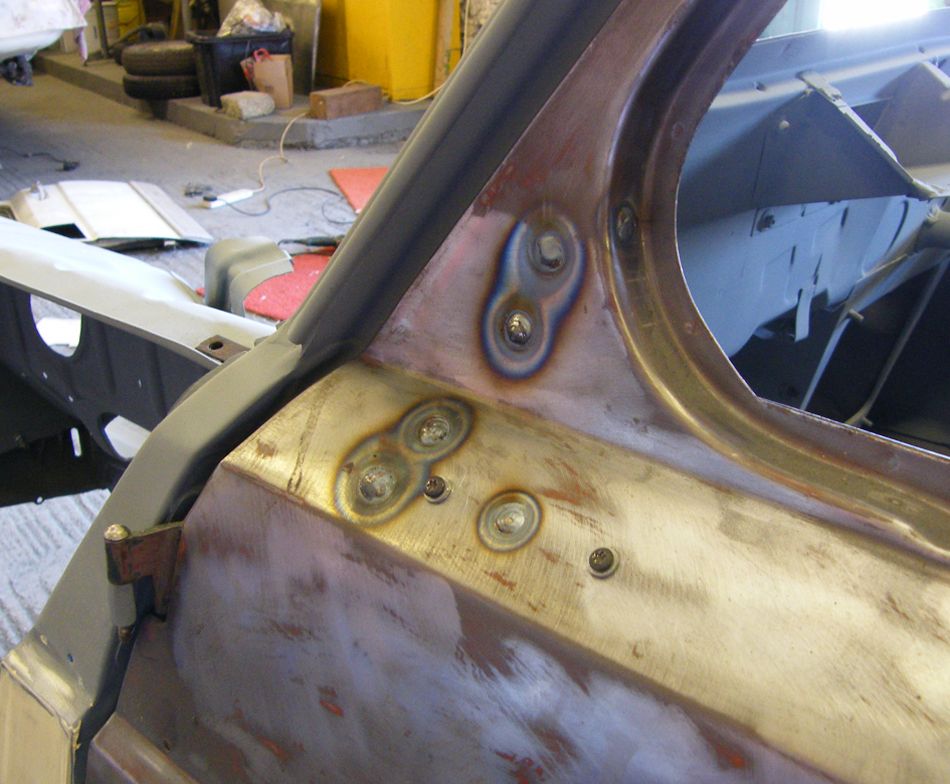
The new section slots into the front of the door without the need to remove any of the panel - it's plug welded through holes drilled in the door skin.
The mirror mounting plate would get in the way on later cars. I fitted mine after the reinforcement. The early cars didn't originally have mirrors mounted on the doors, but it does seem to be a sensible spot for them.
The modification appears to make a significant improvement to door stiffness - maybe doubling the stiffness of the front of the door frame.
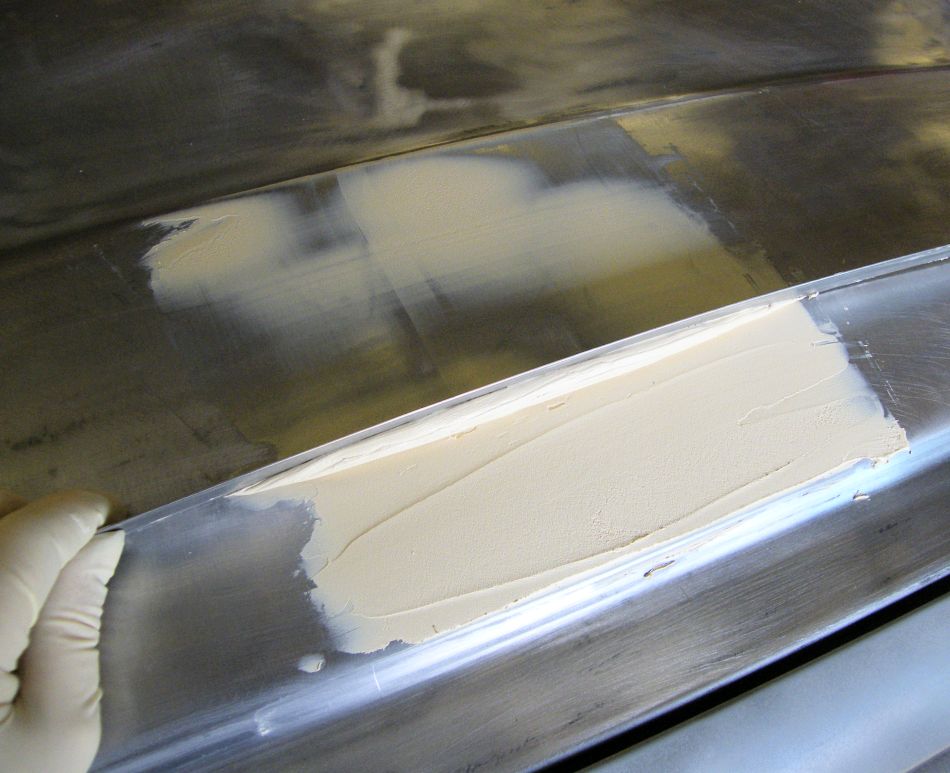
I have rather a lot of filling to do. I had attempted a little panel beating in places to correct the fit of some of the more stubborn panels.
The photo shows a surprisingly quick way to fill panels. This, and everything else you'll need to know to get the car paint ready are detailed on the mig welding site page about car body filling.
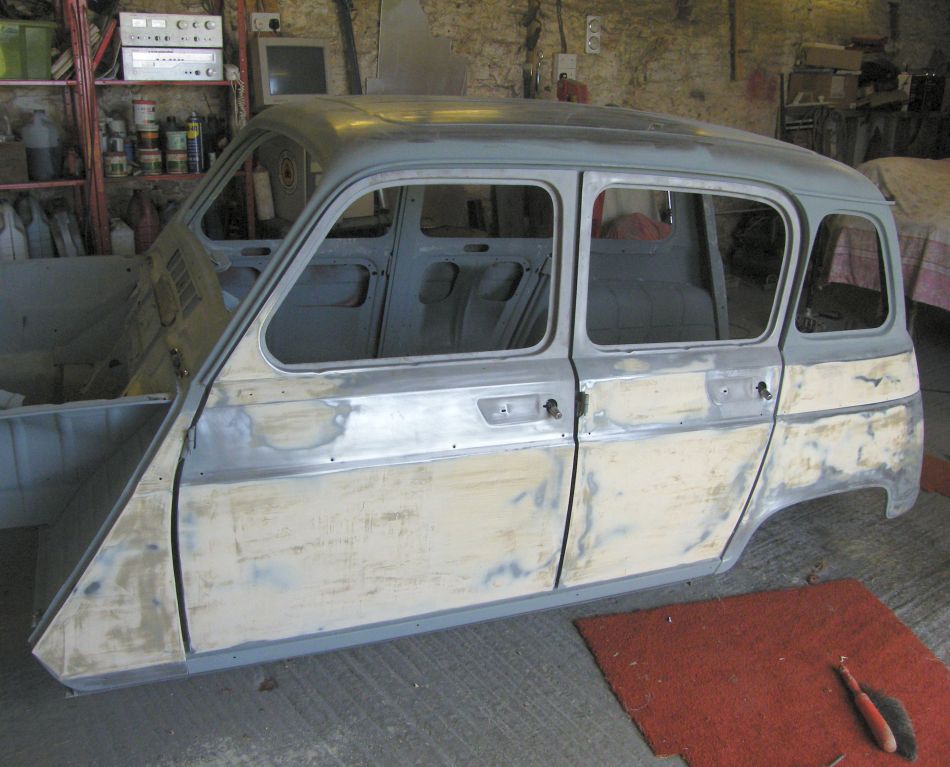
Panel alignment is another of those things that can't be put off any longer. There are 10 detachable body panels on a Renault 4 in addition to the shell, and the factory left plenty of room for adjustment in the half inch panel gaps. (The side windows are in place to add a little weight to the doors and to check they fit. I'm going for the later plastic window frames rather than the early rusty ones.)
But those aluminium trim strips show up the slightest misalignment, so a great deal of thought went into aligning the doors. Then the nerve racking experience of drilling holes in the front wings and rear upper wings and hoping the strips would line up.
A tip for the front wings: The bolts aren't in the right place, but if you need to raise the front of the wing then slacken off the inner wing mountings, bolt the outer wing to the inner wing, then tighten up the inner wing mountings. That'll pull the top of the outer wing closer to the top of the bulkhead. Only works when the inner wing has already been removed from the car and isn't stuck in place with sealant.

I've gone a bit mad with the doors. Renault originally left them where they fitted, so I decided to spend a little time evening up the panel gaps. The gaps should all be about 11mm or 12mm.
Later cars have hidden hinges which can be slackened or moved. For the early external hinge cars the hinges can be persuaded using a heavy hammer. Be sure to remove the door when hitting the hinge, otherwise the springing in the hinge is enough to put a big dent in the door panel before it bounces back to where you want it. The door height is set by washers on top of the hinge.
Plenty of filler in this car. The rear wing in the photo was new old stock and has been bouncing around collecting dents. The rest of the wings are new and don't need any filler (apart from the one I dropped). Incidentally, a tip for the rear wings: If they don't fit high enough the upper mounting flange can be carefully bent to an angle by hand without damaging the wing.
The front wings and bonnet were a pain to align, partly I suspect because I welded the front crossmember in place about 6mm too low. Alignment improved a great deal with 6mm spacers under the bonnet hinges.
This is the first time all of the panels were trial fitted to the car with all of the fixings in place. A good reminder to drill the holes for the bolts through the front of the inner wings. Plenty of filing of holes was required to make things fit a little better. The results aren't perfect, but part of the character of these cars is from the panels not fitting perfectly, and in any case I was getting fed up. Time now for paint!
Next: seam sealing. Or back to the Gordini Project


