Body Repairs
Every restoration project has it's low point. Sometimes it arises when all the jobs you've been putting off really have to be done. All at once. Other times you have a series of disasters, and nothing else in life goes right so you aren't in the right frame of mind to continue. In either case abandoning it for a while and fiddling with other things seems to work for me.
Painting didn't go very well at all - the final coat developed fish eyes. I share the garage with the source of the contamination, so the car needed to be finished elsewhere. A local painter rubbed the car down (annoyingly using a dual action sander which left circles in the final finish) and repainted the top coat for £500. Organising trailers and tow cars to deliver the car to the painter was infuriating, and he couldn't start before October then took longer than planned, but he did mostly fix the fisheyes.
I collected the car in late November 2008. But I didn't secure the body properly onto the chassis and it jumped on a pothole damaging the sill. The project had become no fun, so it was abandoned in a lean-to. By this point I'd bought Ornella, a lovely 1965 Renault 4, so spent the winter on mechanical fettling.
Of course while Ornella is lovely she is also very,very slow. A three speed gearbox mated to a 750cc engine is not going to set the road on fire. That's the Gordini's job. And being blessed with free time this year I've been itching for project.
In the photo the lovely Yvette tows the immaculate (if slightly battered) Gordini into the sunlight for the first time in 6 months.
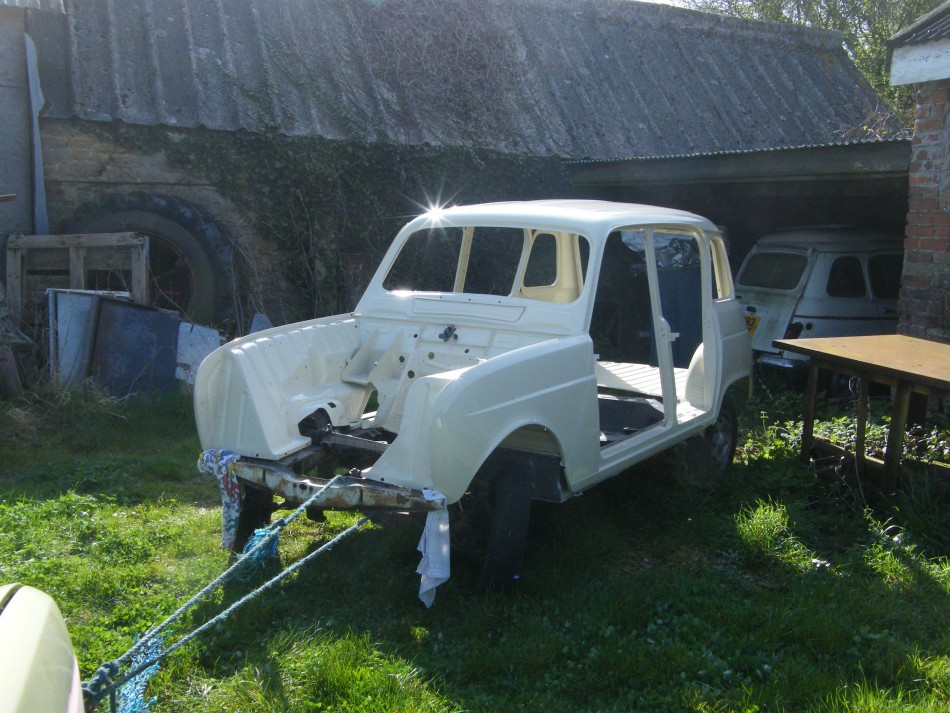
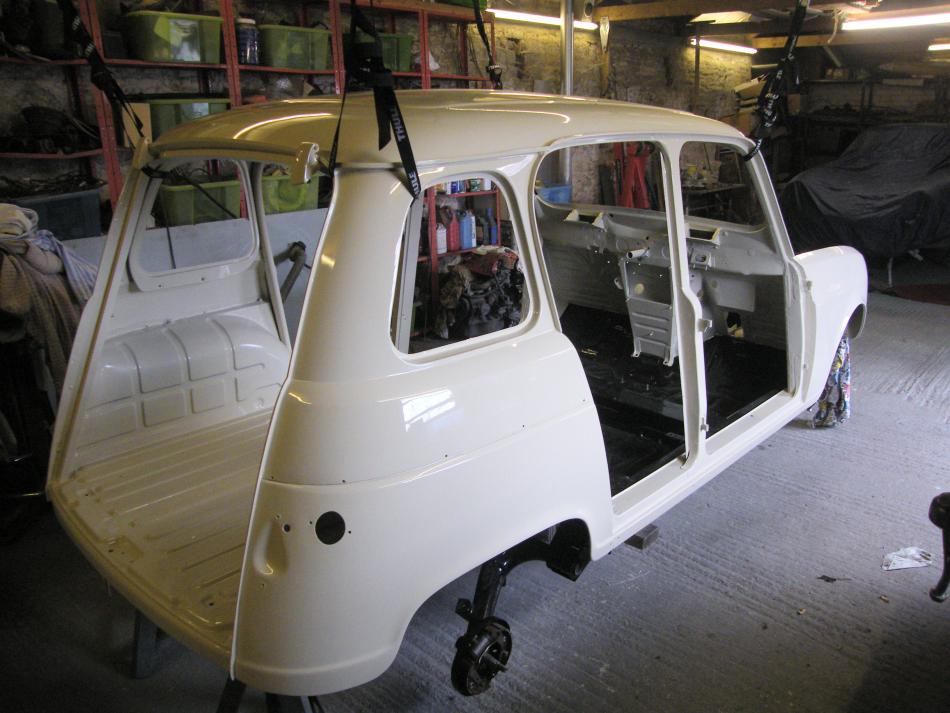
The damage wasn't as bad as I had remembered. The rear of the sill was bent on one side, and there was a small dent in the bottom of the rear wing on the other side, and a couple of other points needed resealing or touching up. In my mind I'd been visualising cutting out and replacing huge sections.
There was not enough access with the body mounted on the slave chassis so off to the shops to buy 4 incredibly expensive Thule straps to suspend the body from the roof without damaging the paint.
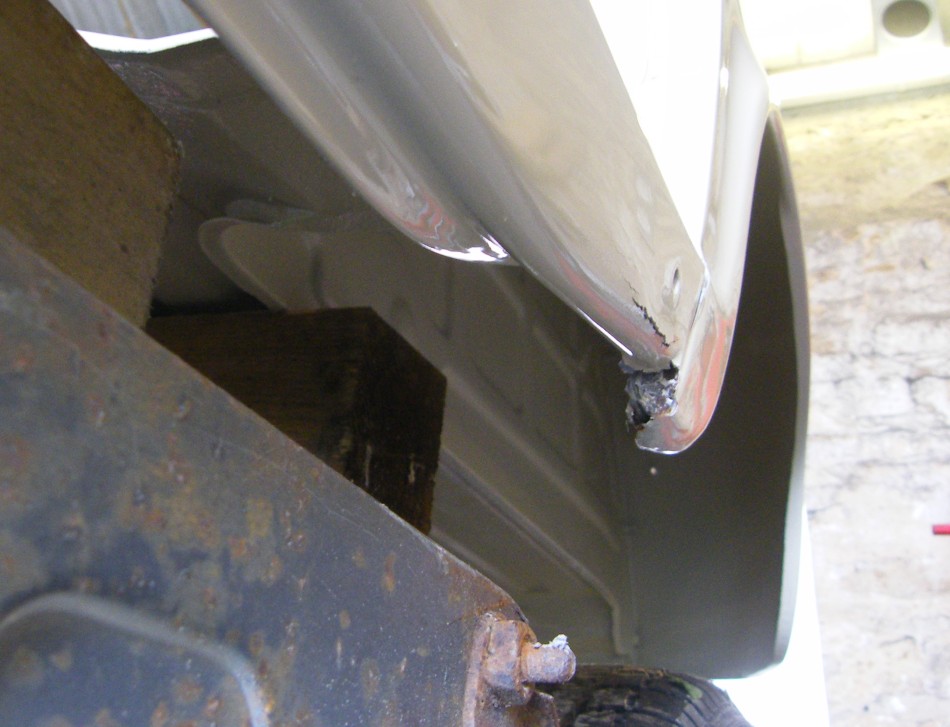
Much to my surprise the damage straightened out quite well. I used a set of welding clamps to pull the lower flange downwards which worked effectively.
Even more of a surprise was the amount of filler on the sill and the weld to the rear wing. Checking through photos I found I'd never applied filler to the sill, and I certainly didn't weld the bottom of the rear wing to the end of the sill. I suspect there may have been a mishap at the painters that I wasn't aware of, or possibly the sill was dinged on the drive down to the painters.
I've removed the weld and will reseal. Though in hindsight the joint wasn't originally sealed and it can move around a bit if it's knocked, so maybe a subtle bridging piece on the inside at the bottom might not be such a bad idea after all.
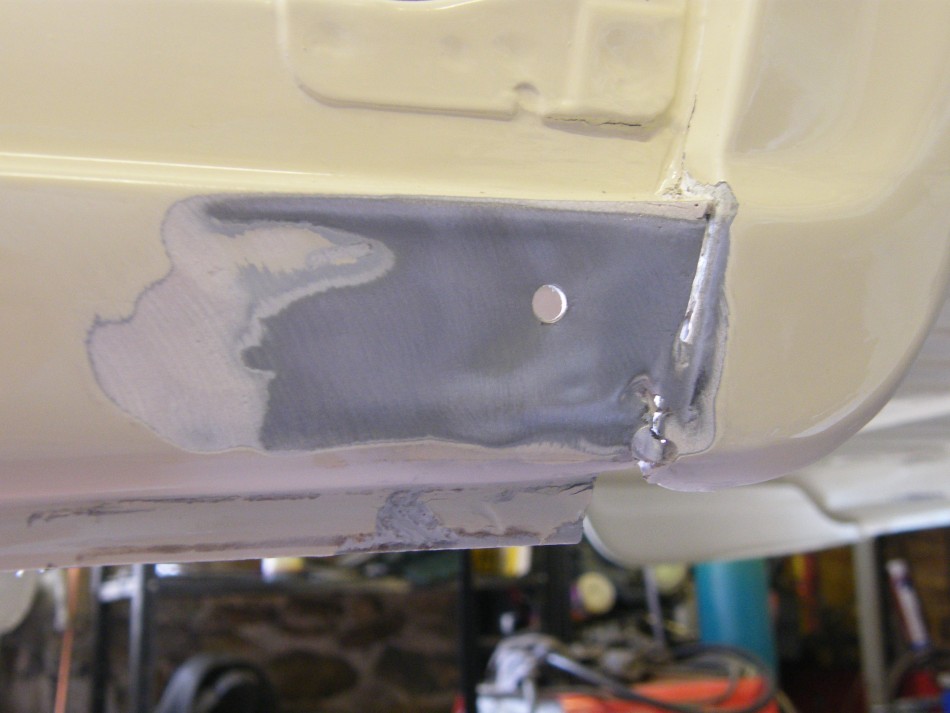
I did weld in a little bridging piece in this corner in the end. I like to seal that gap as it has gone rusty on many of my other R4s, and a bridging piece does reduce movement there. Here's a photo of the completed repair. All fine now and I can crack on with attaching the body to the chassis.
While completing the repair I could hear a buzzing noise which I assumed was a fly getting annoyed with a strip light. It turned out that a bumble bee had found it's way into the sleeve of my overalls, and it stung me on the way out. What are the chances of that happening?
Again I'm starting to think this is an unlucky project. Maybe she'll be happier with a chassis and engine...
The chassis has been mostly covered in sheets for the last few months to protect it from someone else's painting. It's still not on wheels but just needs just a few bearings and brakes. It could also do with some paint on the torsion bars which I should get around to next time I get the spraygun out.
It's fairly well poised to be attached to the body within the next few days.
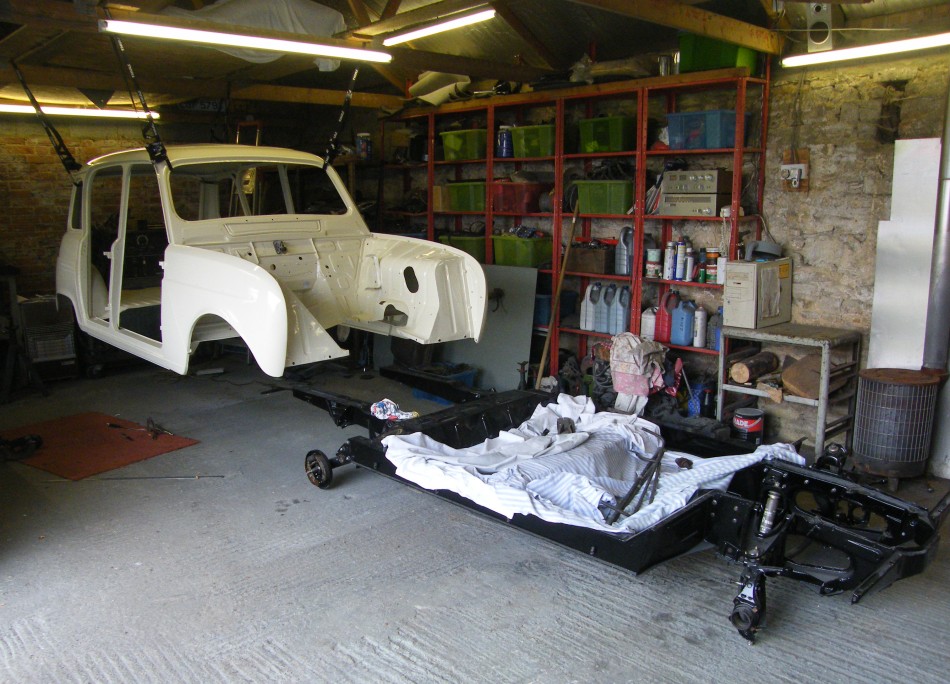
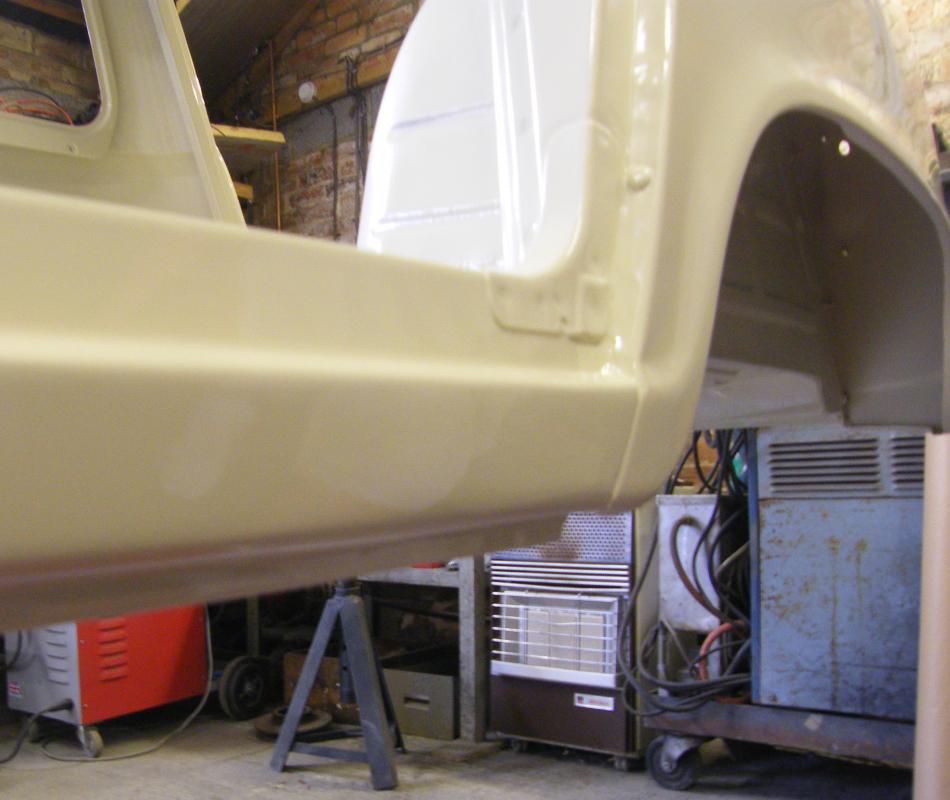
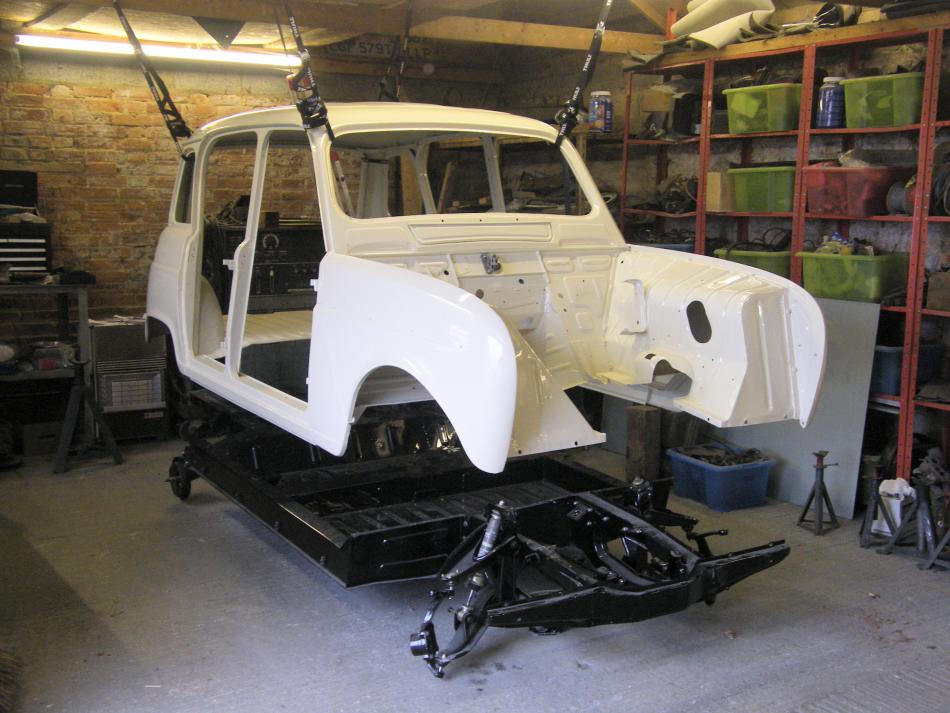
It's been so long since the body was last on the chassis that I can't remember whether I made sure all the holes lined up. There's only one way to check - a trial fit.
I've suspended the body from the roof using Thule straps (self gripping straps used to hold bicycles on roof racks). I used to have 4, but some have been lost, and others have been permanently employed in other duties so I popped out to buy some more. They are £9 each!
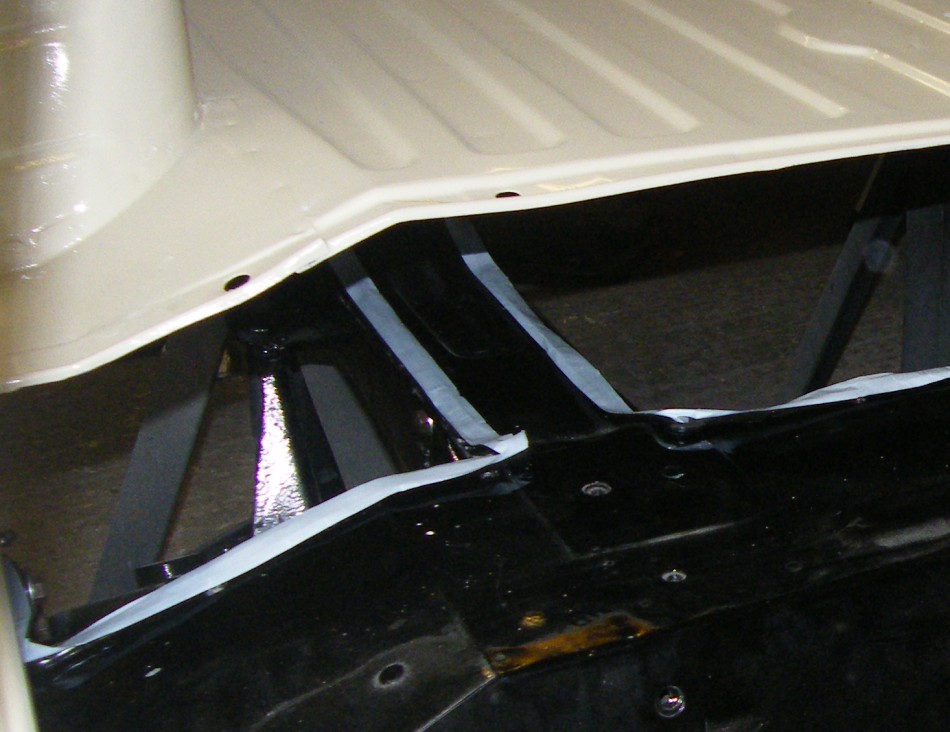
The body was originally sealed to the chassis using butyl sealing strip. It's excellent stuff, sticky so as soon as the body touches the chassis it seals, and even if the body springs back a bit it brings the sealant with it. Also it doesn't set, so it's possible to remove the body from the chassis again in another 30 years. I picked some 8mm diameter butyl strip from Car Builder Solutions. To seal the body to the chassis takes about 13m.
The body needs to be dropped very accurately onto the chassis or else it would stick in the wrong place. I used screwdrivers in the mounting bolt holes to align the chassis, and once it was low enough replaced them with the mounting bolts before finally lowering the body onto the chassis.
The straps made lowering the body a single handed job. The body is mated to the chassis once again.
With the body on final assembly can begin. But it's impossible to bolt anything old and rusty back on to the car, and for every job I need to do there's a rust bit I've forgotten to clean up and paint. There's some danger that I become organised and place a carth of rusty bits in a pile for blasting and painting. Unfortunately even more danger that I'll need to buy a lot of new parts.
Next> Brakes or back to the Gordini Project


