Inner wing welding
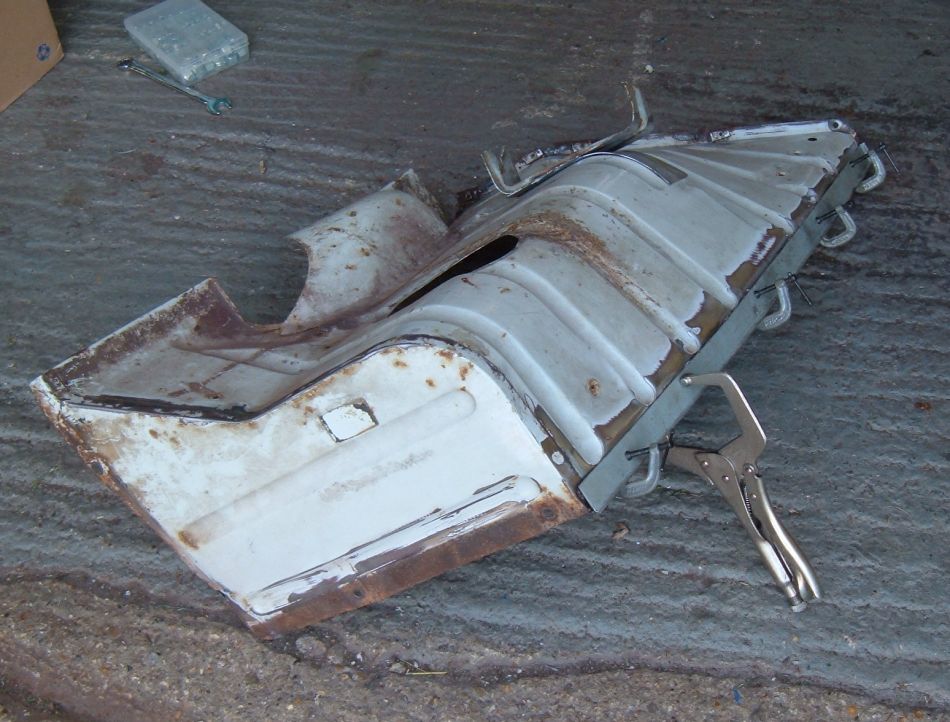
While fitting the jack it struck me how rusty the rest of the inner wing was.
I was in two minds whether to use this early style wing that has a whole load of rot to repair or the brand new later type one I have sitting in the barn. I felt the early type looked cooler.
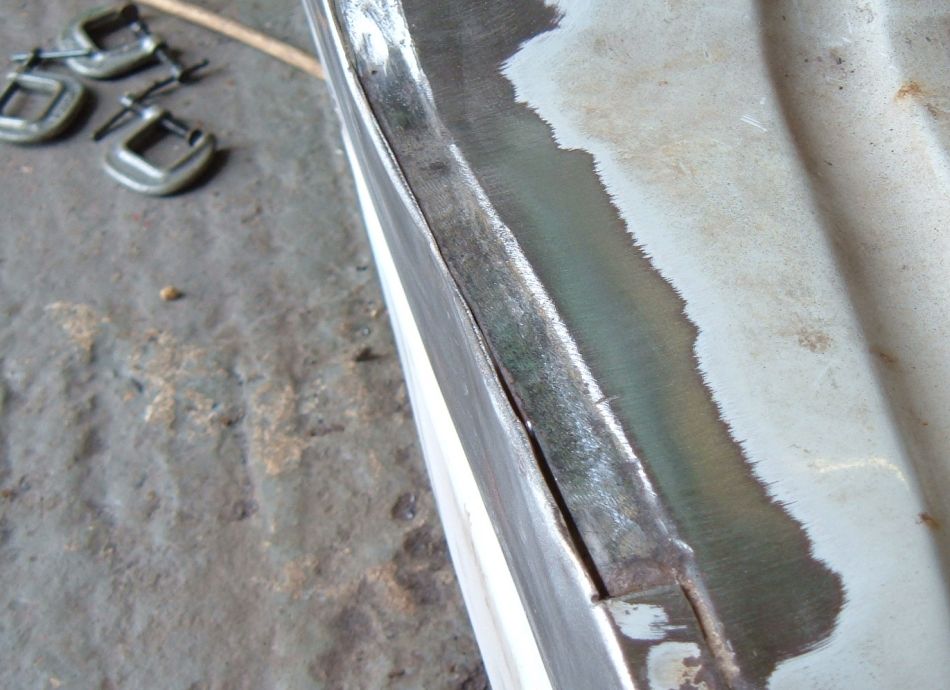
The rust at the top of the wing was very limited on this inner wing. I have repair panels, but decided it would be neater to make my own. Here it is clamped in place. I would later scallop out indents for the swages on the inner wing.
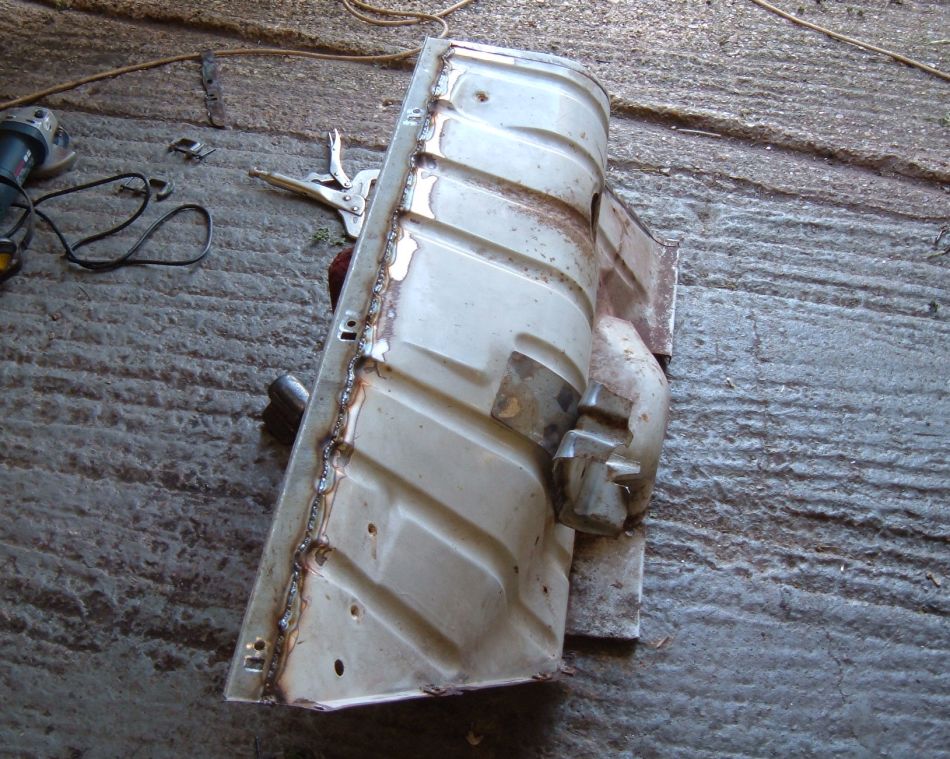
You can just about make out the scallops on the photo (if you are really interested you can double click the photo to see a larger version). The old piece of wing was removed, and the wind prepared for a butt weld.
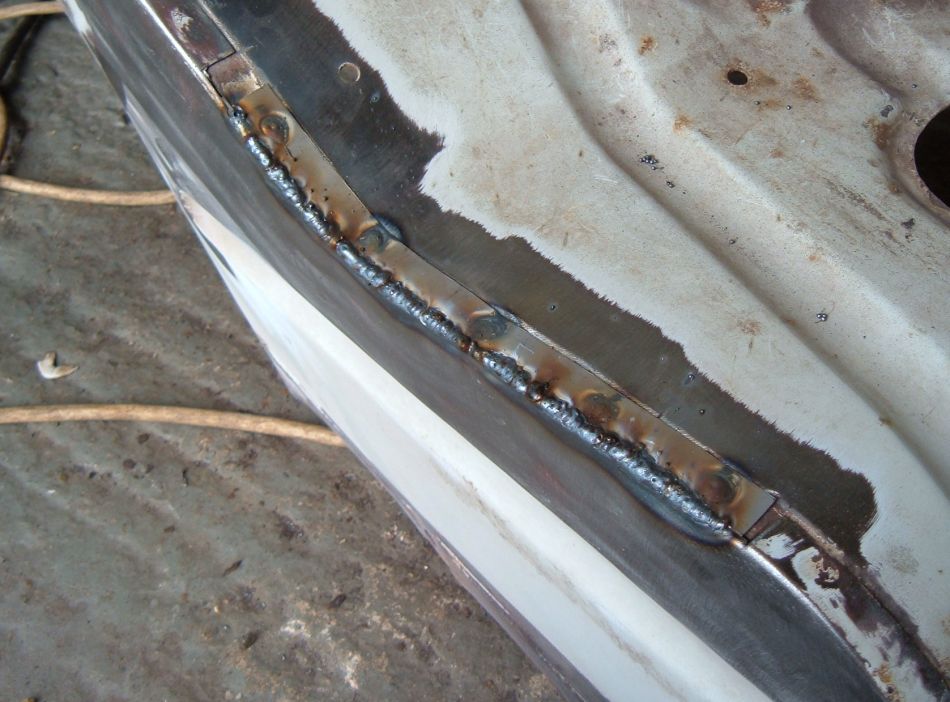
Here the outer wing mounting holes have been drilled in place. The round hole was easy, but I needed a special square drill for the other one. Then the repair was seam welded in place with the aim of maintaining a very narrow weld that would be easy to grind off.
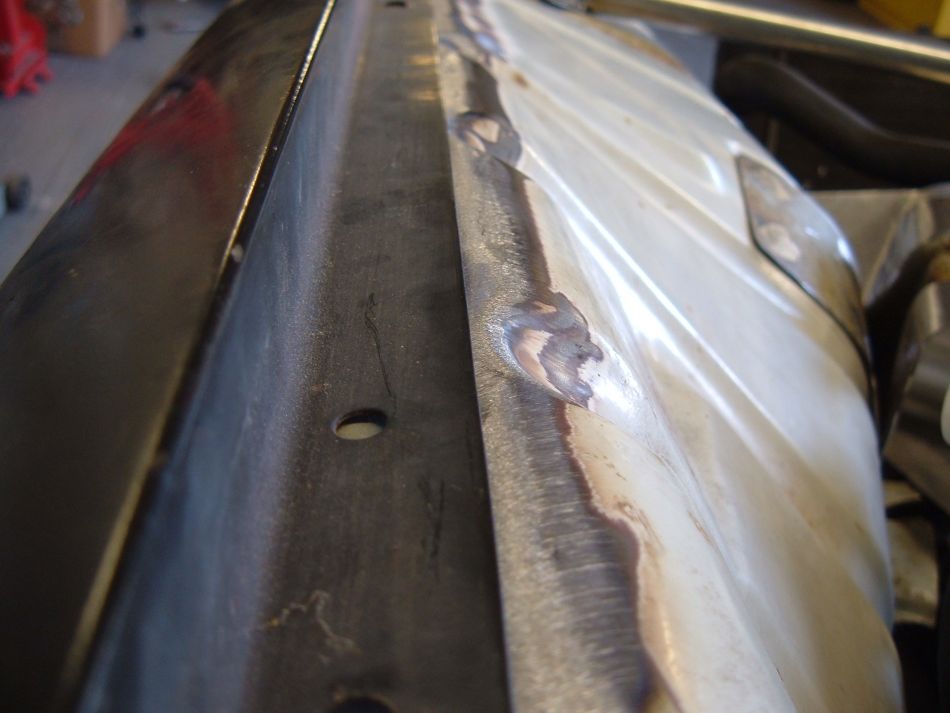
I made an amazing discovery - 40 grit flap discs are far better than grinding discs for grinding welds on curved panels. Where a grinding disc is aggressive and will cut in the flap disc works as a flat surface. It's possible to neatly finish a well prepared weld on 1mm sheet without reducing the thickness.
That's ideal here as I don't like finishing with body filler so close to the wing joint. There's more detail on finishing welds with flap discs on the welding site.
The inner wing is formed from two main panels spot welded together. For some reason the flanges weren't seam sealed at the factory, and there's rot in the seam.
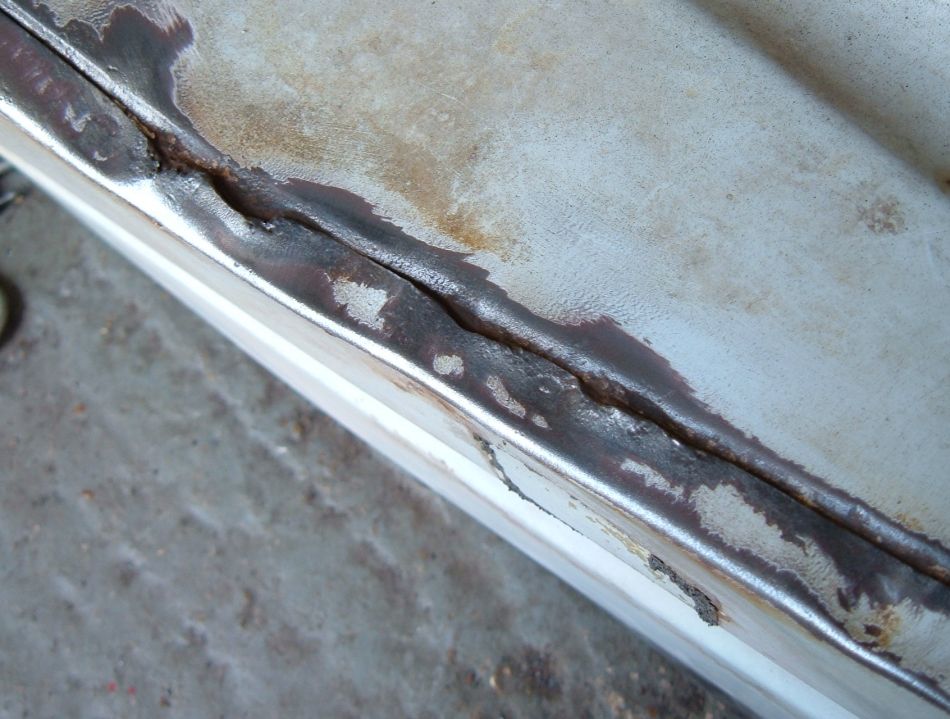
Here the outside part of the seam has been cut away using an ultra-thin cutting disc on an angle grinder. The ultra thin discs are brilliant - they cut very neatly between the inner flange and the bend in the outer part.
I might not be ultra thin - I'm using 1mm cutting discs. Compared to the 3mm discs I used before these are so much easier. They seem to last longer, and they don't seem to fail in any catestrophic manner (they do fail sometimes but being thin they don't do any damage).
The remainder of the skin was removed by grinding the welds out with a grinding disc which was also used to remove the rust on top of the inner panel. Amazingly given the condition of the outer part of the flange the inner bit has survived well.
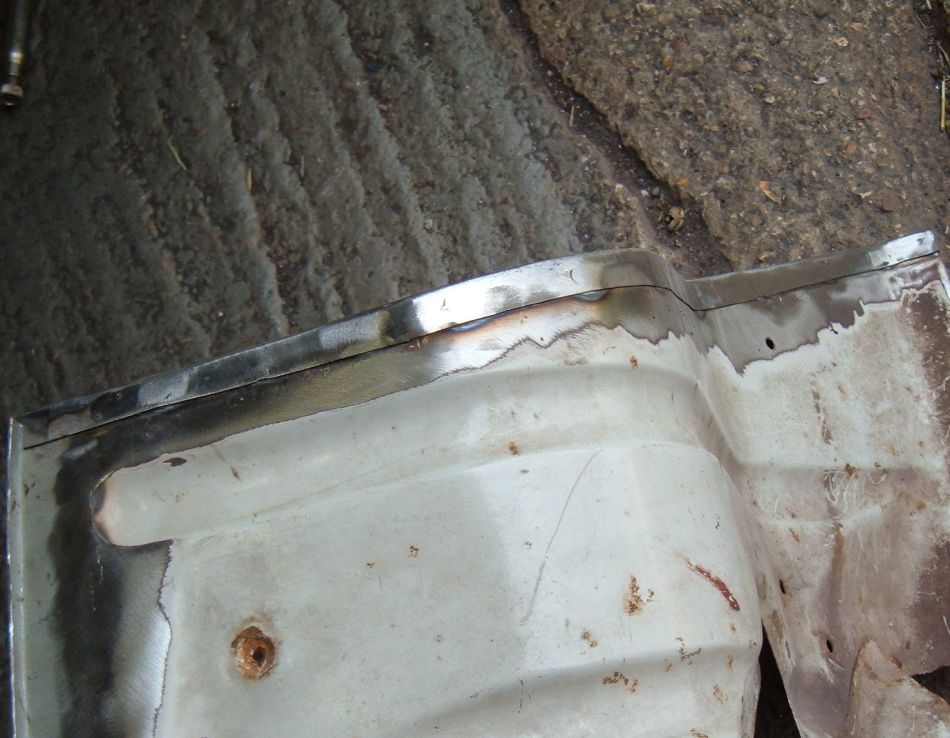
The repair was simple - a strip of metal plug welded to the inner skin and seam welded to the outer.
I've left gaps at each end. This is only part of the job - the whole flange needs to be replaced, and I decided to do the job in 4 sections to maintain the position of the two parts.
The welds were finished with the flap disc and the finished job looks like new.
Well it should do - it took all morning! There'll probably be some seam sealant on the job when it's painted up this time.
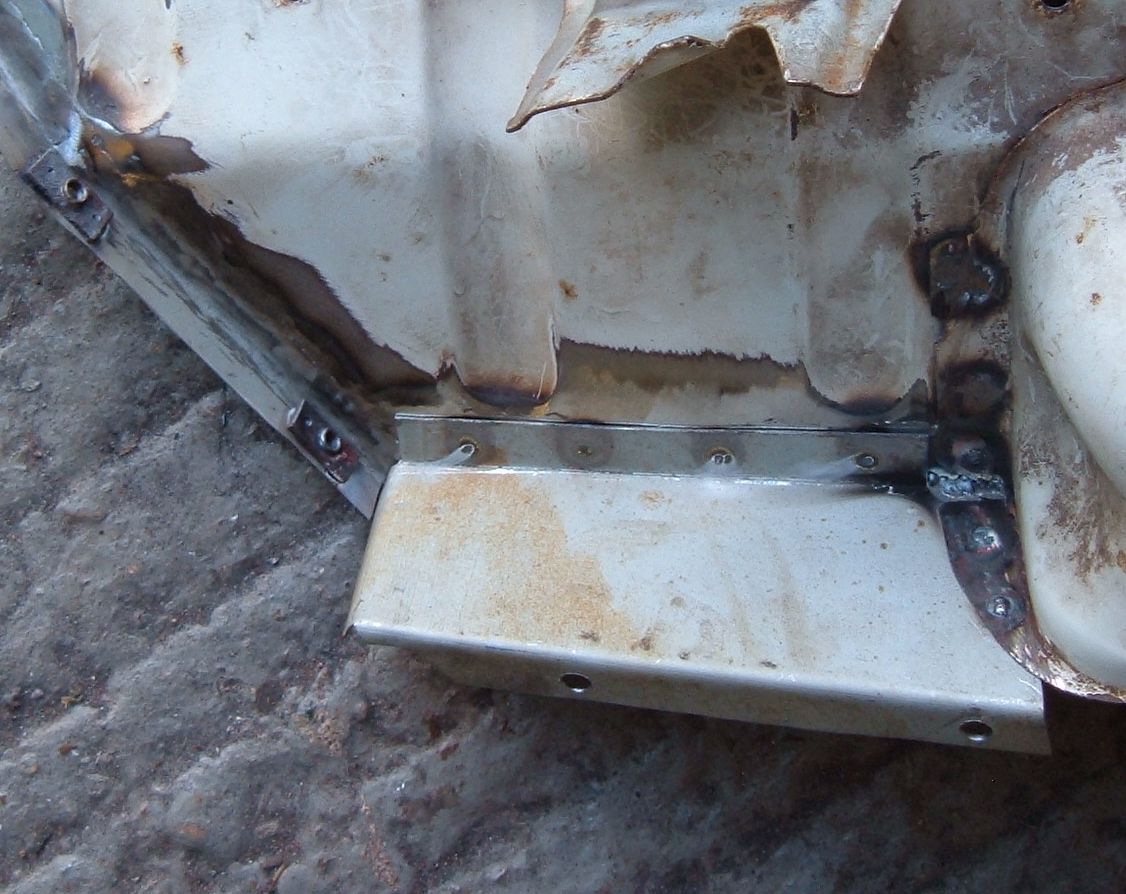
Finally a new mounting flange for the rear of the inner wing and a lower section. The flat section at the bottom of the wing is there to make space for the brake master cylinder on LHD cars and presumably to make it possible to remove the starter motor.
I decided to panel beat the wing and mounting flanges inwards to reduce the width of this section by about 25mm to allow a little more clearance for the exhaust down pipe that runs behind the inner wing. Hopefully it will still be possible to remove the starter motor without first removing the engine.
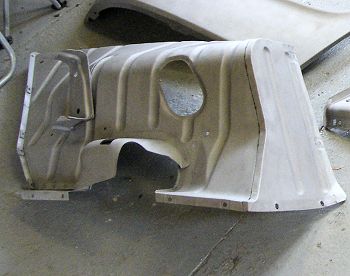
Here's a photo of the inner wing following sandblasting. I've modified the suspension turret cover to '73 spec to allow more air to escape from the engine bay and to help access the shock absorber mounting. The big hole is for the twin pipe Gordini exhaust, and of course the jack mounting will now be on this side as the air filter takes up the space on the other side of the car.
The job has been a complete waste of time, but it's interesting to develop the techniques to do this sort of work. Restoration after all should be more about repair rather than replacement. Especially when parts supplies are drying up. Mind you, I'm only selectively restoring this car. Quite happy to modify it when I feel like it.
Next> Rear upper wing repairs, or back to the Gordini Project


