Chassis Painting
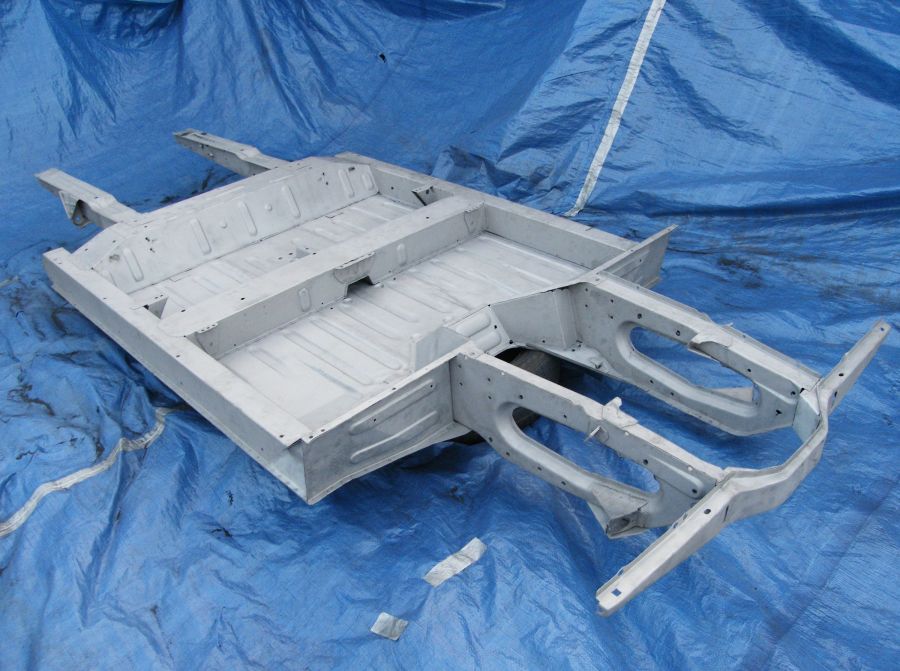
We last saw the chassis after shot blasting. Sandblasting is a very effective method for removing old paint and surface rust. Grinding or wire brushing doesn't even get close to removing all the surface rust.
Some might advocate rust passivation products. but getting rid of the stuff altogether feels much better (and will surely work better long term).
The other reason for sandblasting is it's a requirement for the primer I plan to use.
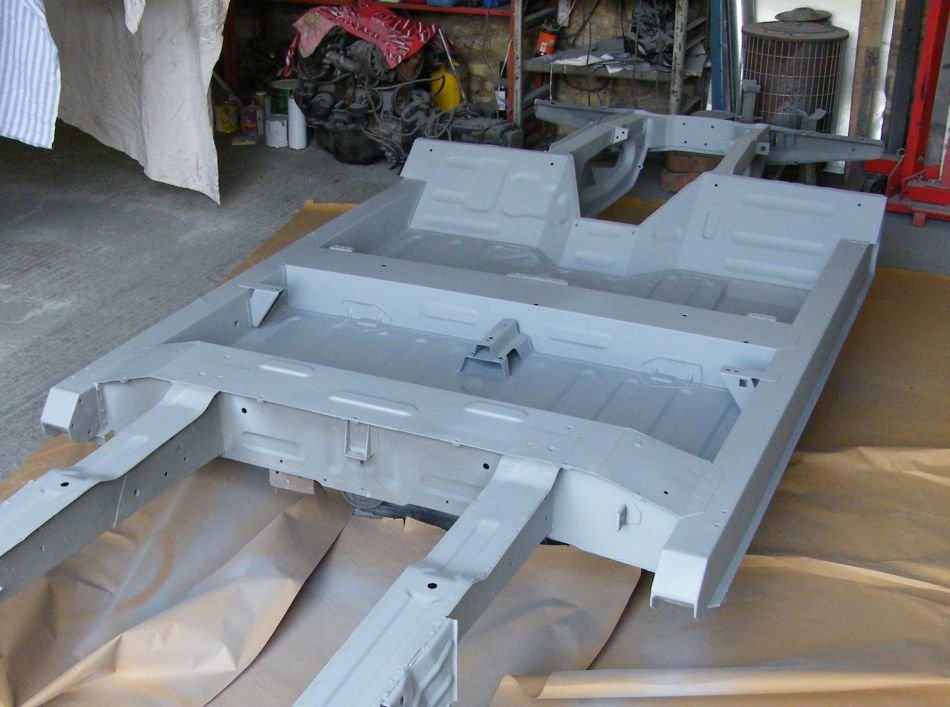
I settled on "cold galvanising paint". The primer is 90% zinc by weight. That's enough zinc to give the chassis some level of galvanising protection.
The paint doesn't stick as well as ordinary primers unless the surface is sand blasted, and it's mechanical strength is poor so it needs to be overpainted with anti-stonechip primer where it's likely to be chipped.
I'd considered having the chassis galvanised, but a friend had a floorpan chassis galvanised and the floors warped badly. Chassis twisting is also a risk. Another less destructive option might have been hot spray galvanising where zinc is melted and sprayed onto the panel.
Please forgive my safety equipment. Disposable paint overalls cost only £5, and are not hot to wear. Eye protection is sensible too.
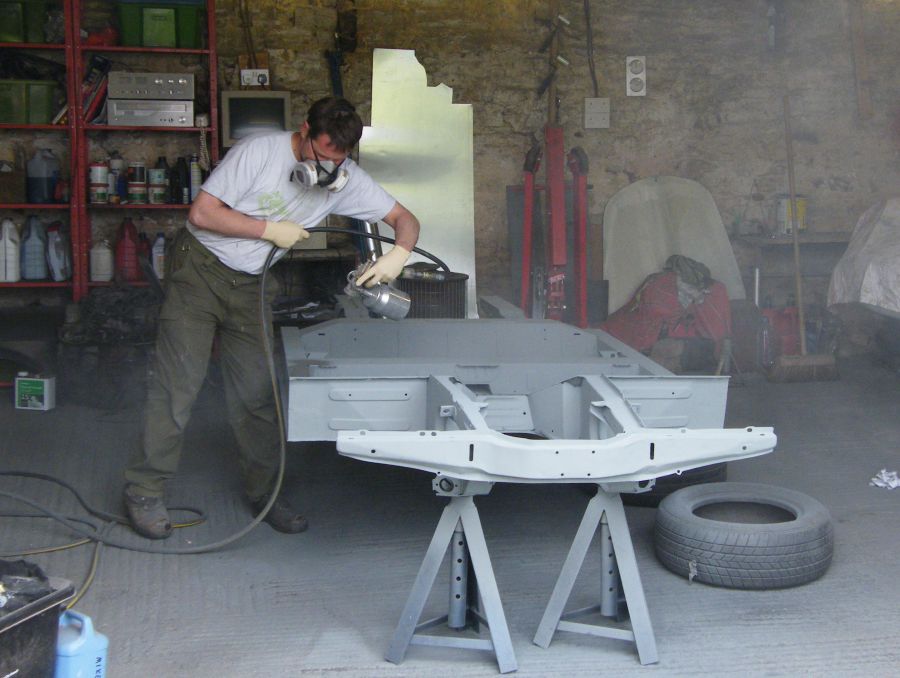
The sales literature for the paint is entertaining. They say it's good for oil rigs and things... oh and for car chassis as well but only if you want them to last an extremely long time. Here's hoping.
They say to use one coat, or two for severe marine applications. I went for 2 coats as I have accidentally left cars in the sea in the past.
The zinc actually needs to be left exposed to air rather than painted over in order for it to act like galvanising. So overpainting on the face of it is senseless. The reason I'm using the zinc primer is to help protect the chassis after the paint surface is broken. Which it will be very quickly as soon as I start driving the thing around and start collecting stone chips.
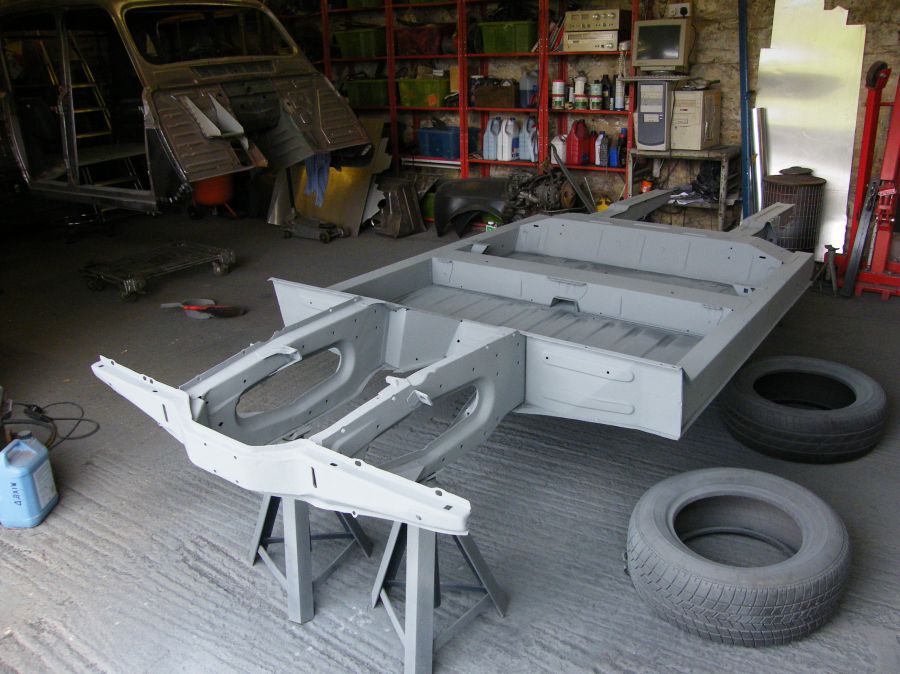
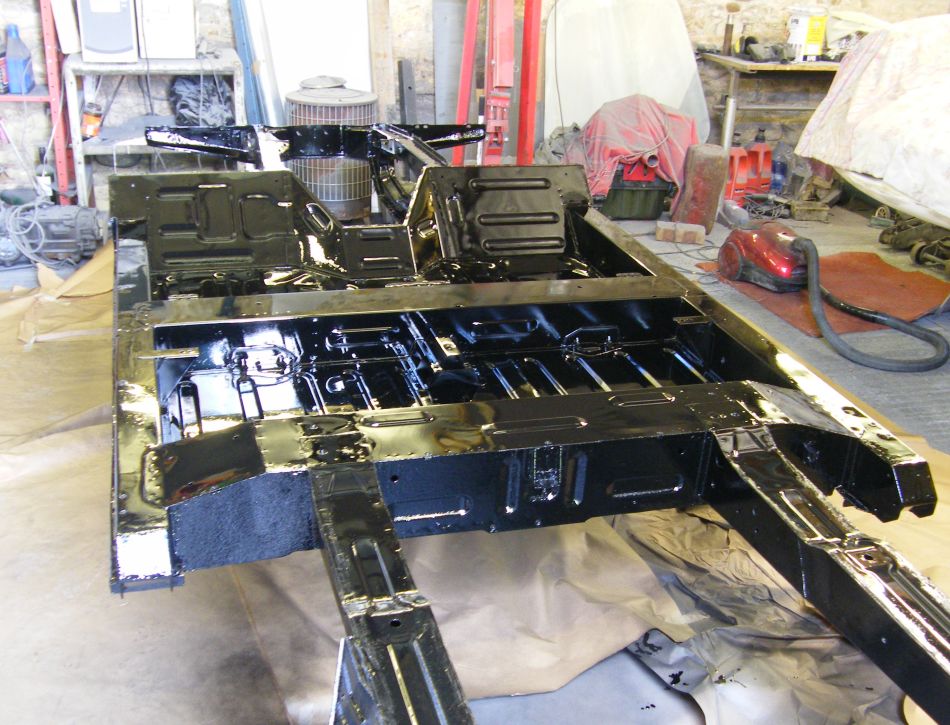
The white pinstripes in the photo are PU seam sealant. The photo was taken after the anti-stonechip was applied, so some has been covered over.
I've noticed that most of the rust points in Renault 4s seem to start in seams that were not sealed by the factory. So my approach is to seam seal every single seam. I've even gone around the edges of the floorpan.
The seam sealer paints over quite nicely and you'd hardly know it is there. There's a debate about whether to apply sealant on bare metal or on primer. Manufacturers always apply it on top of e-coat primer so I'm happy to follow and have some protection should the sealant fail.
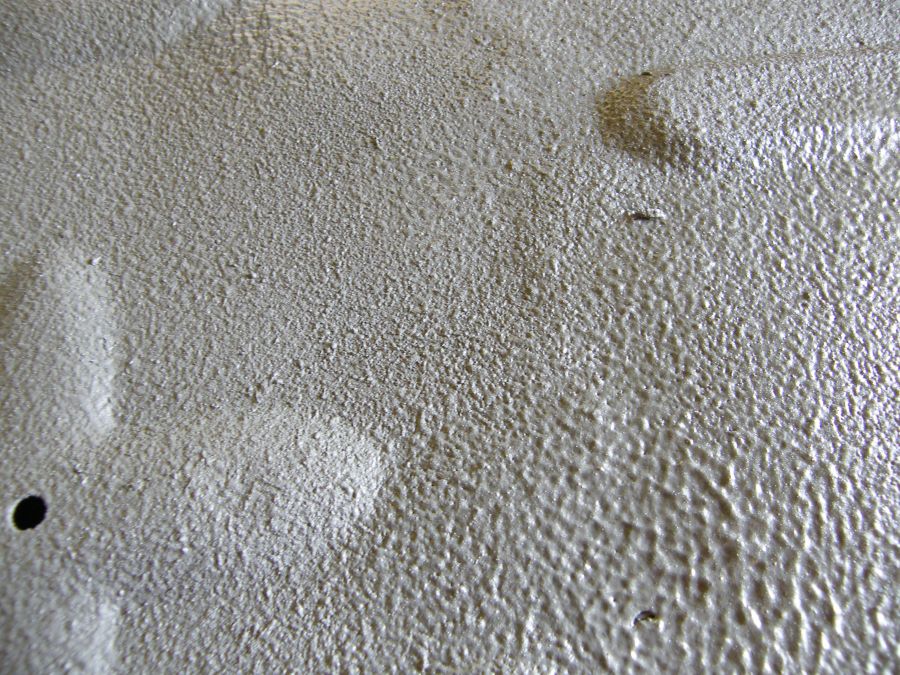
It's so easy to mess things up. The chassis looked perfect after painting and seam sealing. But the stonechip primer on the underneath ended up looking like I'd pebble dashed the chassis (photo).
I did all the normal things (heating up the stone chip primer in a hot bucket of water, and really thorough shaking). Problem turned out to be the stonechip had been sitting on the shelf at the local paint factor for too long and had thick stuff at the bottom that wouldn't mix in. I don't know why I carried on and sprayed the whole chassis with the stuff.
I spent a day wet flatting the mess, then sprayed some thinned stonechip using a conventional spray gun to try and smooth it out. I was still not happy with the result, but that did improve things.
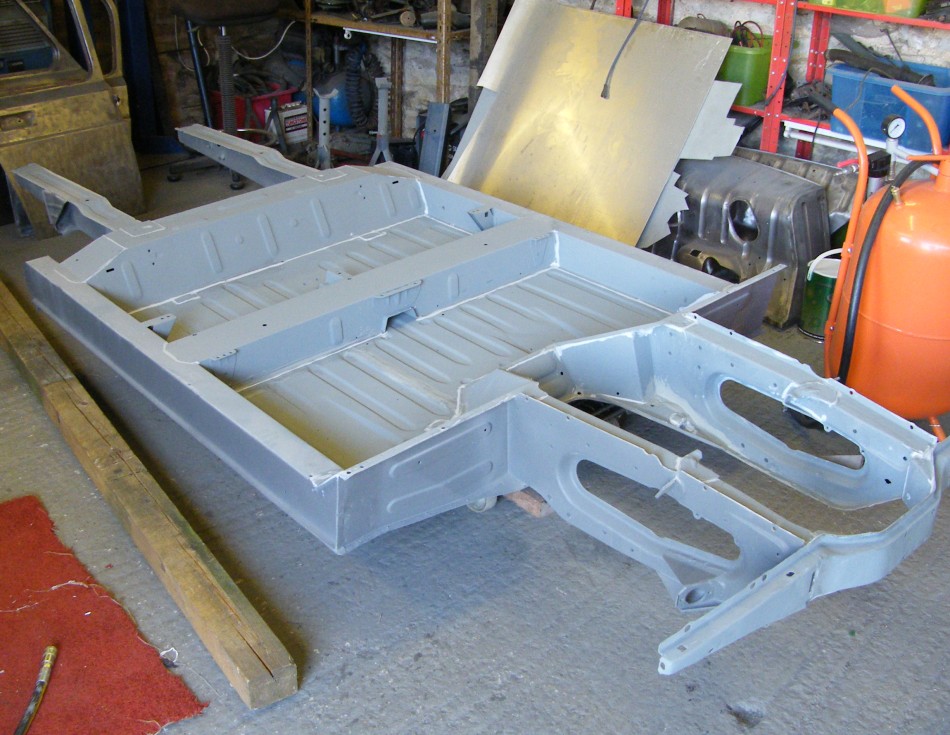
I sprayed some 2-pack filler primer on top of the zinc primer on the top surface of the chassis to smooth the surface up and allow a quick de-nib to remove imperfections before the black colour coat.
I've improved my safety kit since the first photo. 2K paint is nasty stuff (gives you asthma - see the HSE pdf) so and I've invested in an air fed mask in addition to the overalls I ought to have been wearing in the first place.
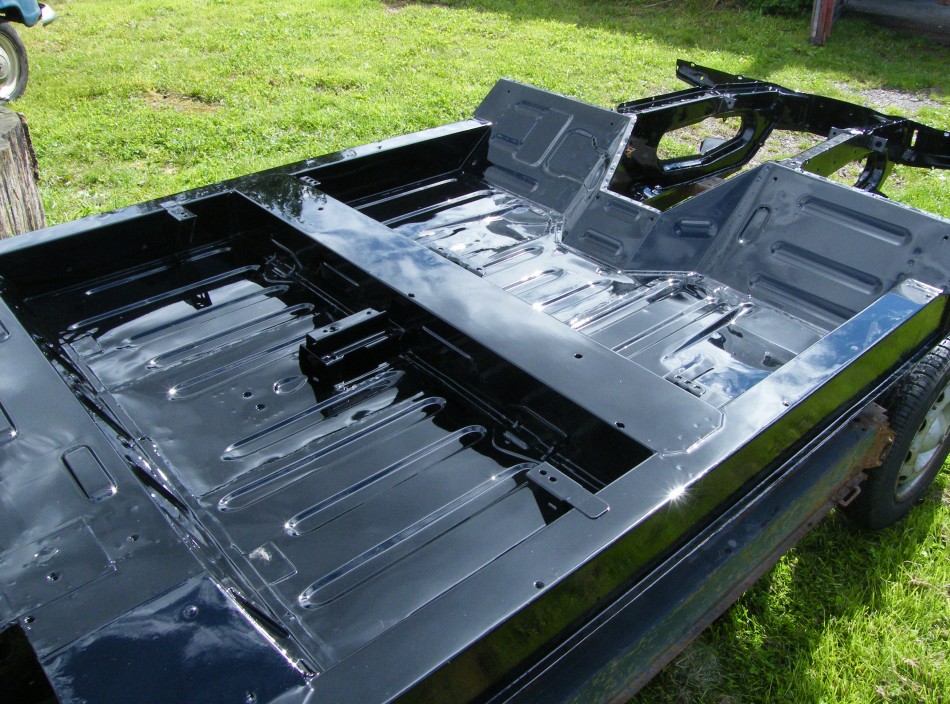
After the first coat of 2-pack black on the underneath the anti-stone chip primer disaster still looked terrible. I followed it up with a wet on wet application of a further 2 coats. The underneath now just looks like it's been painted far too thickly - as good a result as I could have hoped for.
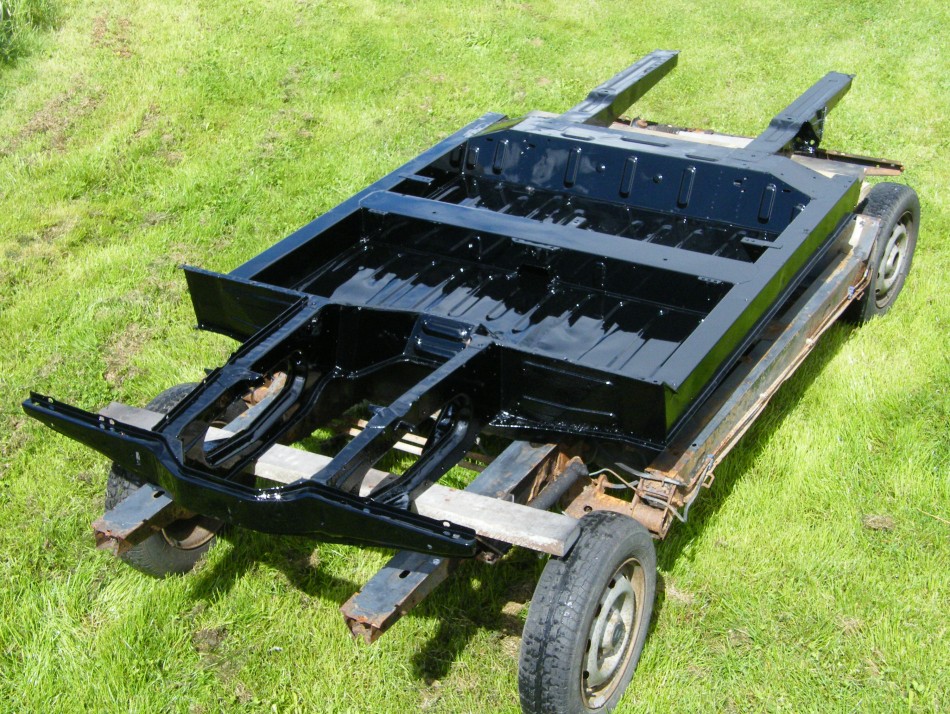
The top surface is much more pleasing. This photo was taken after the first coat and it looks far too shiny (the correct finish is more of a silk black rather than high gloss). Most of the chassis will be covered by rubber mats and seats so the extra gloss isn't really a big deal for me.
It was a windy day and they were harvesting around here, so I managed to get some dust inclusions in the paint. Once it's dry it will have a light sand and a final coat of paint (on a less windy day).
Wet flatting with 800 grit worked a treat. After drying overnight a final coat went on. I altered my sequence of painting the chassis. Previously I had painted the side members before the floors, but it occurred to me that the floor panels will be covered with mats while the and the side members would remain visible, so painting the other way around would leave any overspray on the floor where it didn't matter.
Actually I had the gun pressure a little low so overspray wasn't an issue, though if anything the paint went on a little thickly as a result.
You need a lot of light to see what you are doing when spraying black paint. I didn't really have enough light so it was difficult to see what was going on in the fiddly front longerons. A few drips there as a result.
The chassis takes up a lot of space in the garage, and I didn't want it to be covered in white overspray from the body, so I've lowered it onto an old chassis and wheeled it into storage elsewhere until after the body is painted.
It was only after painting that I realised that black might not necessarily be the correct colour for the chassis. Later car chassis and suspension appear to be dark grey, though I don't have an early car in good enough condition to make a judgement on the original colour.
Next: body painting. Or back to the Gordini Project


