Gordini Project - The Floor Panel
How far to go? It's easy to get carried away as a restoration progresses. I often start off with the intention of a few quick repairs then find more to do than I first thought.
From there if it's worth doing the repairs it's worth doing them properly,and so on...
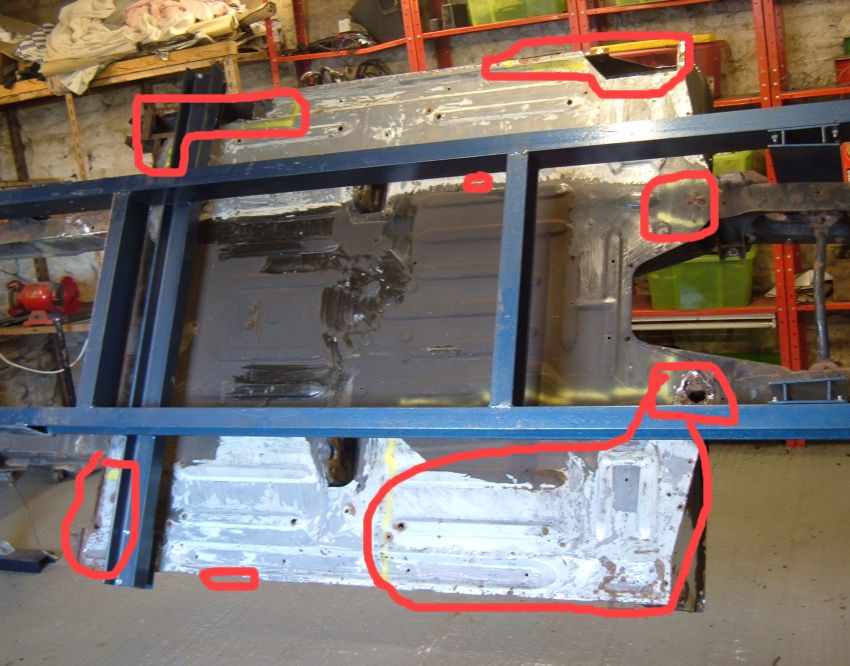
The rusty areas of floor are circled in the photo. It was tempting initially to patch up just the bits that needed to be repaired, but by the time I'd done that I'd have replaced half the floorpan. Better to remove the whole thing and have done with it.
Stripping the plastic underseal from the old floor was a horrible job. I used a heat gun and an old fashioned table knife to get the worst off, then finished off with a hand held wire brush and heat gun. Another alternative is a radial wire brush fitted to an angle grinder, but neither method is quick.
It used to be possible to pick up a complete new floorpan, but at the time of writing only repair sections are available from the manufacturer. I'd got a pair of repair panels in the barn bought from eBay so elected to use those.
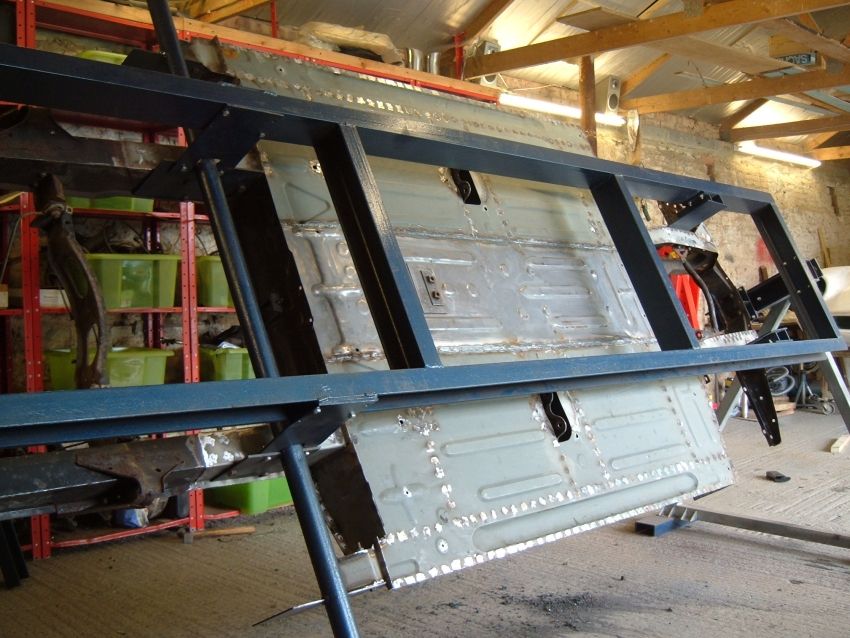
Here the floor has been removed by grinding out the spot welds and cutting on a line that avoided any swaging.
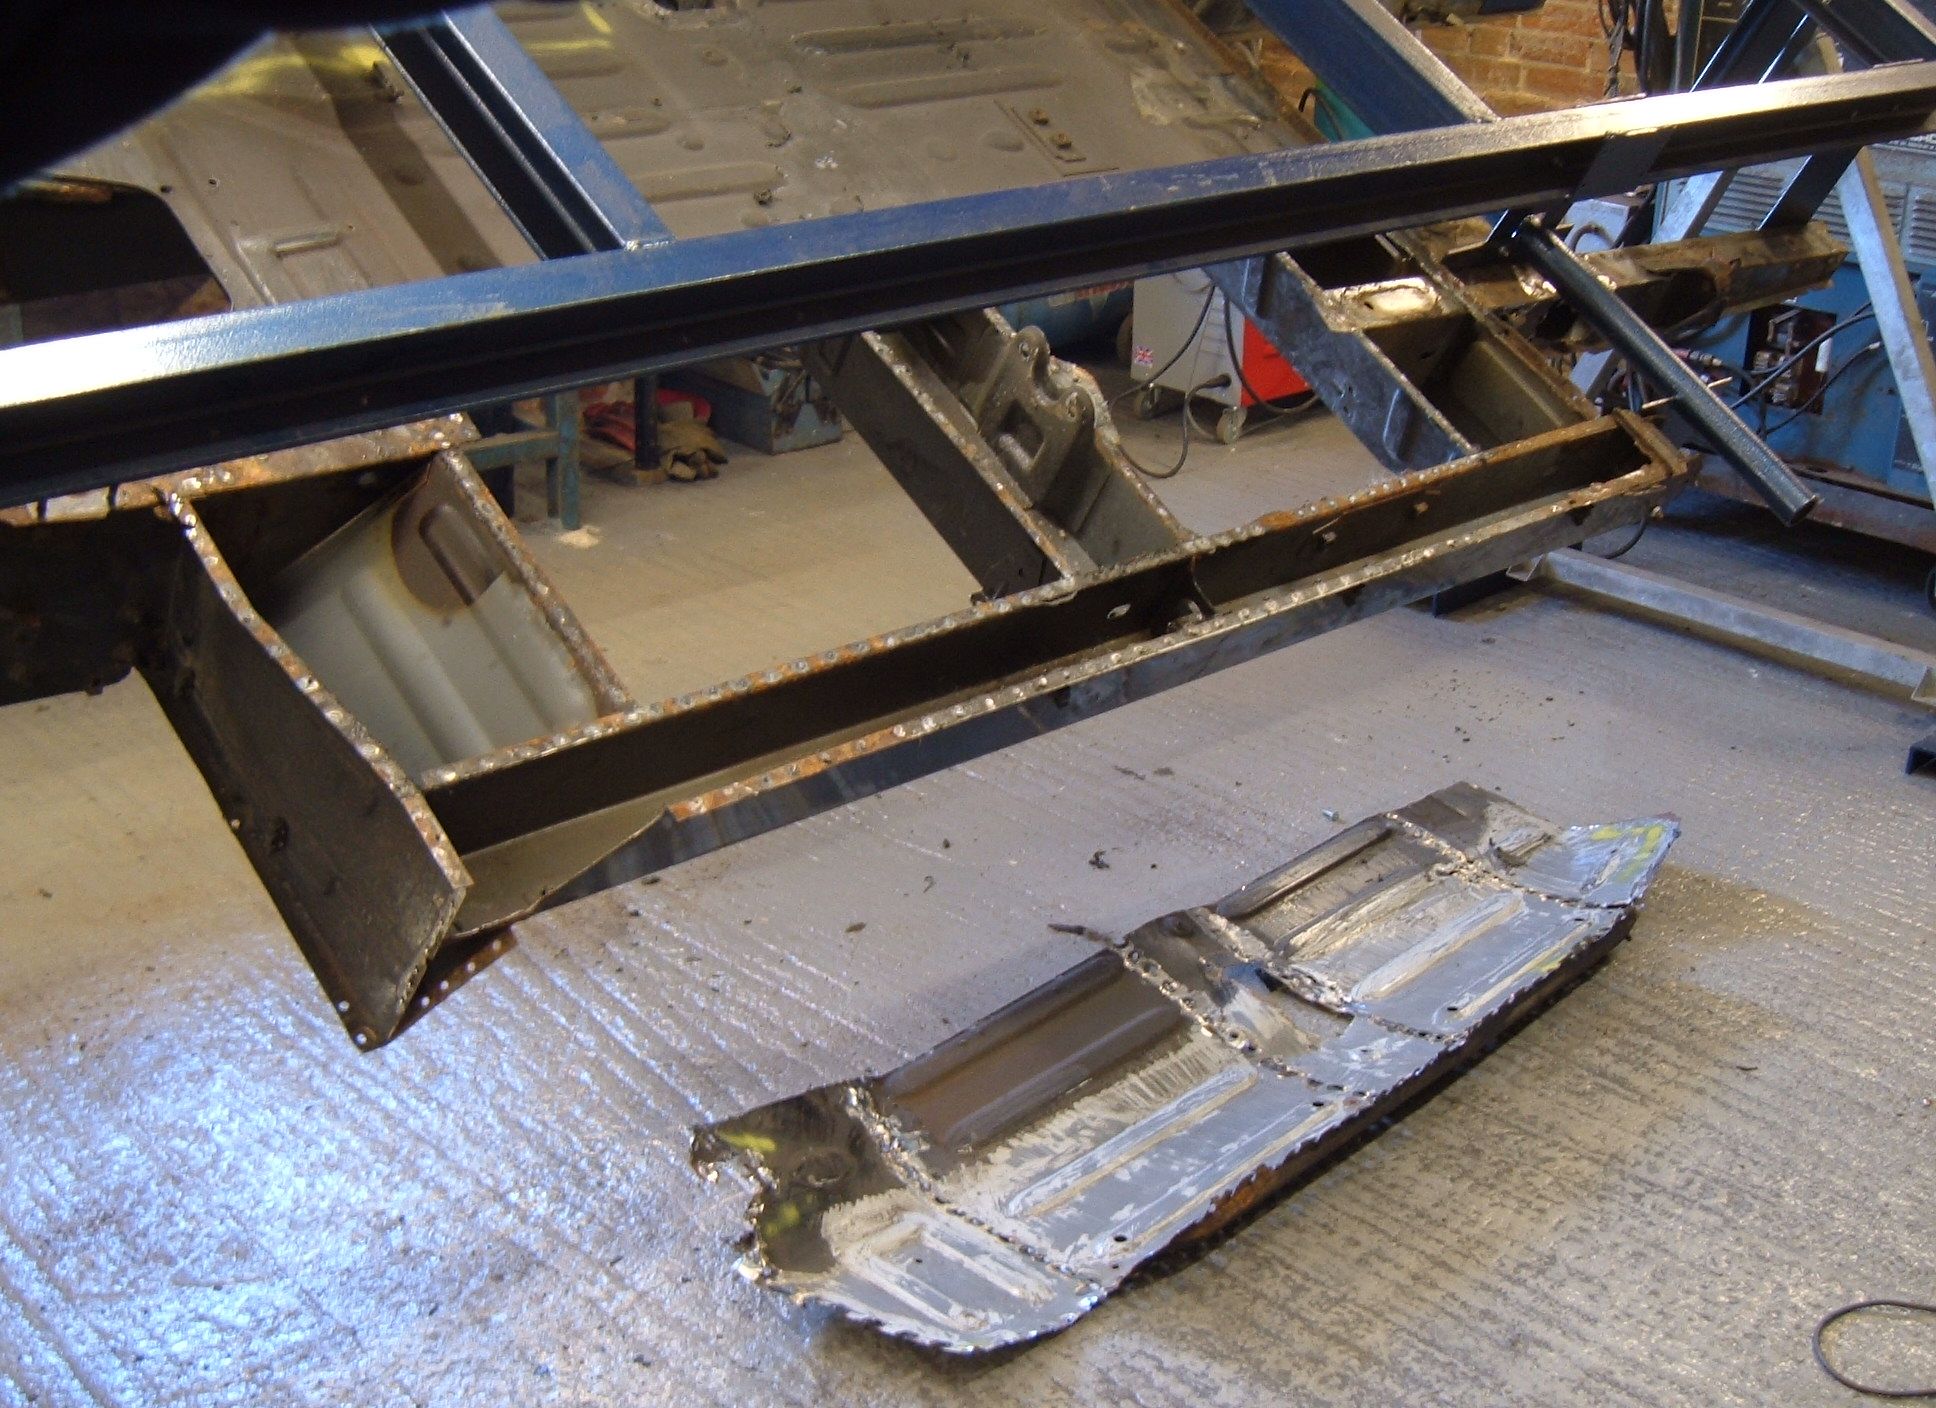
The chassis itself was actually quite solid in the area of the floorpan and only needed a repair to the front corner.
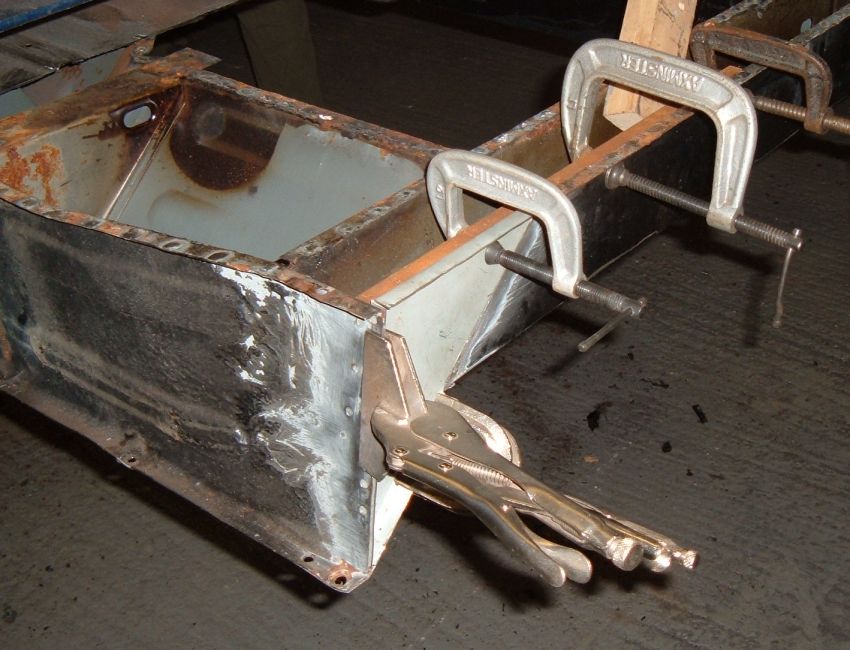
It's another area that was originally double skinned and not sealed. I tend to cut these areas out and replace them with a single skin of slightly thicker steel than original butt welded in place.
The repair section was cut to size (the size worked out using a cardboard template) and clamped in position with a length of steel behind for alignment.
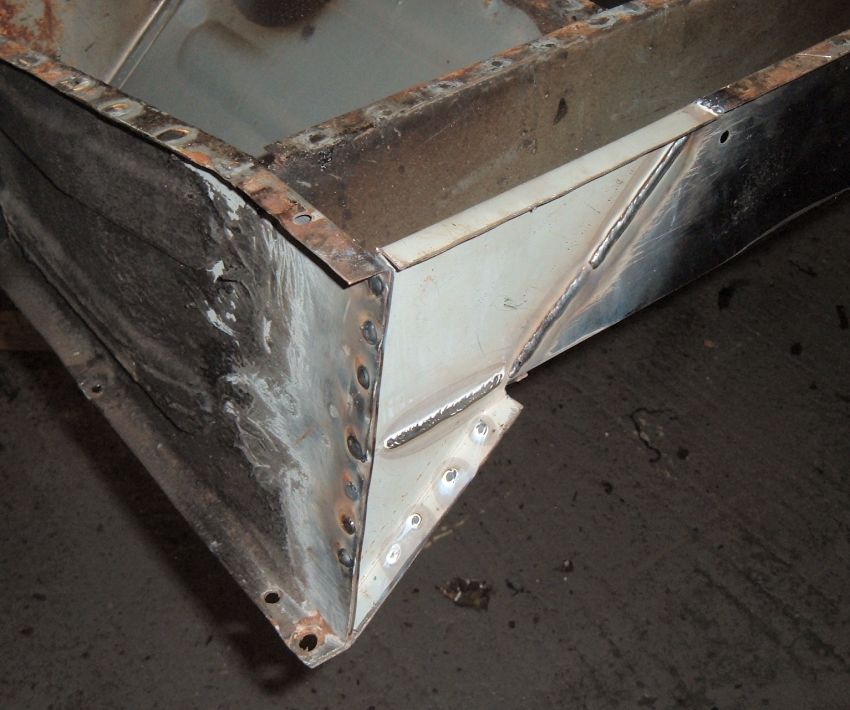
The repair was butt welded to the chassis, with a fillet weld to the top part of the chassis welded from inside, and plug welds to all the remaining seams.
There were still repairs to the rear suspension mountings and the front chassis before the new floor could be welded in place.
And like magic the new floors appeared. The whole repair is covered is covered as a how to weld floors tutorial over on the welding website, so there's no sense in duplicating it here.
I think the floor panels were from a slightly more modern era, and the swaging pattern didn't quite match. A little panel beating corrected that problem. They were attached by plug welding to the flanges then TIG welding the seam.
The job would have been much easier with a complete new floor, and I could have avoided 3m of edge to edge TIG welding.
Next> 5 speed gearbox or back to the Gordini Project


