Wheel Arch Liners
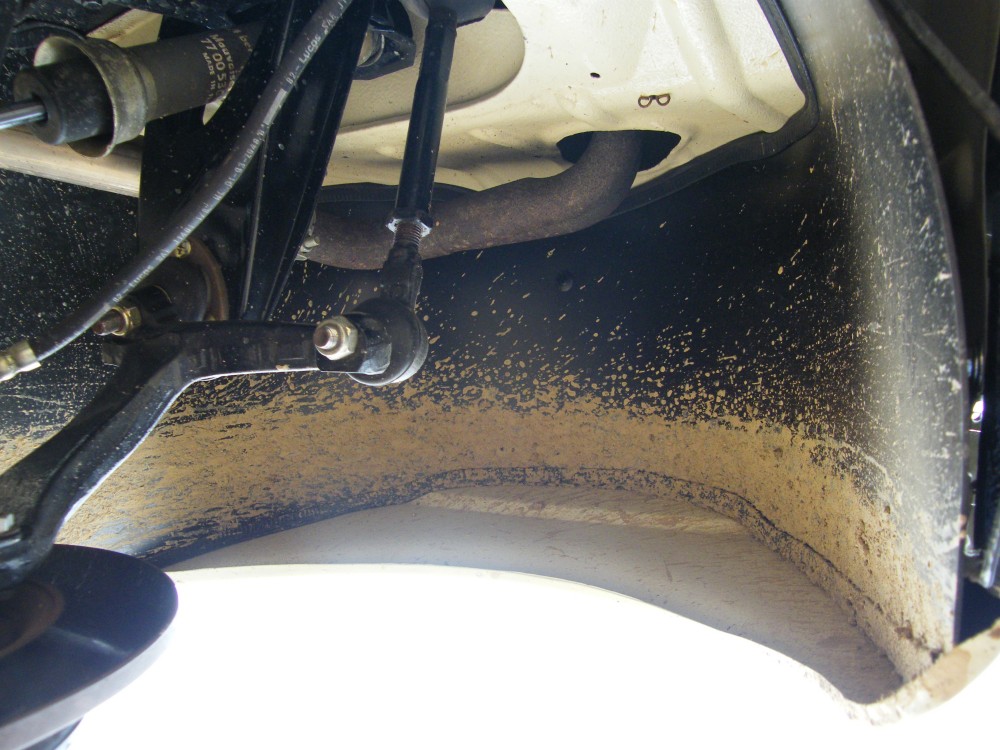
Most Renault 4 rust problems are caused by wet mud collecting in the wheel arches causing the body panels and structure to rot away. The front, top and rear of the front wing, the outer suspension mounts at the rear, top of the rear wing, and the rear of the boot floor all spring to mind.
Wouldn't it be nice if those bits didn't rust? Wheel arch liners should go a long way towards stopping the mud from collecting. There are some commercially available in Germany, but they didn't look sensible to me so I'm going to make my own.
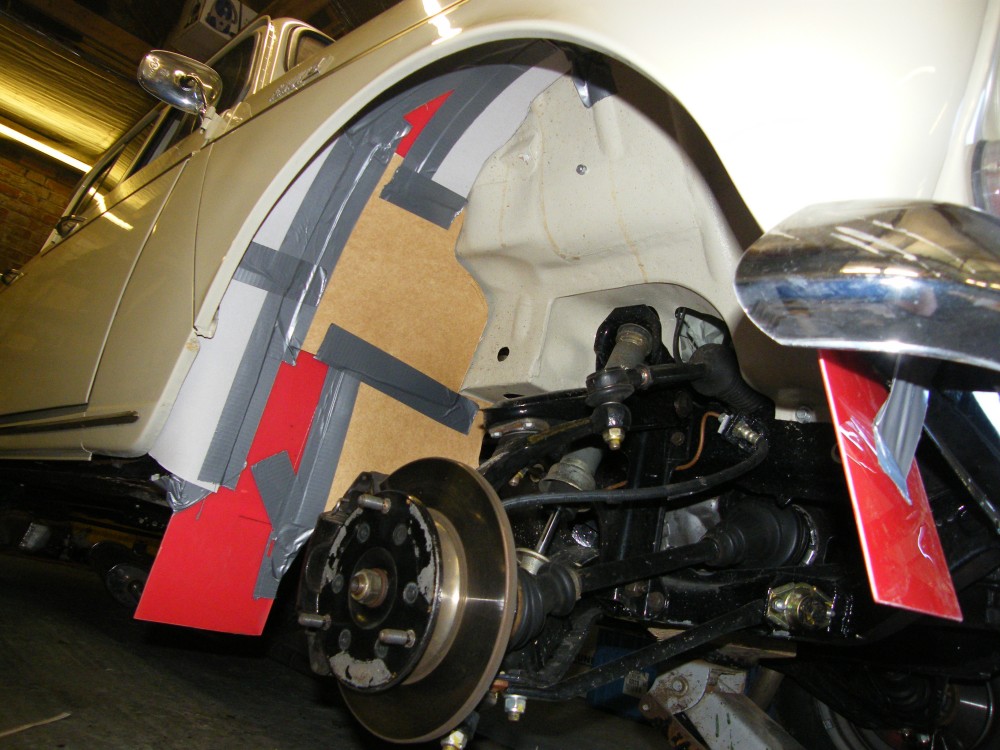
The photo shows templating in progress. The red part is a strip of ABS plastic used to figure out how the liner would sit, and the brown and white parts are bits of card gaffer taped to the plastic to help figure out the shape.
I'm planning to make the liners from black ABS plastic with rubber seals around the edges to allow for tolerances and prevent too much mud from making it's way behind the liners.
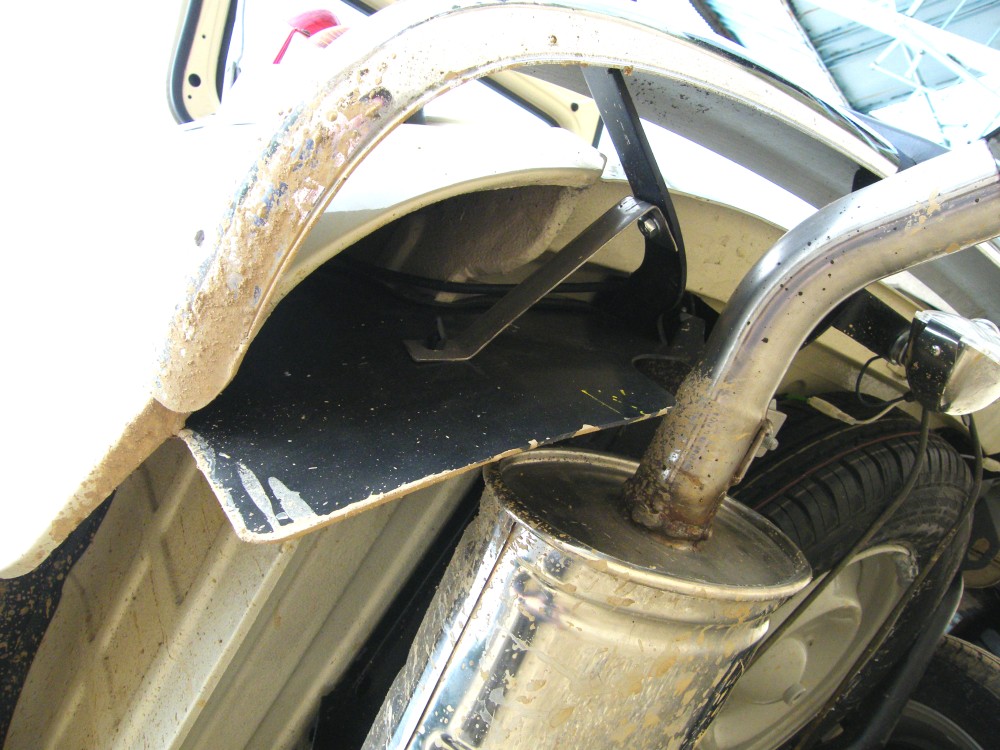
In the photo the template has been developed a bit and includes a hint of a mud flap. The mud flap might be a bit more tricky on the other side of this car - I wondered while making the exhaust why the original exhaust took such a weird routing.
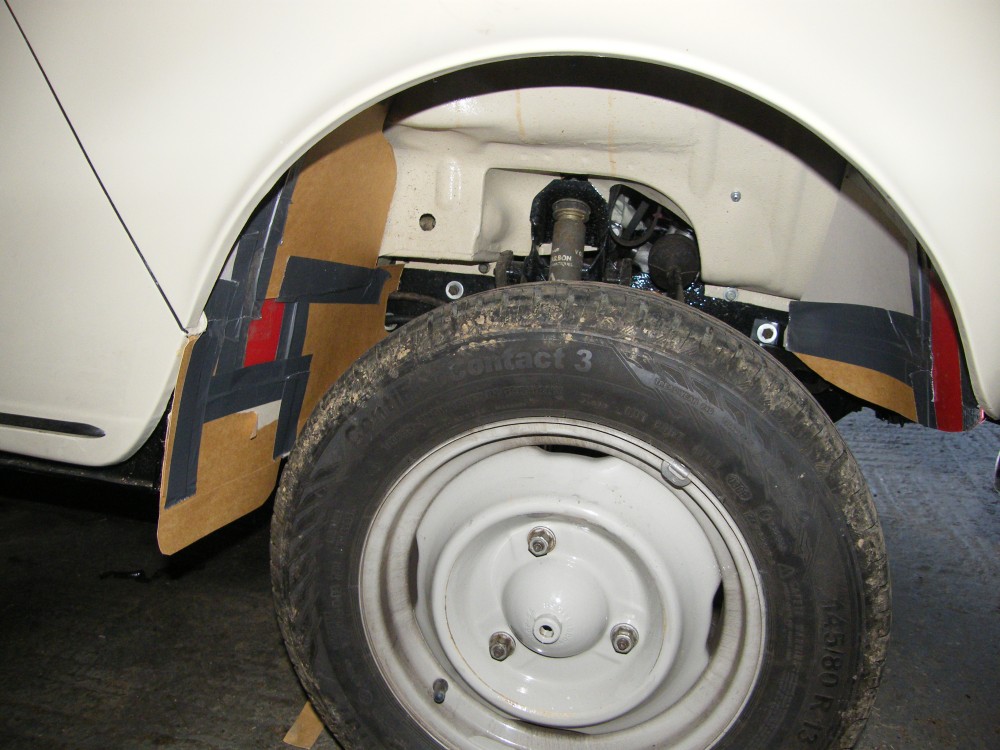
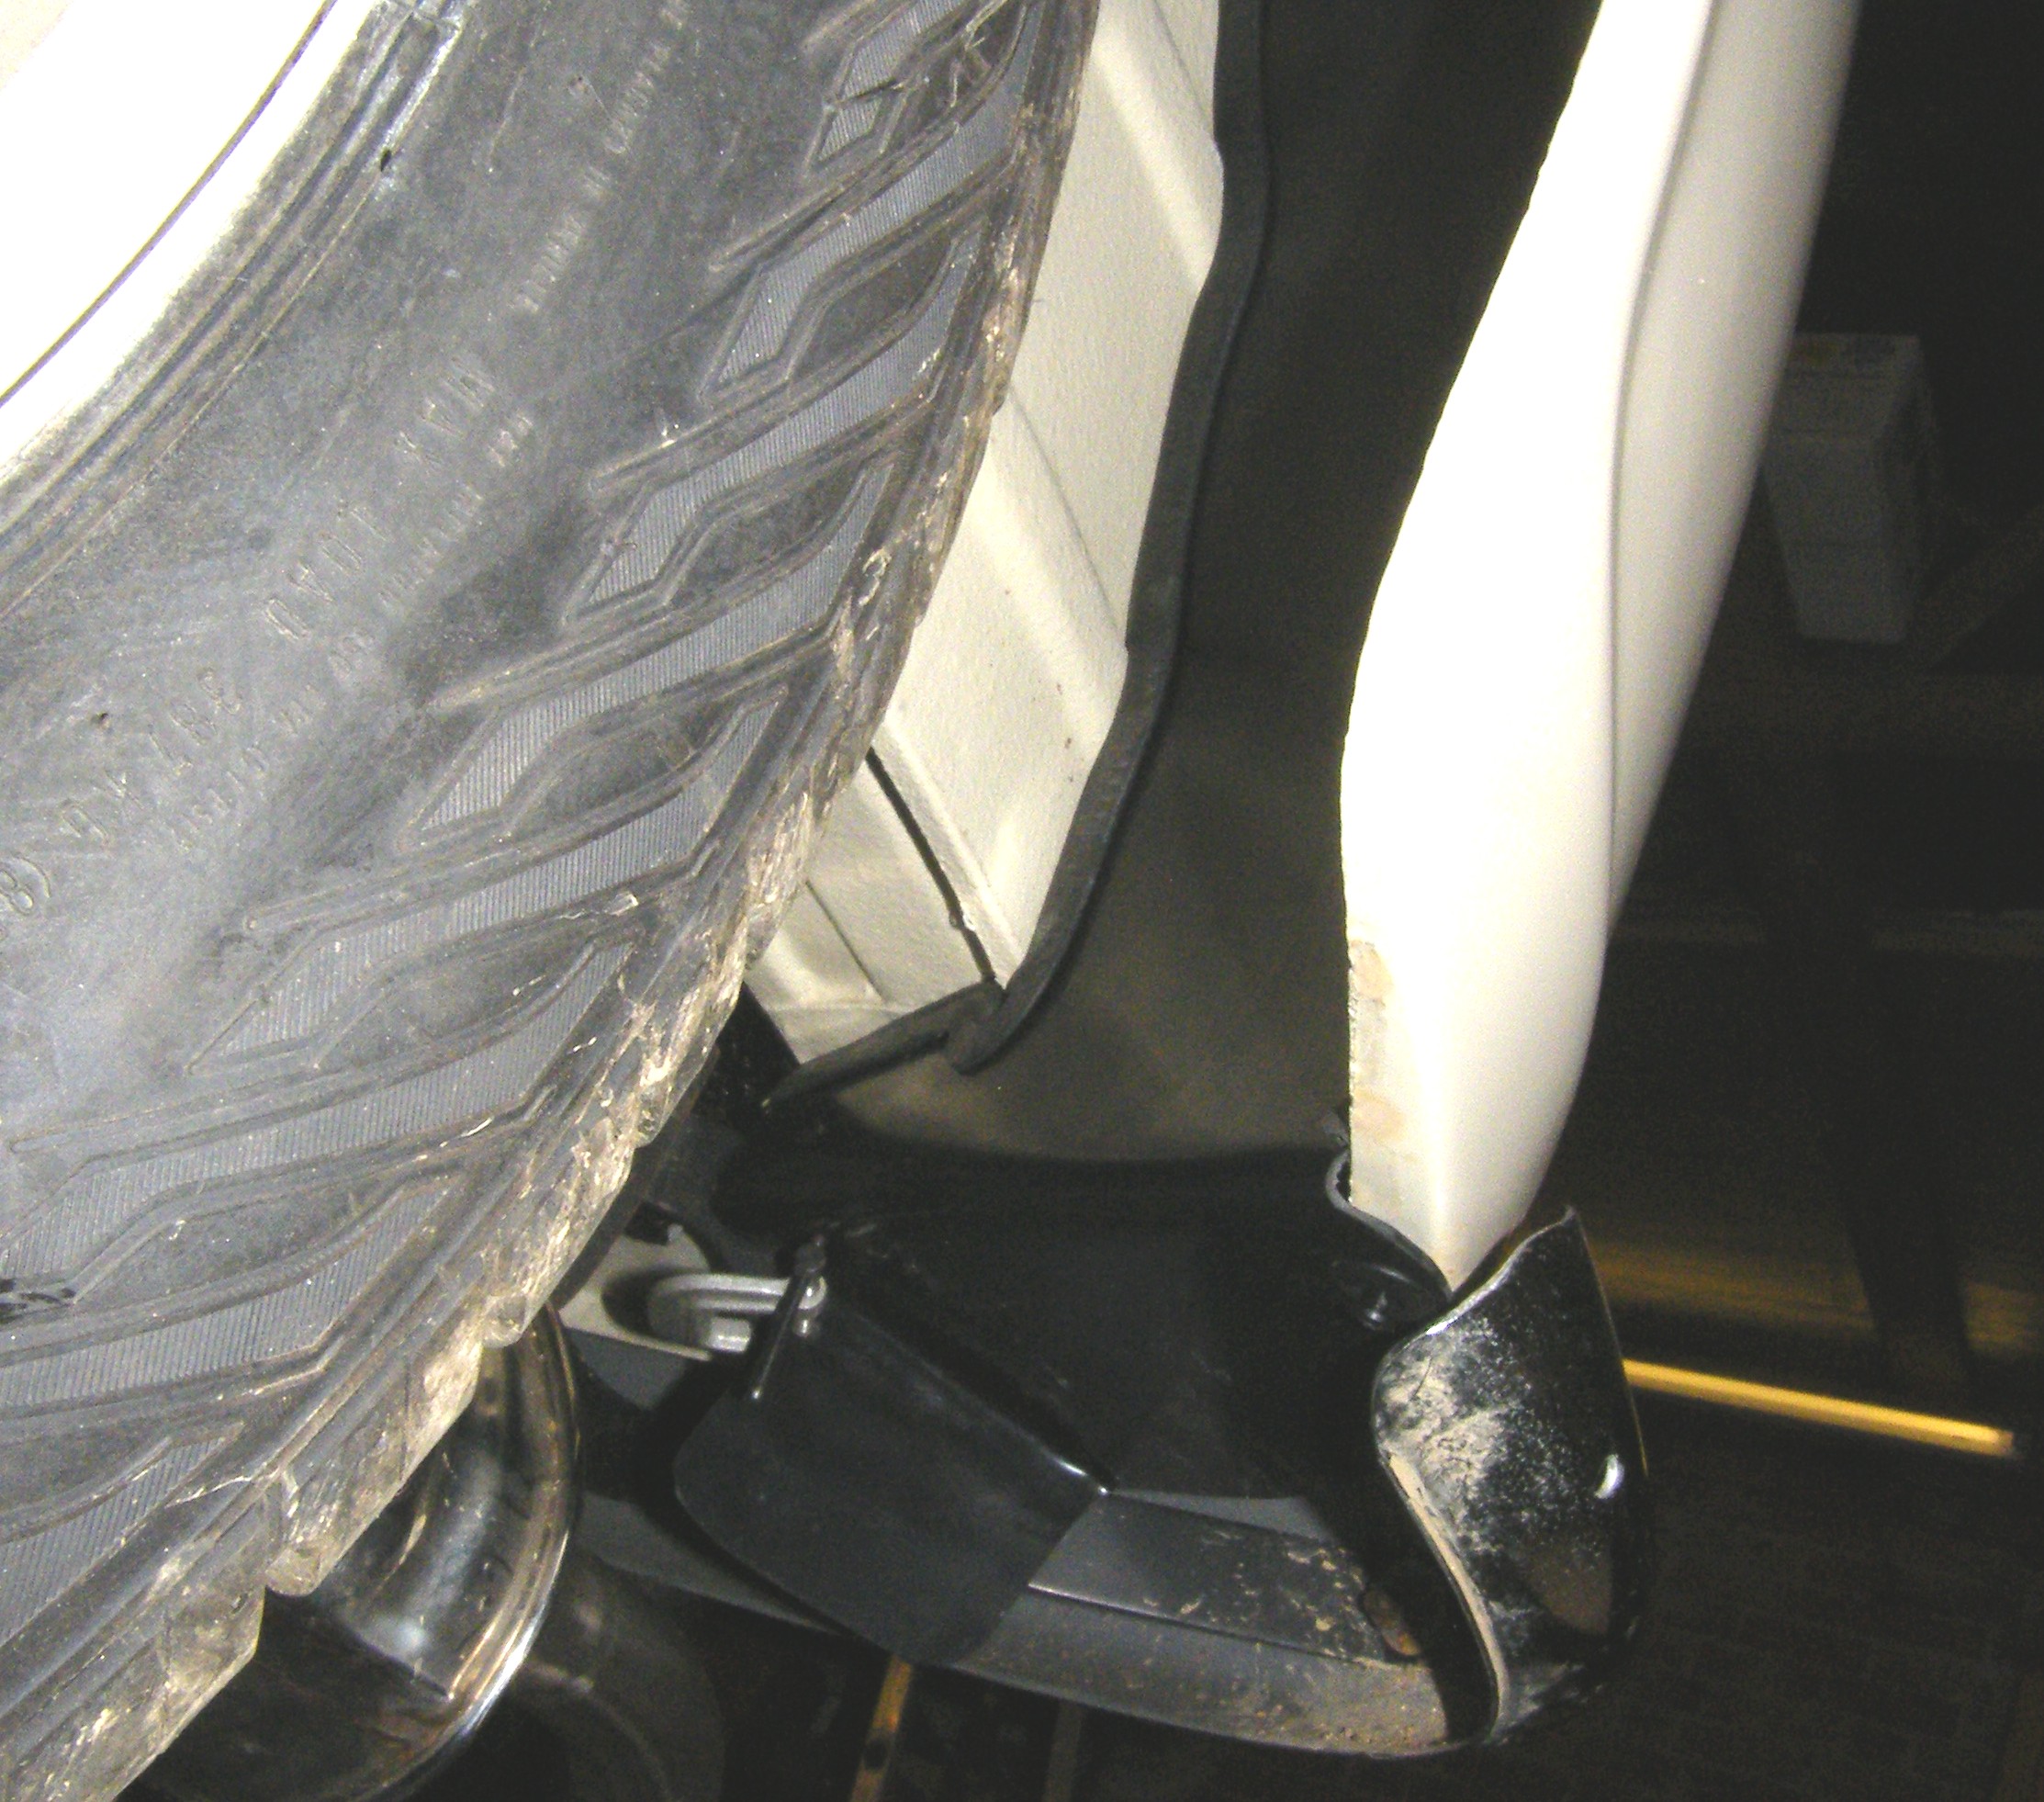
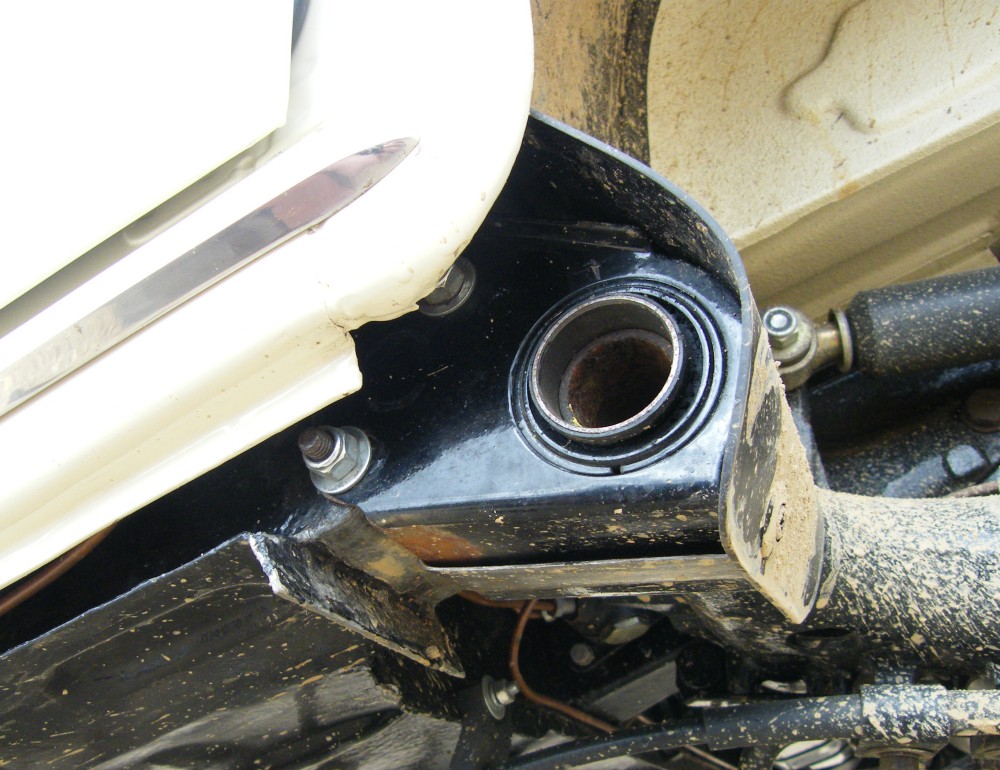
Here's the first liner roughly in place. It looks a bit funny at the front with the wheel jacked up - the front of the liner attaches to the bumper stay.
At the rear the mud flap has been removed, but the liner sits in front of the outer sill to cover the mud trap between the chassis and the sill.
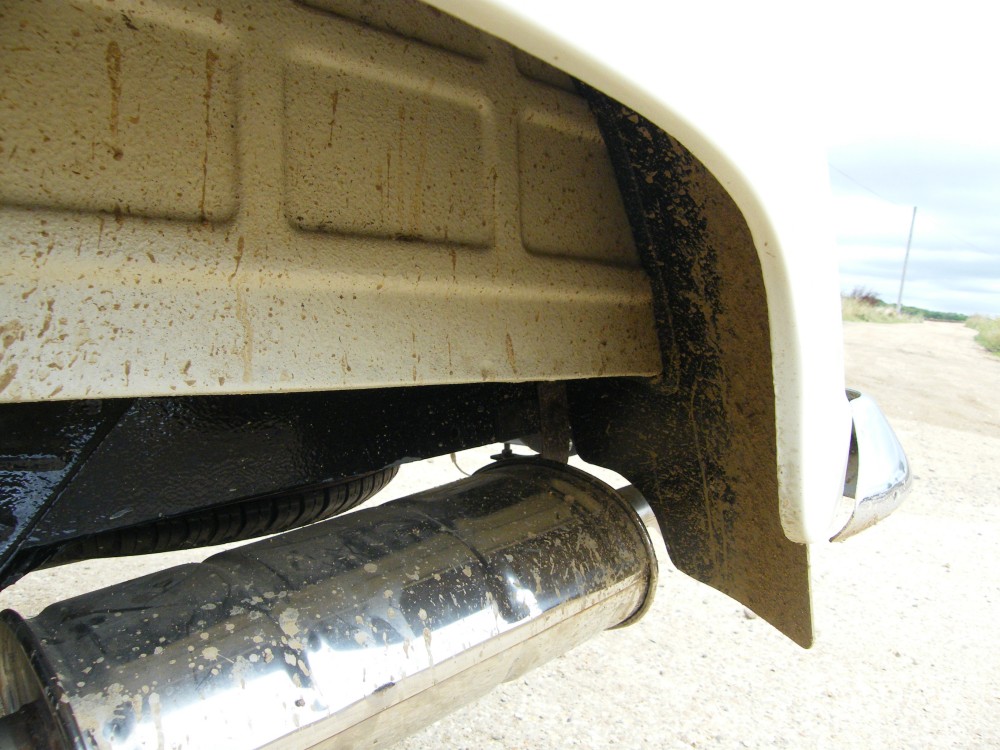
It's not handy to have an exhaust manifold passing through the wheelarch - the ABS plastic distorts at about 100 degrees C. I've put a fixing above the exhaust to avoid fire, but I might need to redesign.
Update - having covered 40 miles between engine rebuilds the liner seems fine, though my exhaust takes a different routing from the normal R4 exhausts which would touch the liner.
The liner is largely self-supporting, but I've added 2 fixings at the back and one at the front. I'm using plastic wheelarch fasteners with a screw that expands an outer part.
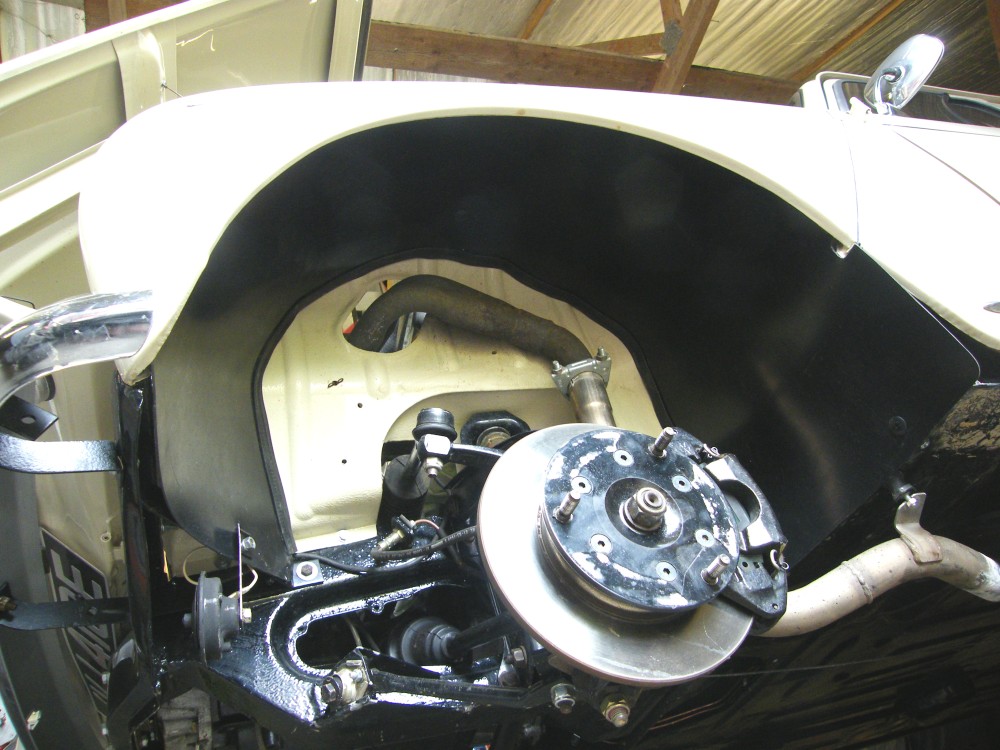
The car looks oddly plastic with the liner fitted. I'm used to seeing proper metalwork underneath, but the liner does make the car look neater.
From the side there is a gap between the liner and the bottom of the front wing behind the wheel as the liner follows the shape of the chassis. Maybe I'll try a MK2 version for Ermintrude the R4 GTL.
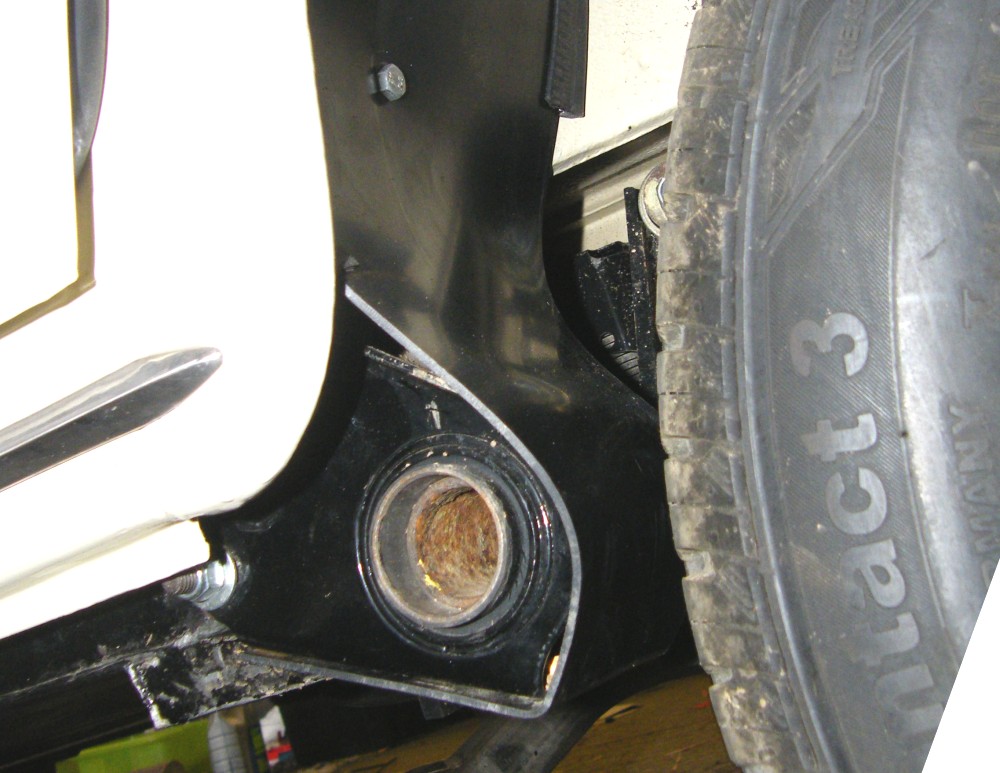
I've tried before to cover the rear suspension outer mounting. It fills up with mud very quickly, and it's a pain to repair.
The lack of space between the mounting and the wheel make this difficult. My first attempt was to mount the rear wheelarch liner to the bottom of the mounting and to the wheelarch above to hold the liner tightly in place. This could trap any mud that made it's way in there, so a second attempt will follow.
I've extended the rear of the rear liner to cover the exposed end of the box section at the back of the boot floor. There's a danger that mud will sit on top of the cover. The Mk2 version will be a little different as mud will certainly collect on any horizontal surface.
ABS plastic is lovely to work with. It can be cut with a jigsaw with a wood cutting blade, bent using a heat gun, and drilled with a metal drill bit. I sat it on a sheet of Celotex insulation when cutting. The jigsaw blade passes through, but the insulation holds the ABS and stops it from vibrating.
I've managed to remove all of the horizontal surfaces in the MK2 version of the rear liners, but have yet to take photos.
I would also like to fit wheelarch liners to my GTL, and decided to keep the Gordini liners as templates. This gave a chance to make MK2 versions sooner than planned.
The front liners have changed a little at the rear. I've added mud flaps and improved the fit to the rear of the front wing. The rear liners have changed a lot - I've redesigned them to remove the horizontal surfaces and to improve drainage and venting.
Since then I've been examining modern cars and very small mudflaps seem to be the form these days and a Mk3 version is approaching so I can avoid looking uncool.
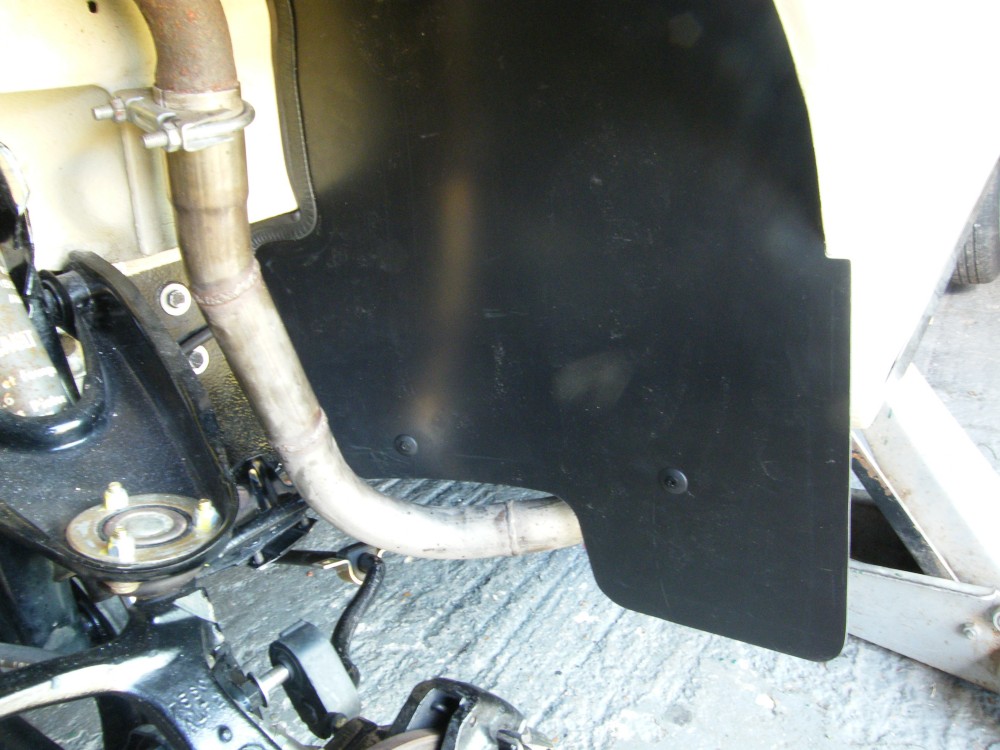
I ended up keeping the mudflap at the rear of the front liner. The exhaust on this car is a little close to the liner, so I've added a further bracket to keep the liner away from the exhaust. (ABS has a tendency to bend towards the heat source when it gets hot.)
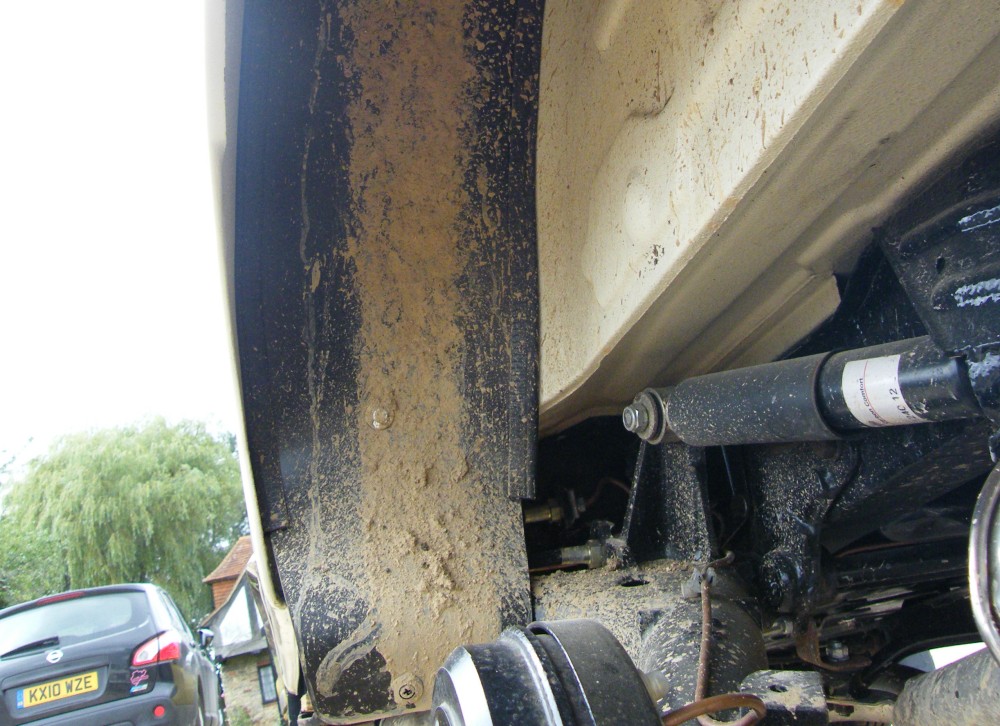
The car has been off the road with engine problems since I started making the liners. Finally I am able to test the liners. Here they are covered in mud after driving carefully down the track to our house. The liner has done an excellent job of keeping the chassis mud-free.
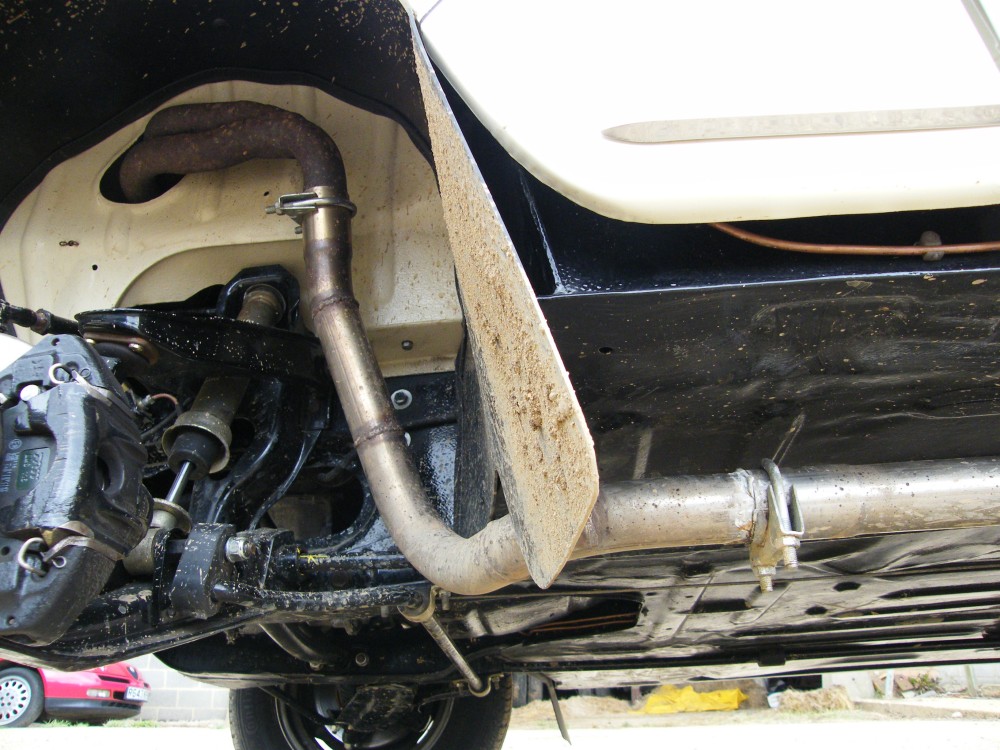
The majority of mud sticking to the underneath of the car appears to be mud picked up in the tyre treads along the track and then thrown off as speed is increased on tarmac roads.
The mud is deposited on the liners in a fairly narrow band. Only the very top and front of the front wings (where the panel curves inwards) is the bodywork exposed. More importantly the liners appear to shield all of the wing joints where the mud would have collected.
The rear liners have altered significantly since the earlier photos. The liners now fit further back in the rear wheelarch and extend inwards to cover the end of the open crossmember at the rear of the boot floor.
The horizontal surface has been removed and a small mud flap added in it's place.
They are effective in protecting the rear of the bodywork, but not the edge of the rear bumper.
Again the largest deposits of mud have been thrown from the tyre treads in a narrow line onto the liner. Some has also fallen on top of the rear suspension arm.
The line or mud would previously have filled up the rear suspension outer mounting.
Here's the outer mounting. I've redesigned the liner a little here too. The liner no longer continues under the mounting, and is instead secured by a stainless steel strap tucked in to the front of the mount.
That removed the horizontal surface that would inevitably have collected mud, and opens the hole at the rear of the mounting allowing venting and water drainage.
Plans for the liners
Thanks for all the interest in these liners. I would like to see them fitted to other Renault 4s as they should do a lot to preserve them into the future. To save time I've photographed my liners.
Once I have tested the liners and fitted them to my GTL I may publish plans. This will probably be in 2011 as I am unlikely to have time this year due to work commitments - the joys of being self employed.
Until then reproduce the liners at your own risk and understand they have not been properly tested.
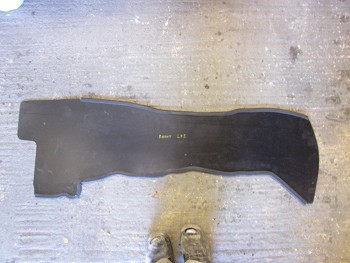
Front RHS Liner
The two front liners are different due to the inner wing shape. These ones would fit pre-1978 cars. The GTL has a different inner wing pressing and the liners will certainly need to be modified for the GTL.
Every car is likely to be different. Aftermarket front wings are a different shape to Renault front wings, and the shape of the wing will vary depending on how it has been fitted.
The exhaust downpipe will need to be modified to fit the liner on the LHS. The liner could not be fitted to cars with an under wing silencer as the heat would cause the ABS plastic to droop onto the silencer and possibly catch fire.
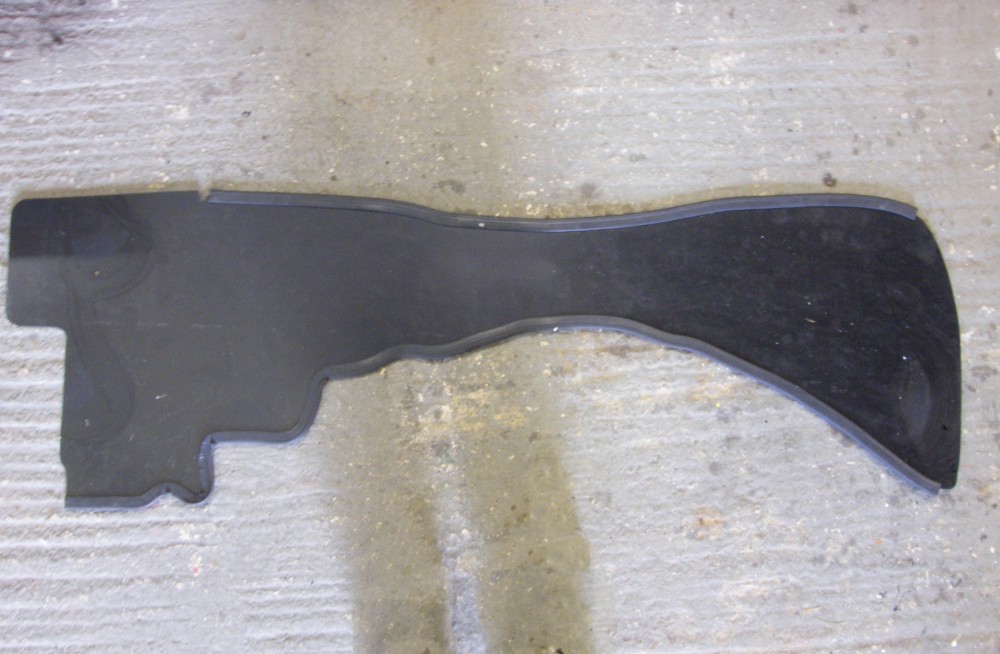
Front LHS liner
The rear liners are identical apart from the cut-out for the fuel filler pipe on the RHS. The photo shows a template rather than the liner itself.
I used 2mm ABS plastic for the liners and a rubber edge strip to protect the paintwork and provide a seal.

Rear liner (LHS does not have fuel filler cutout)
Next> Head gasket or back to the Gordini Project


