Braking System
Like everything else on this car the brakes are going to be a little different. The car was originally fitted with drum brakes all round with a dash mounted handbrake operating on the front wheels. My plan is to fit the later disc brakes at the front which will involve moving the handbrake to the rear wheels, but I can't use the floor mounted handbrake fitted to most later cars as I have a bench front seat.
Also I find the pedal effort a little high on the disc brake cars and want to fit a brake servo.
I did an experiment with my GTL. Wound it up to speed then did an emergency stop. The wheels didn't lock up. All the brakes are fairly new on my GTL so they ought to be reasonably efficient. Possibly the move from asbestos brake pads in the 1990s has increased the pedal pressure required to lock the brakes.
I'm planning to fit at least 155 section tyres on this car, so a system that doesn't lock 135 tyres isn't going to fit the bill. I needed a servo.
This is a remote servo made by Lockheed (Delphi own the name these days). I decided on a 2:1 boost ratio after a lot of deliberation. I've got a 1.65:1 on the MGA and it works well, but the pedals are in a slightly more fiddly position on the Renault so it's not so easy to push hard on the pedal. I'll feedback whether it's a good choice when I have the car on the road. (Turned out just right!)
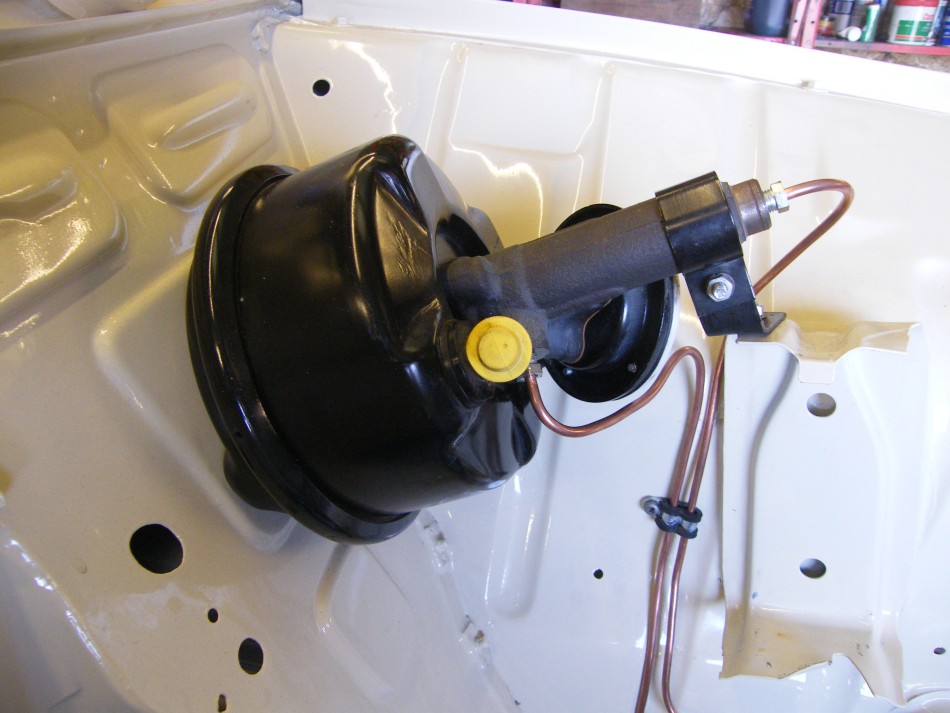
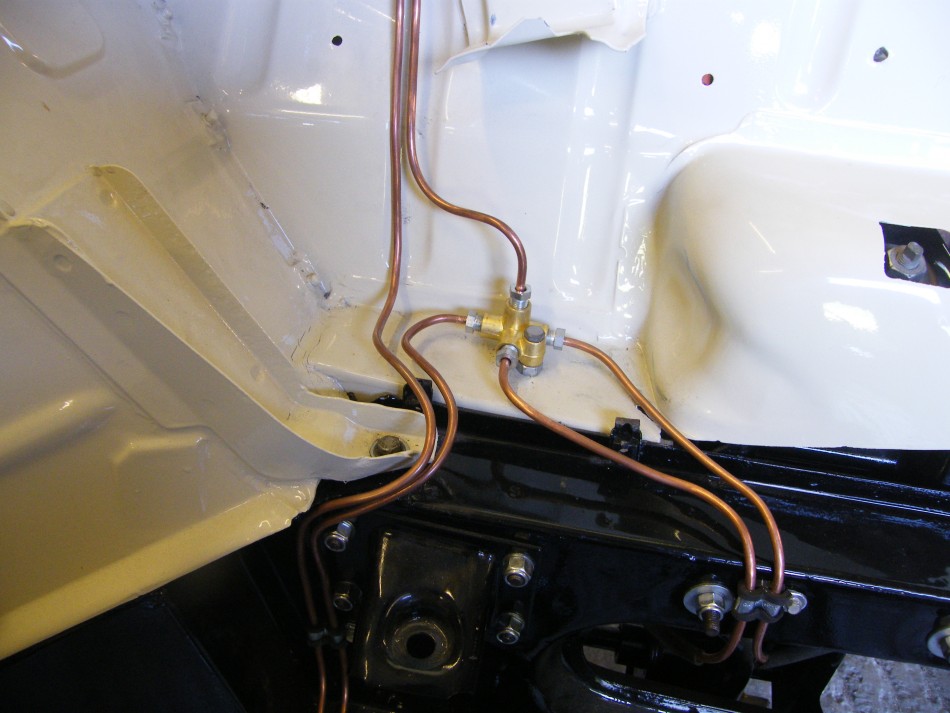
The remote brake servo has a single input and output. I've used an early mater cylinder (it's single circuit rather than dual circuit, but I've always got the handbrake in case of emergency). I've used a single outlet from the master cylinder which goes to the servo. A 4 way connector splits the outlet from the servo to the rear brakes and the two front brakes.
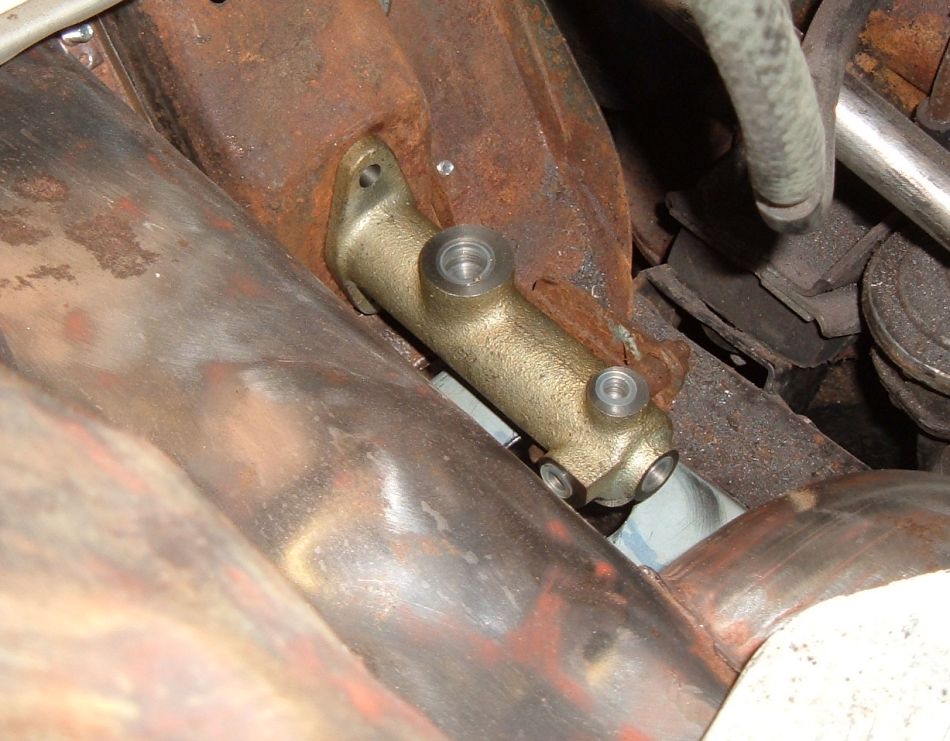
I couldn't decide which size master cylinder to use. The early style seems to be available with 20.2mm or 22mm bore (depending on year and whether the car is a van or not).
It had to be a single circuit master cylinder as the remote circuit is single circuit. That meant an early type master cylinder.
In the end I took pot luck. I bought on eBay. The cylinder was described in the advert as for a car or van. But the package was marked van. It turned out to be 21mm bore which should help compensate for the increased pedal travel from the servo.
There's some earlier forum discussion about brakes, boosters and bore sizes.
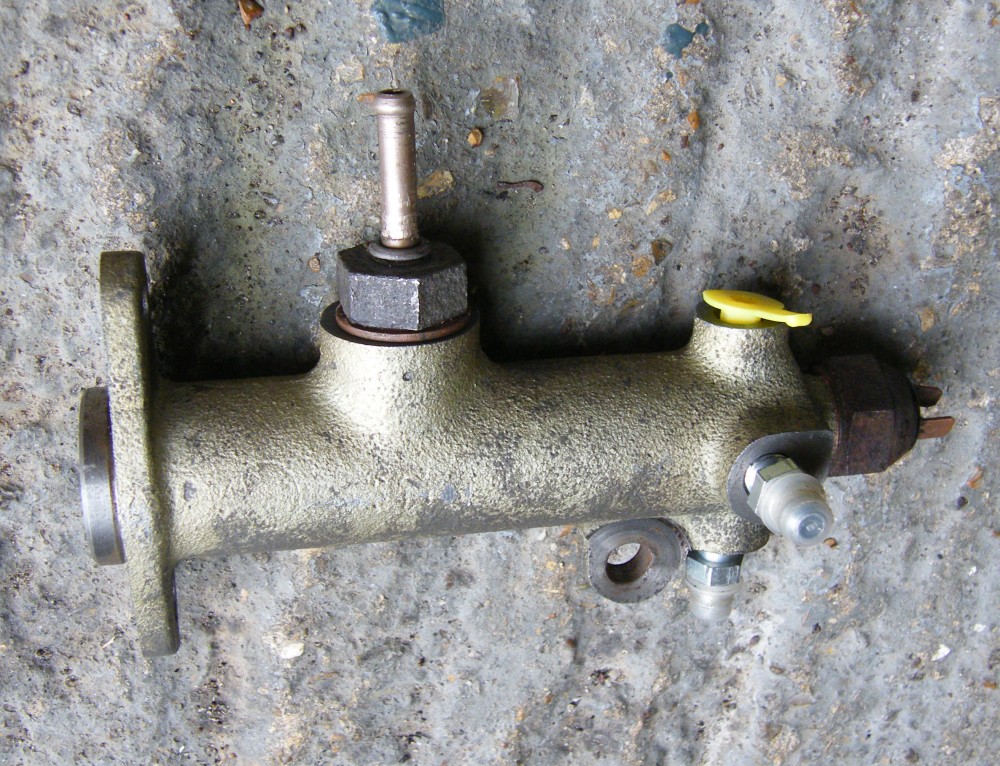
Blanking plugs for the unused outlets just don't seem to be available. I ended up countersinking the holes to accept bleed nipples (a standard metal drill is about right).
Assess to the master cylinder is poor, so I'm planning to fit a remote reservoir. I've used the threaded part from an old reservoir and fitted a 6mm fuel pipe inside. To seal the pipe I compressed it in a vice to expand it, then flared the inside end (the same way as the pipe that was originally in there was fitted).
I'll do a leak check under pressure before I install the master cylinder.
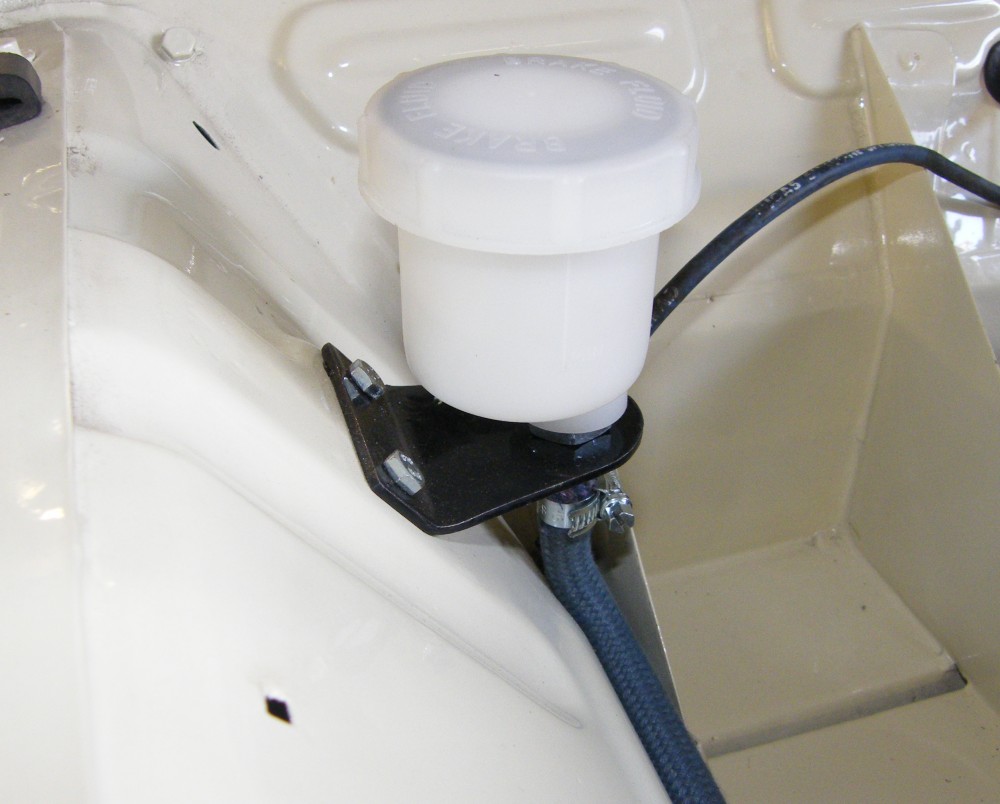
Finally, to complete the master cylinder the remote reservoir was positioned in some free space near the battery.
It's a generic aftermarket part purchased from the only eBay seller that bothered to provide dimensions, and is mounted on a bracket I fabricated.
After filling up the system with brake fluid I found the blue pipe was leaking. I've reverted to the original system which isn't that bad to fill if the expansion bottle and air filter are removed. The remote reservoir might be refitted the first time I try to change an oil filter.
The handbrake came from a Spanish built 1983 TL. The Spanish built cars combined an odd mix of components from various years of production, and one of their crazy ideas was to operate a handbrake mechanism on the rear wheels via a dash mounted lever. That's lucky!
It's a terrible photo. I've modified the handbrake to make it ergonomic to operate from the right hand side of the car, but have mounted it on the left side because I'm out of space on the right side.
The old mounting brackets have been removed, the handbrake rotated by 90 degrees, and new brackets made. The one to the right side of the photo was easy, but it took me a day to get the angles for the mounting to the bulkhead.
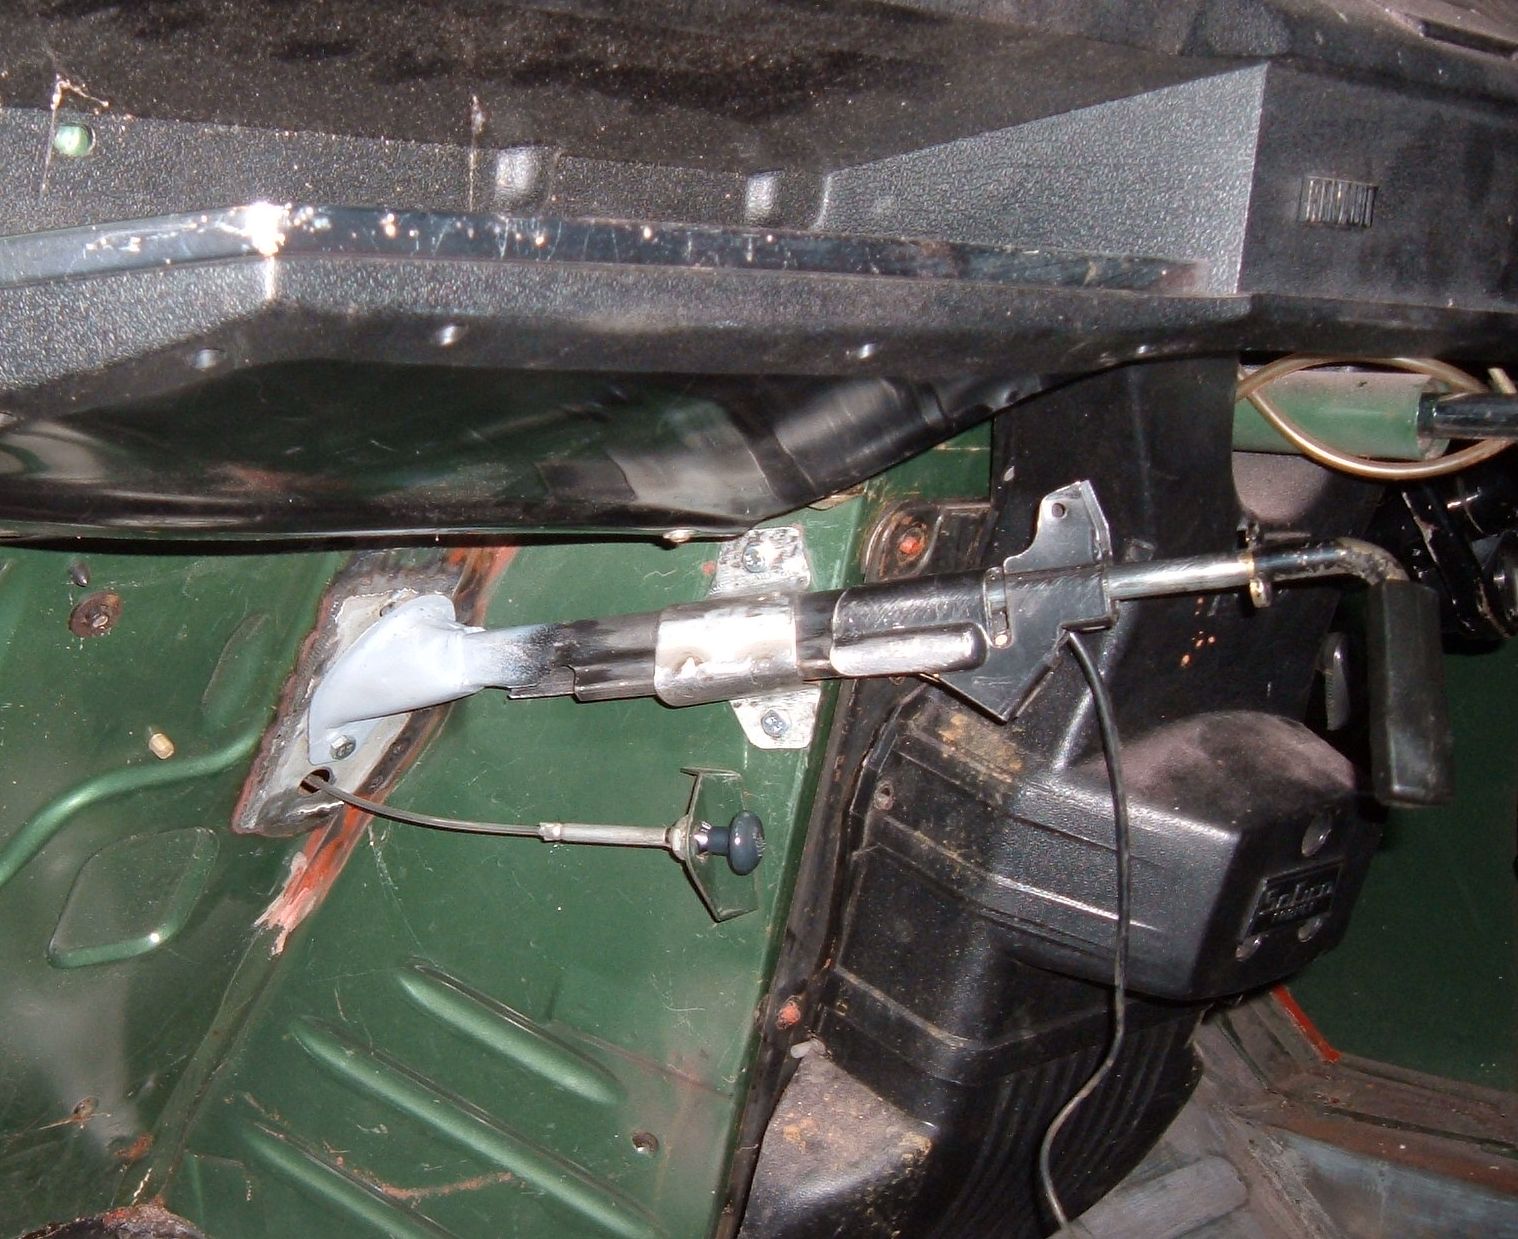
The Spanish TL handbrake cable runs from the dash mounted handbrake lever to the gusset on the inside of the front chassis leg just behind the engine. The inner cable runs to the rear of the floor and operates a bell crank. From there two cables operate the rear drums in the normal GTL fashion.
The system is not as effective as either the front or rear wheel handbrake systems found on French made cars. A good tug on the handbrake lever is required to overcome the resistance in all of the cables.

The handbrake was moved to the rear wheels because I wanted to fit disc brakes. I also wanted to use the original wheels.
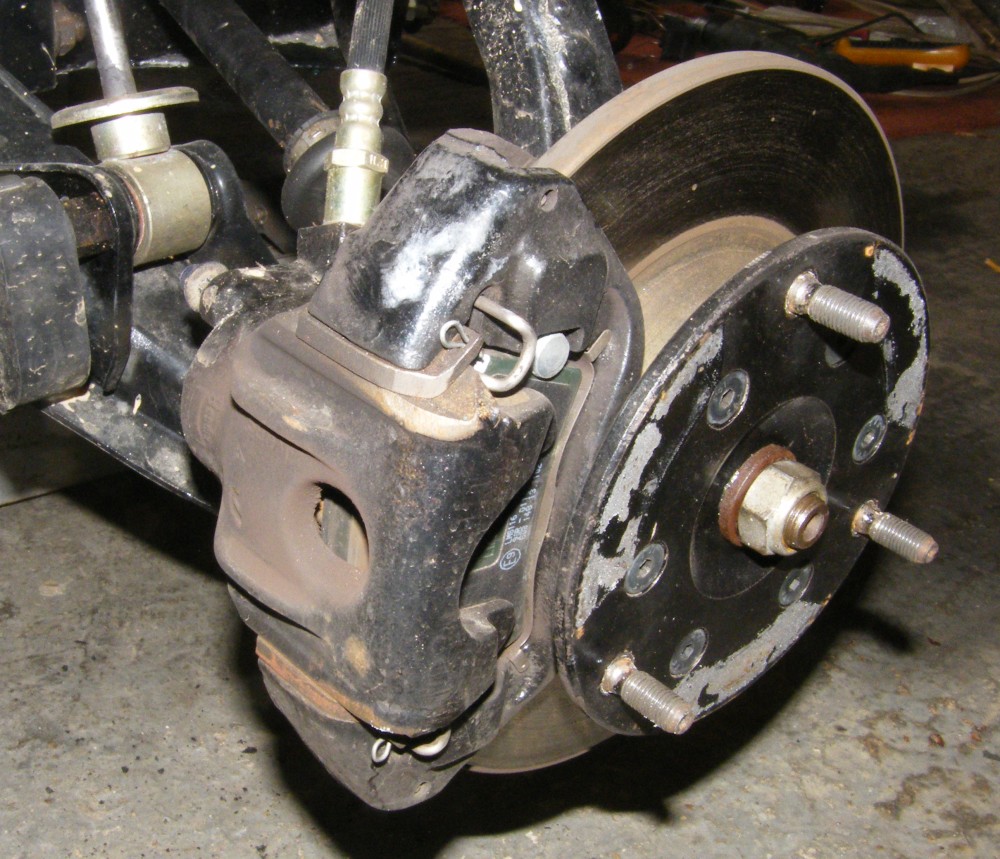
Fitting a pre-'78 wheel over the six bolts that hold the brake disc to the hub will cause the wheel to fail as there is no clearance for the bolt heads. I've countersunk the holes in the hub and fitted countersunk screws.
Girling brake calipers will foul the early wheels. I've used a Bendix caliper as it is lower profile, but clearance is still very tight, so I've ground some metal off the caliper and the retaining plates to improve clearance slightly (can be seen by clicking on the photo to enlarge it). I reckon I have about 5mm clearance to the early wheels, and inspection shows there is no contact.
Next> the engine, or back to the Gordini Project


